Using the Controller
You should first connect your controller with the device on which you are using RoboDK. The add-in maps specific robot movements and settings to standard gamepad inputs. The default mapping was created for an Xbox One controller.
Movement Controls
Press the Launch Game Controller icon in the toolbar or go to Connect-Game Controller-Launch Game Controller. This will start the add-in and it will automatically try to detect the connected controller. Click again on the Launch Game Controller icon to stop the add-in.
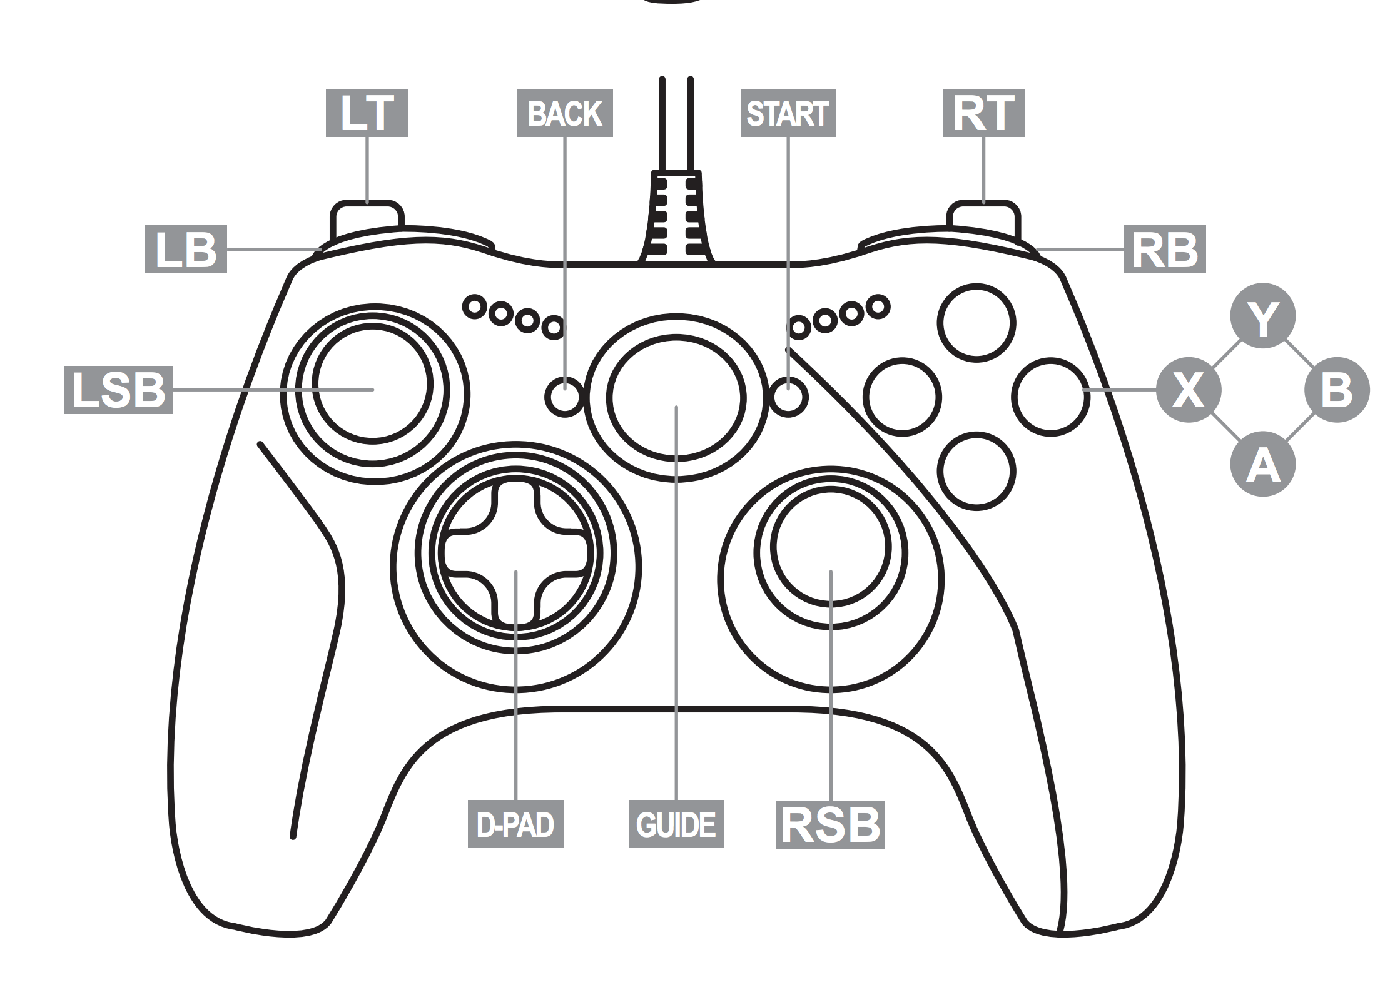
To move the robot, you must select an axis and use the D-pad to apply movement.
1.Select X Axis: Press and hold X on your controller.
2.Select Y Axis: Press and hold Y on your controller.
3.Select Z Axis: Press and hold B on your controller.
4.Move: While holding an axis button, use the D-pad up or down to move the robot along the selected axis.
Toggles
The Game Controller Add-in offers some toggle buttons to customize the behavior.
Other options to manipulate the motion of your robot include:
1.Translation vs. Rotation: Press the Left Stick Button (LSB) to toggle between moving the robot linearly (mm) or rotating it (deg). We use translation (mm) by default.
2.MoveJ vs. MoveL: Press the Right Stick Button (RSB) to toggle between Joint movement (MoveJ) and Linear movement (MoveL). The default movement instruction is MoveJ.
3.Step Size: Use the D-pad left or right to decrease or increase the movement step increment.
4.Home Position: Press both Bumpers (LB + RB) simultaneously while engaging the safeguard to return the robot to its home position.