Reference Frames
A Reference Frame defines the location of an item with respect to another item with a given position and orientation. An item can be an object, a robot or another reference frame. All Offline Programming applications require defining a reference frame to locate the object with respect to a robot to update the simulation accordingly.
Drag & drop any reference frame or object within the Station Tree to define a specific relationship, such as the nested reference frame shown in the following image.
It is common to define the location of one or more reference frames with respect to the robot by touching 3 points. This allows placing objects in the virtual space. The procedure can be accomplished using the robot teach pendant or RoboDK (more information available in the Calibrate Reference Frame section).
With RoboDK it is possible to manually enter the translation and rotation values, including different rotation orders of the Euler angles.
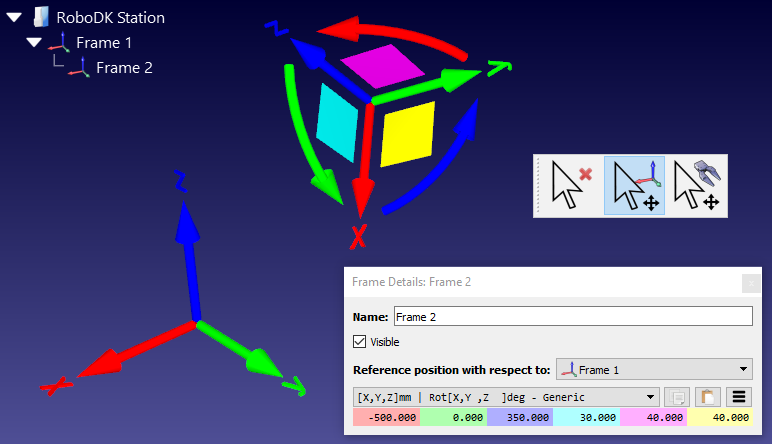
By default, RoboDK displays the relationship as the XYZ position and the Euler angles in the X➔Y➔Z format. This means the rotation is made in the following order:
1.First: a rotation is made around the X axis (light blue case).
2.Second: a rotation is made around the static Y axis (pink case).
3.Third: a rotation is made around the static Z axis (yellow case).
For example, Fanuc and Motoman controllers use the previously described format, however, other robot manufacturers handle the rotation order in a different way.
It is possible to select among different orientation formats from the dropdown list of the reference frame details window (double click a reference frame).
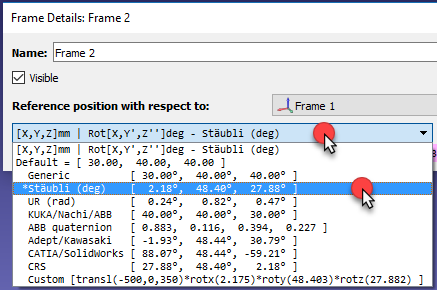
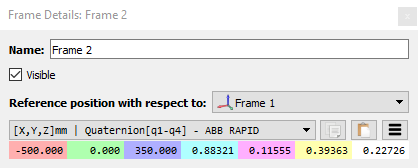
For example, Stäubli robots use the X➔Y’➔Z’’ order, or KUKA and Nachi robots use Z➔Y’➔X’’. On the other hand, ABB controllers use Quaternion values, which require 4 values to define the rotation:
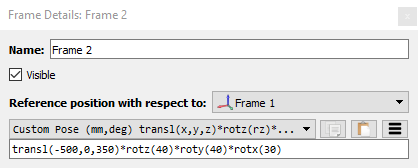
It is also possible to manually enter a customized format. For example, the following command is displayed when the Script (Custom Pose) option is selected: