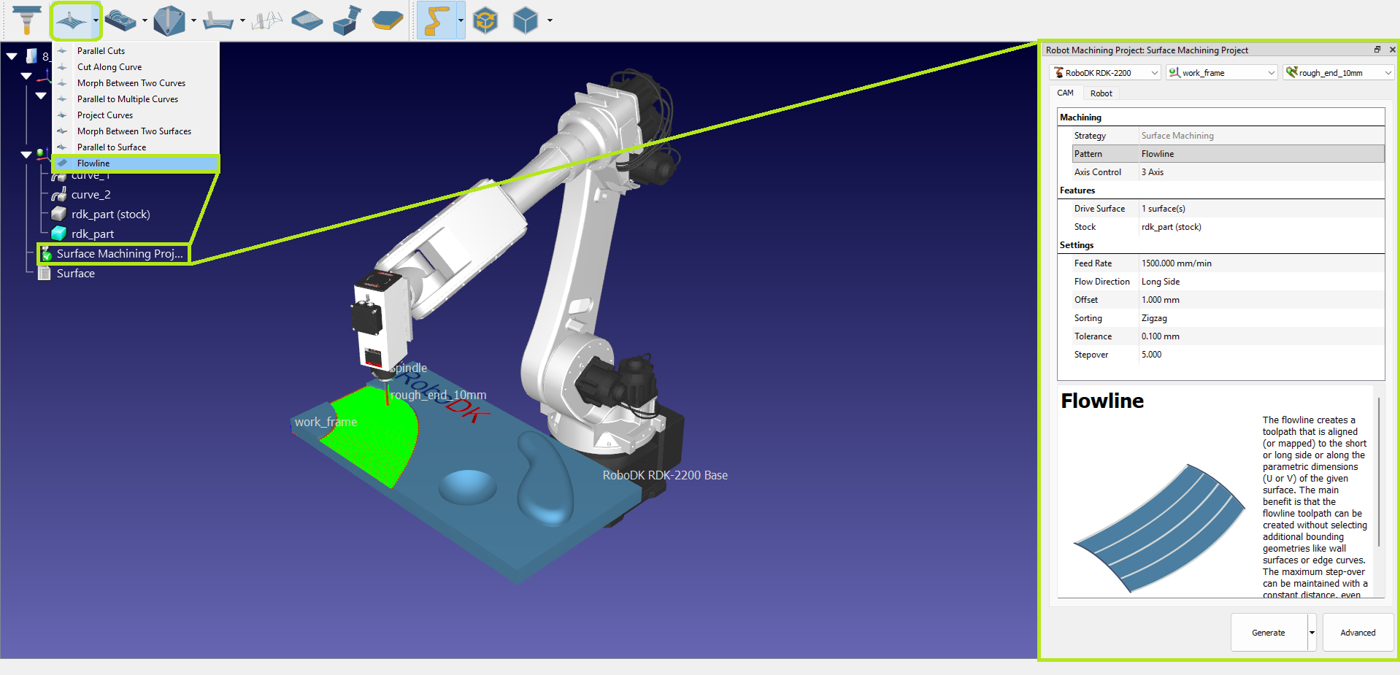
CAM Project
On the RoboDK CAM toolbar, you can select the machining strategy that is suitable for your task.

After selecting the required strategy, the CAM project will be created automatically.
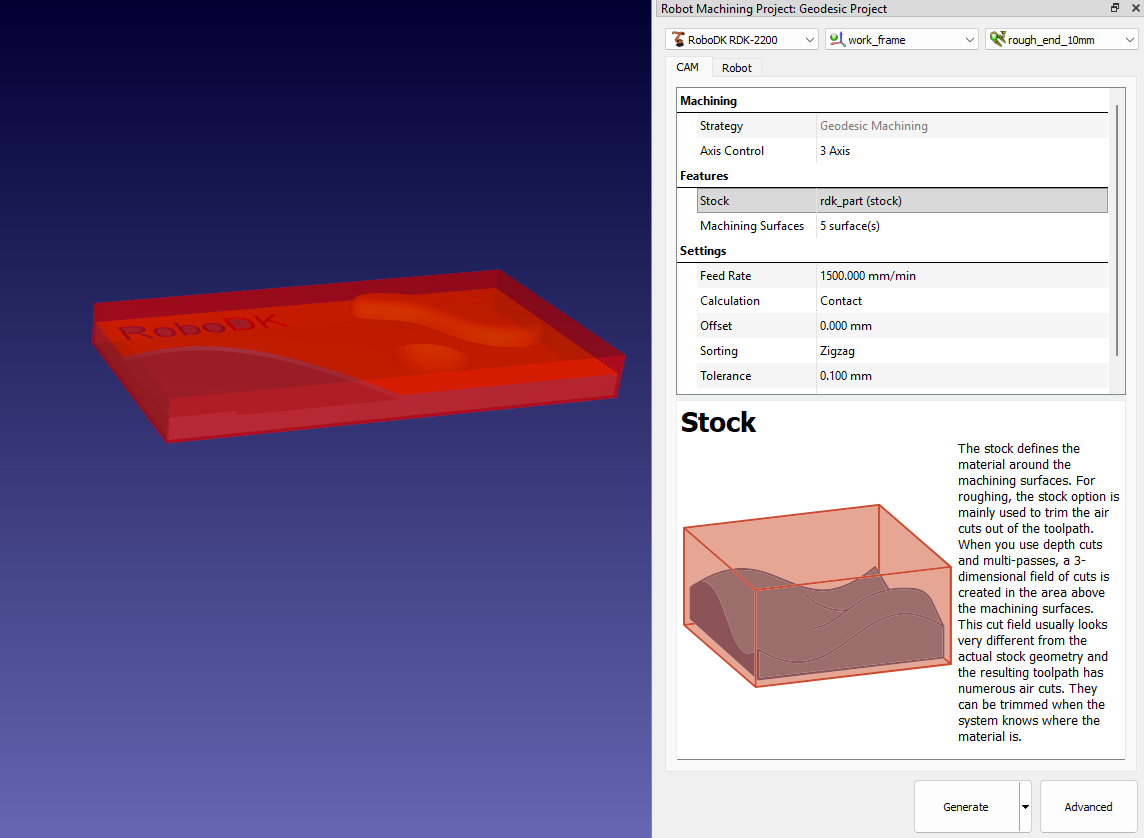
CAM settings
The CAM Project settings window consists of a top section and the CAM and Robot tabs. The robot, reference frame, and cutter are selected in the top section of the window. By default, the active elements at the time of CAM project creation are selected.

CAM tab
The CAM tab from the CAM project menu contains the machining settings and other strategy settings described in this section.
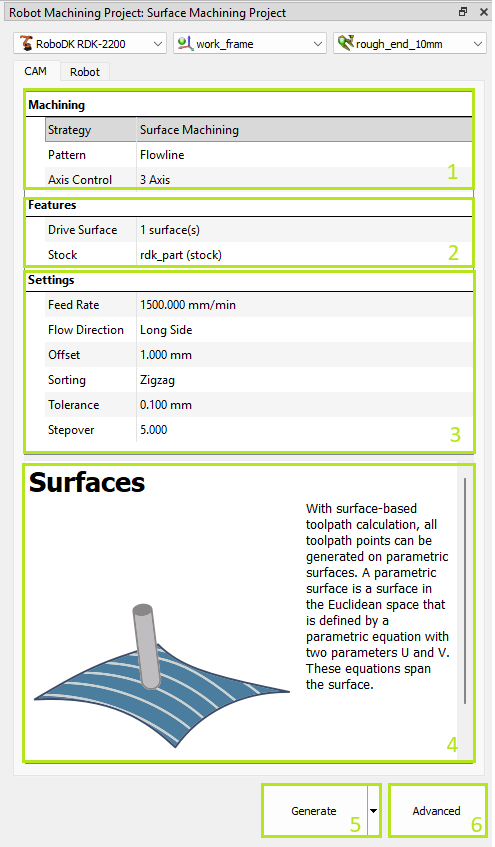

1.Machining settings – indicates selected strategy group and allows to switch between patterns. Additionally, you can select the axes control mode.
2.Features settings – indicates the selected features of the part and stock. This selection is mandatory for calculating the toolpath.
3.Strategy specific settings.
4.Tip – appears when clicking on parameters.
5.Toolpath generation button – calculates the toolpath and applies it to the selected robot. The Validate and Apply to Robot sub-options allow you to separate the calculation and application actions for complex toolpaths.
6.Advanced strategy settings.
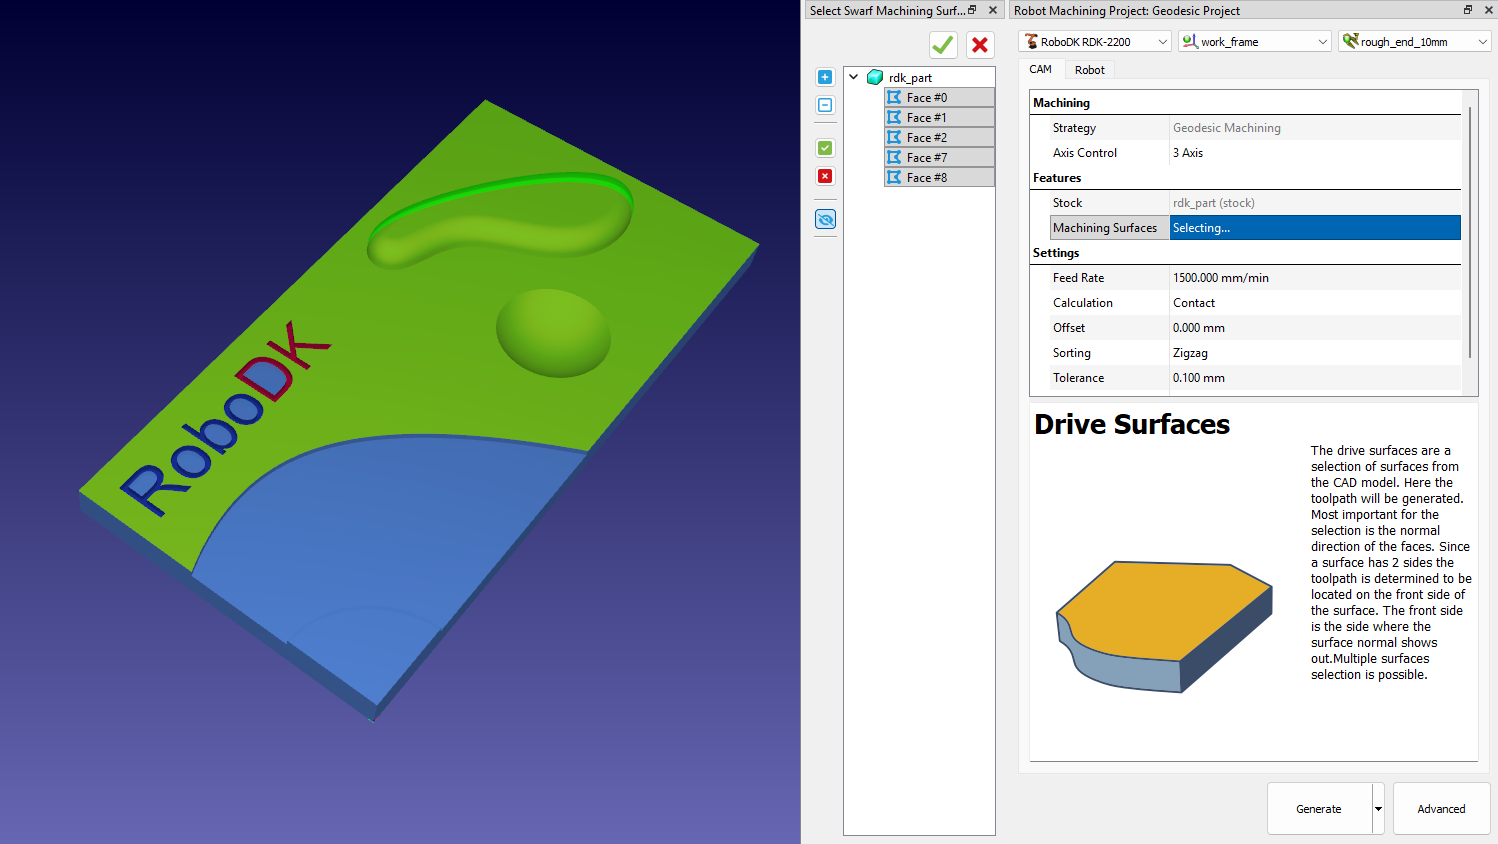
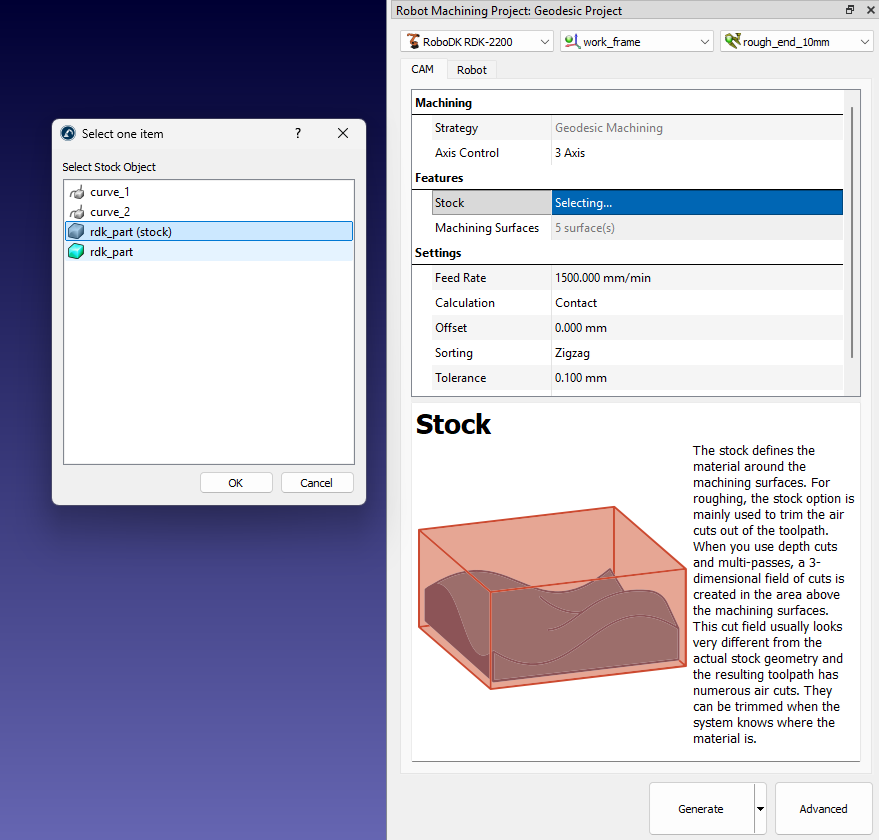
Features selection
In the Features section, you can select the geometric features required for the strategy.Depending on the strategy, you need to select surfaces, curves, or points. The selector tool is launched by double clicking on the features setting line.
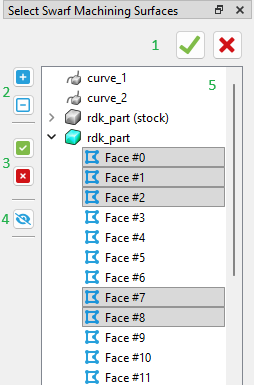
1.Apply selection / Close selector
2.Show tree elements
3.Select all in expanded trees / Clear selection
4.Show / Hide all features
5.Tree view of features
You can check selected geometry features by clicking on selector line.

Also, you can specify the model that will be used as a stock.
Robot tab
The Robot tab from the CAM project menu contains the setting related to the robot motion.
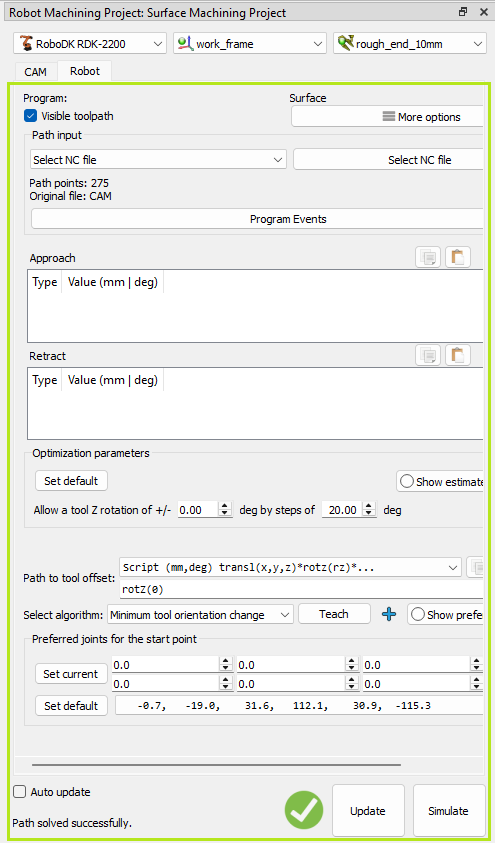
These settings are the same settings you can find in the Robot Machining Project settings of RoboDK.