Pick and Place
Introduction to pick and place
Pick and place refers to the automated process where robots pick up parts or items from one location and place them in another location. Automating pick and place operations helps increase production rates.
Pick and place robots can handle repetitive tasks while freeing up human workers to focus on more complex work. These robotic systems are a crucial component in many manufacturing and production lines for automating repetitive and time-consuming tasks.
Video: Watch this video tutorial introducing Pick and place with robots: Pick and Place - RoboDK Webinar.
Robot arms can easily perform pick and place operations. Even though there are dedicated robot arms for certain pick and place applications (such as palletizing for palletizing, or Scara robots for PCB assembly), a generic 6-axis robot arm is suitable for any pick and place operation.
Pick and Place Examples
You can find some example projects to perform pick and place simulations in this section of the documentation.
The examples in this section include:
1.A simple pick and place example where a robot picks a part and drops it somewhere else.
2.A pick and place example with an assembly operation.
3.A pick and place example using the palletizing addin.
4.A pick and place example using the API.
Simple pick and place example
This section shows a simple pick and place example using a robot arm with a vacuum gripper moving one box.
Follow these steps to create your pick and place example:
Create a new RoboDK Project
These steps will show you how to create a new project (also known as station) in RoboDK for a pick and place application.
1.Open RoboDK: Launch the RoboDK application on your computer.
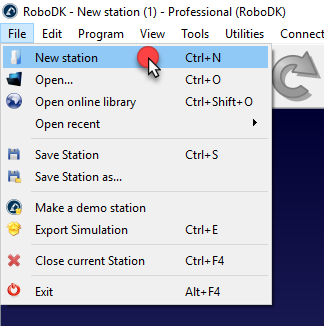
2.Create a new station: Select File-New Station from the main menu in RoboDK-A new, empty station will be created as your workspace.
3.Add a Robot from the Library
a.Open the online robot library to download a robot
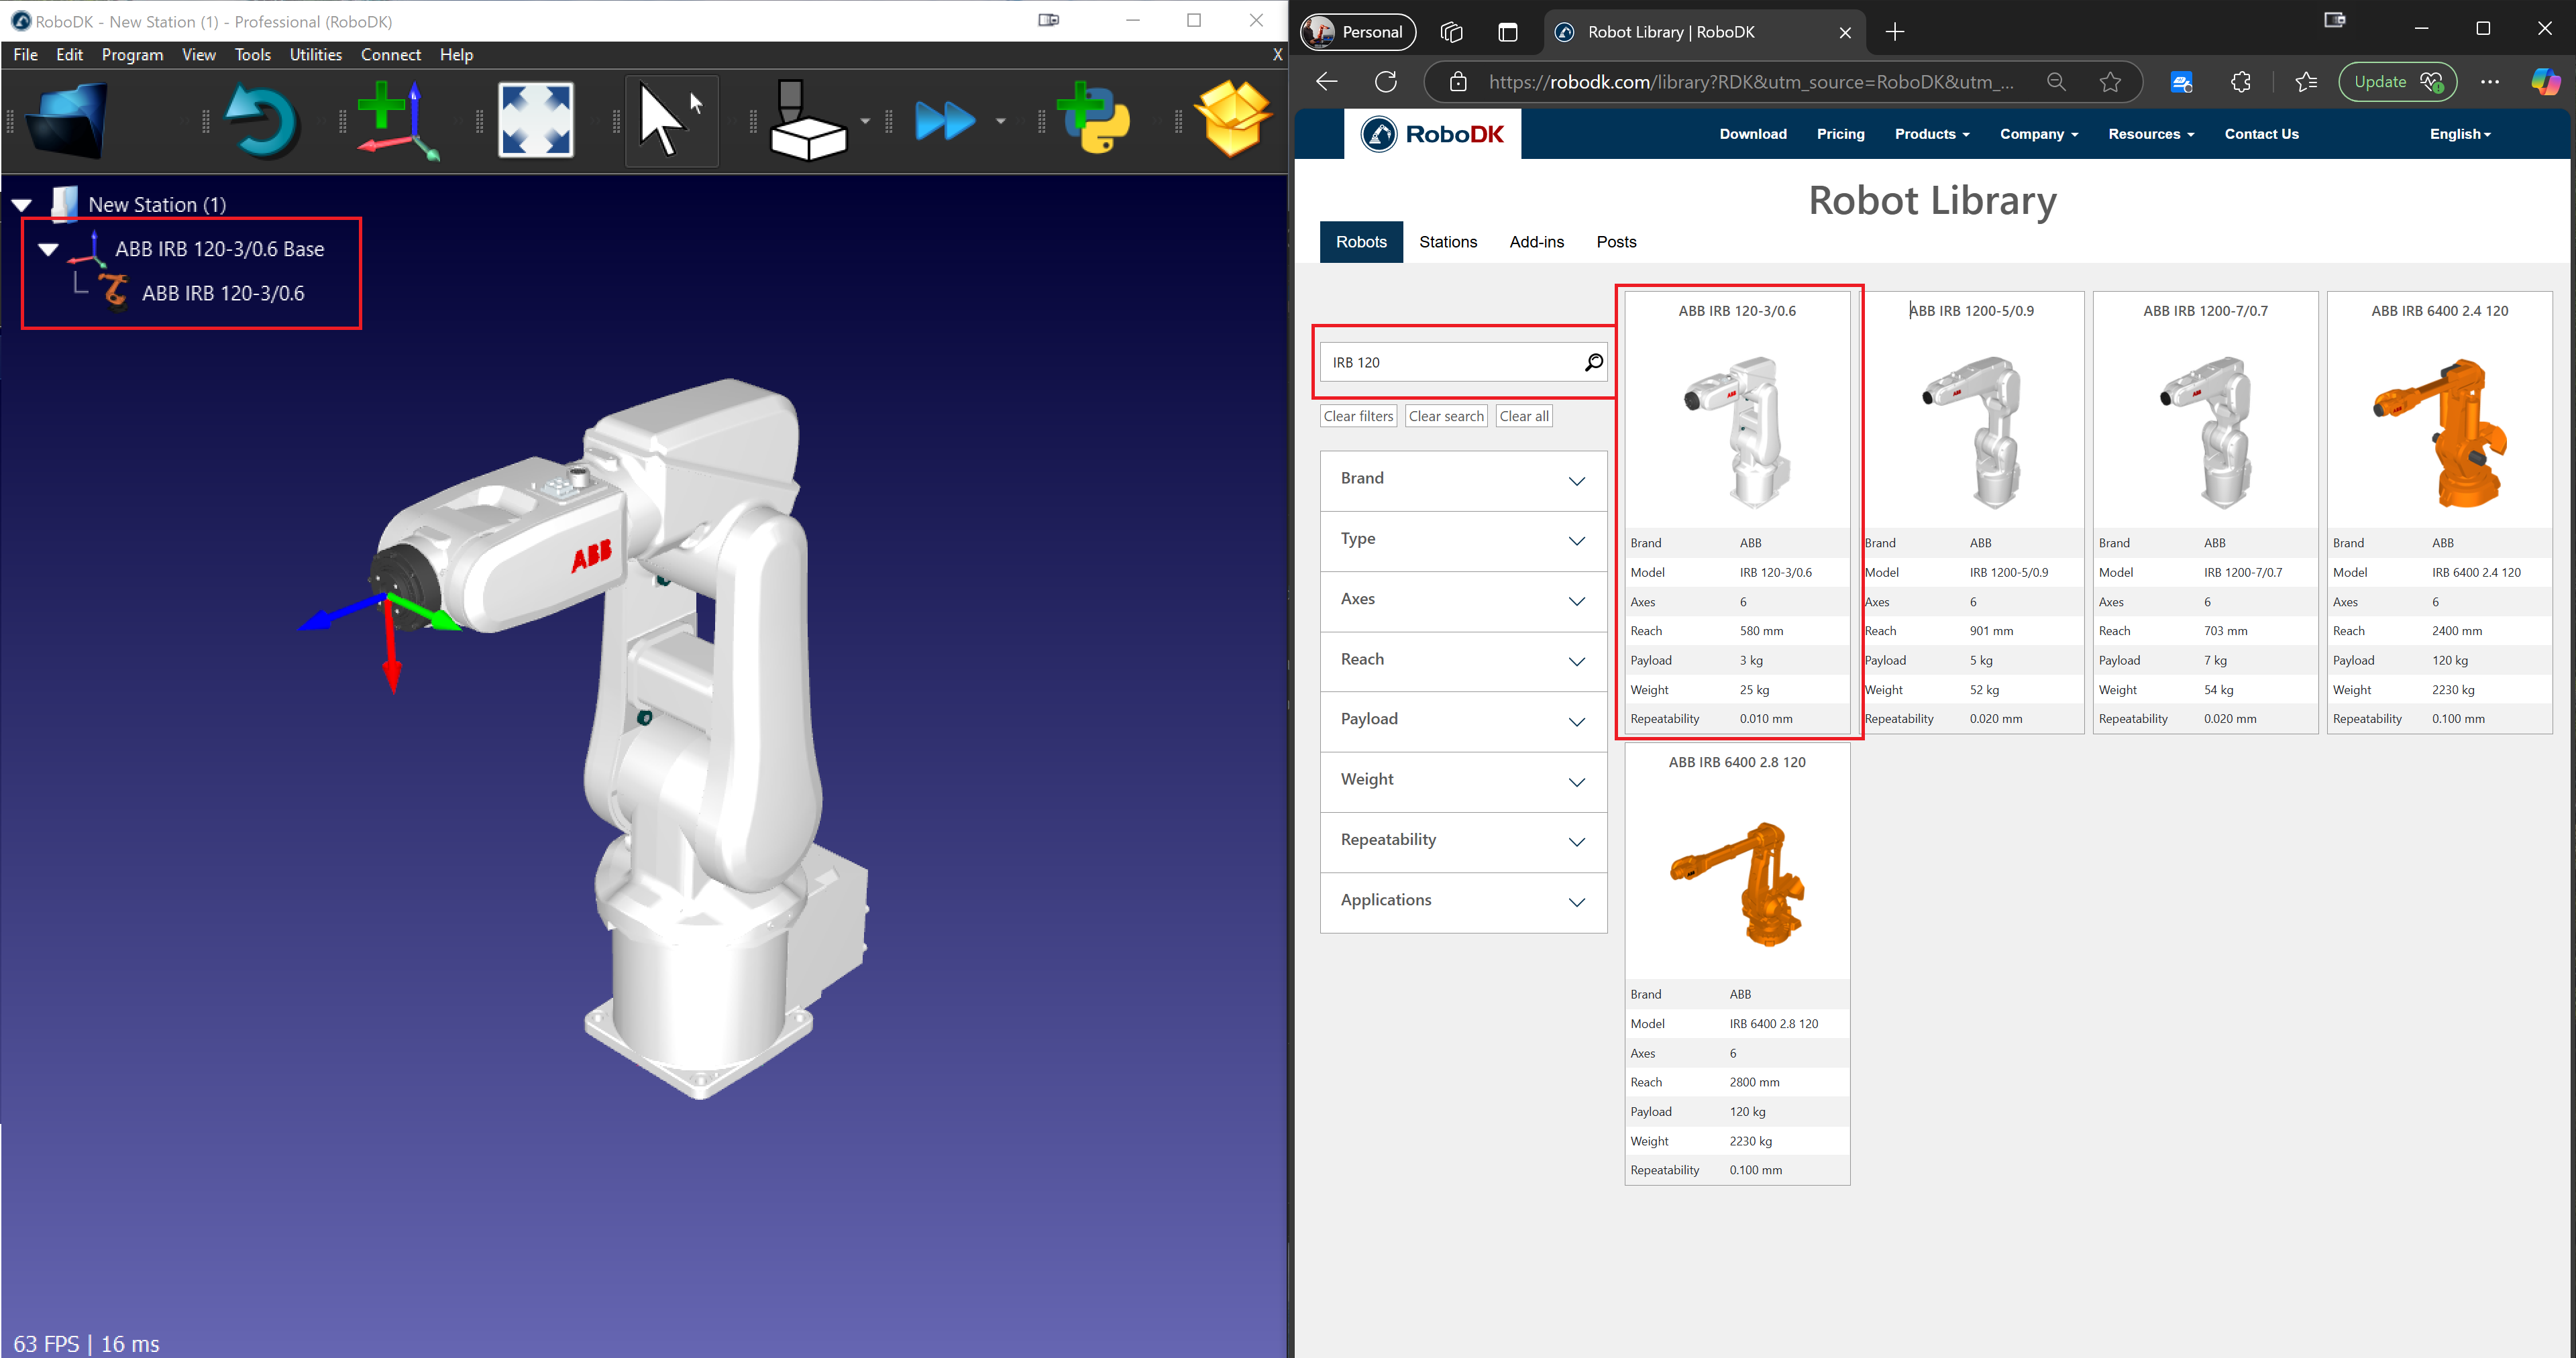
i.In the main menu, select File → Open online library.
ii.The RoboDK Library window will open, displaying a variety of industrial robots.
b.Select and Import a Robot:
i.Use the search bar to find a robot suitable for pick-and-place tasks (e.g., UR10, ABB IRB 120, Fanuc LR Mate).
ii.Click on the desired robot and select Download.
c.Position the Robot in the Station:
i.The robot will automatically appear in the station.
ii.Use the Move Tool to adjust its placement if necessary.
4.Add a Reference Frame
a.Create a Reference Frame:
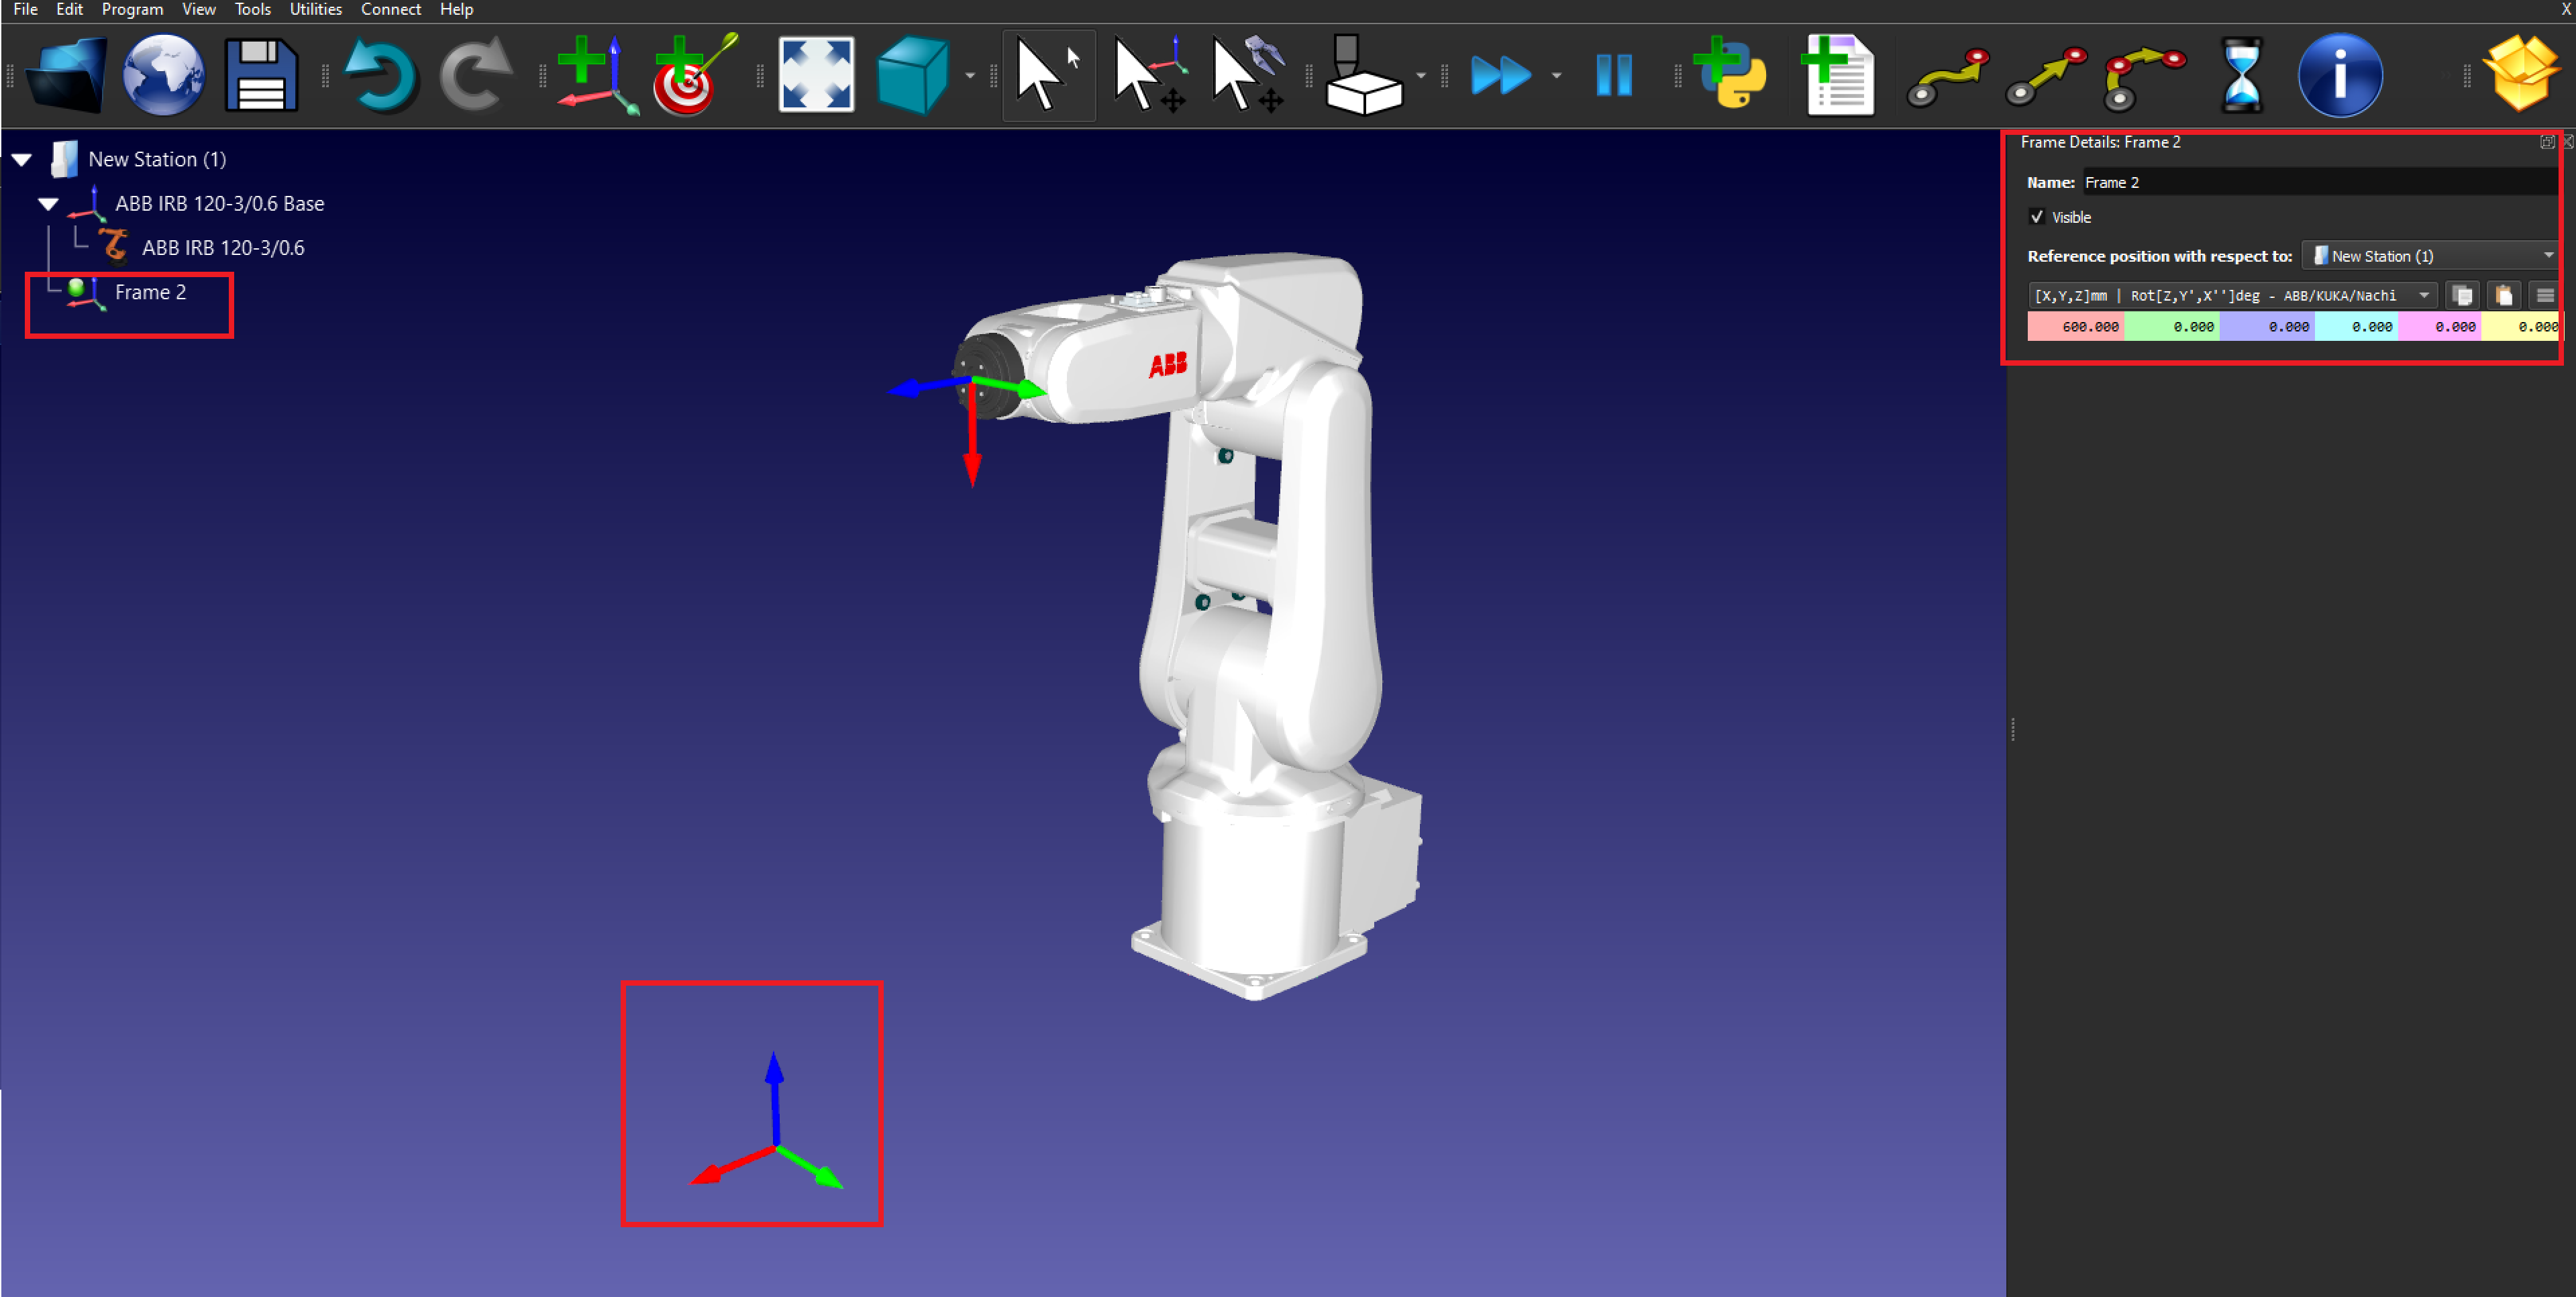
i.Go to Program → Add Reference Frame.
ii.A new reference frame will appear in the station tree and the 3D view.
b.Position the Reference Frame:
i.Double-click the reference frame to enter coordinates (X, Y, Z) and rotation values.
ii.Click OK to save the position.
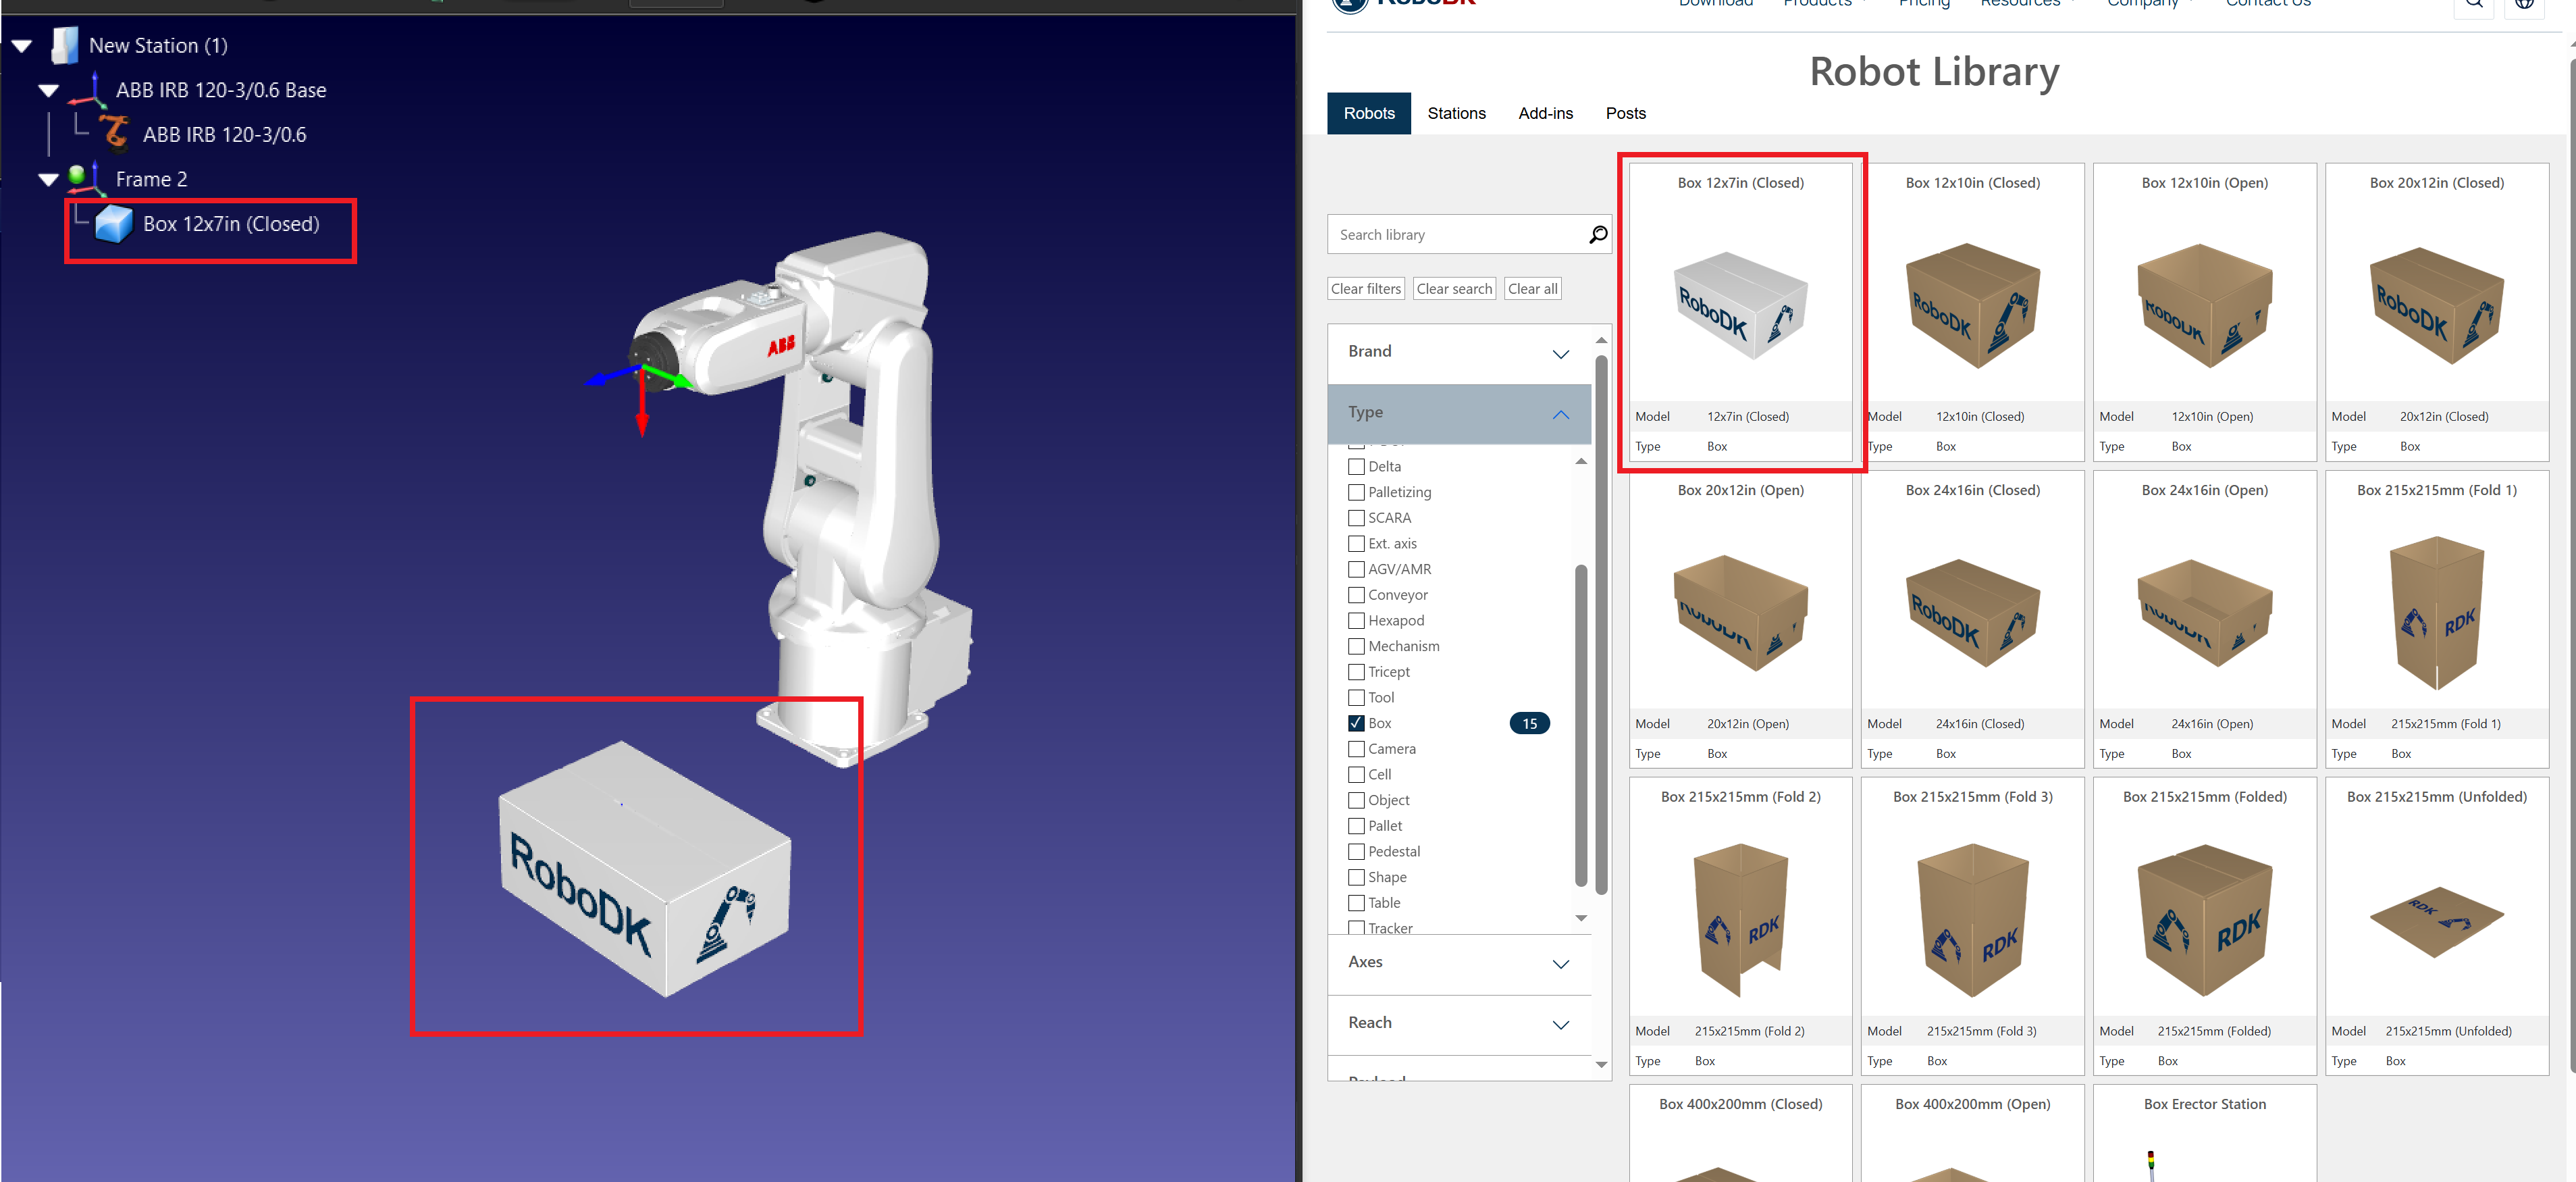
5.Import 3D Objects
a.Load Object Models:
iii.In the main menu, select File → Open.
iv.Browse and select the 3D models of objects to be picked and placed (e.g., STEP, IGES files).
b.Position the Objects:
v.Use the Move Tool to adjust object placement in the reference frame.
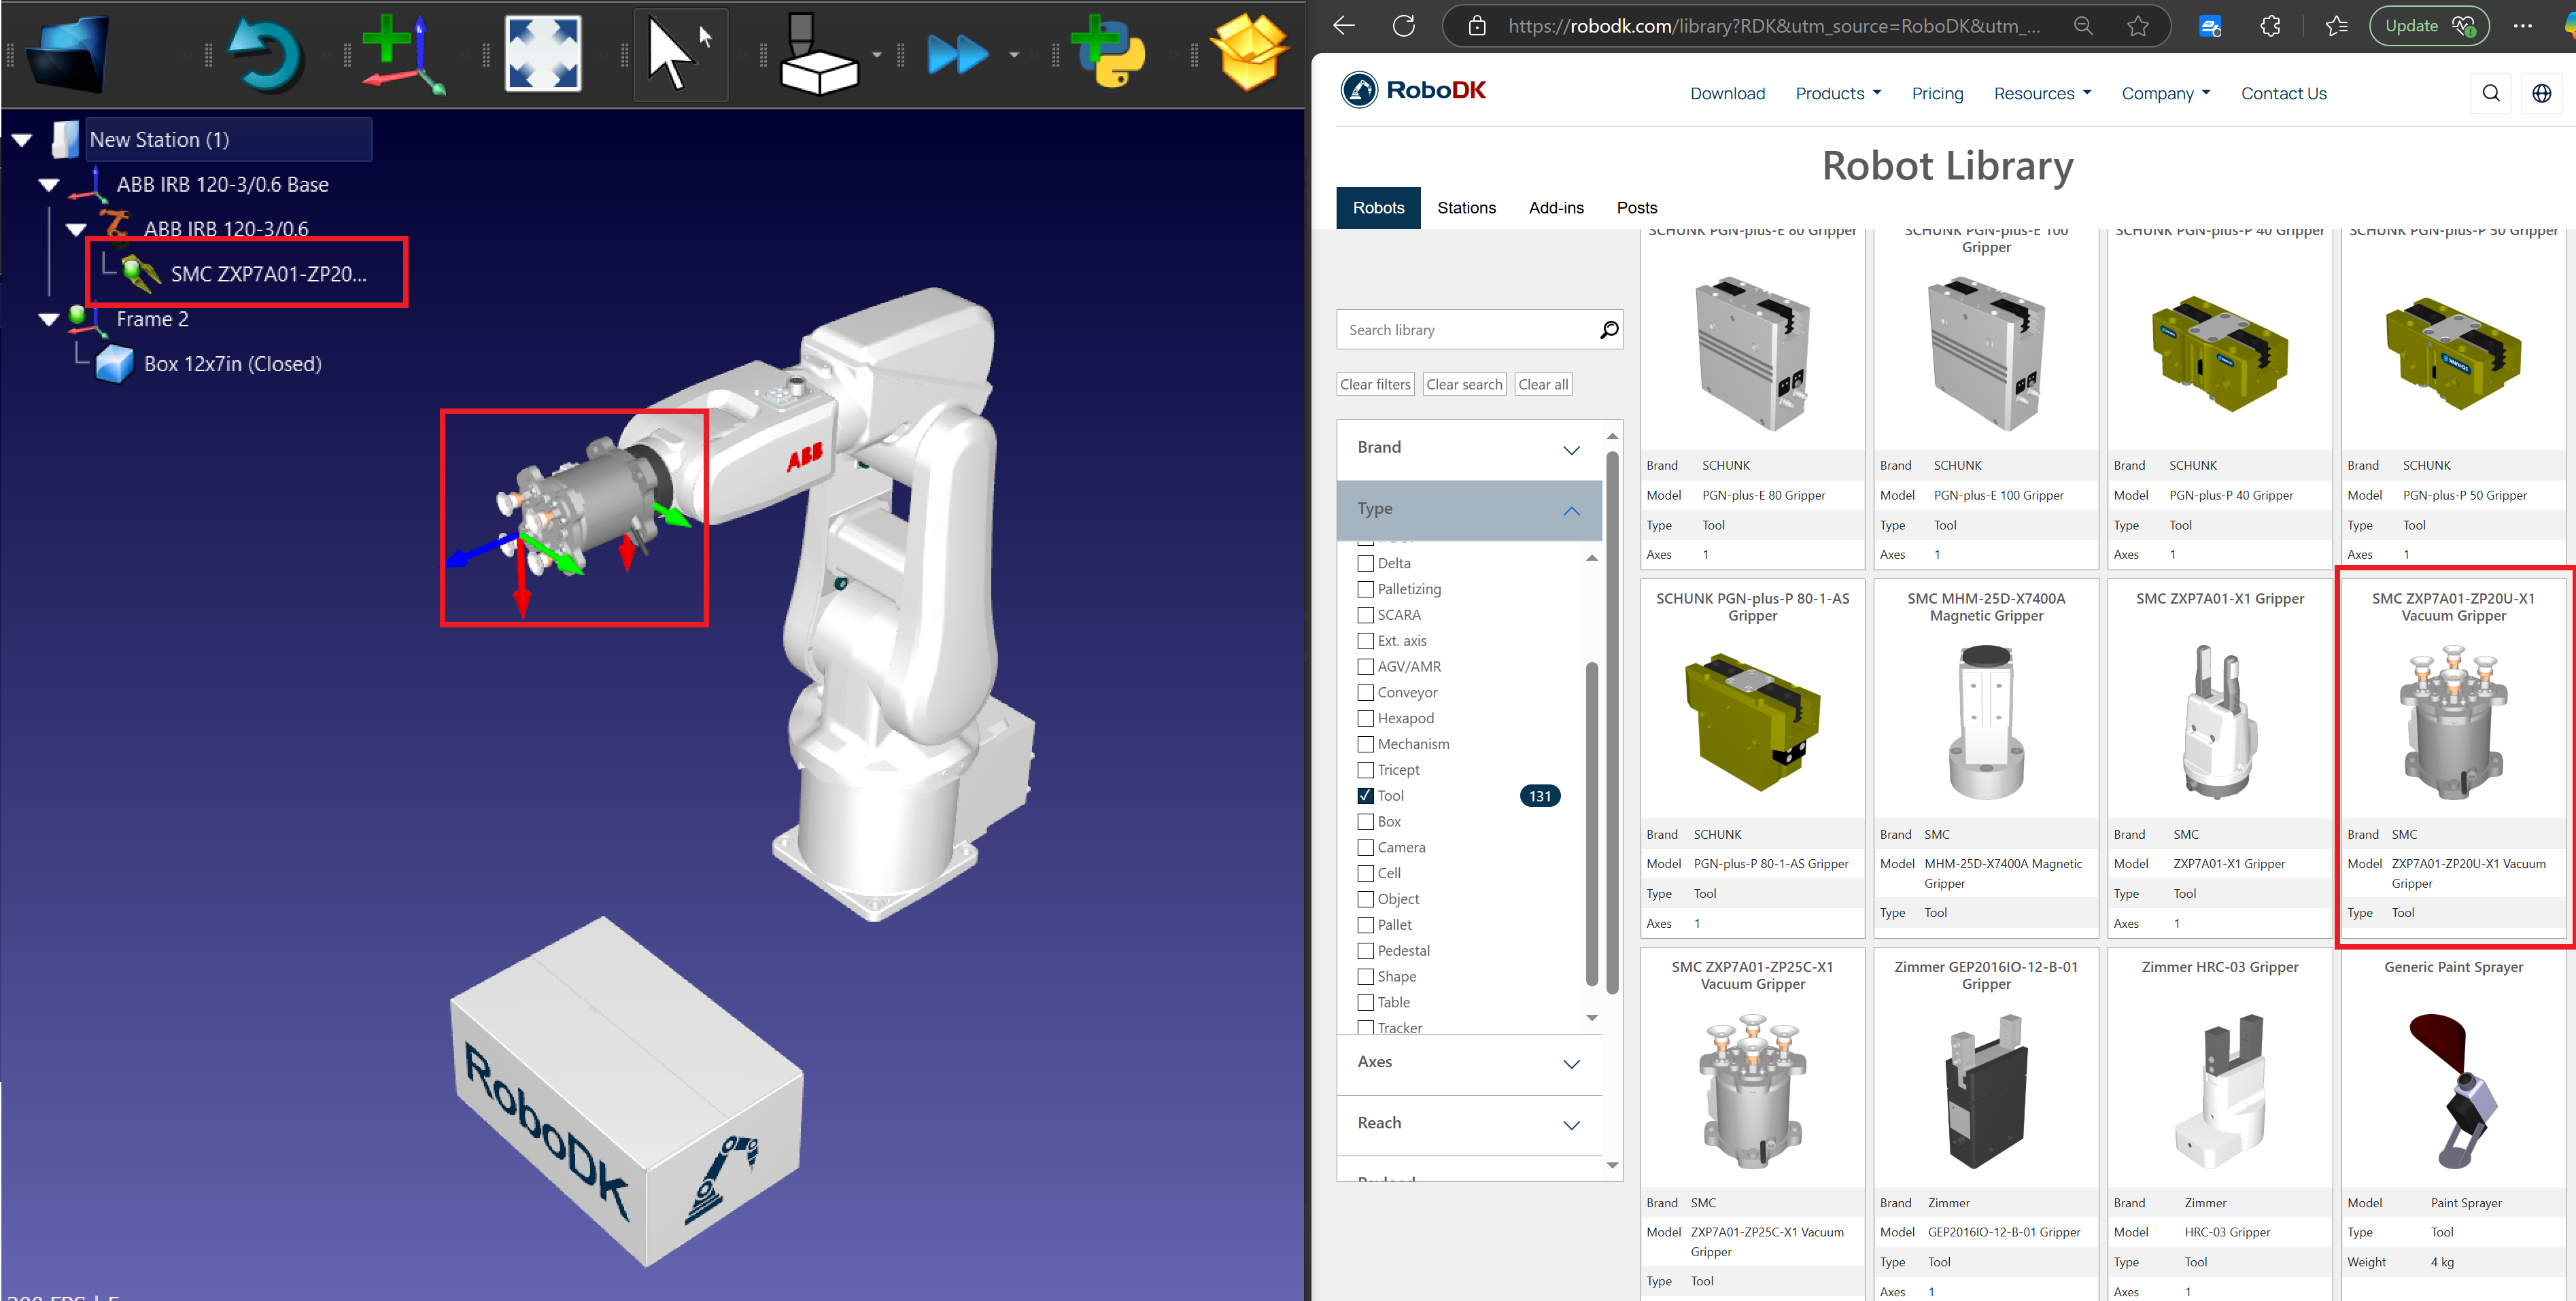
6.Add a Tool (Gripper)
a.Select a Gripper:
i.In the main menu, go to Utilities → Add Tool (TCP).
ii.Choose a gripper from the Robot Library or import a custom gripper file.
b.Attach the Tool to the Robot:
i.Right-click the gripper in the station tree and select Attach to Robot.
ii.Choose the appropriate robot flange.
c.Define the TCP (Tool Center Point): Double-click the tool and enter the TCP coordinates relative to the robot flange.
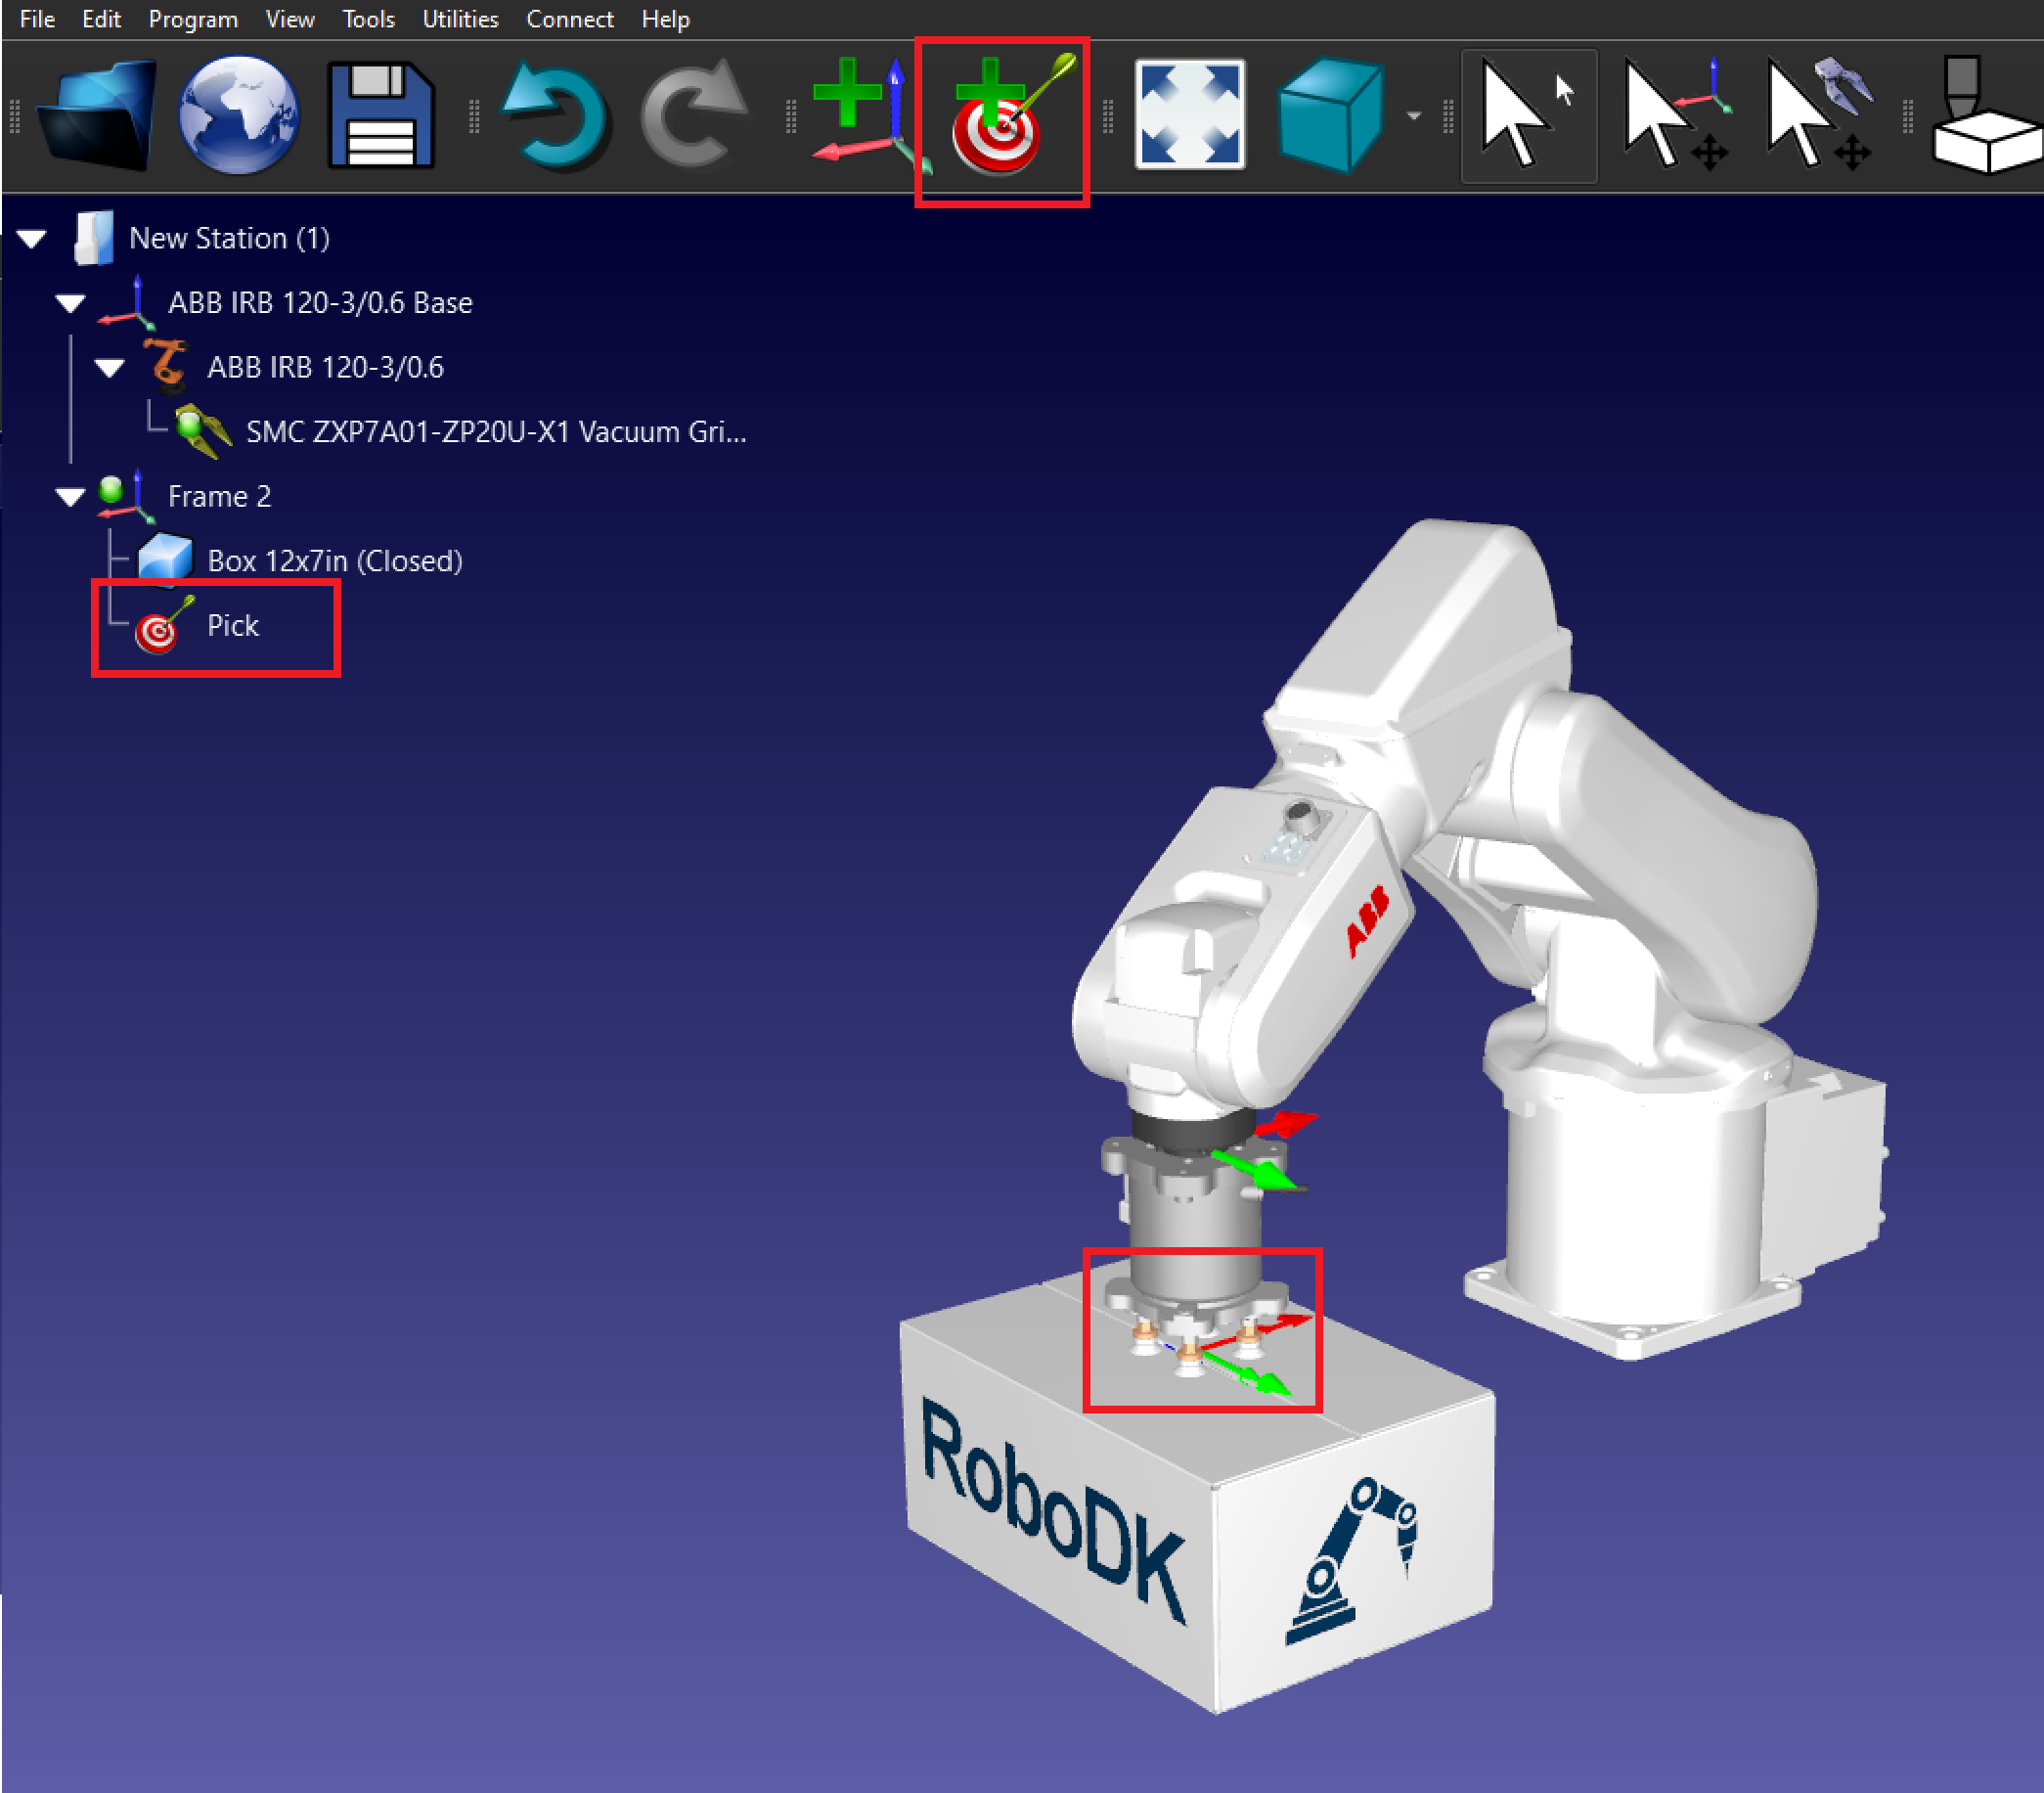
Create Targets for Pick and Place
Follow these steps to create a basic target in RoboDK for pick and place application
7.Add Pick and Place Targets:
a.Move the robot to the desired pick position.
b.Select Program → Teach Target to save the position.
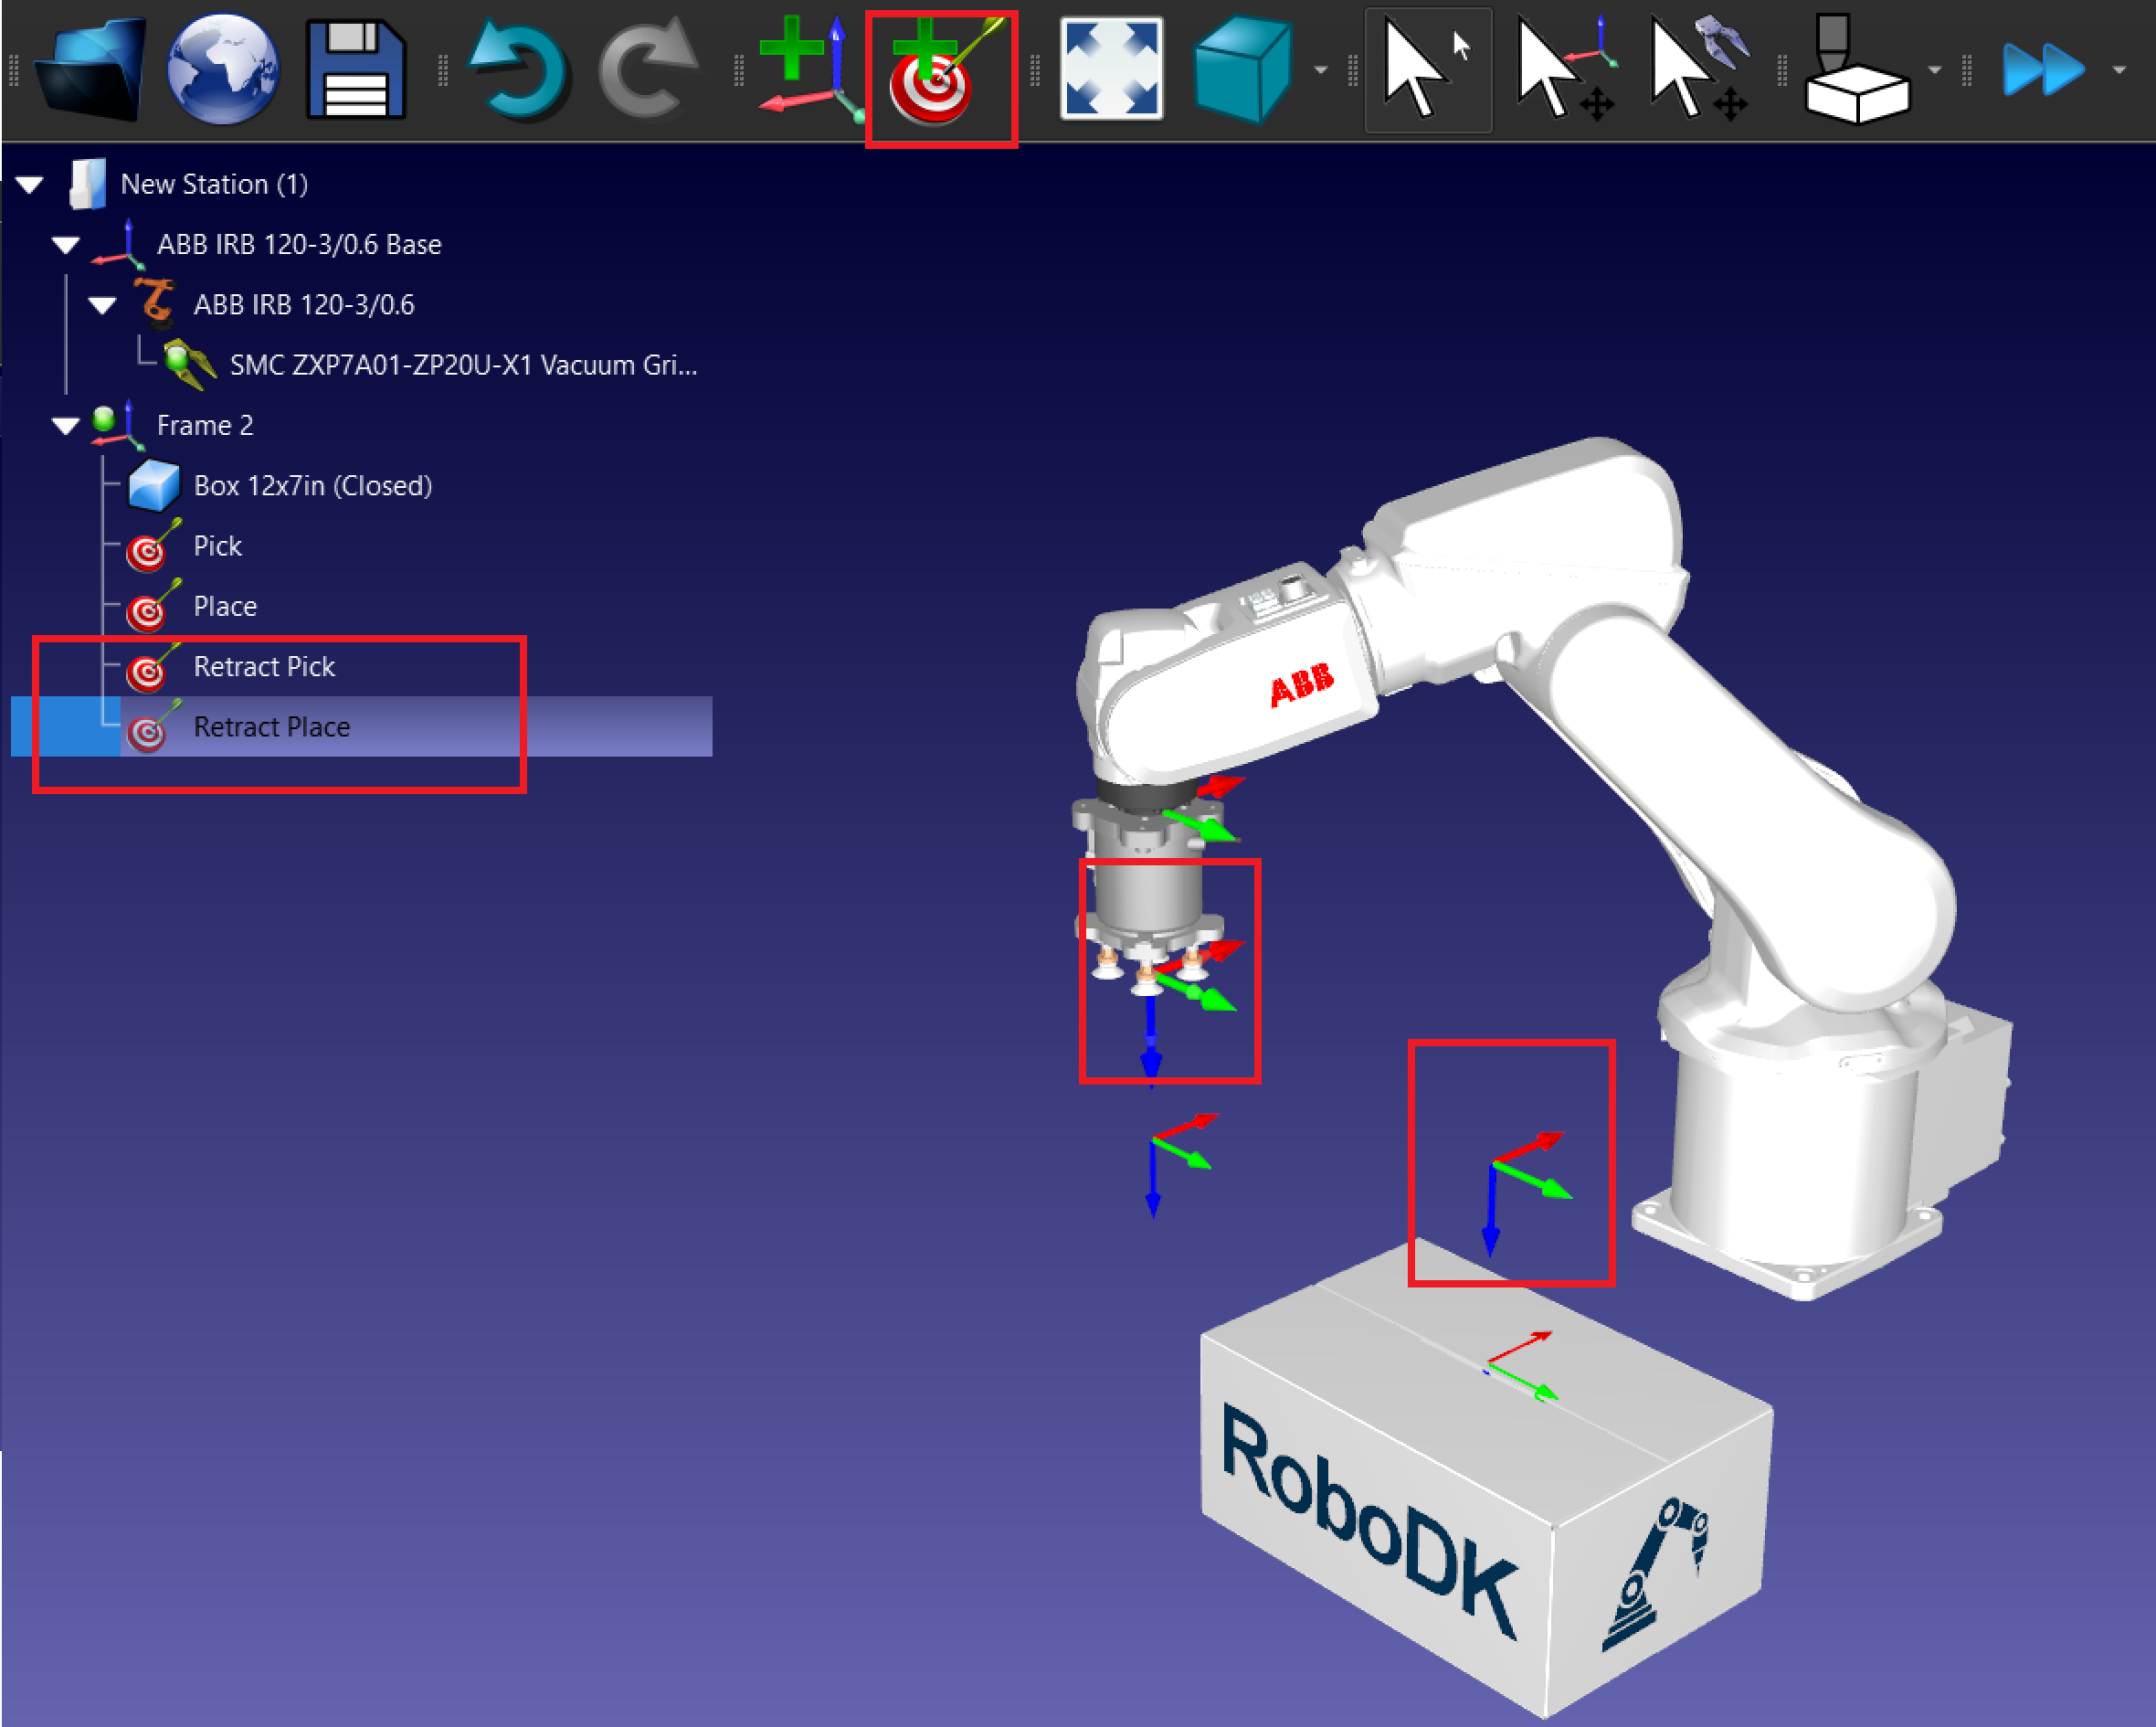
c.Repeat for Pick, Retract Pick, Place, and Retract Place positions.
8.Organize the Targets:
a.Rename the targets for clarity (e.g., Approach_Pick, Pick, Place). Press F2 to rename the targets.
b.Don’t forget to create the targets under the relevant reference frames in the station tree.
9.Create the Pick target: Place the robot over the box and create a target called Pick.
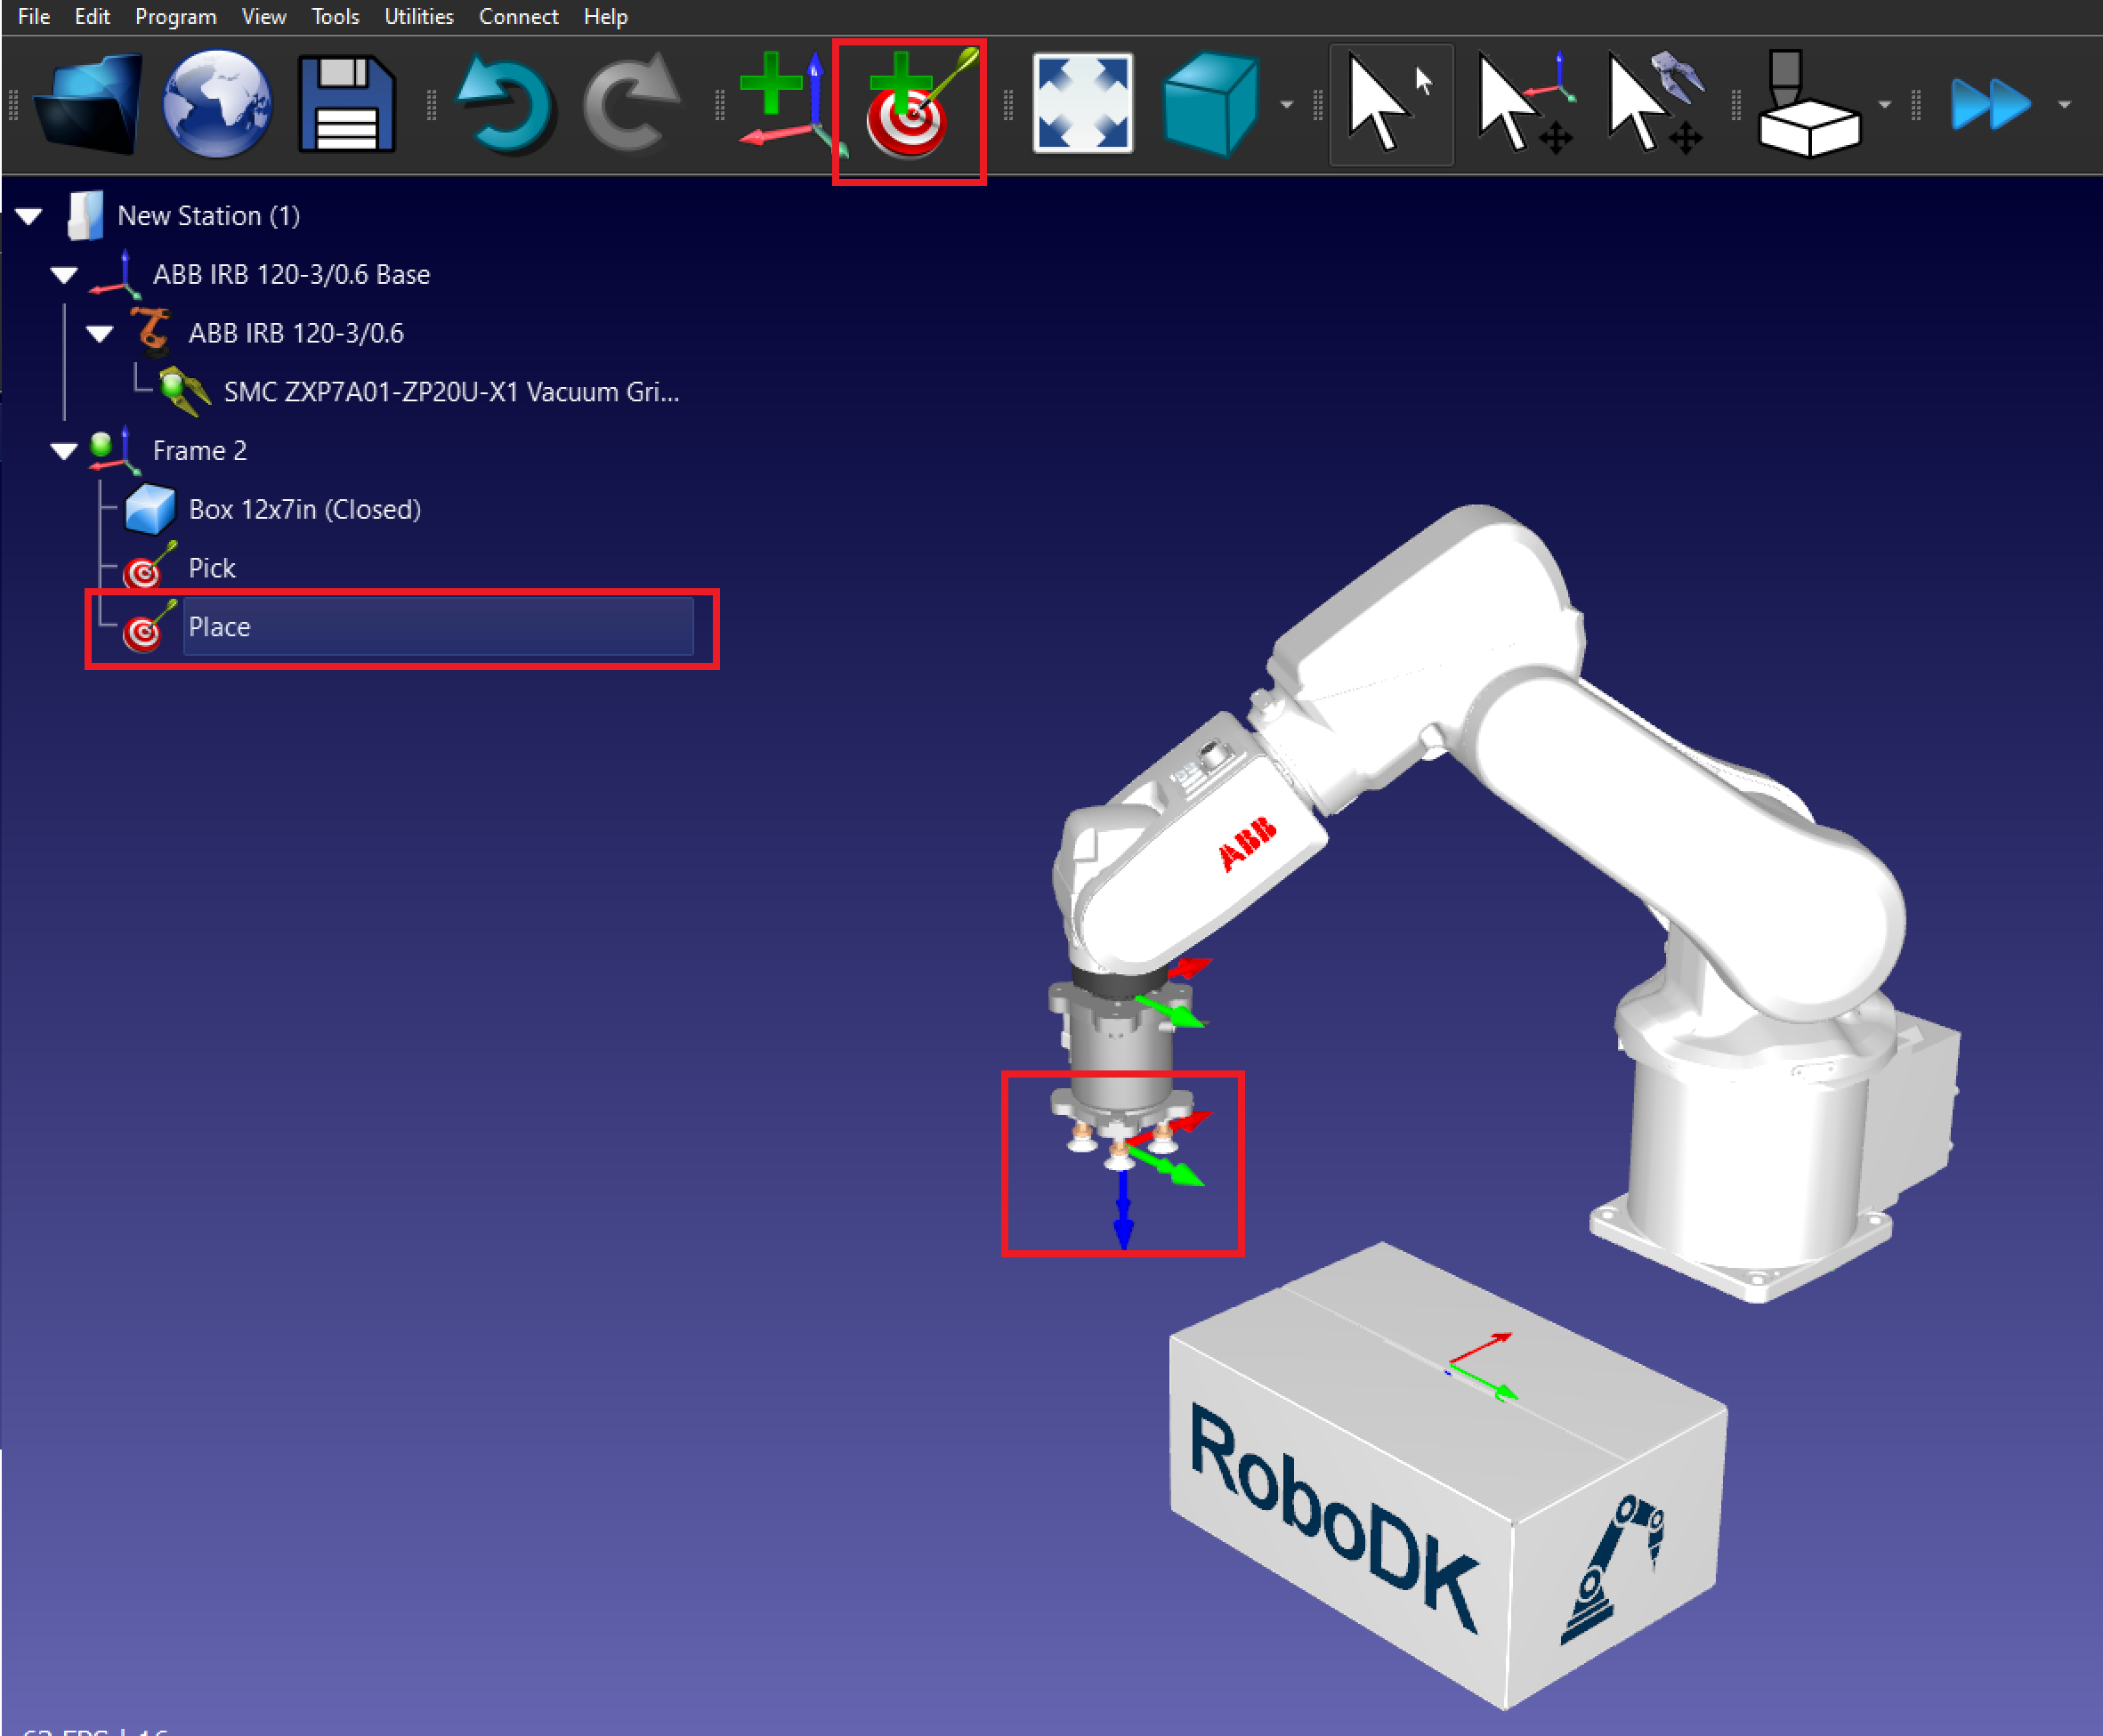
10.Create the Place target: Move the robot where you want to place the box and create a target called Place.
11.Create the Retract targets:
a.Move the robot the Pick target and up on the Z axis.
b.Create a new target called Pick Retract.
c.Repeat with the Place target.
Create pick and place program
Follow these steps to create a basic pick and place program in RoboDK with a 6-axis robot arm using a vacuum gripper to move a box.
1.Program the Pick and Place Operation:
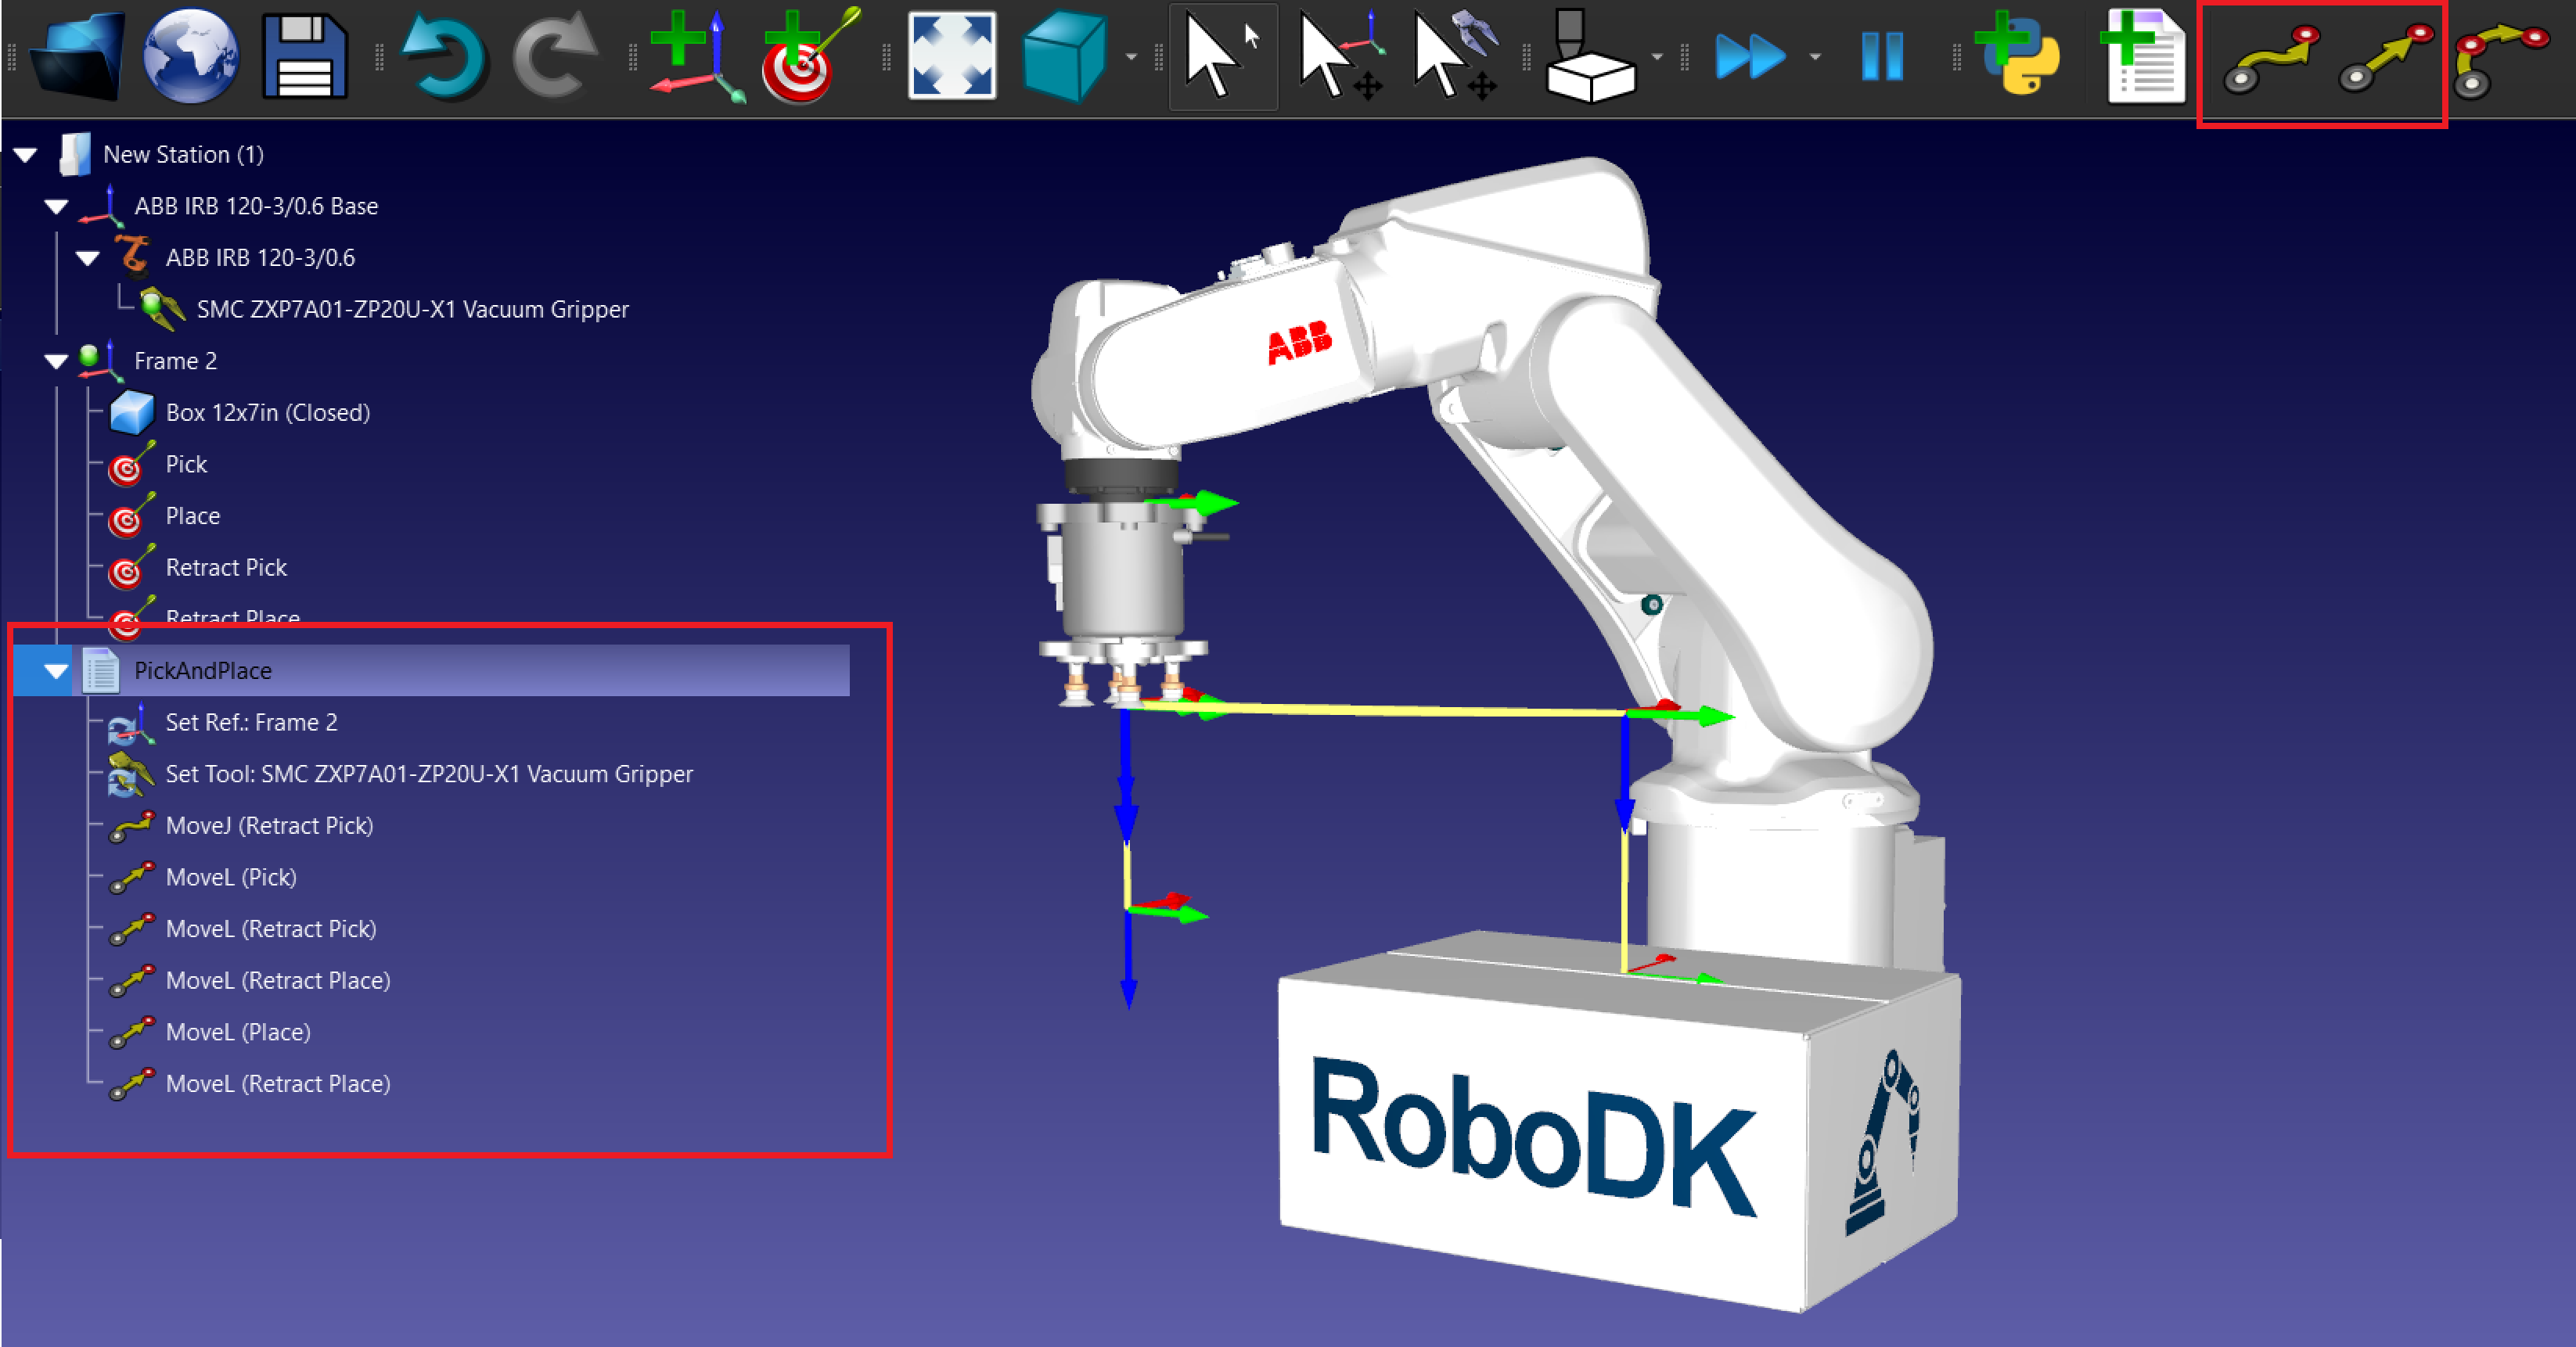
a.Create a New Program: Go to Program → Add Program and name it PickAndPlace.
b.Add Movement Instructions:
i.Add MoveJ or MoveL instructions for each target.
ii.Move the robot to the retract target first, then create a MoveL to the Pick target and back to retract.
iii.Repeat with the Place target.
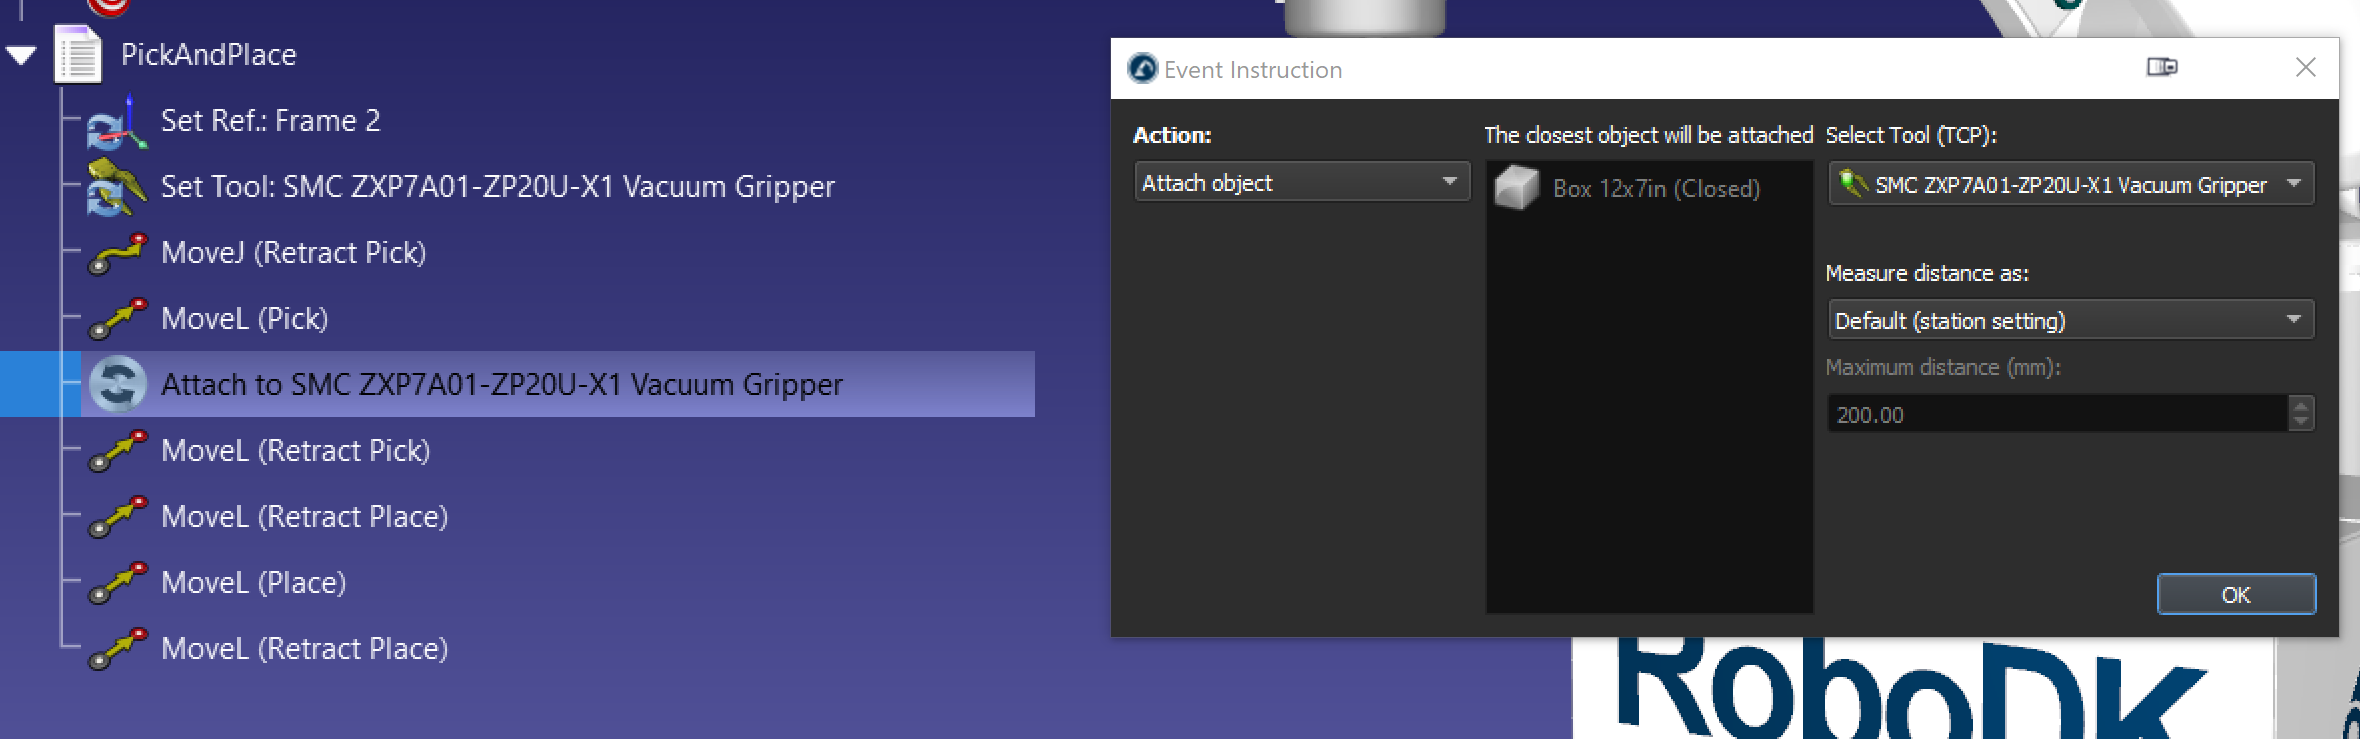
2.Add event to pick and place the object.
a.To add an event, go to Program → Simulation Event Instruction.
b.Add an event with the action Attach object to pick the box after the MoveL (Pick).
c.Add an event wit the action Detach object place the box after the MoveL (Place). The Attach to parent option allow to attach the object to a new once it is detached from the gripper.
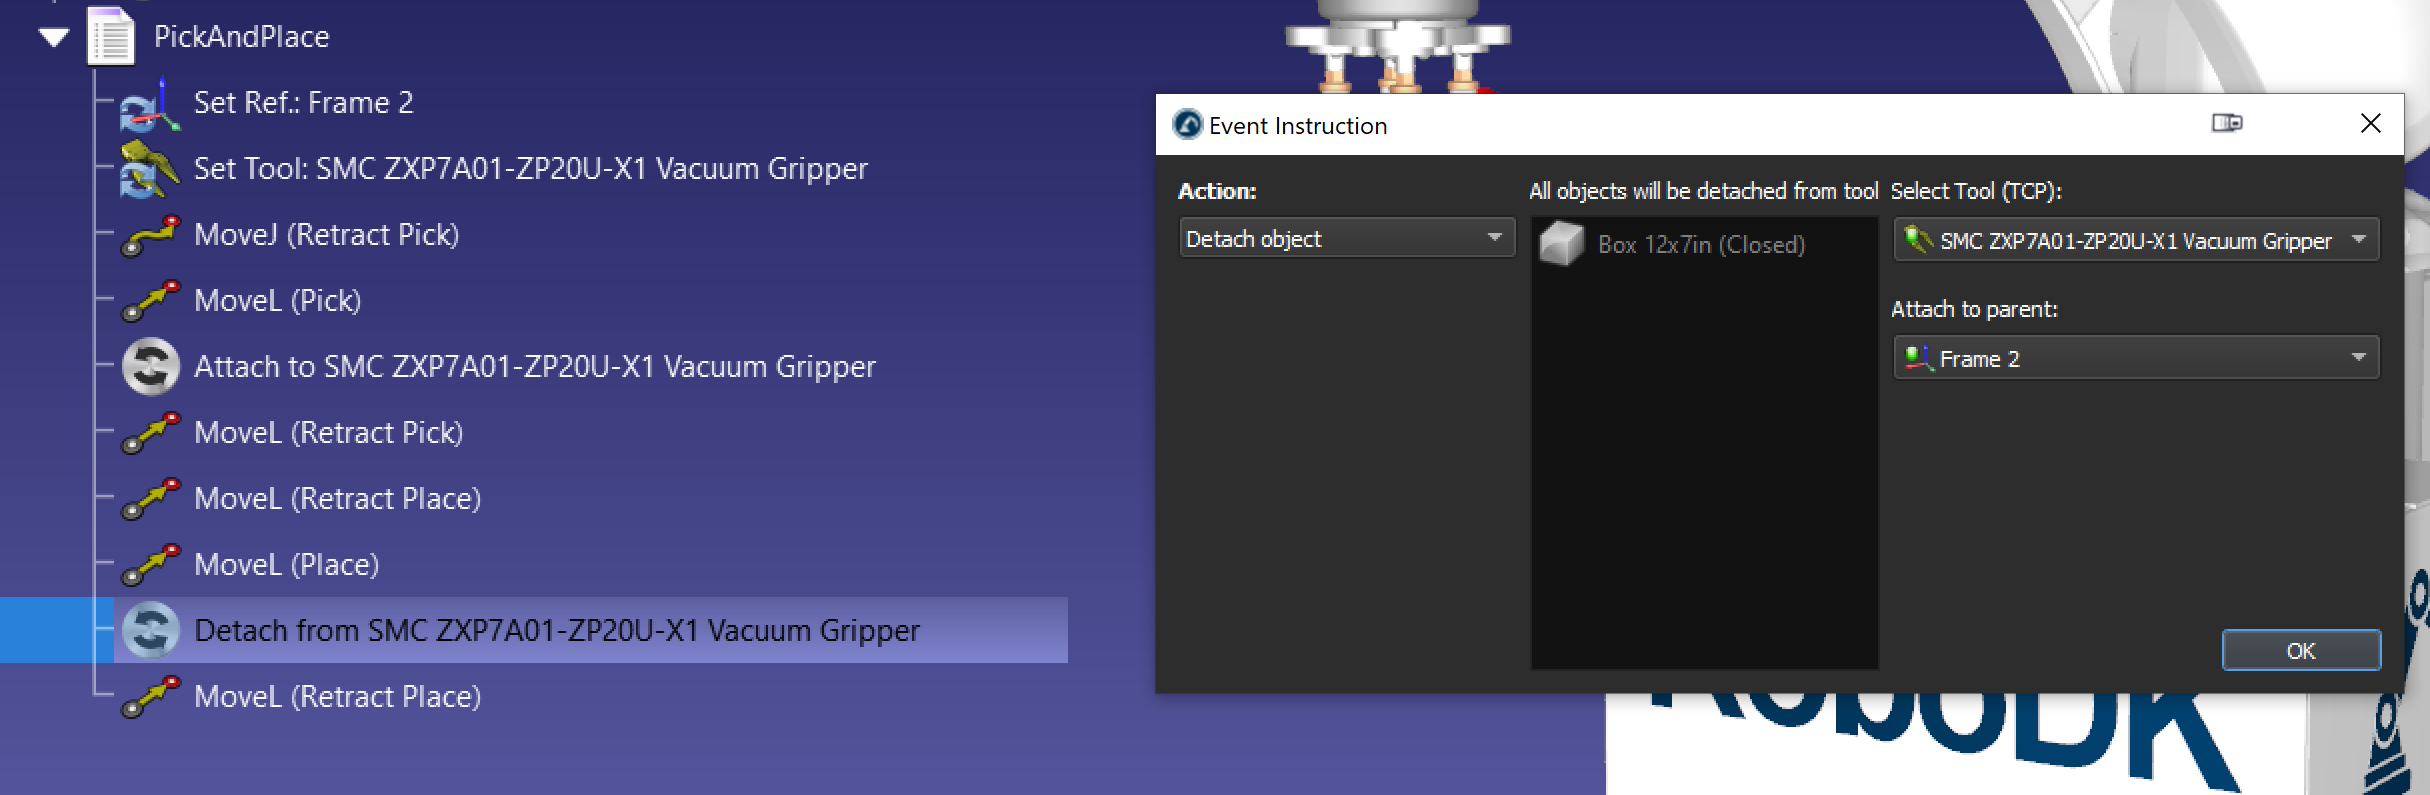
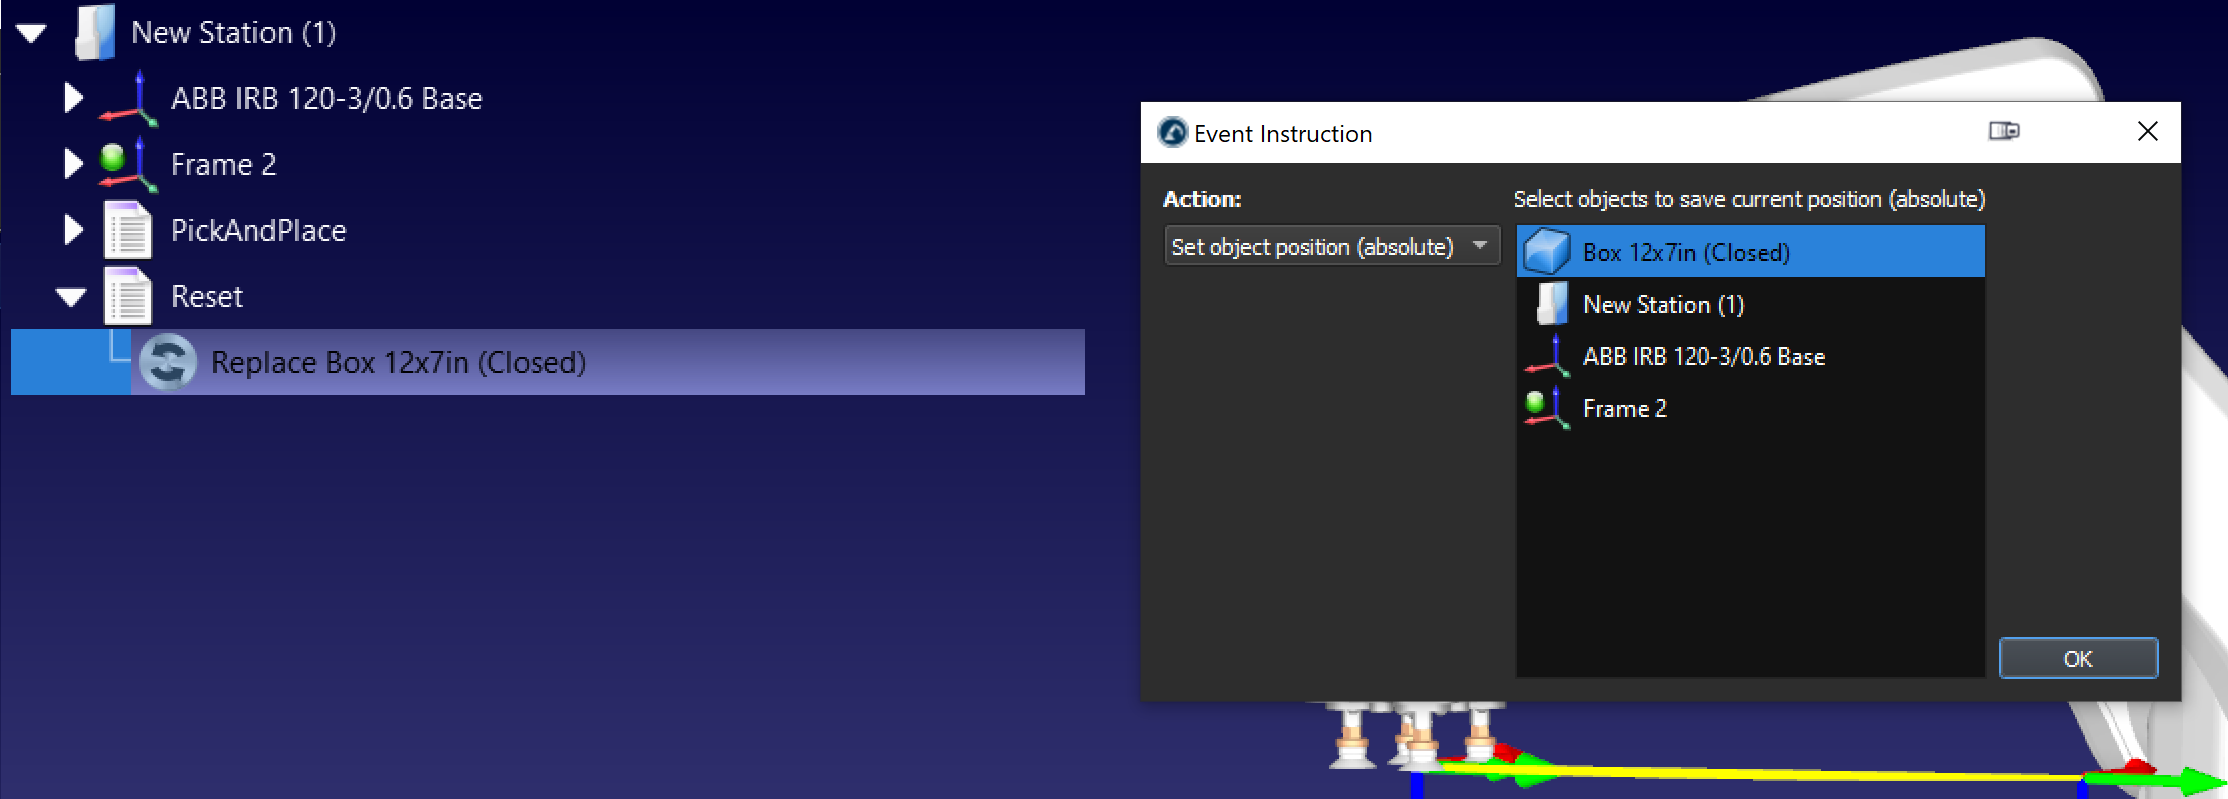
d.It is good practice to also create a separate program with an event action Set object position reset the box to its origin position if needed.
By following these steps, you can successfully create a basic pick-and-place station in RoboDK.
Pick and Place and Assembly
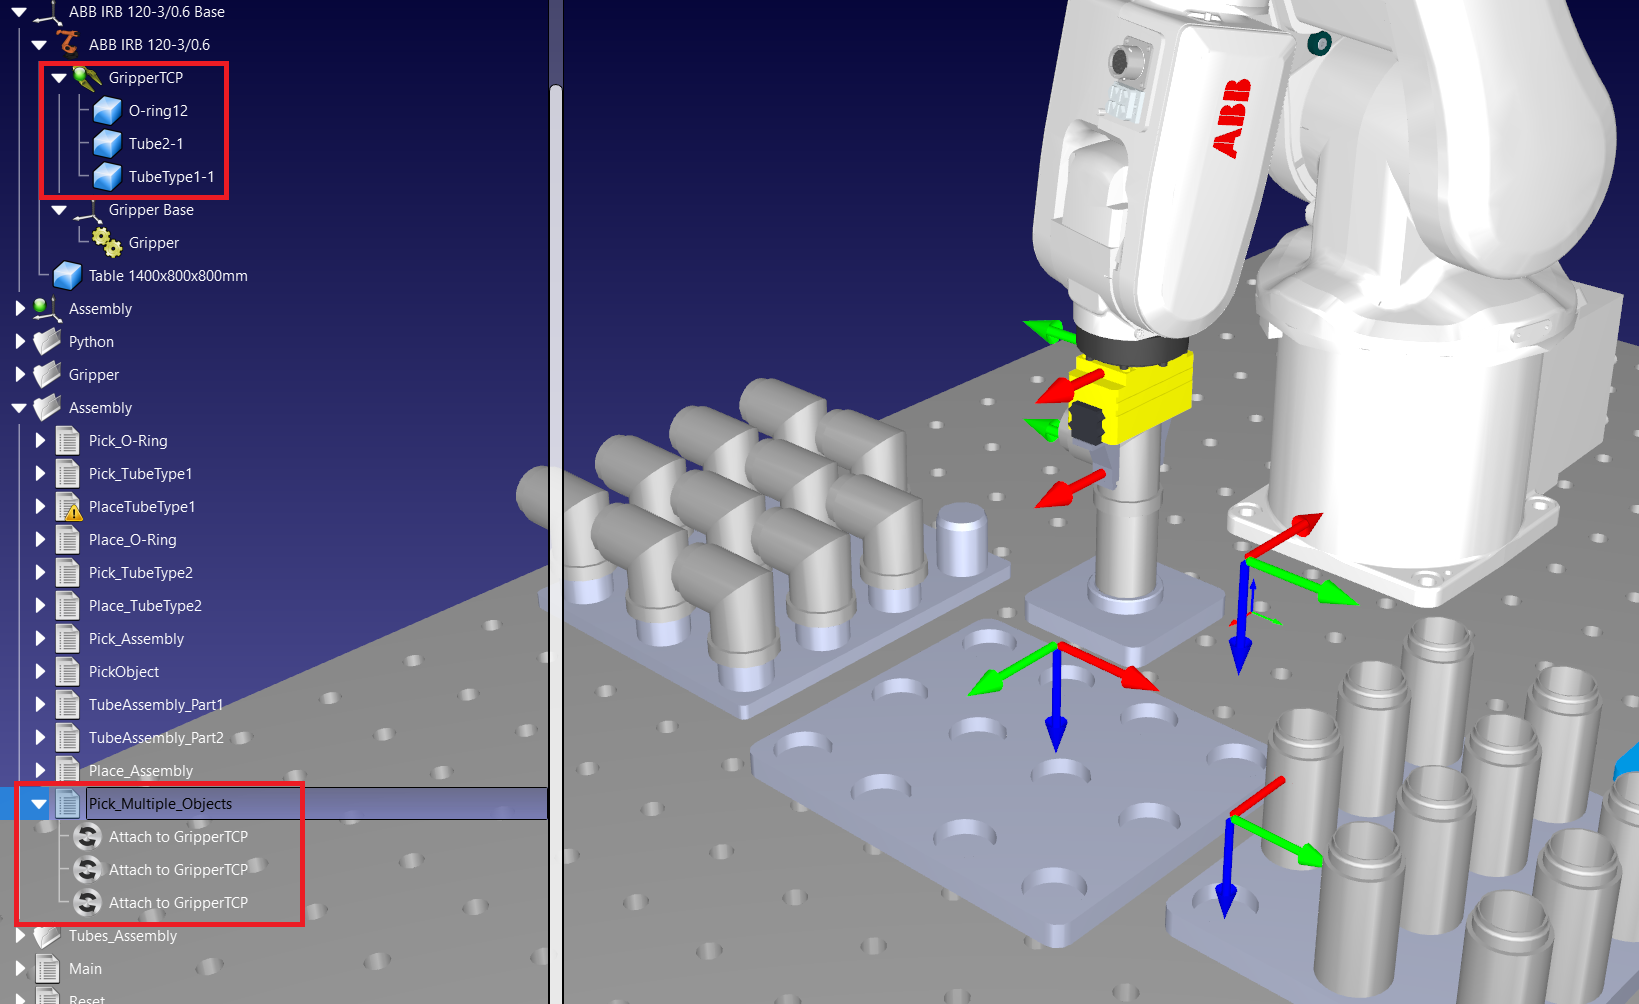
Pick and place applications can be used to automate an assembly operation. By using “attach object” event multiple time, you can pick up multiple objects at once and create an assembly pick-up. For example, if you have 3 objects in the assembly to, you can use the event 3 times as shown in the following image.
Pick and place using the palletizing Add-in
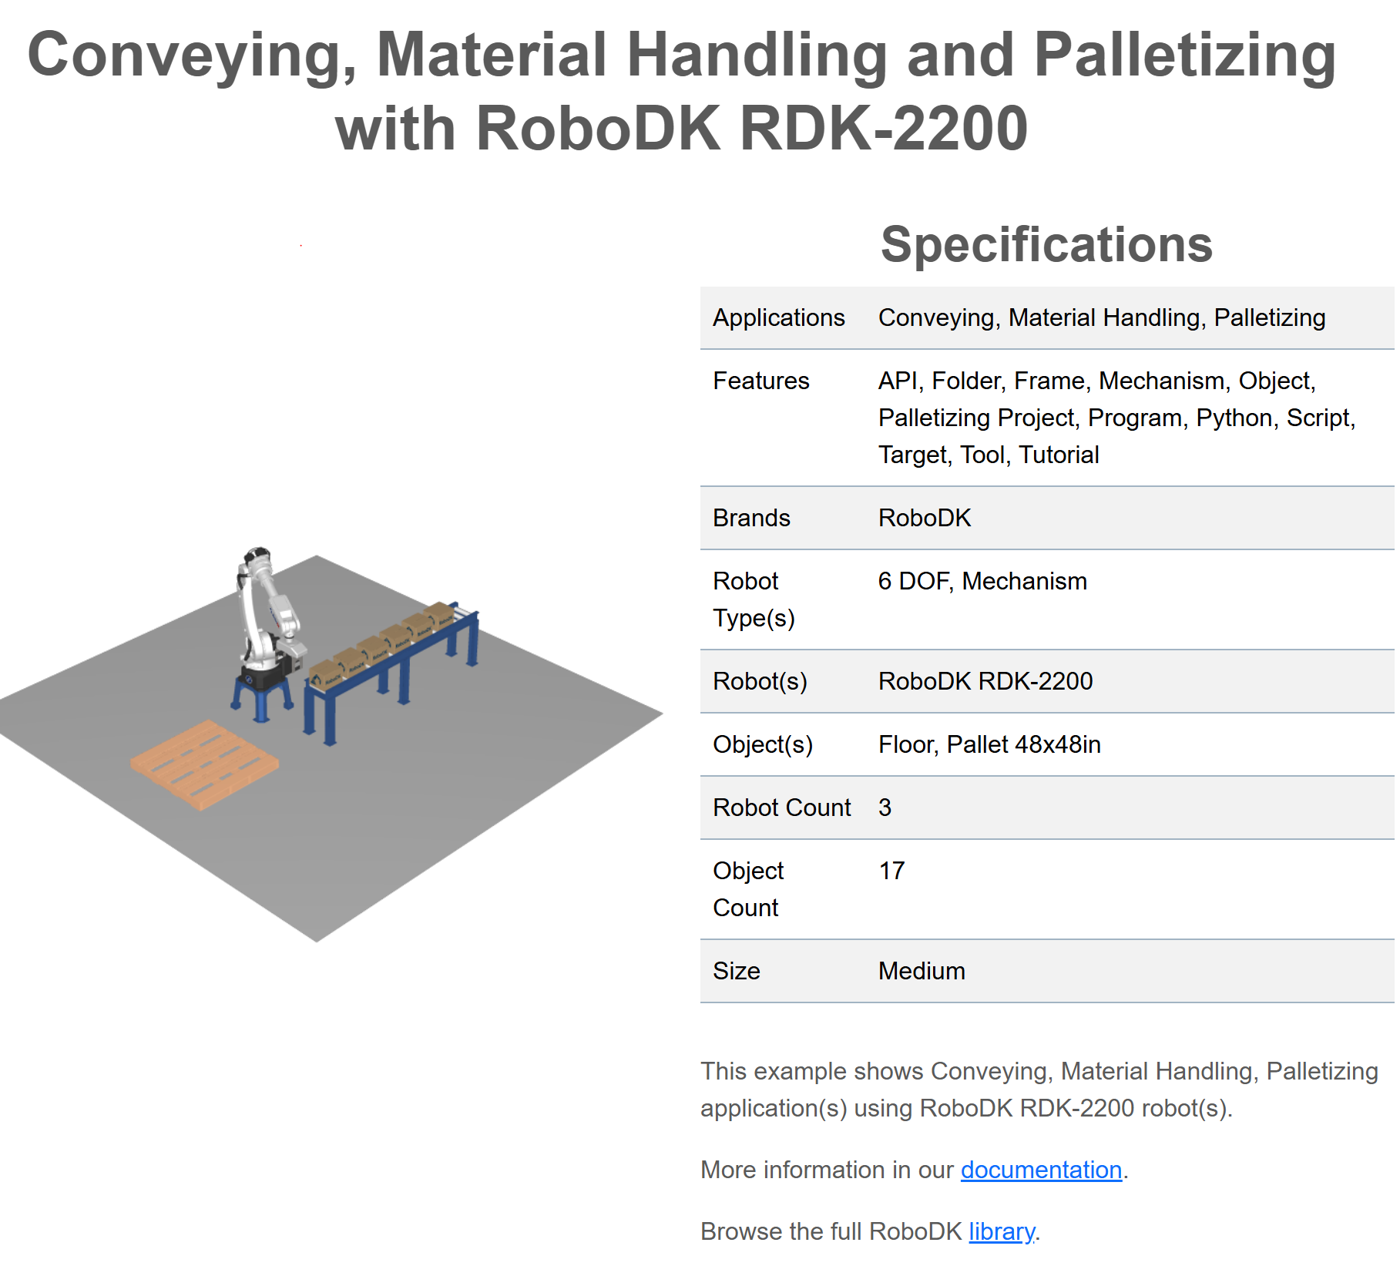
If you have a repetitive pick and place operation involving a palletizing pattern, you can use our palletizing plugin to simplify the task. Simply use the following link and download our palletizing plugin: Palletizing | Add-in Marketplace. Follow our palletizing documentation for more information about the palletizing plugin
Pick and place using the API
If you need more advanced pick and place operations such as picking up large assemblies or picking up object from a moving conveyor, you can use the API to program your pick and place applications.
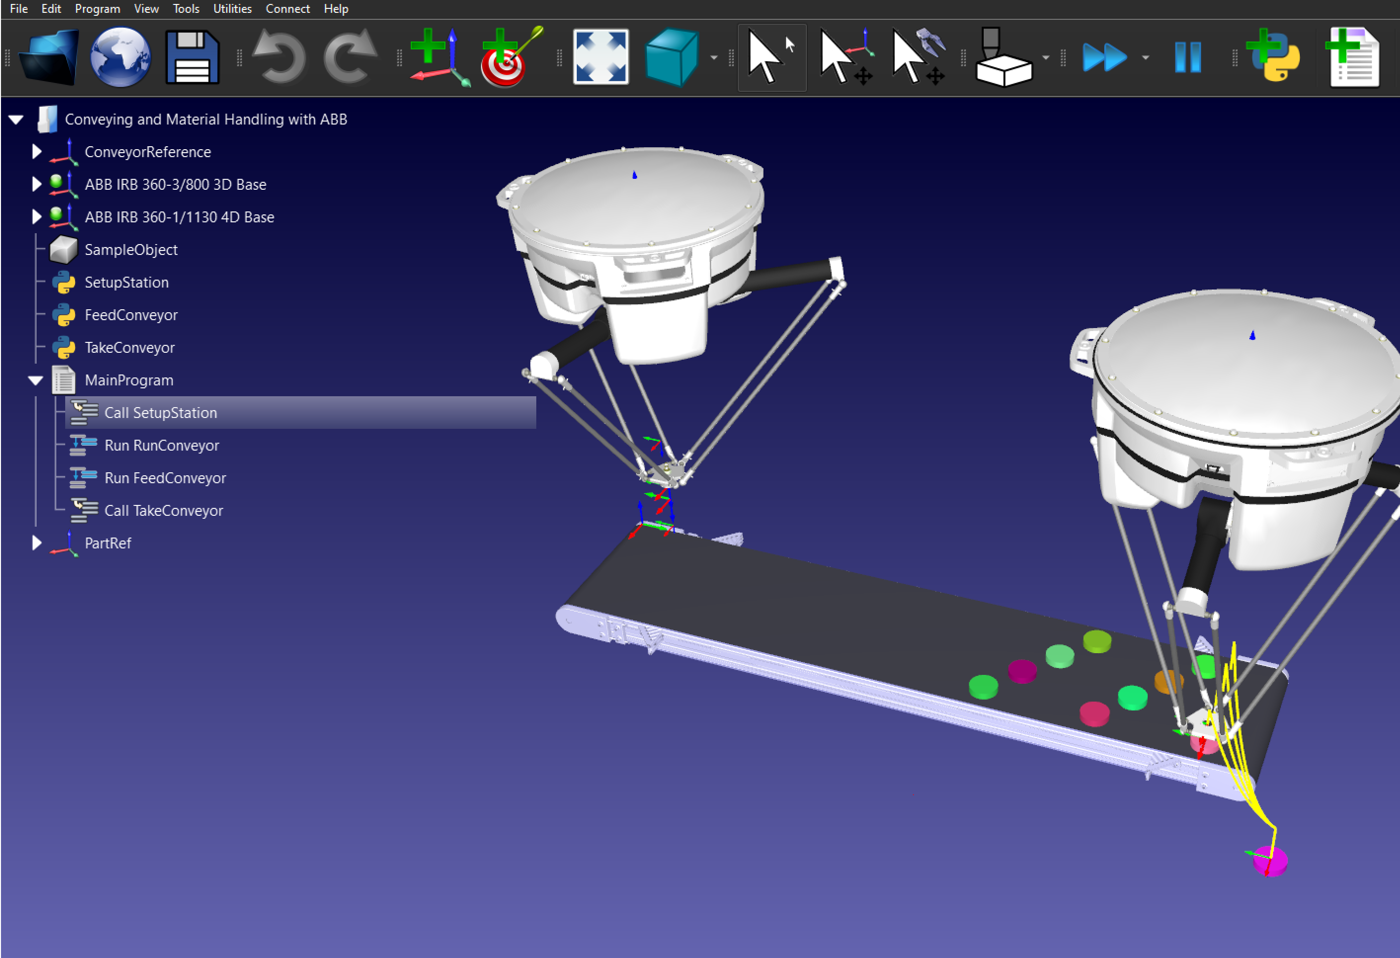
This exampleuses the RoboDK API with Python to pick and place objects on a moving conveyor, you can download it from our library.
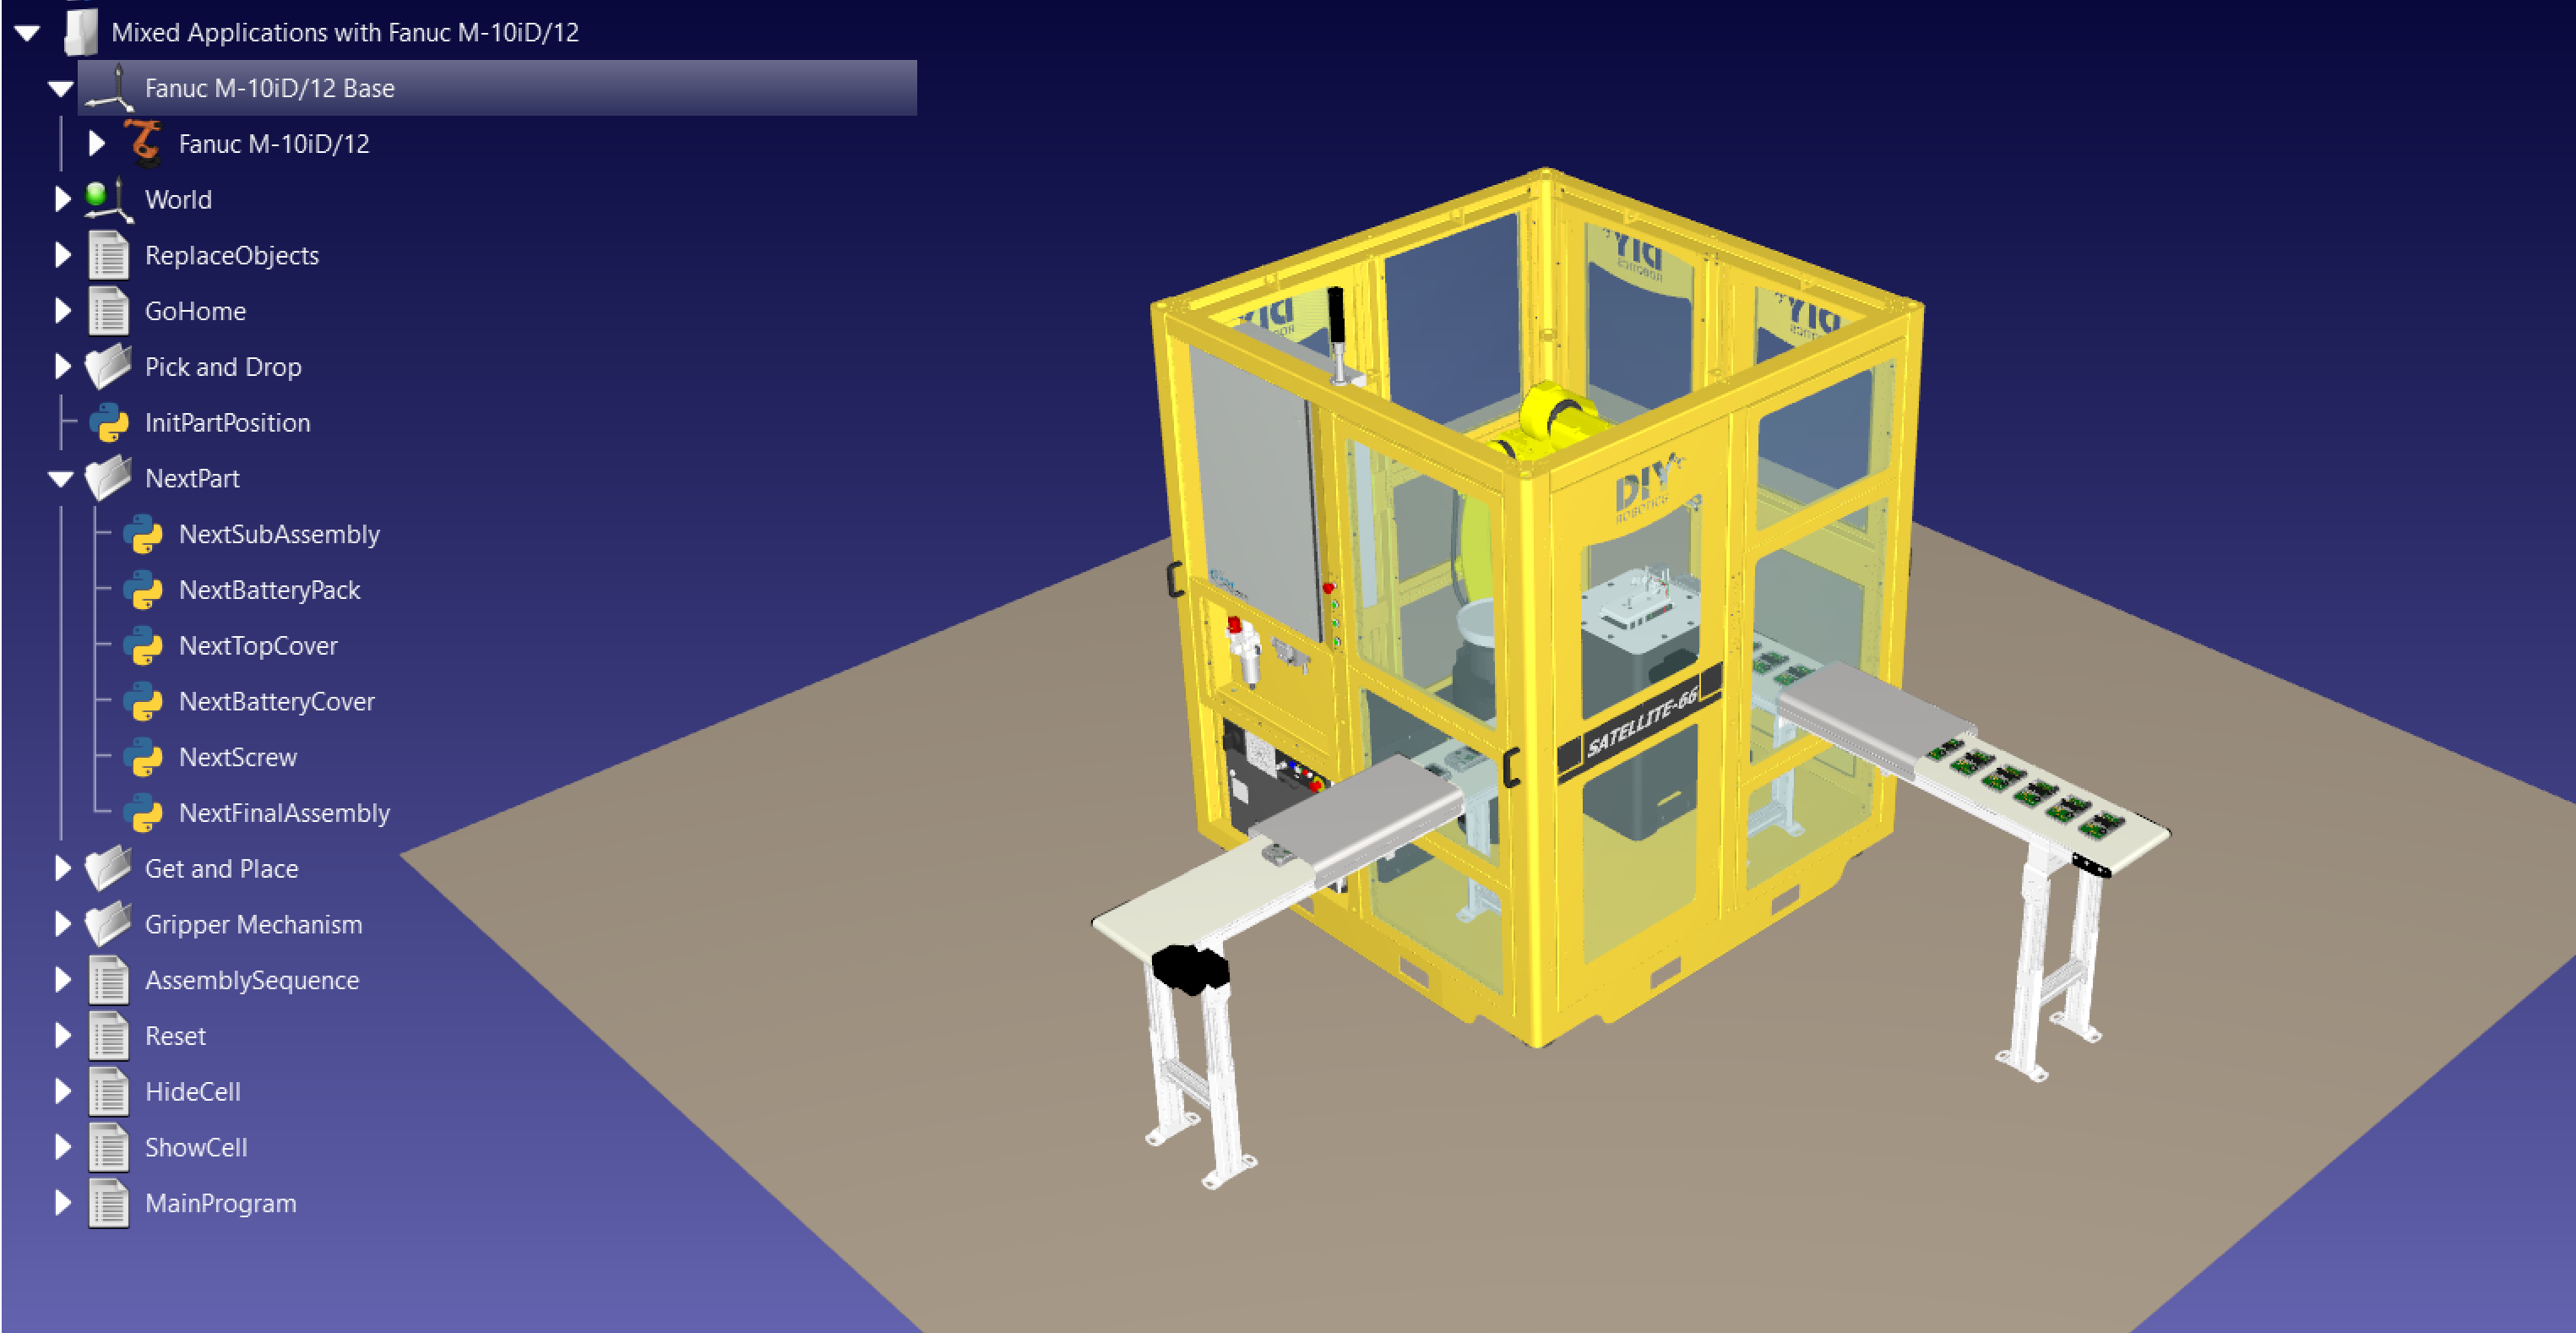
You can also take a look at this assembly station that uses multiple parts to create an final assembly, using many pick and place operations: Mixed Applications with Fanuc M-10iD/12.