A Simple Pick and Place Example
This section shows a simple pick and place example using a robot arm with a vacuum gripper to move one box.
Follow these steps to create your pick and place example:
Create a new RoboDK Project
These steps will show you how to create a new project (also known as station) in RoboDK for a pick and place application.
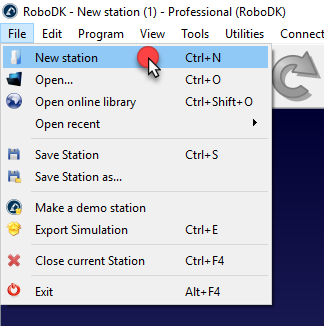
1.Open RoboDK: Launch the RoboDK application on your computer.
2.Create a new station: Select File → New Station from the main menu in RoboDK - A new, empty station will be created as your workspace.
3.Add a Robot from the Library
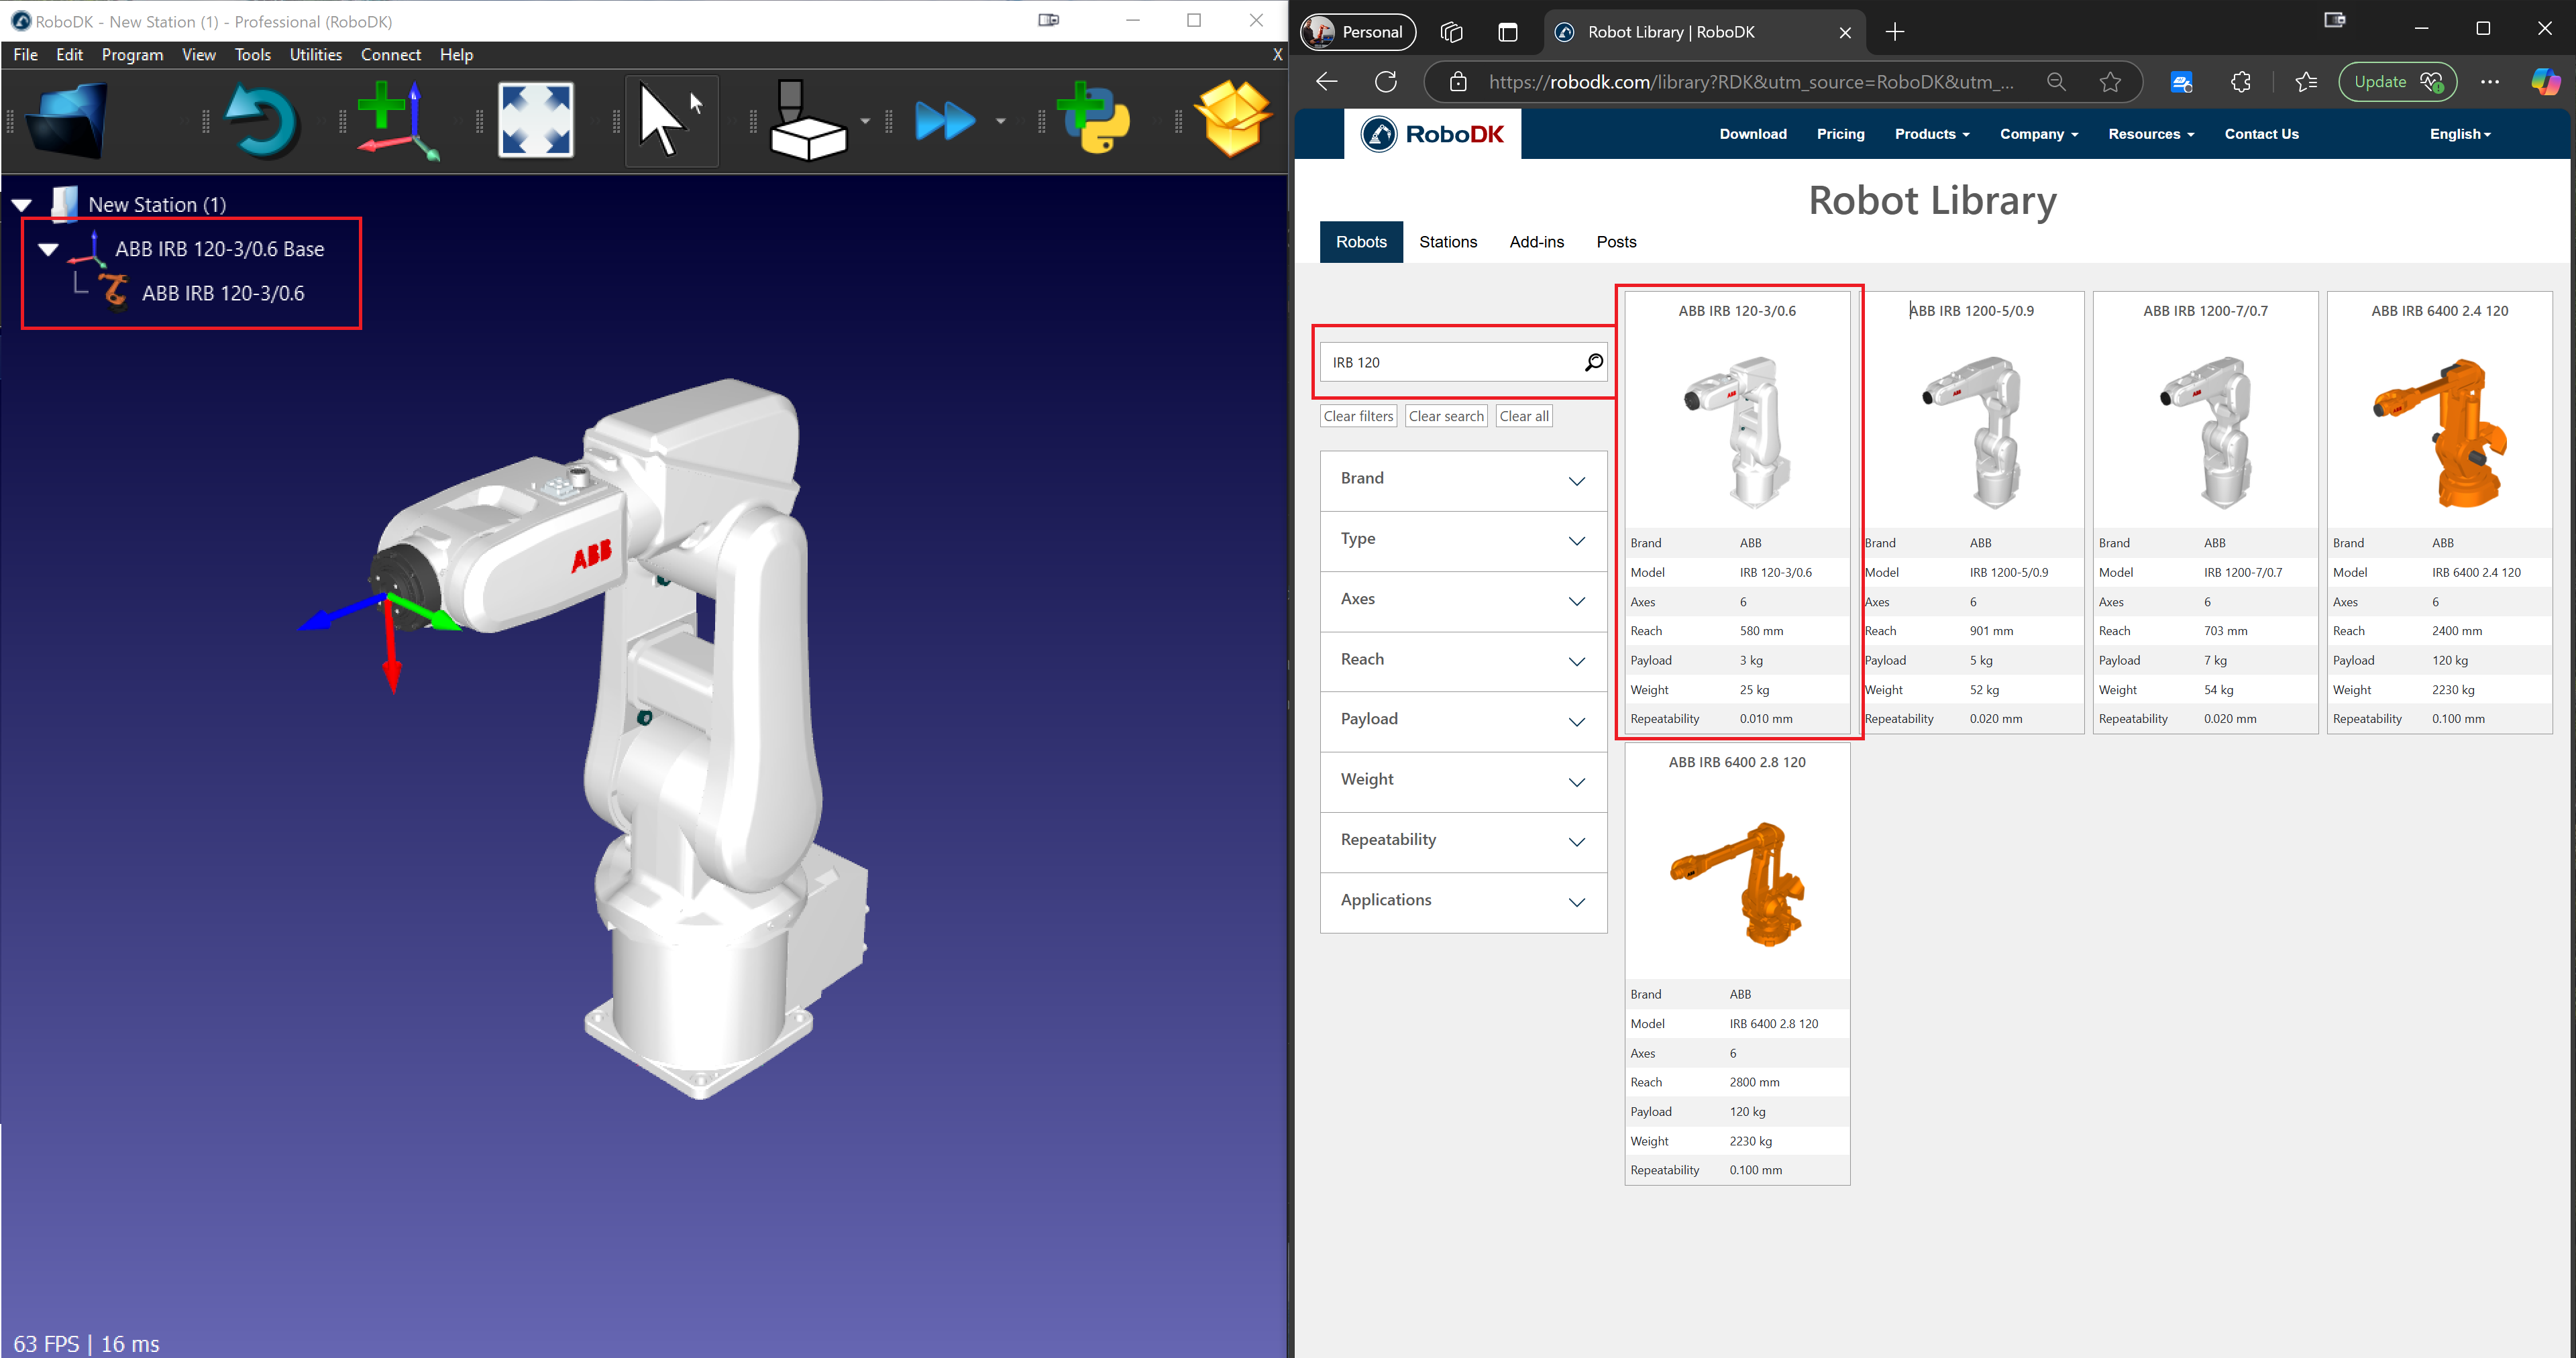
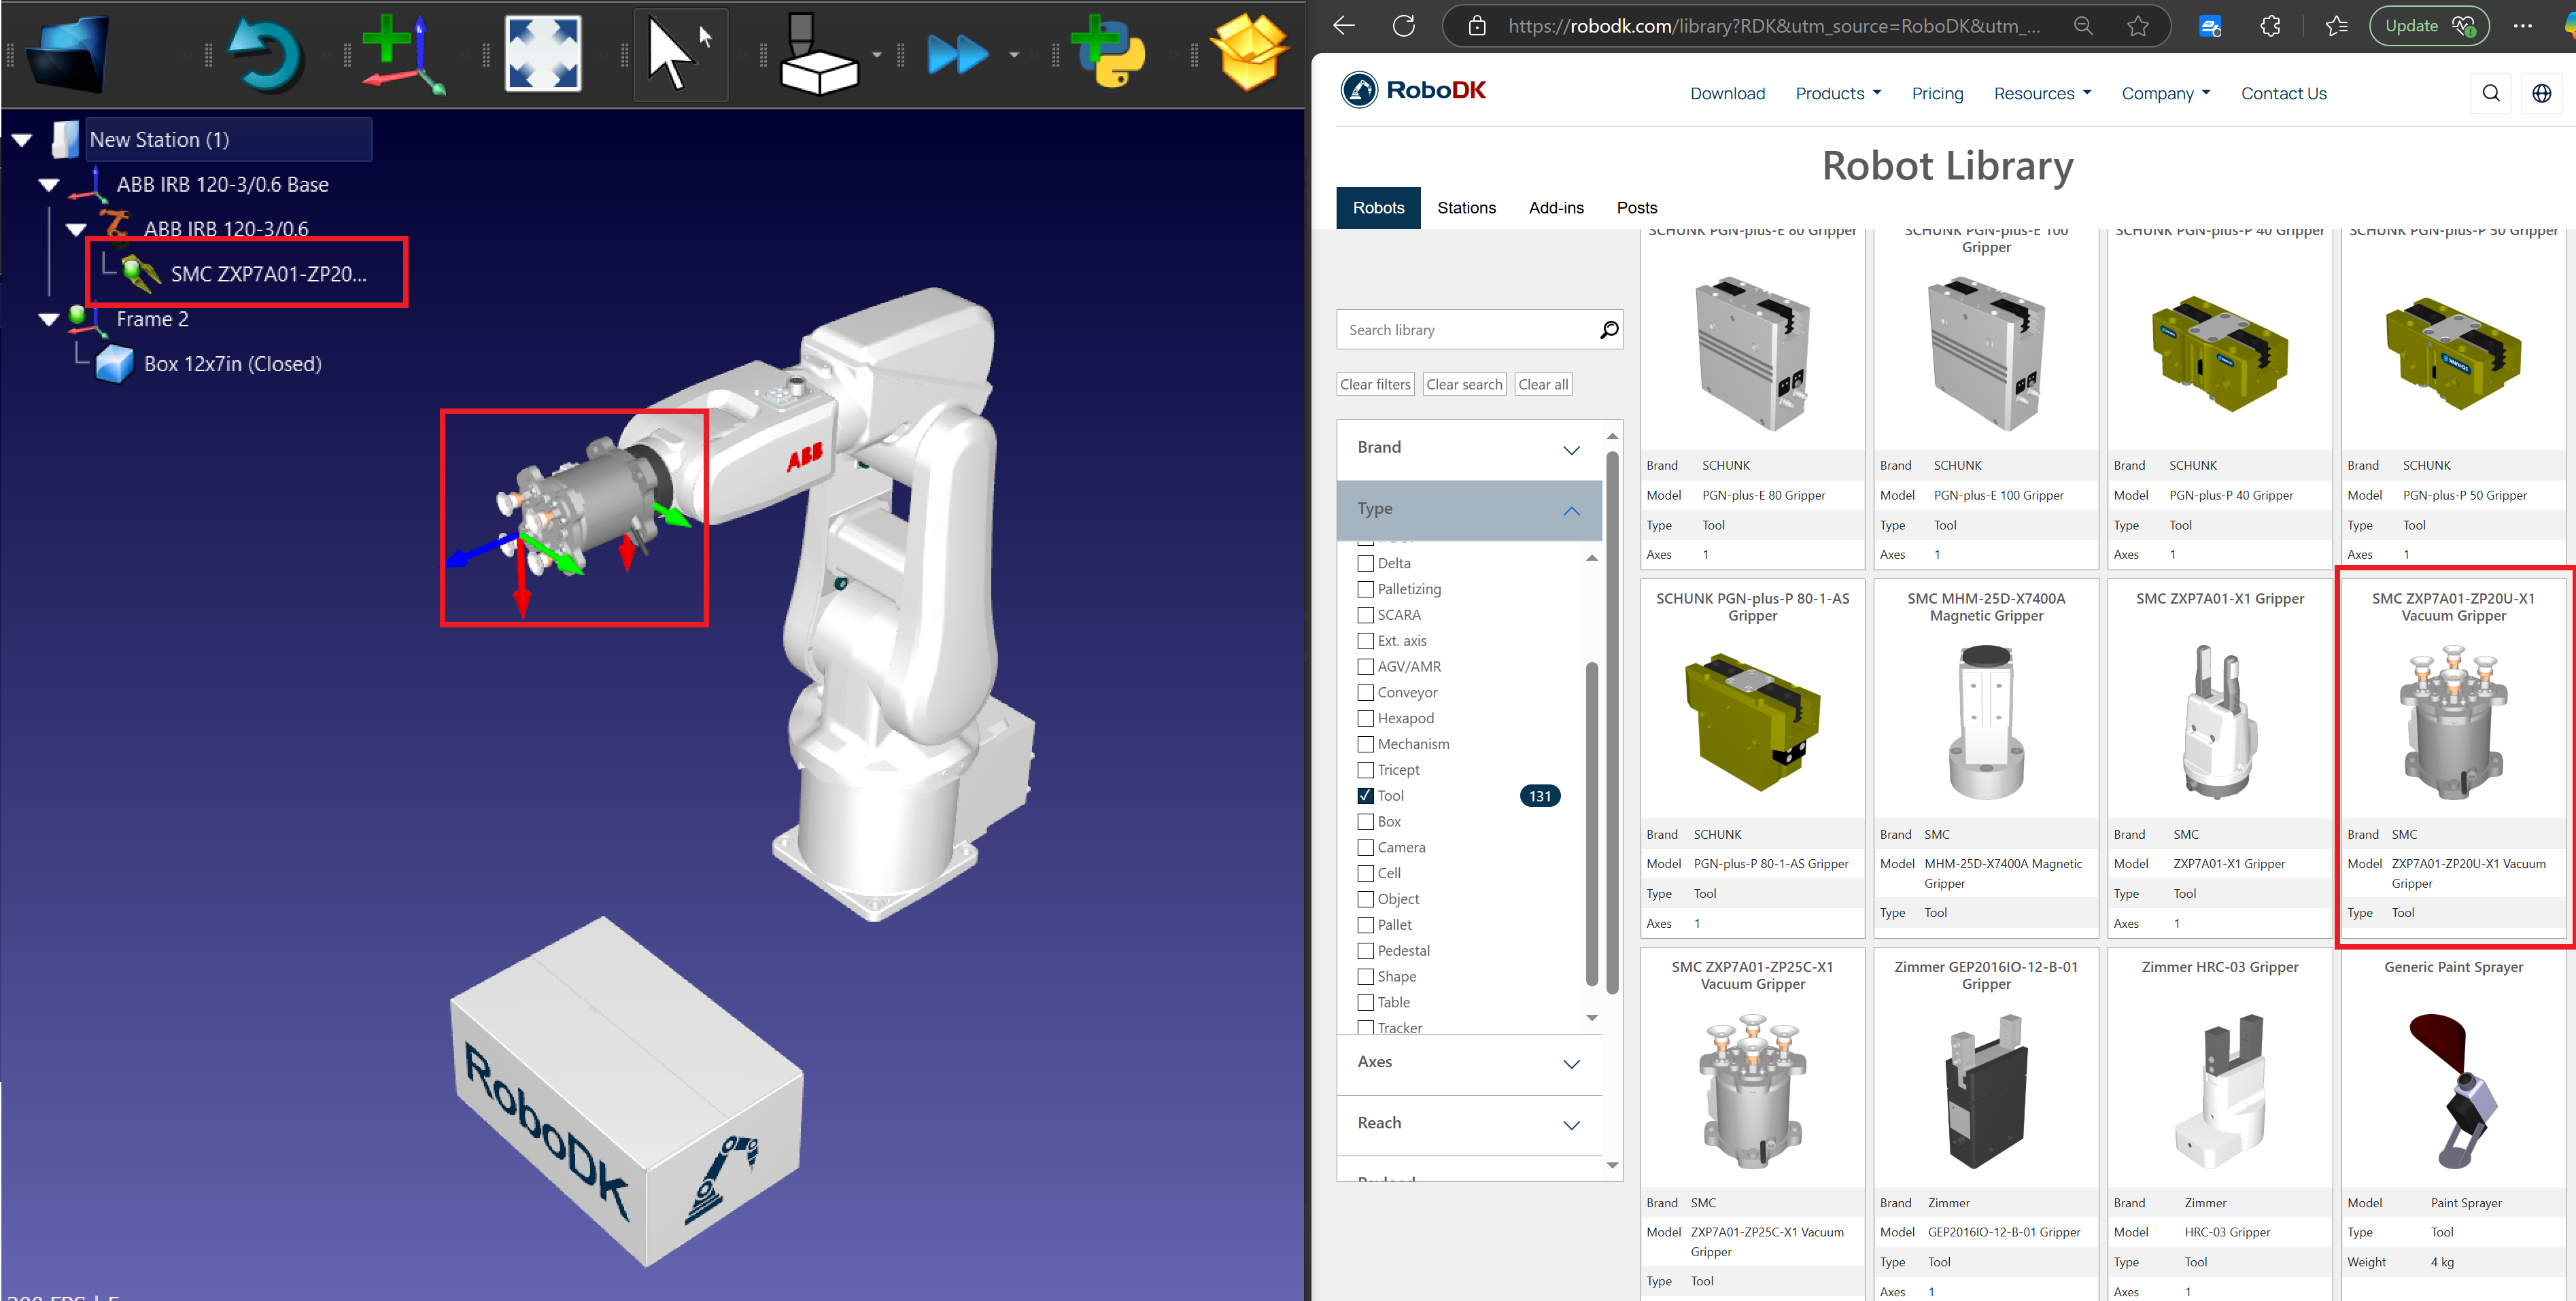
a.Open the online robot library to download a robot:
i.In the main menu, select File → Open online library.
ii.The RoboDK Library window will open, displaying a variety of industrial robots.
b.Select and Import a Robot:
i.Use the search bar to find a robot suitable for pick-and-place tasks (e.g., UR10, ABB IRB 120, Fanuc LR Mate).
ii.Click on the desired robot and select Download.
c.Position the Robot in the Station:
i.The robot will automatically appear in the station.
ii.Use the Move Tool to adjust its placement if necessary.
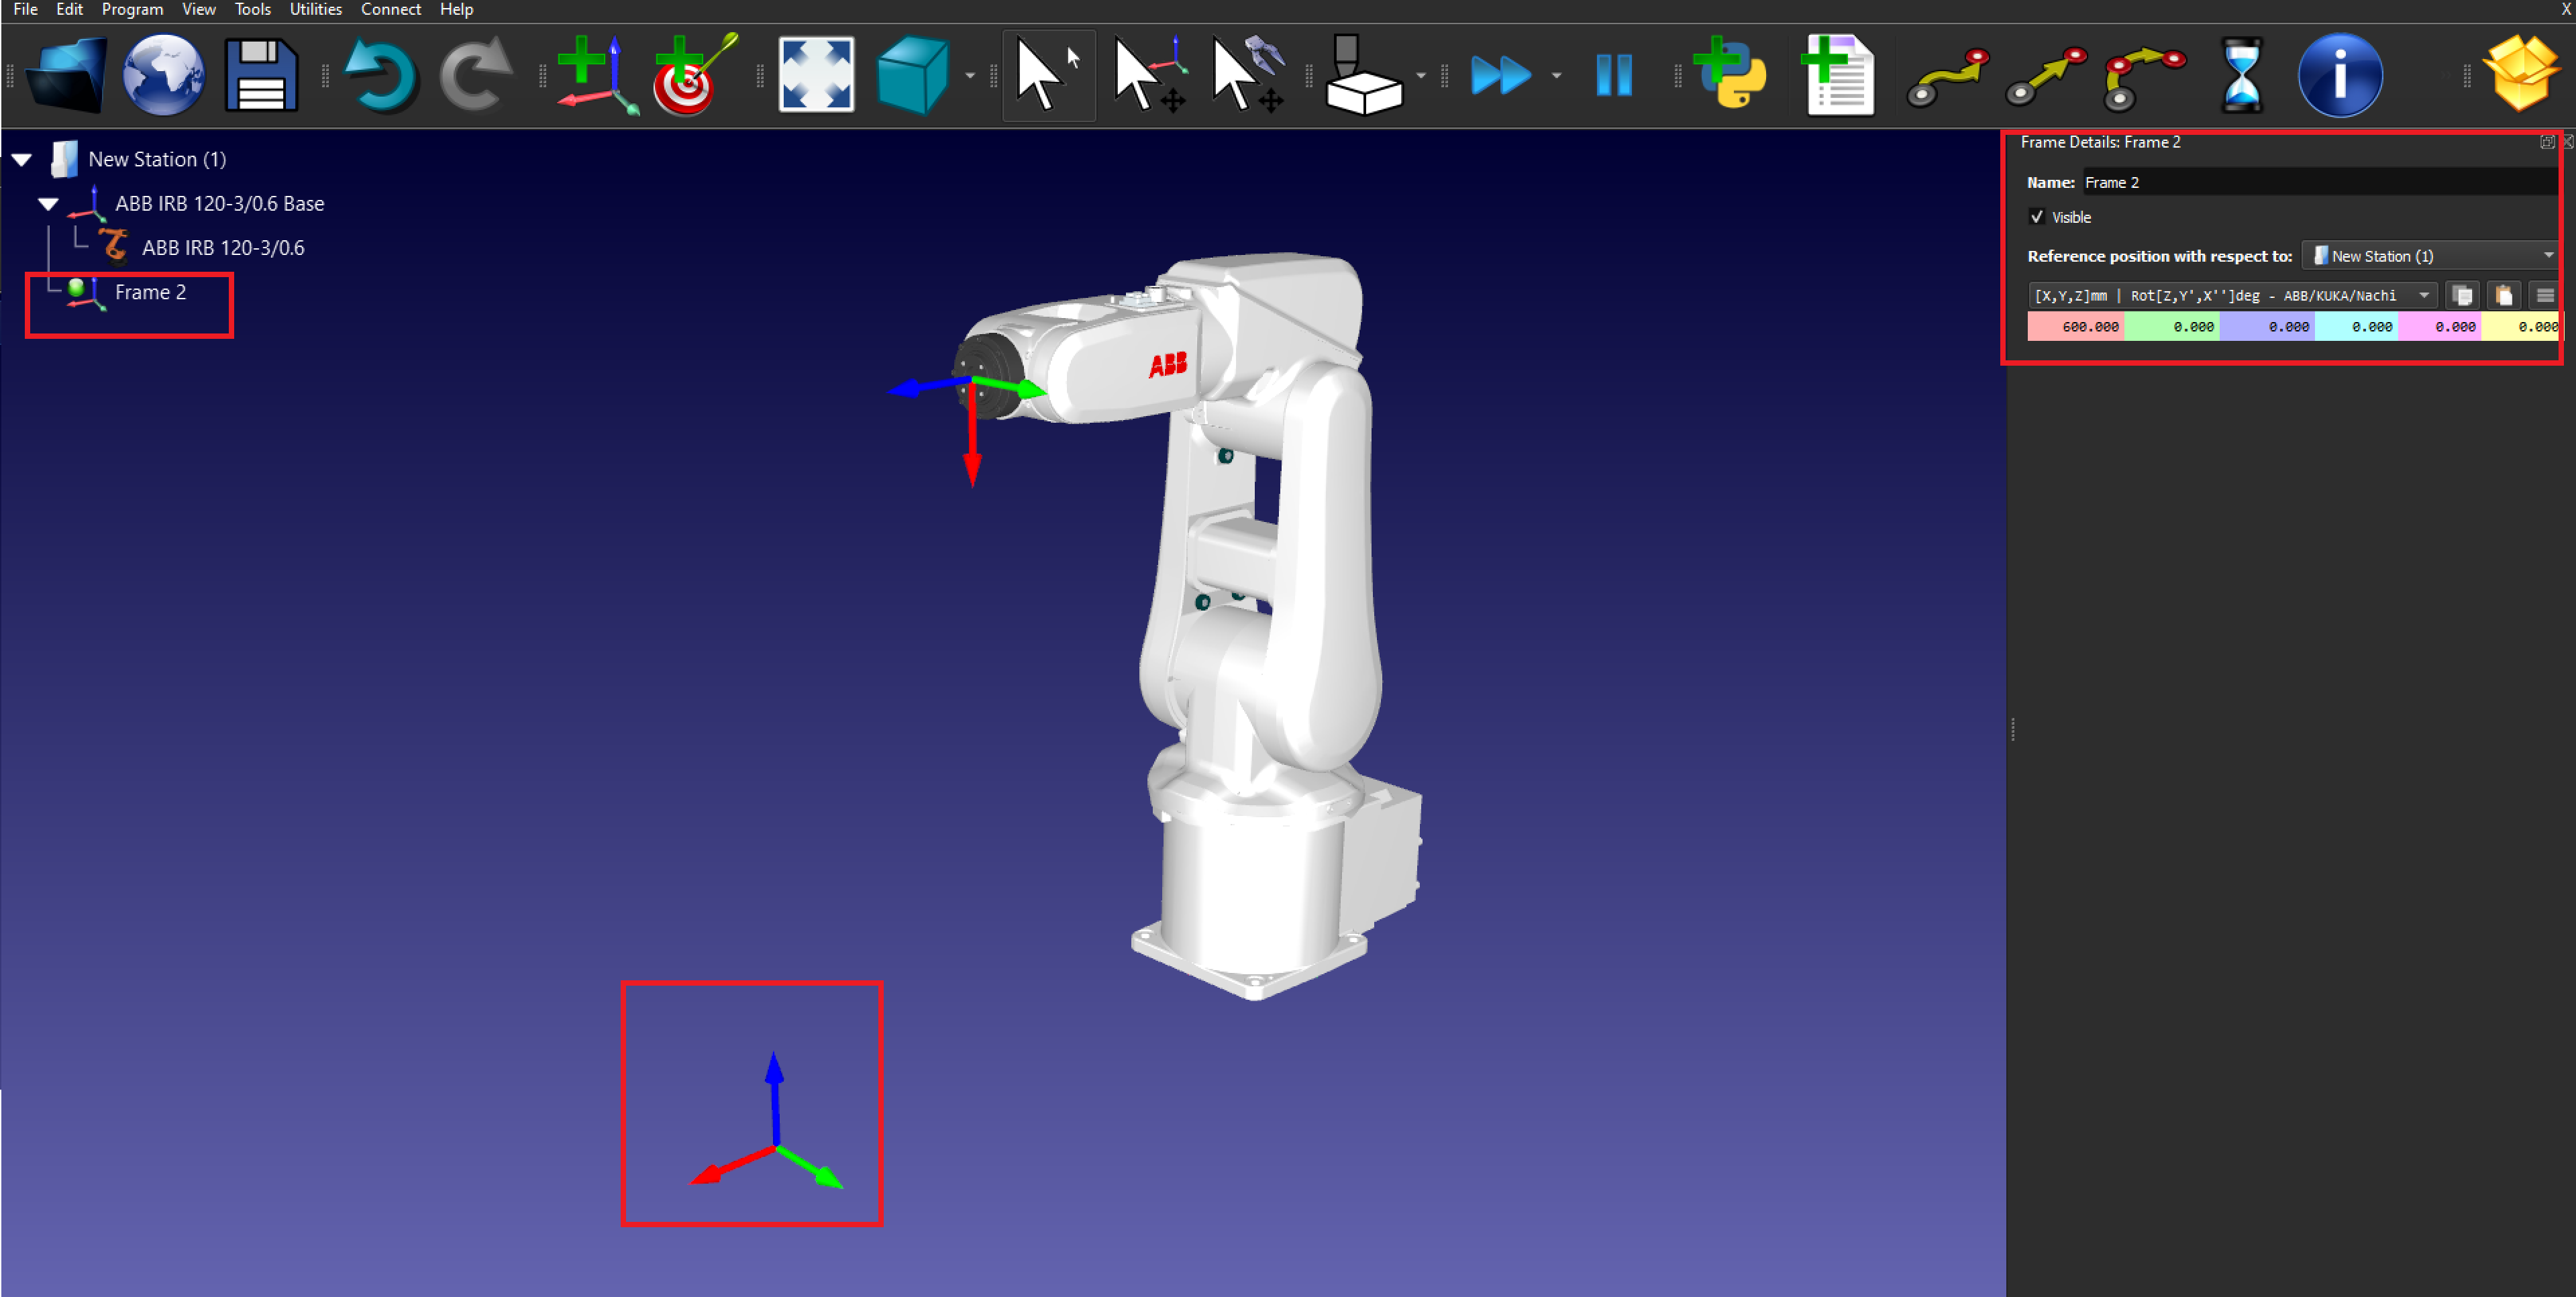
4.Add a Reference Frame
a.Create a Reference Frame:
i.Go to Program → Add Reference Frame.
ii.A new reference frame will appear in the station tree and the 3D view.
b.Position the Reference Frame:
i.Double-click the reference frame to enter coordinates (X, Y, Z) and rotation values.
ii.Click OK to save the position.
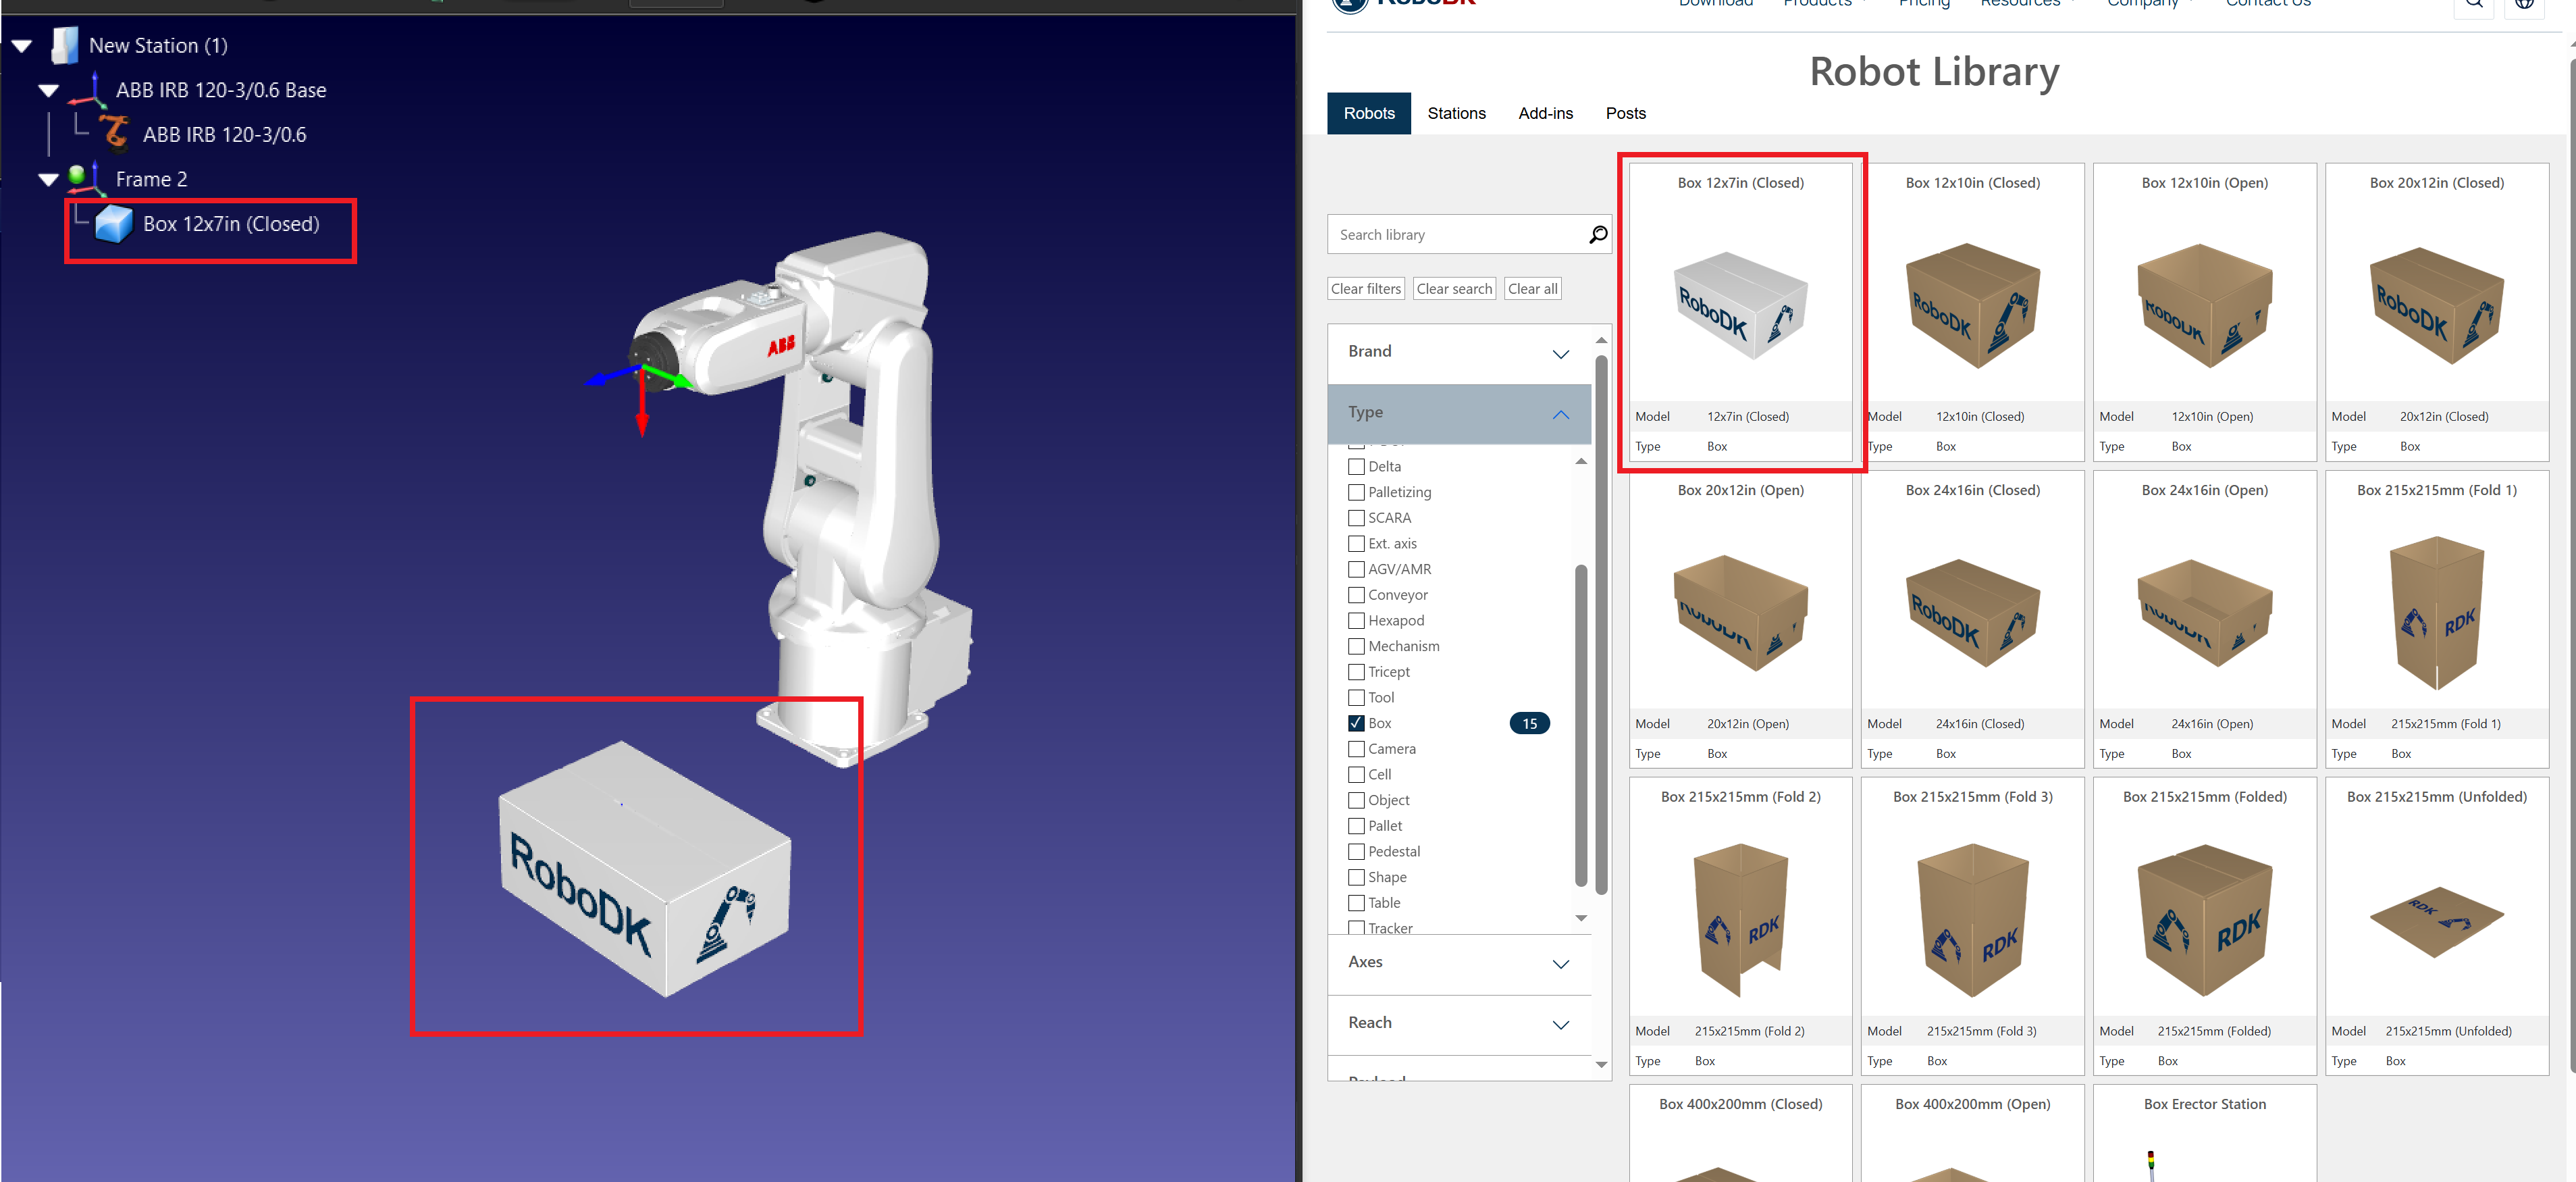
5.Import 3D Objects
a.Load Object Models:
i.In the main menu, select File → Open.
ii.Browse and select the 3D models of objects to be picked and placed (e.g., STEP, IGES files).
b.Position the Objects: Use the Move Tool to adjust object placement in the reference frame.
6.Add a Tool (Gripper)
a.Select a Gripper:
i.In the main menu, go to Program → Add Tool (TCP).
ii.Choose a gripper from the Robot Library or import a custom gripper file.
b.Attach the Tool to the Robot:
i.Right-click the gripper in the station tree and select Attach to Robot.
ii.Choose the appropriate robot flange.
c.Define the TCP (Tool Center Point): Double-click the tool and enter the TCP coordinates relative to the robot flange.
Create Targets for Pick and Place
Follow these steps to create a basic target in RoboDK for pick and place application
1.Add Pick and Place Targets:
a.Move the robot to the desired pick position.
b.Select Program → Teach Target to save the position.
c.Repeat for Pick, Retract Pick, Place, and Retract Place positions.
2.Organize the Targets:
a.Rename the targets for clarity (e.g., Approach_Pick, Pick, Place). Press F2 to rename the targets.
b.Don’t forget to create the targets under the relevant reference frames in the station tree.
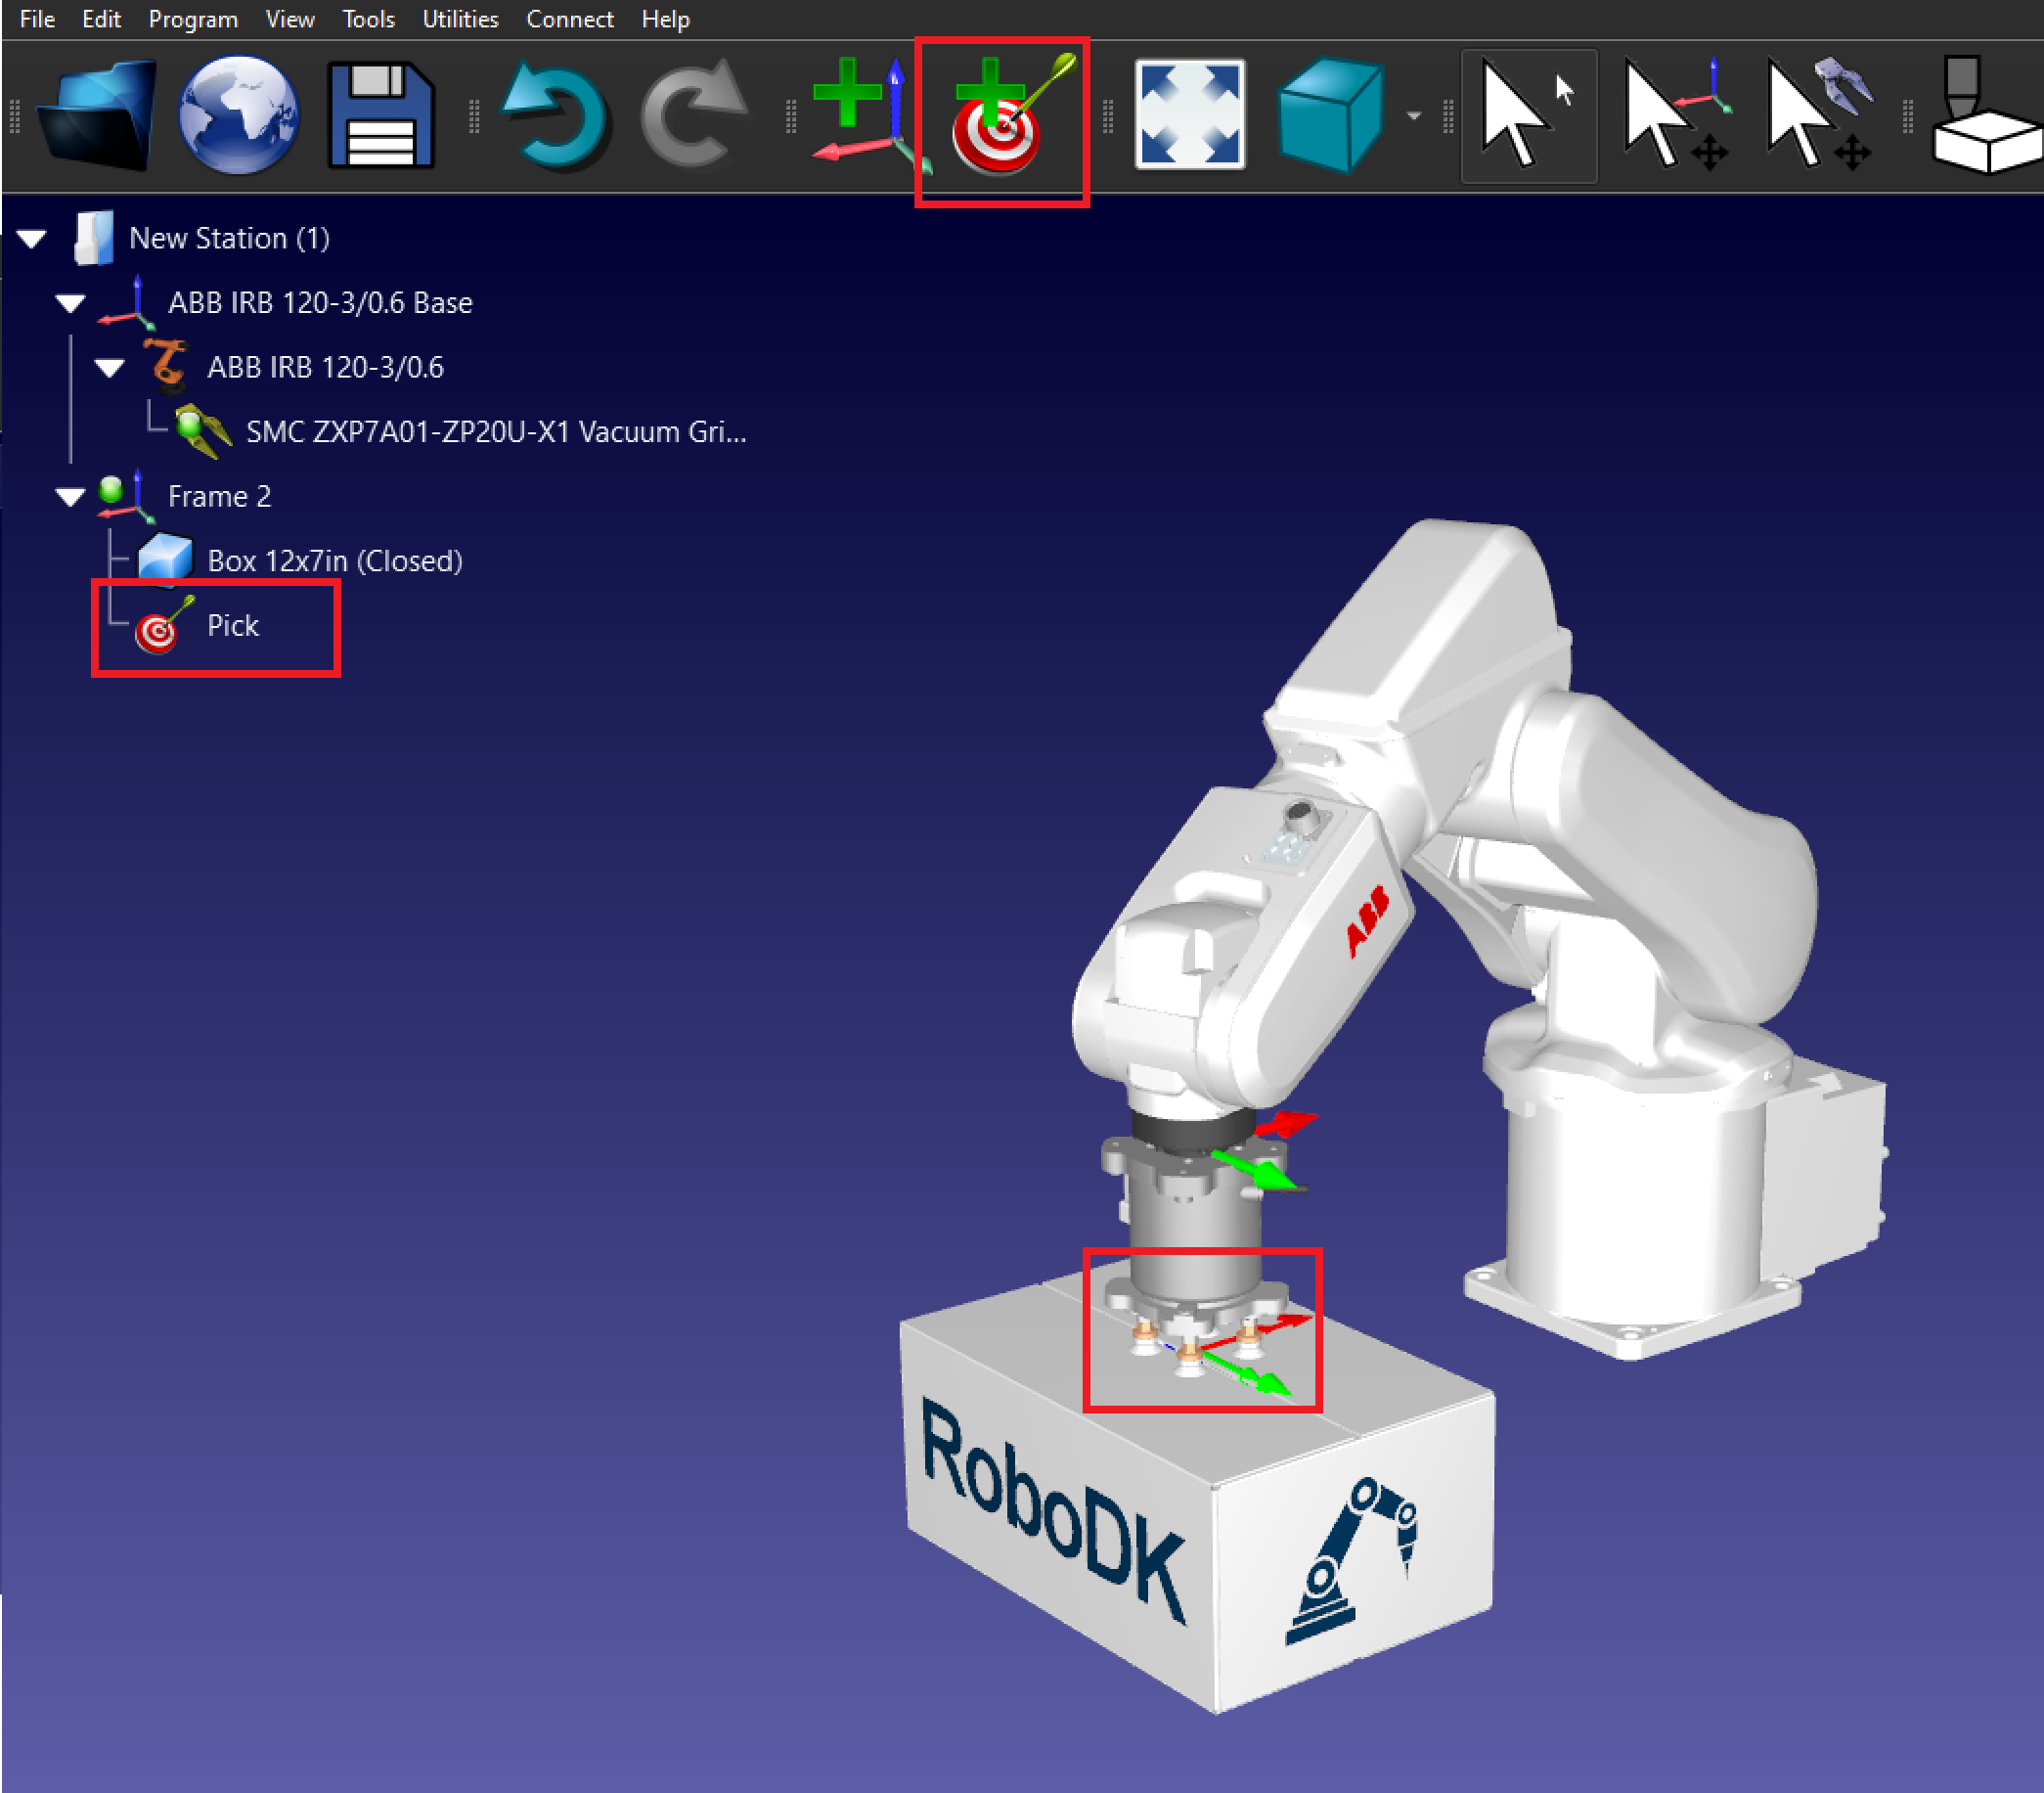
3.Create the Pick target: Place the robot over the box and create a target called Pick.
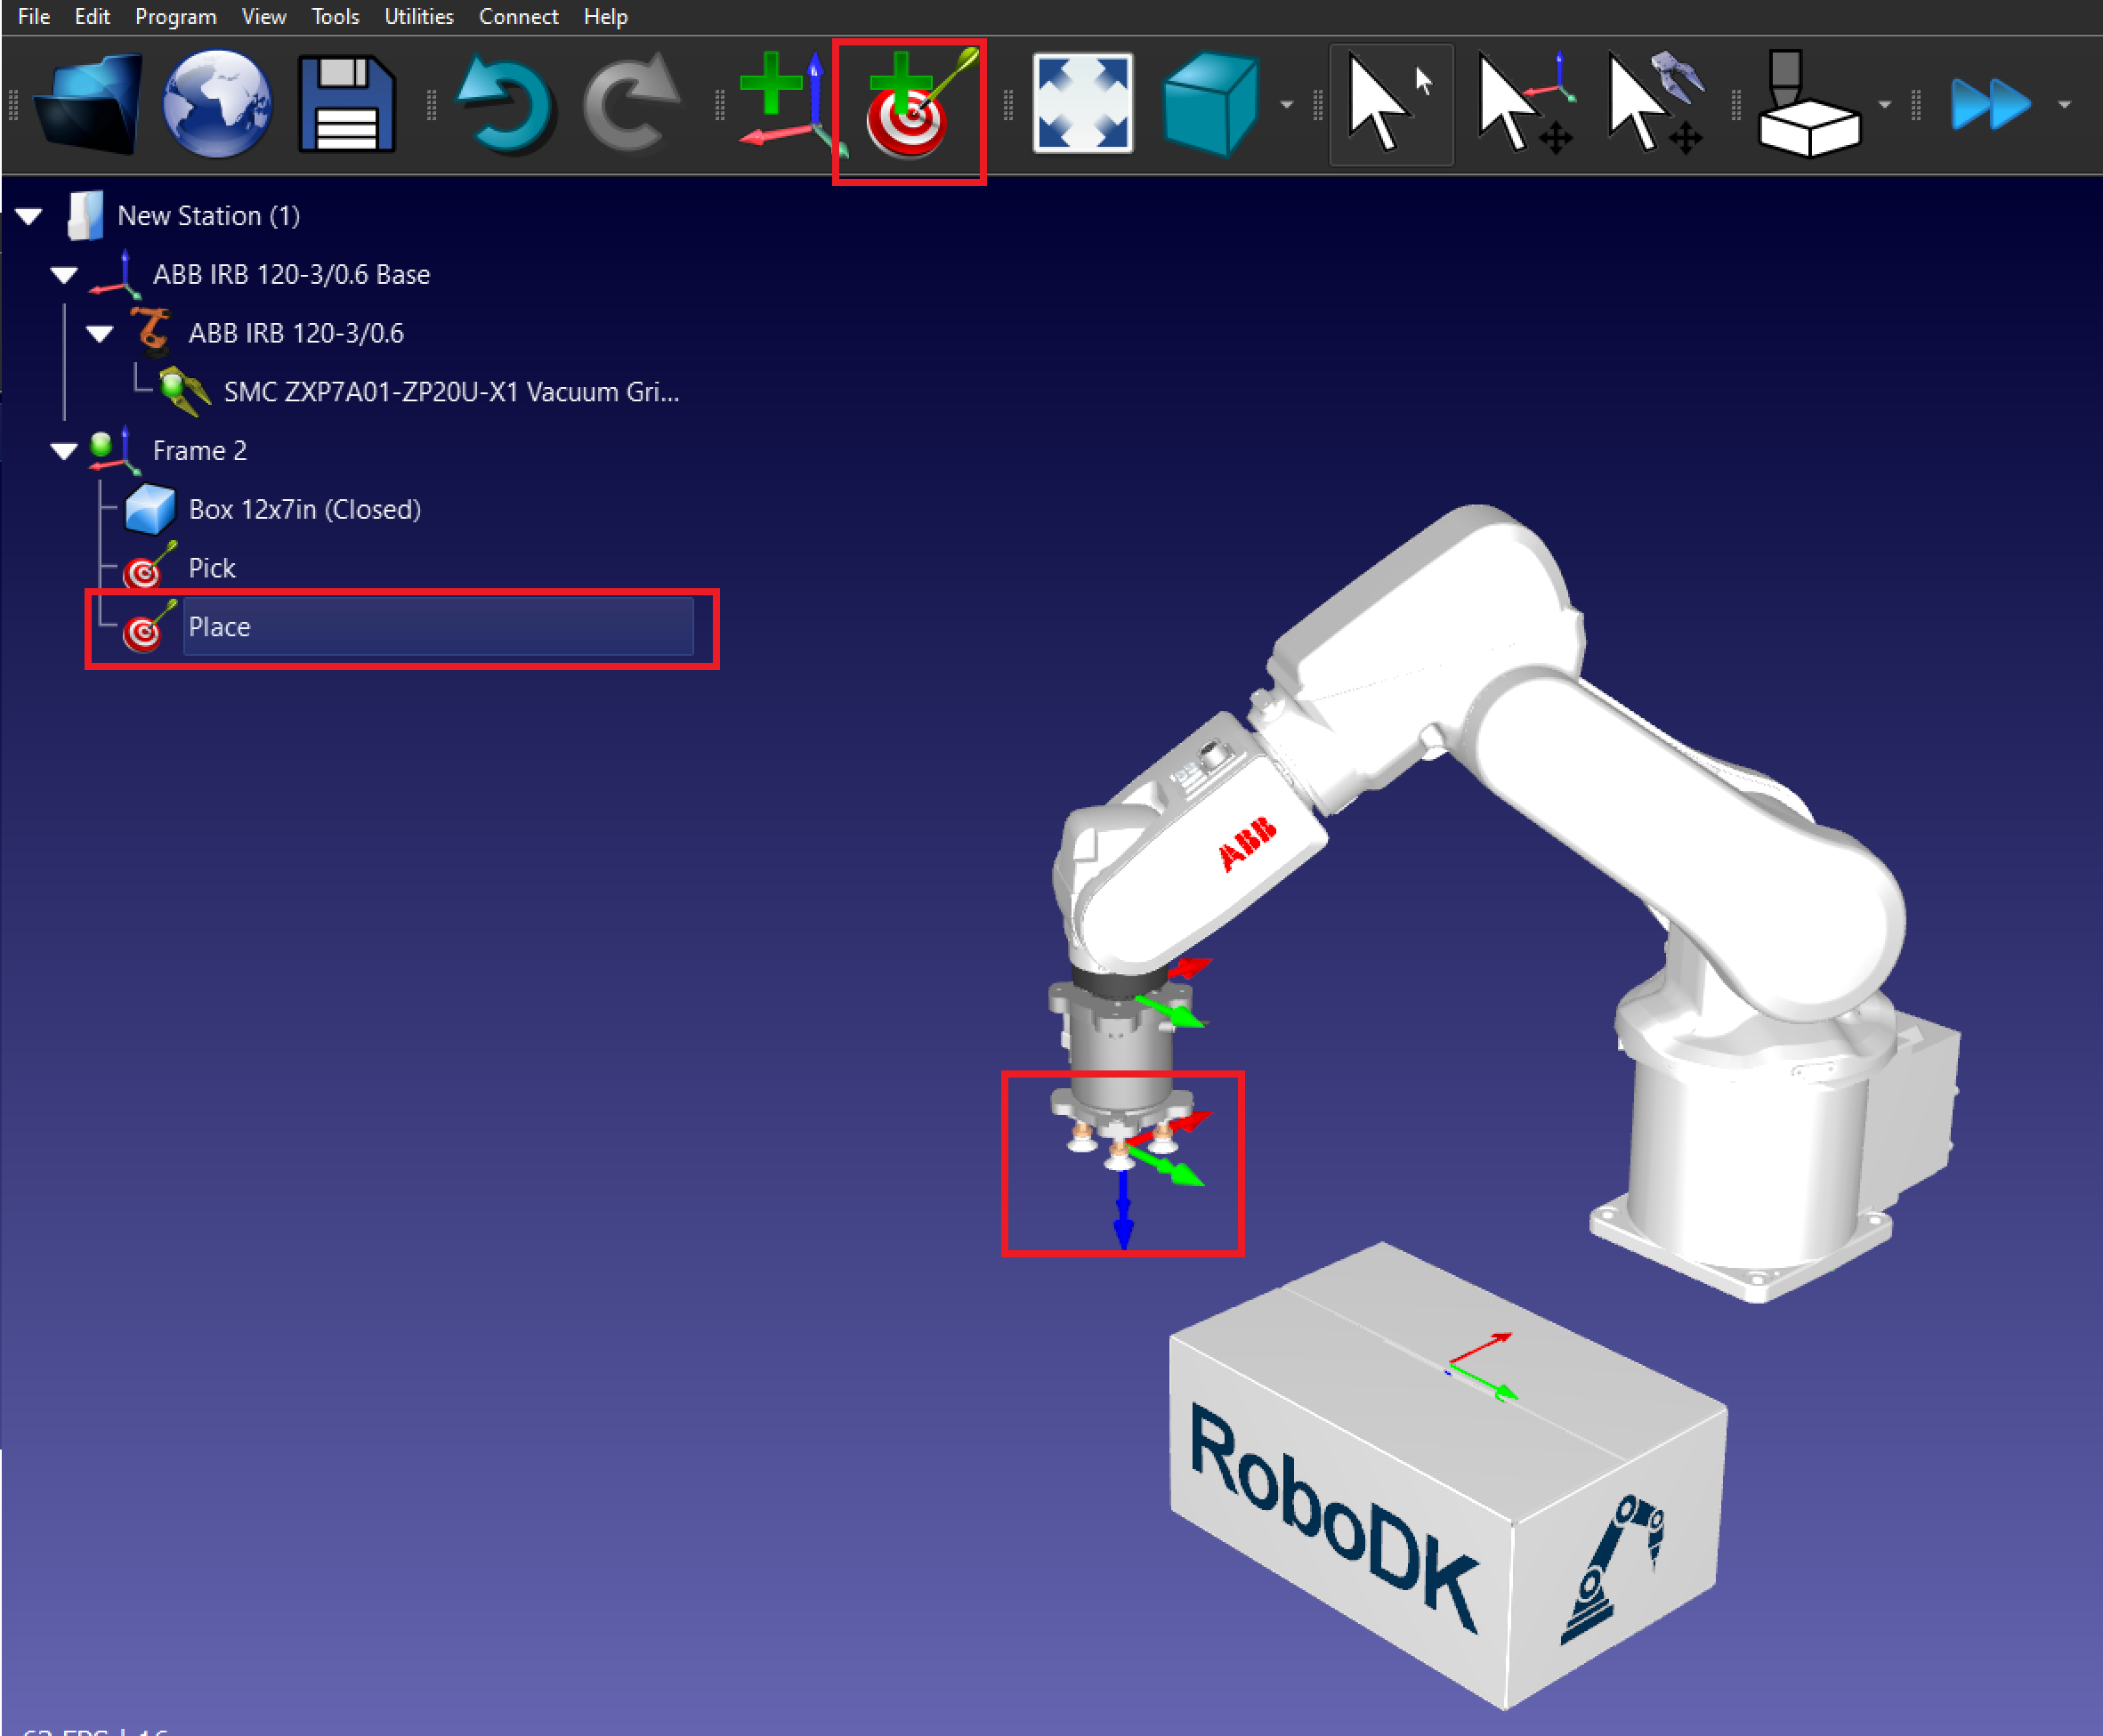
4.Create the Place target: Move the robot to where you want to place the box and create a target called Place.
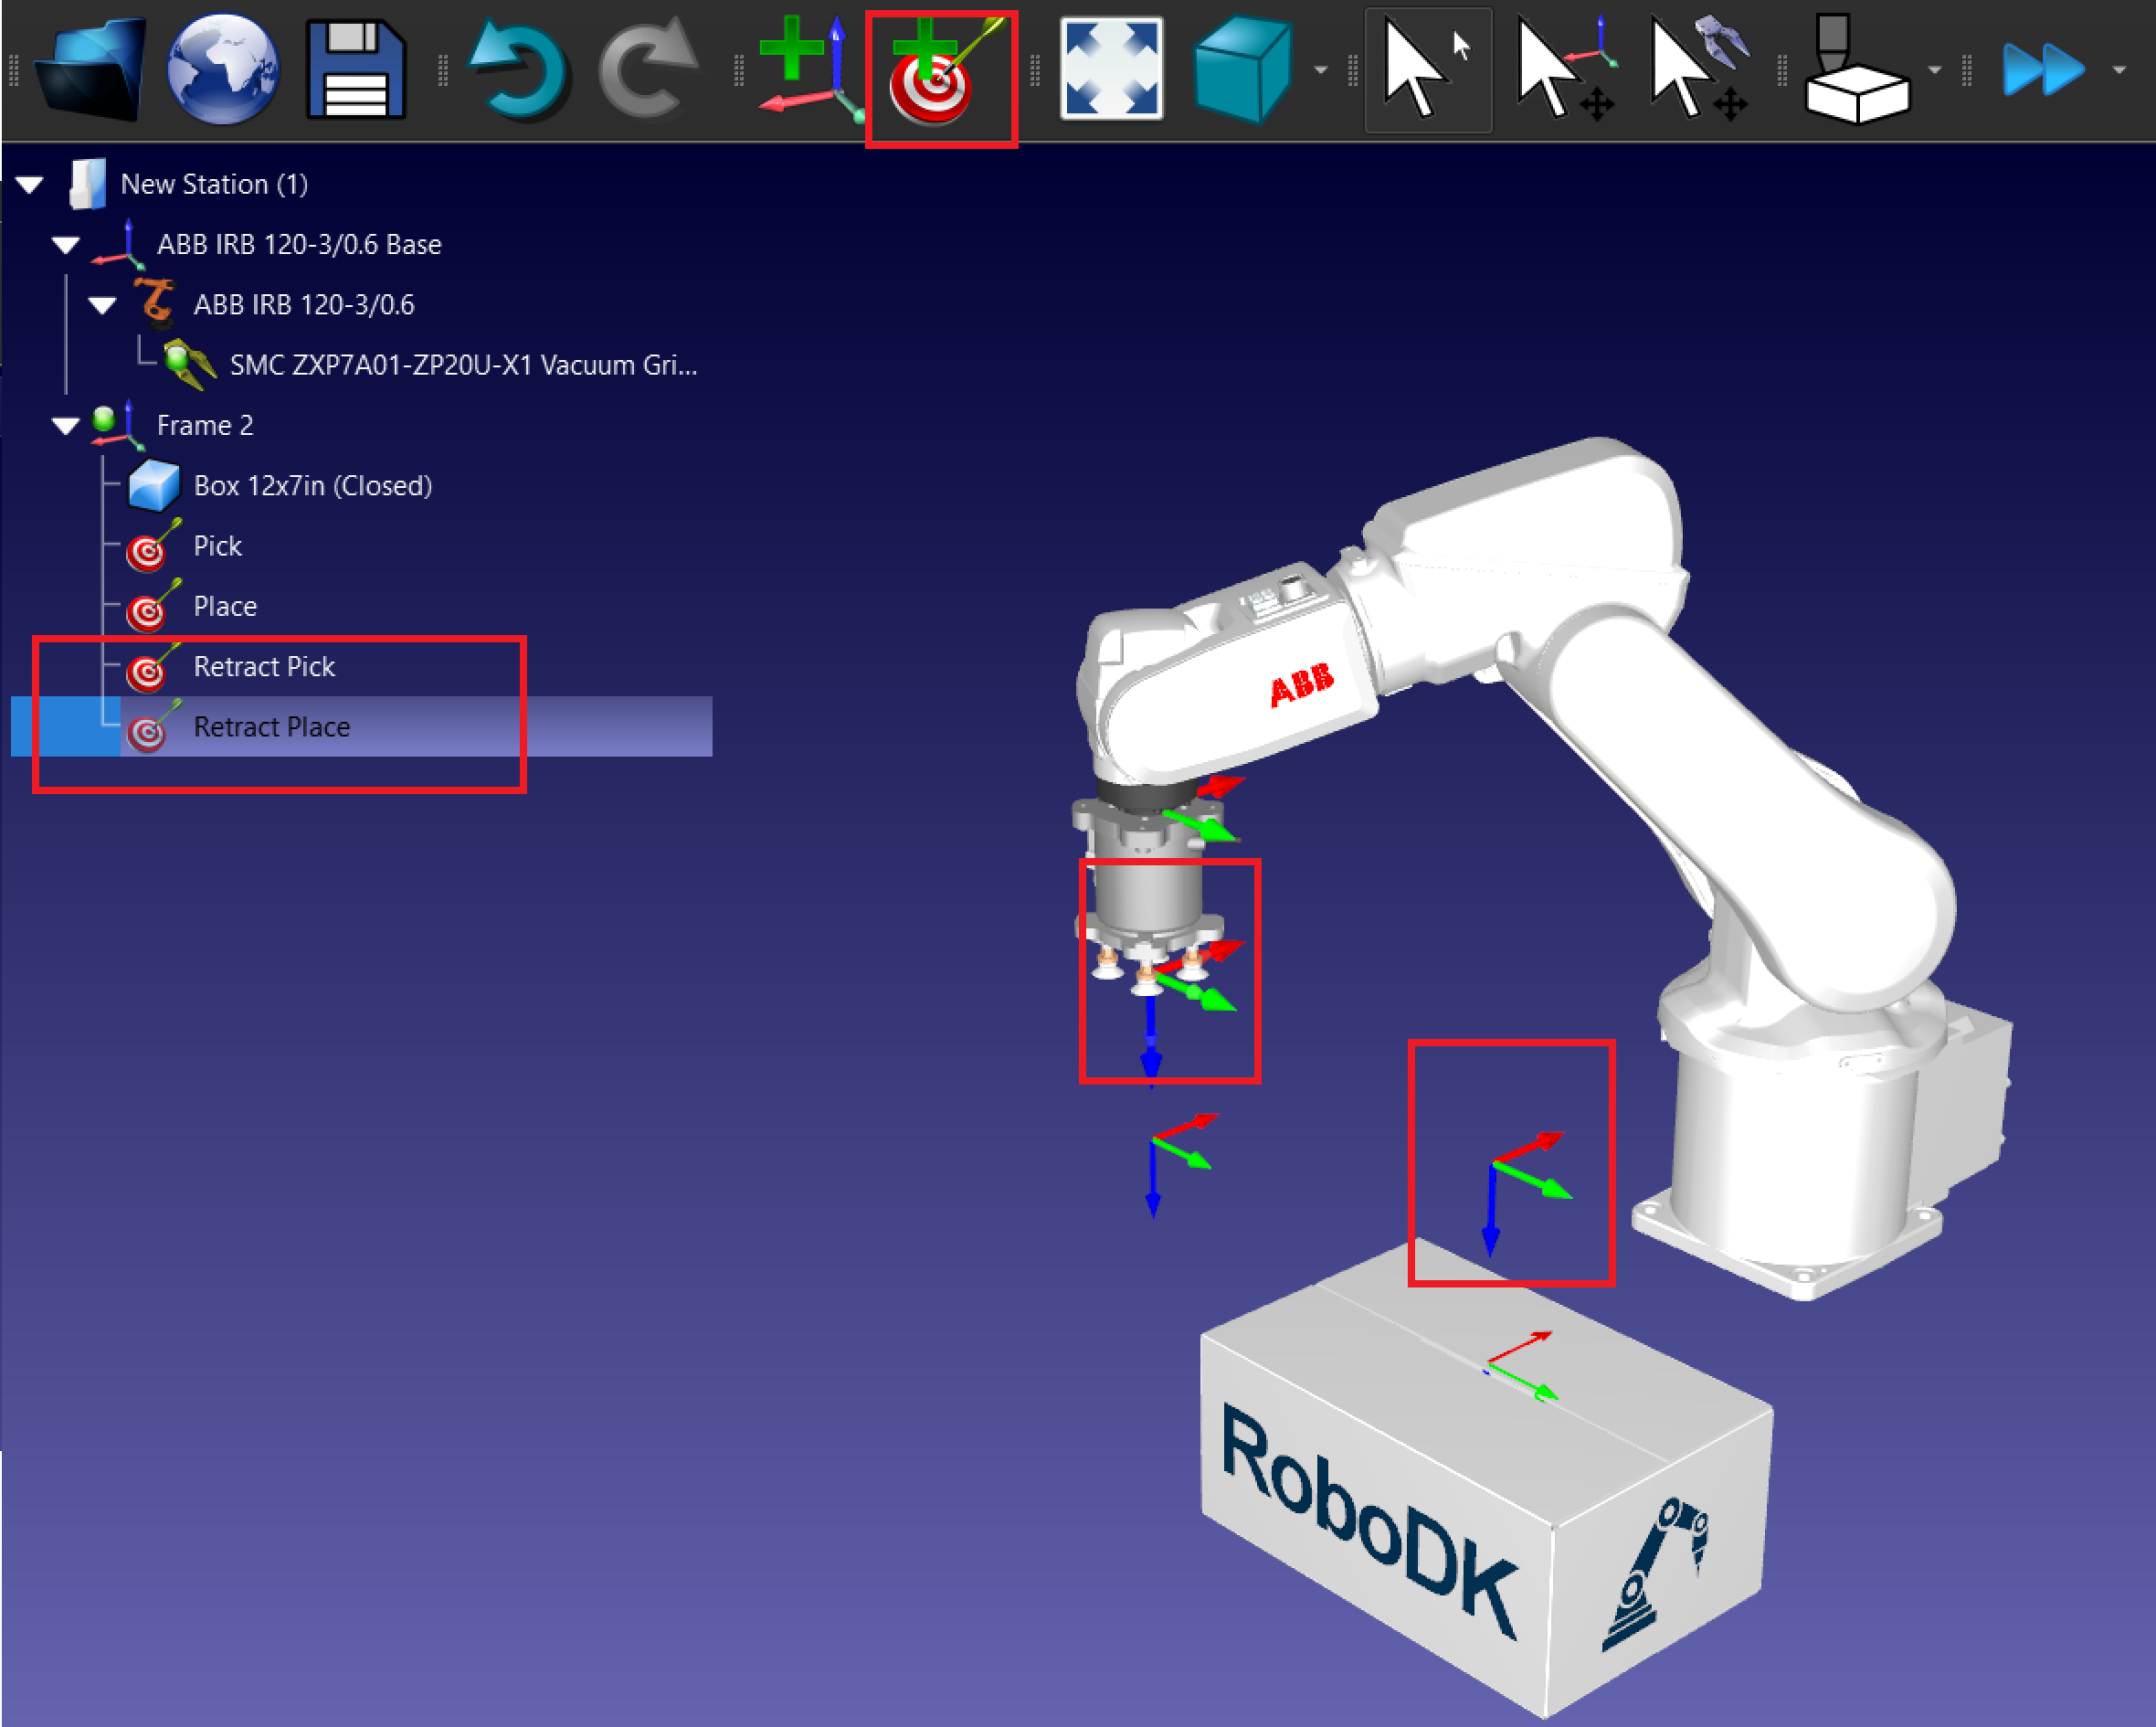
5.Create the Retract targets:
a.Move the robot to the Pick target and up on the Z axis.
b.Create a new target called Pick Retract.
c.Repeat with the Place target.
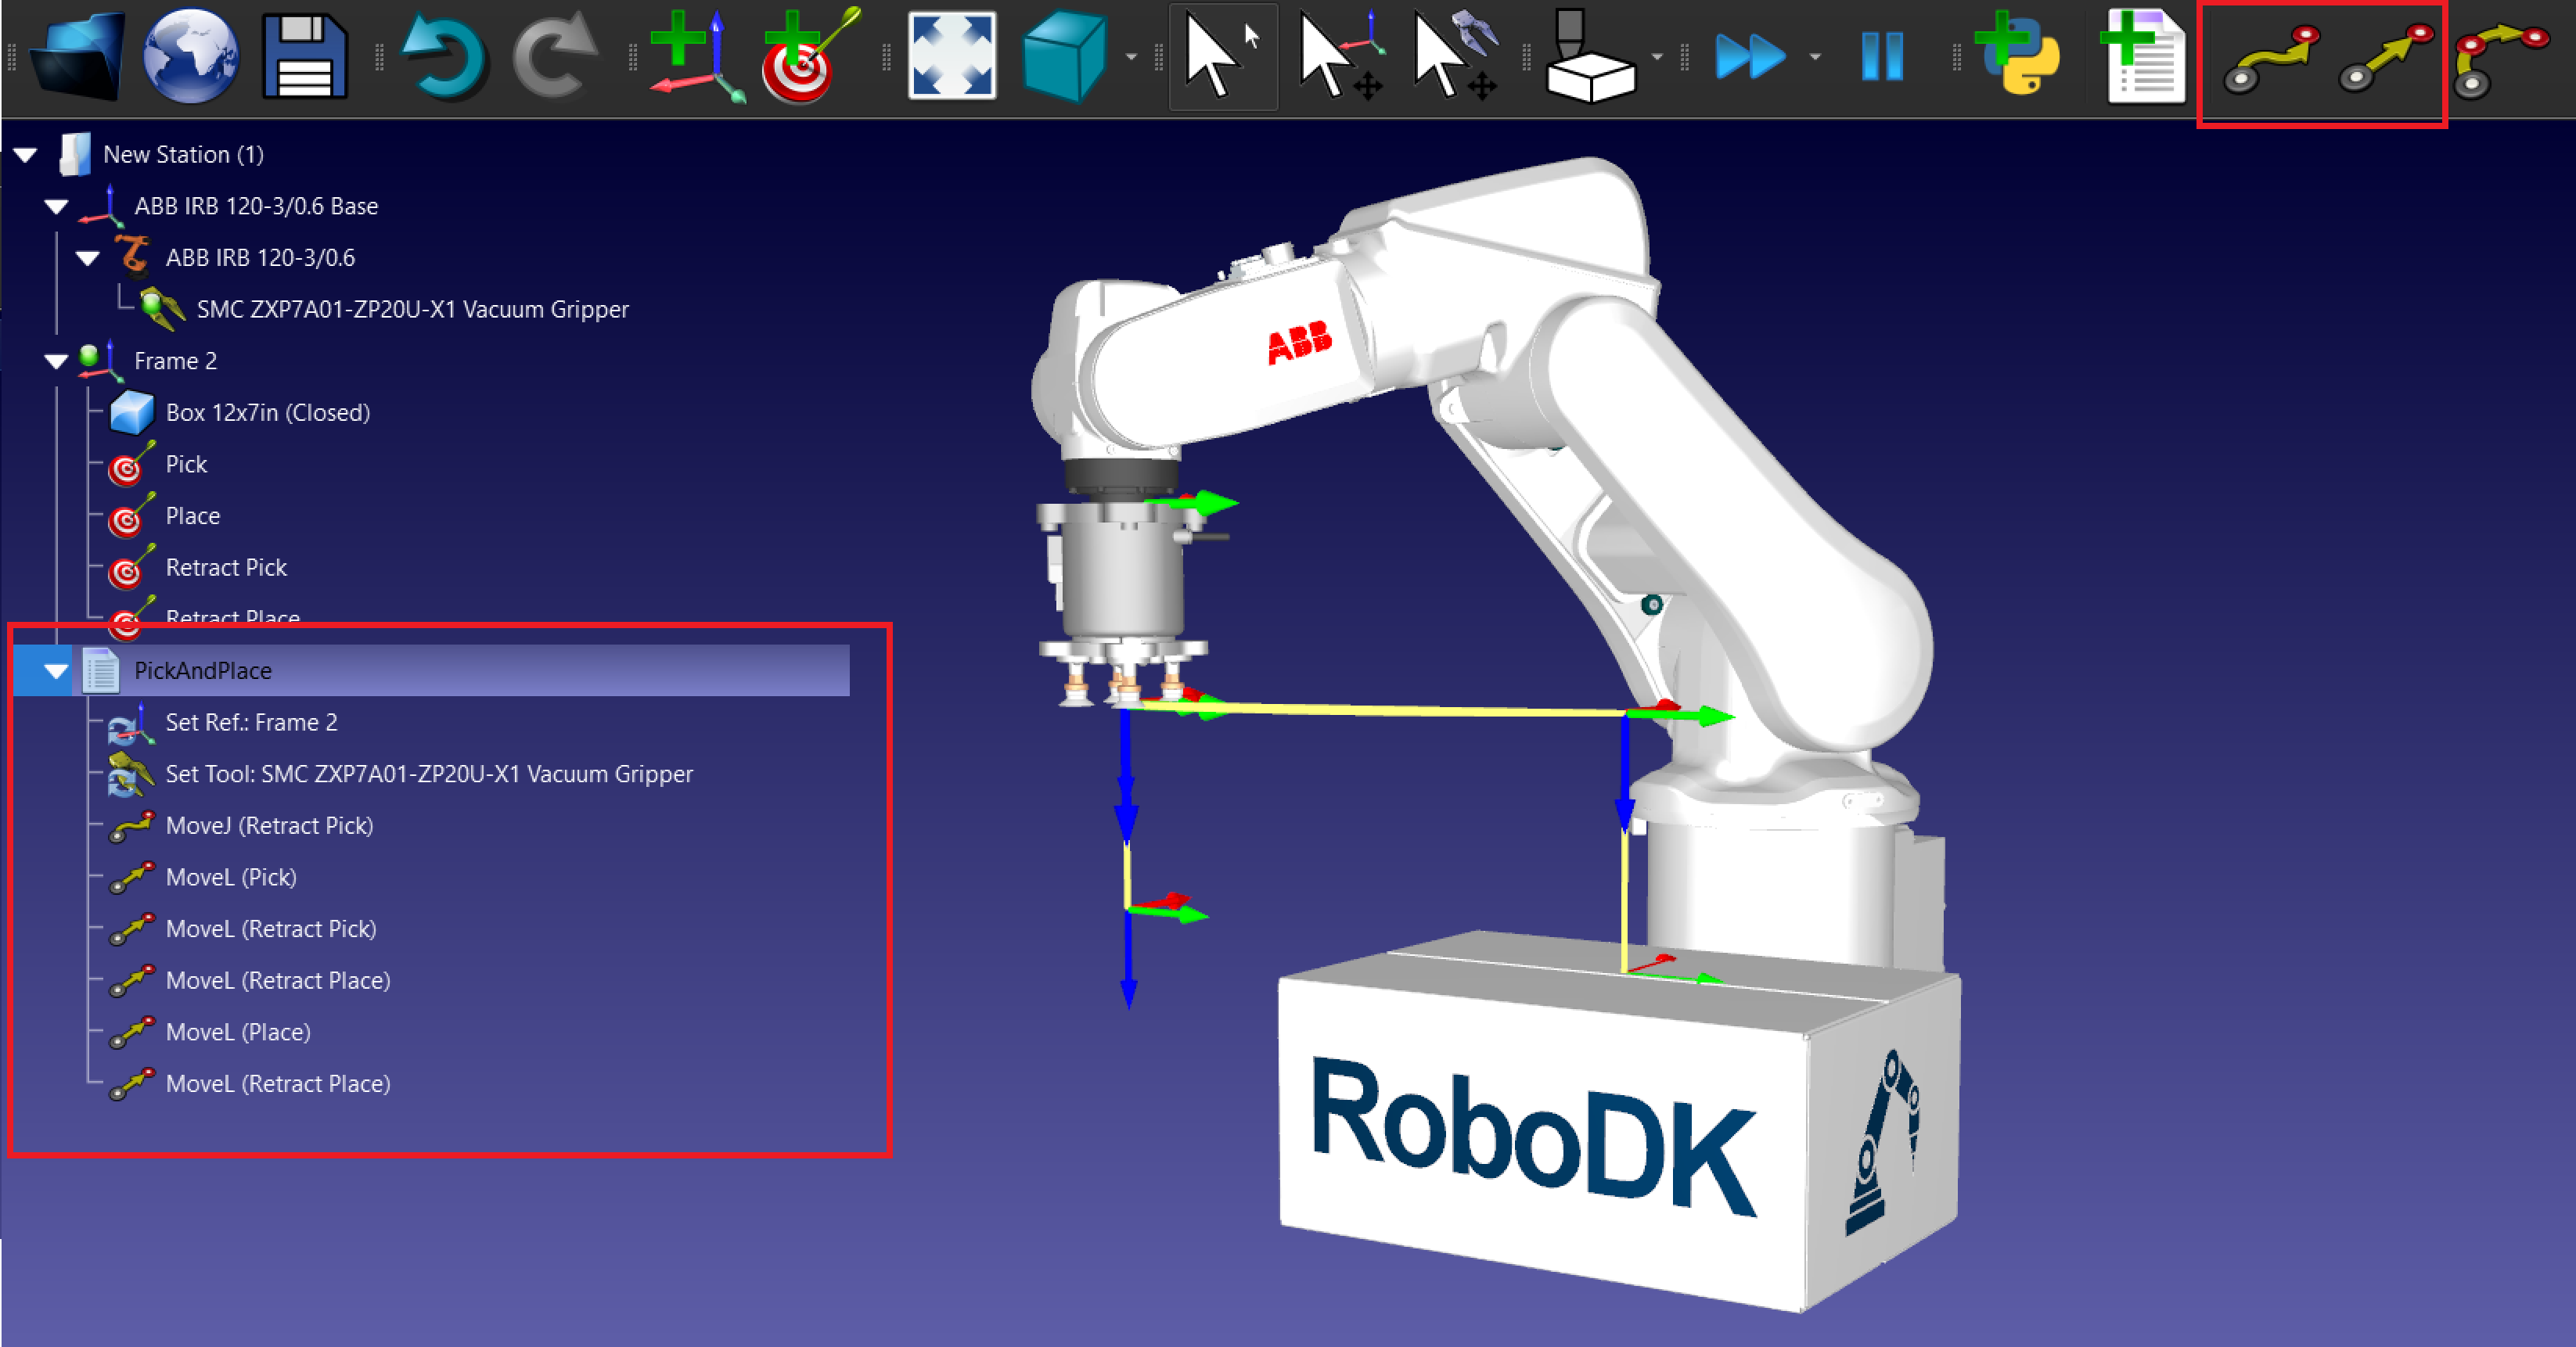
Create Pick and Place Program
Follow these steps to create a basic pick and place program in RoboDK with a 6-axis robot arm using a vacuum gripper to move a box.
1.Program the Pick and Place Operation:
a.Create a New Program: Go to Program → Add Program and name it PickAndPlace.
b.Add Movement Instructions:
i.Add MoveJ or MoveL instructions for each target.
ii.Move the robot to the retract target first, then create a MoveL to the Pick target and back to the retract target.
iii.Repeat with the Place target.
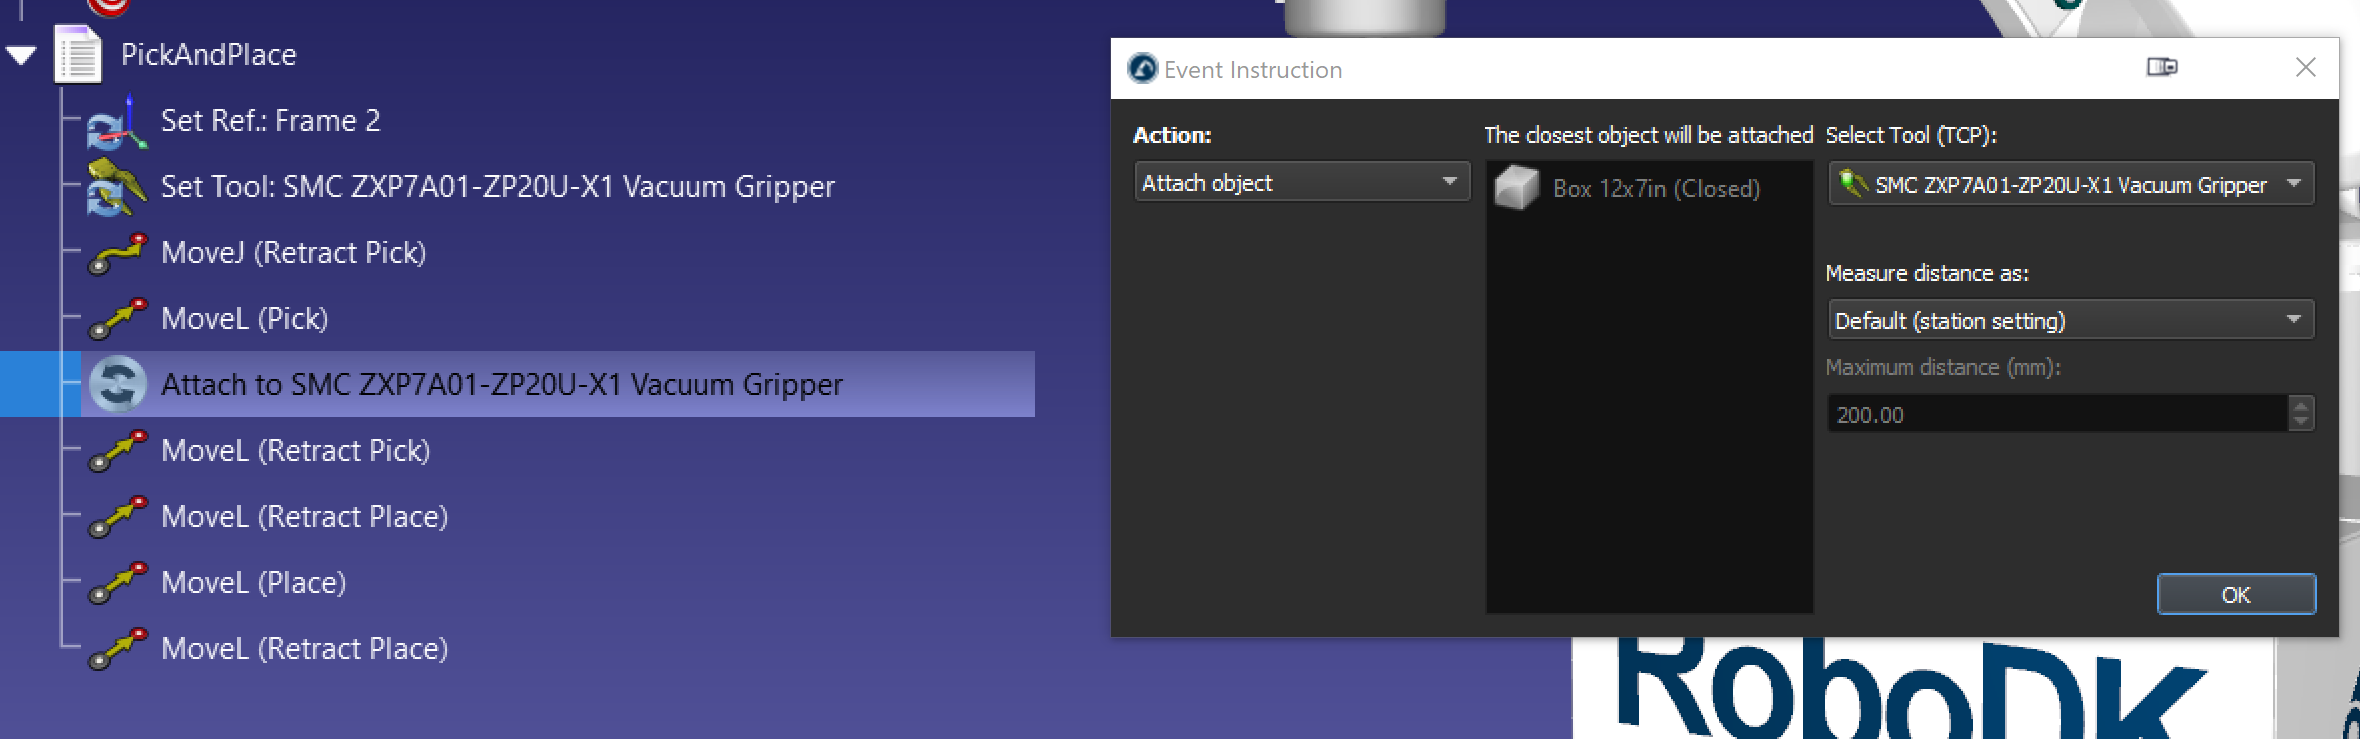
2.Add event to pick and place the object.
a.To add an event, go to Program → Simulation Event Instruction.
b.Add an event with the action Attach object to pick the box after the MoveL (Pick).
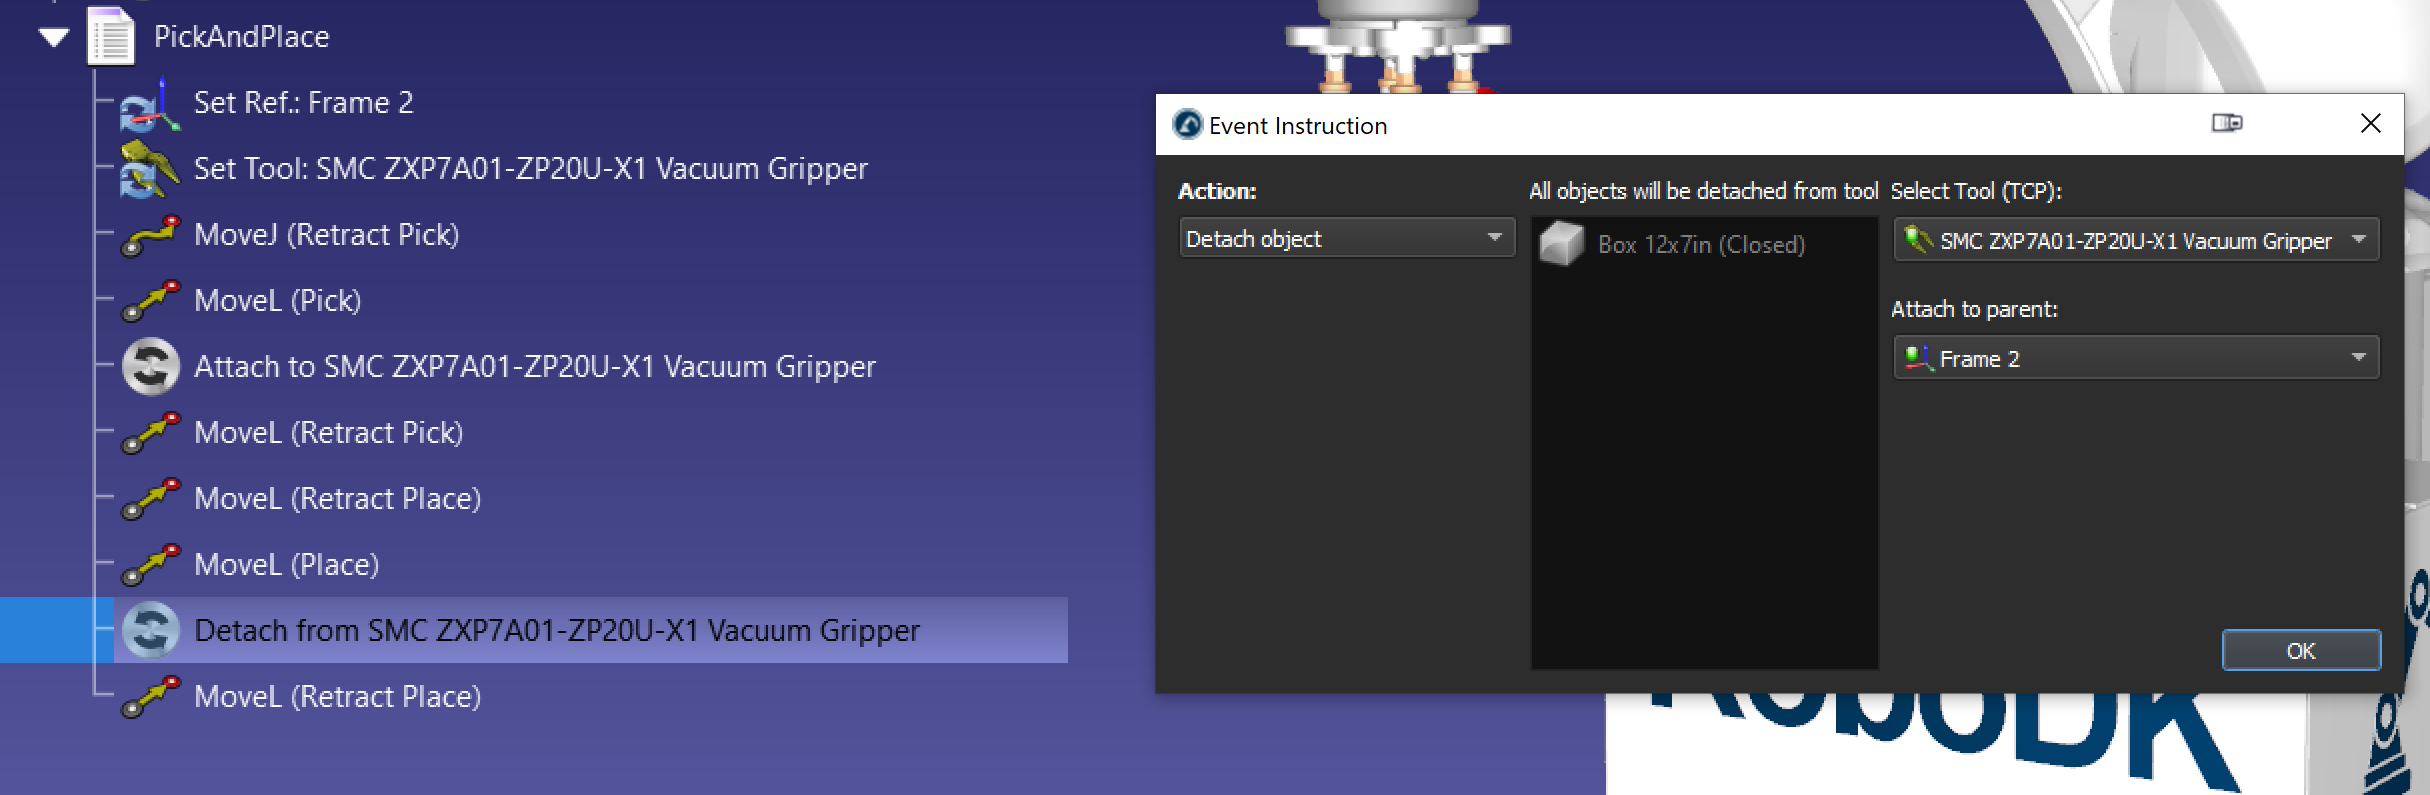
c.Add an event with the action Detach object to place the box after the MoveL (Place). The Attach to parent option allows to attach the object to a new frame once it is detached from the gripper.
d.It is also a good practice to create a separate program with an event action Set object position to reset the box to its original position, if needed.
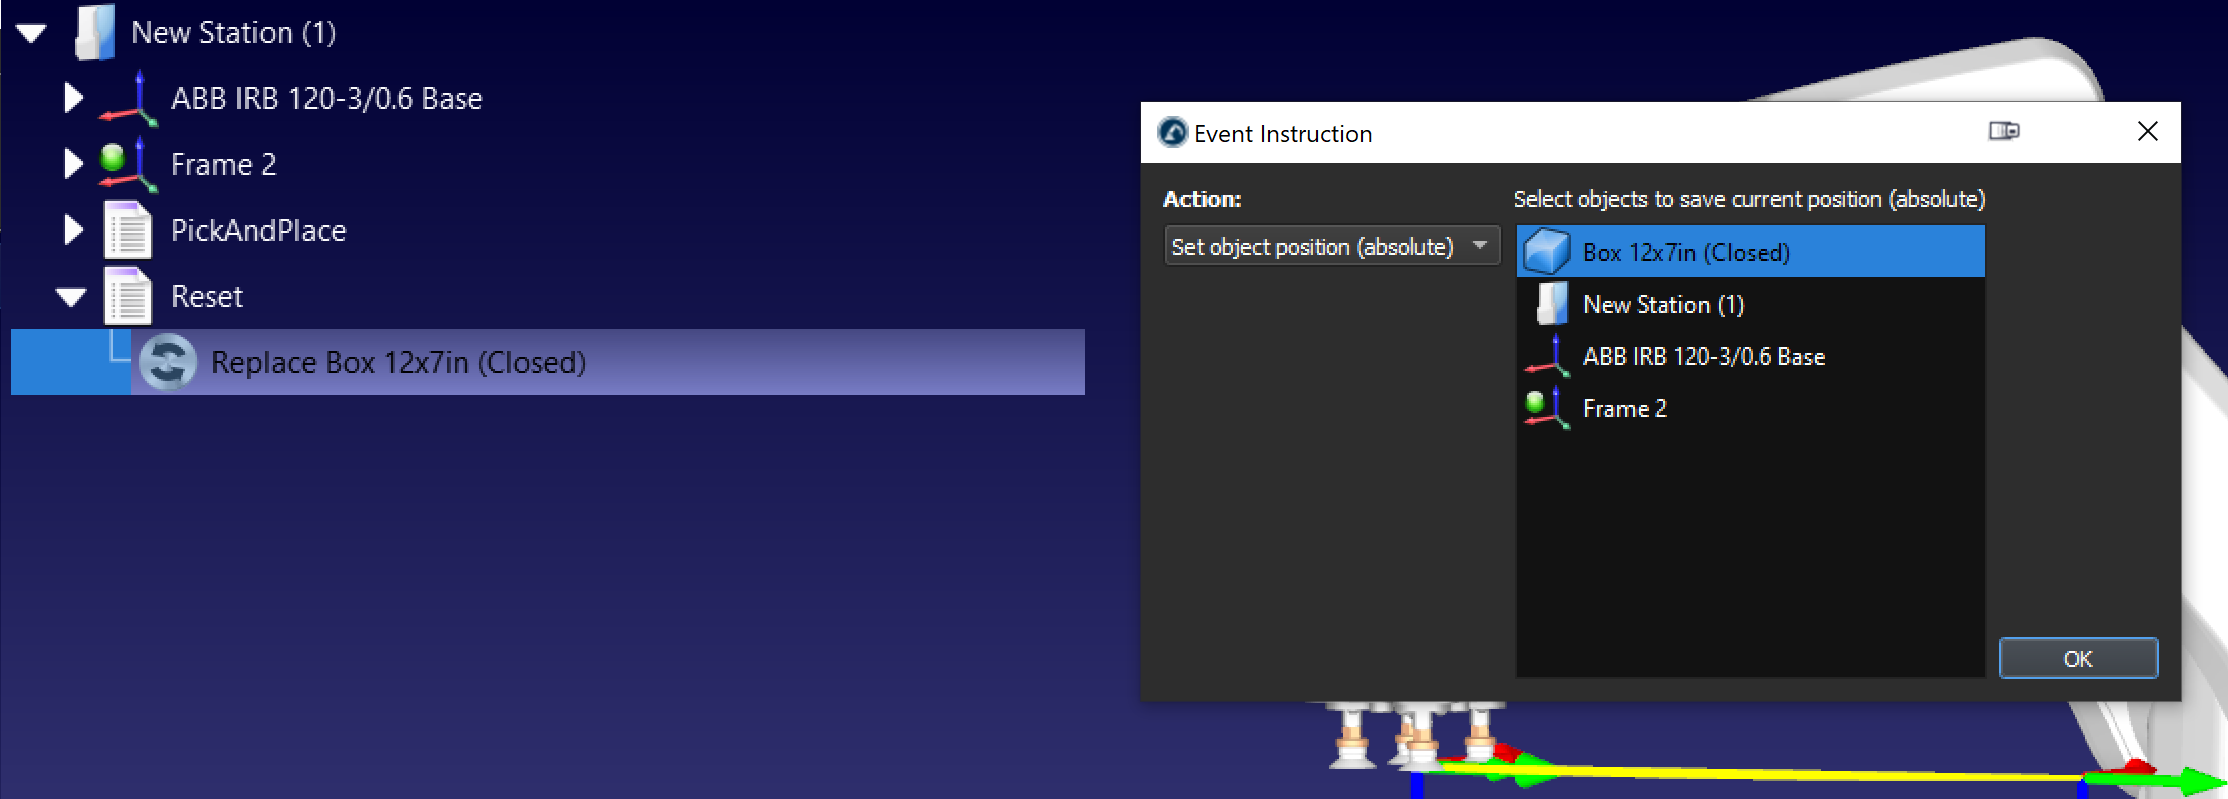
By following these steps, you can successfully create a basic pick-and-place station in RoboDK.