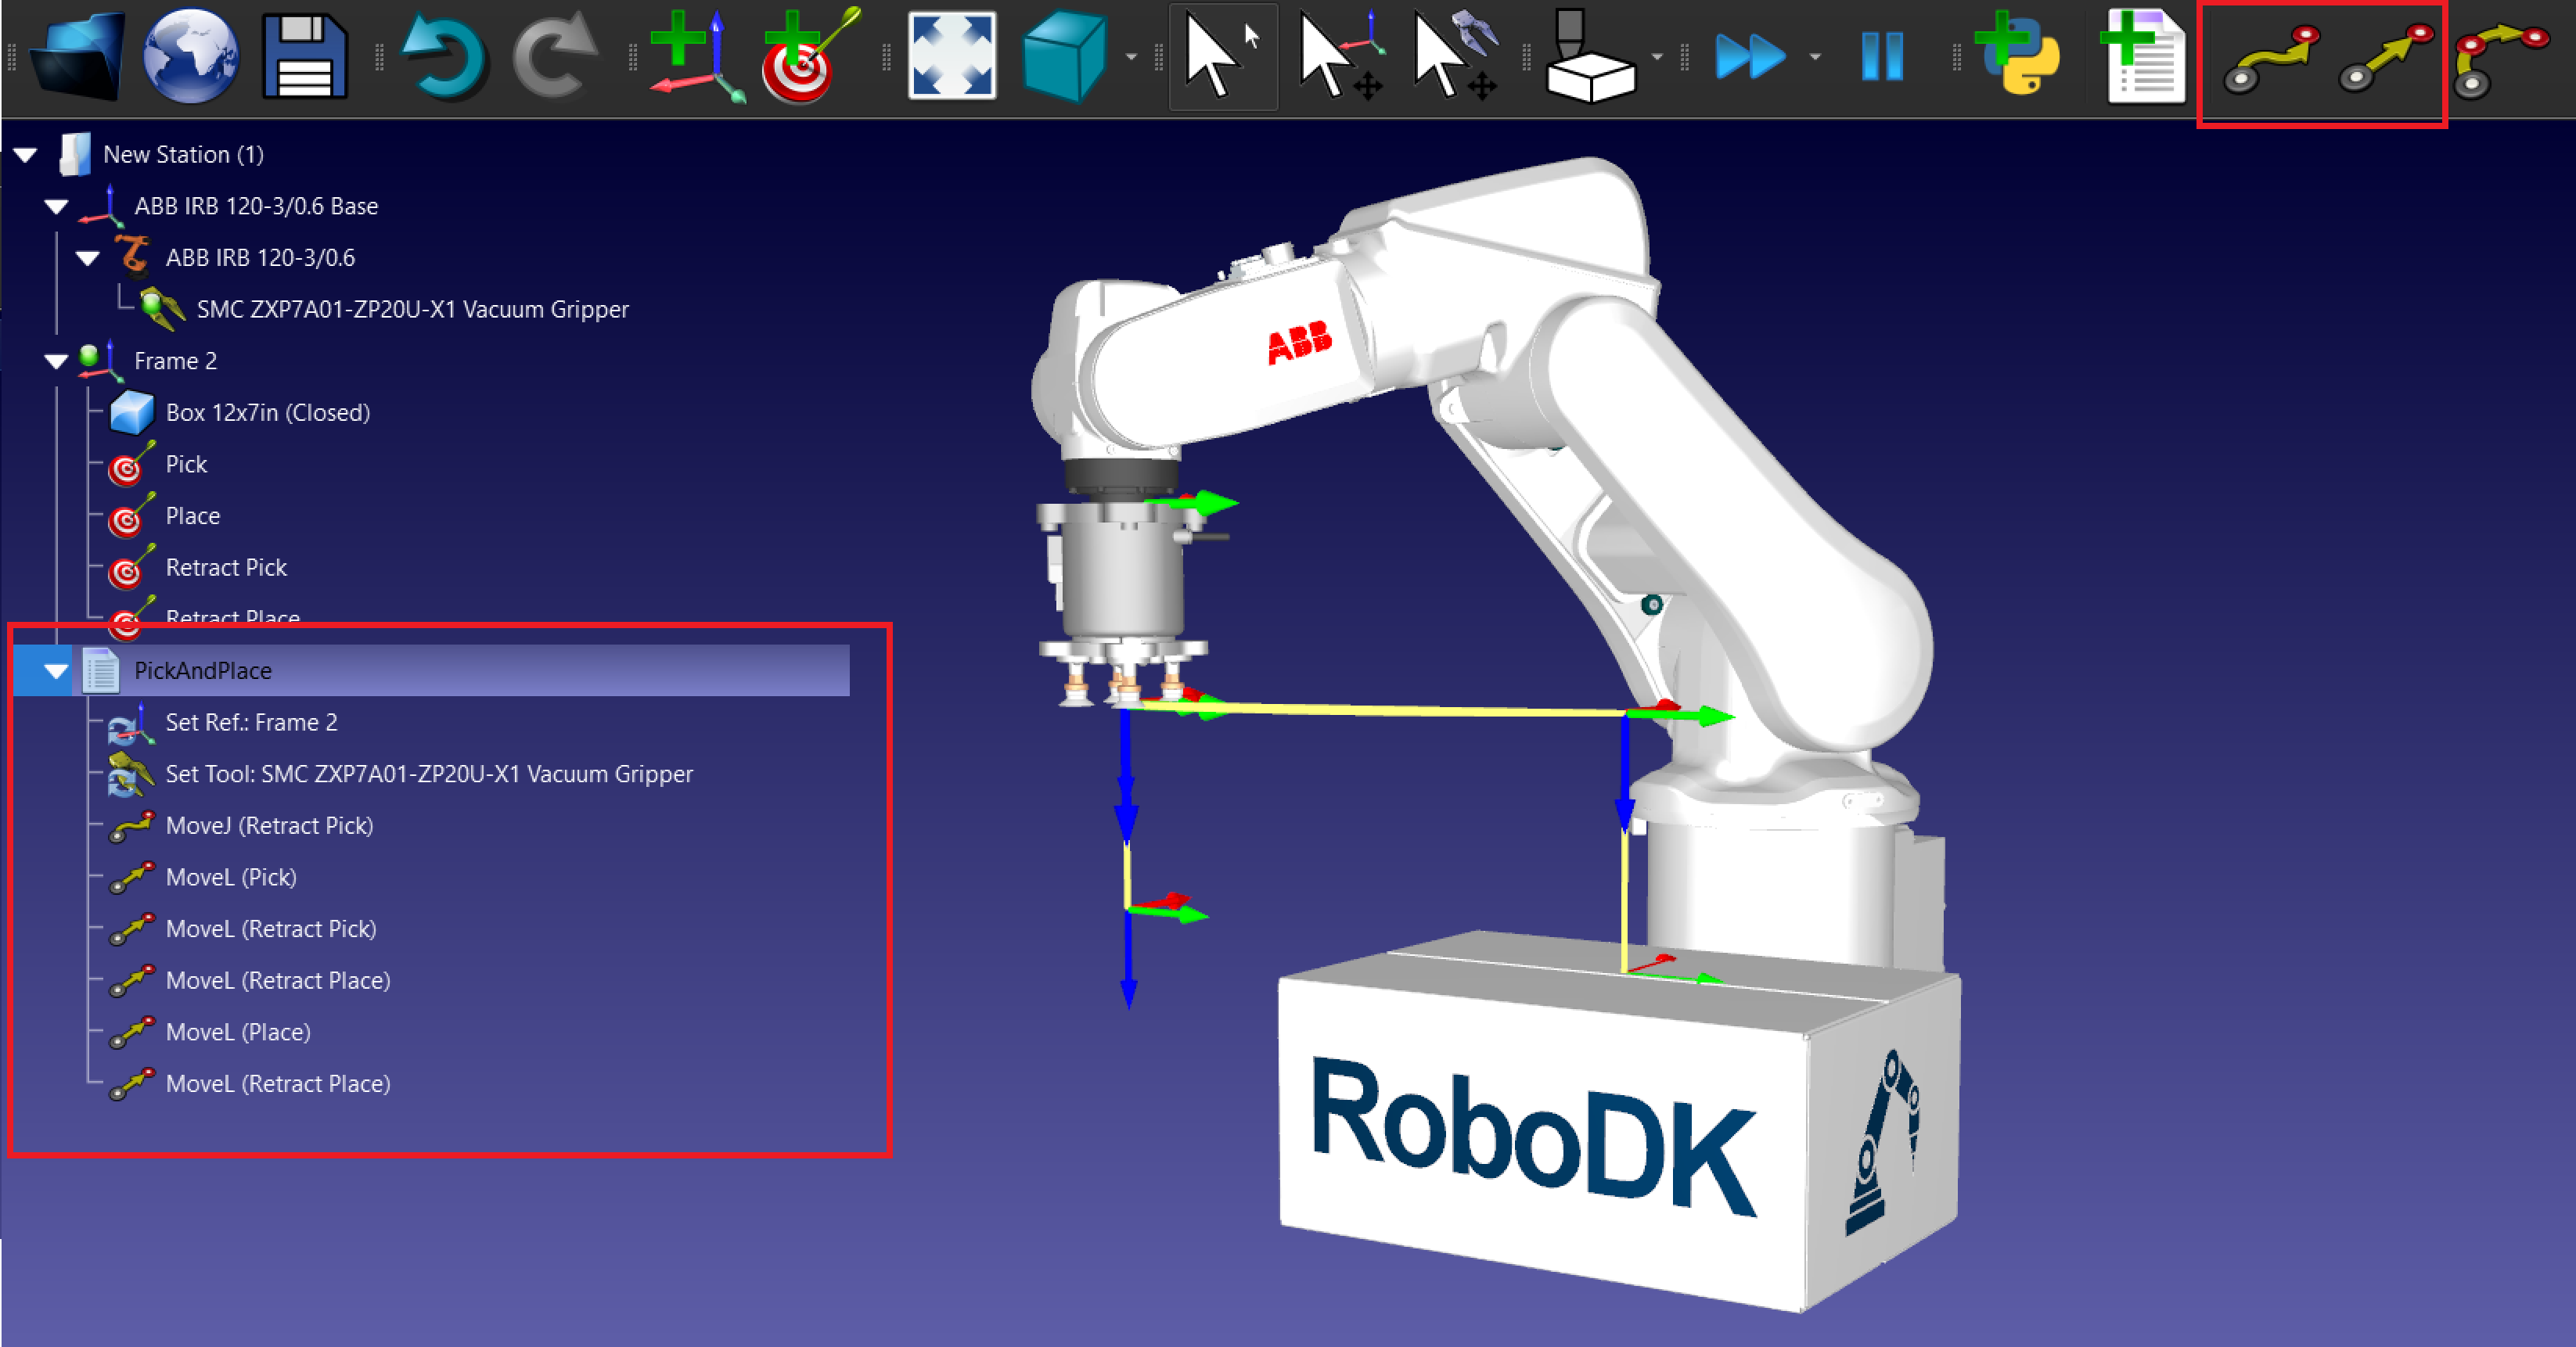
Create Pick and Place Program
Follow these steps to create a basic pick and place program in RoboDK with a 6-axis robot arm using a vacuum gripper to move a box.
1.Program the Pick and Place Operation:
a.Create a New Program: Go to Program → Add Program and name it PickAndPlace.
b.Add Movement Instructions:
i.Add MoveJ or MoveL instructions for each target.
ii.Move the robot to the retract target first, then create a MoveL to the Pick target and back to the retract target.
iii.Repeat with the Place target.
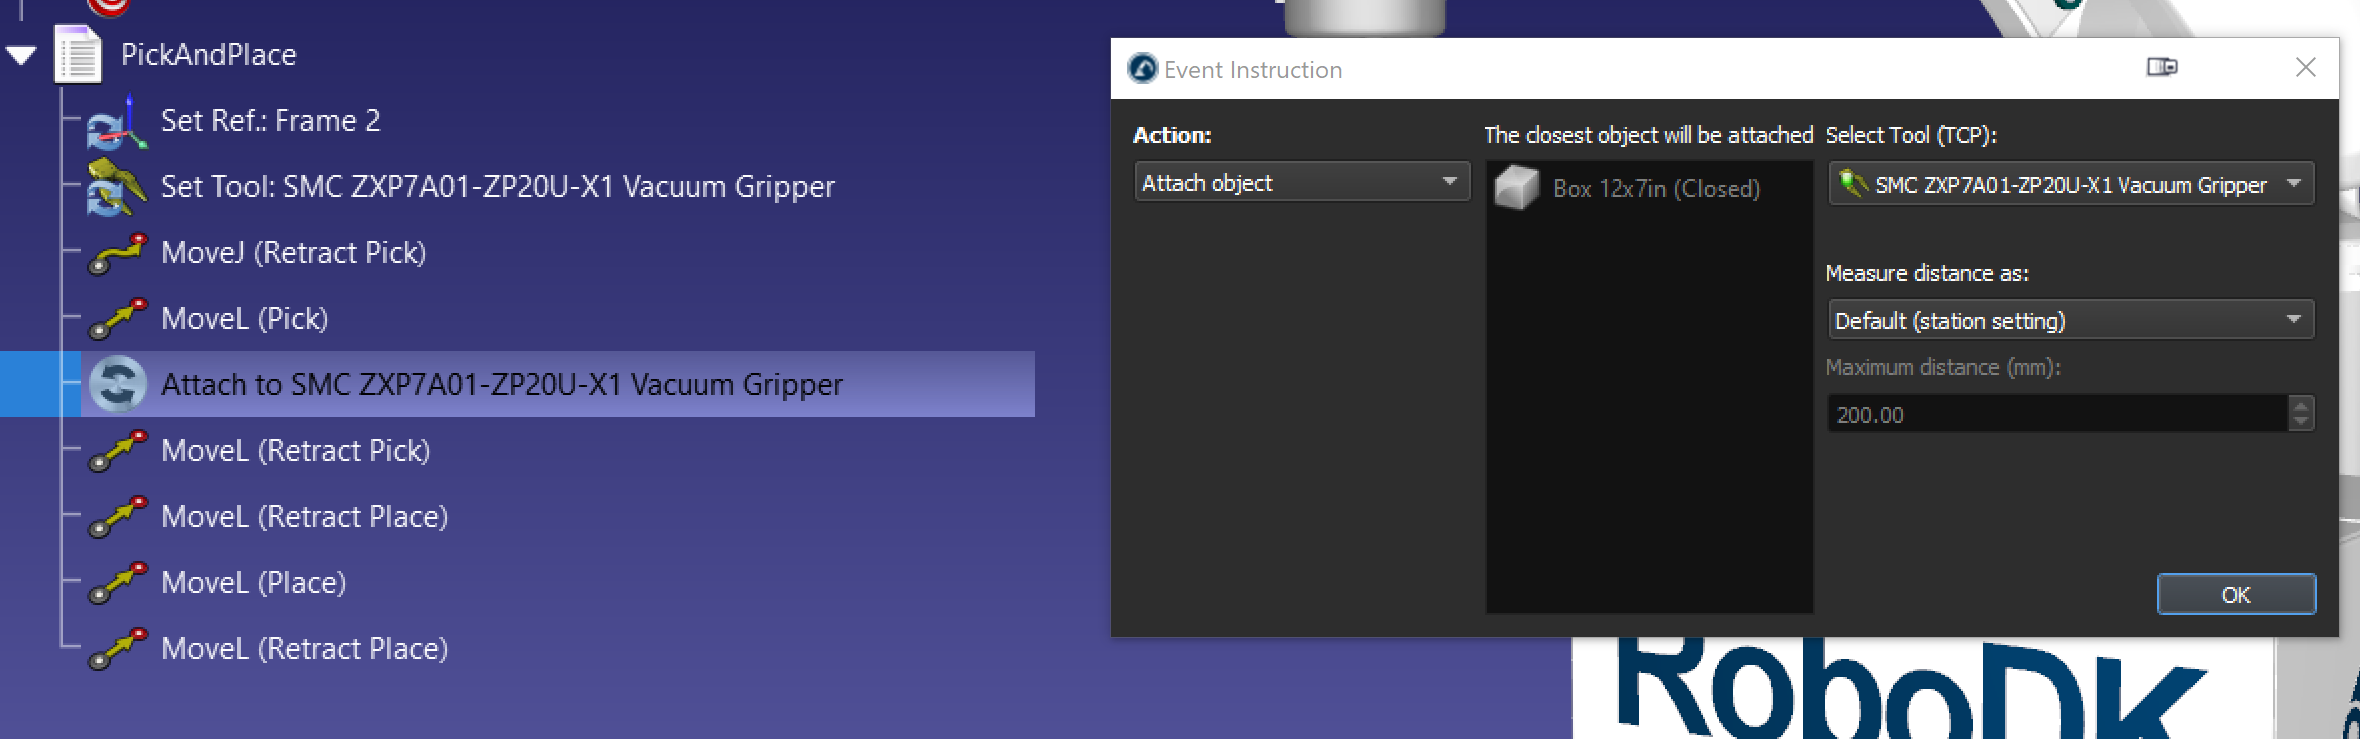
2.Add event to pick and place the object.
a.To add an event, go to Program → Simulation Event Instruction.
b.Add an event with the action Attach object to pick the box after the MoveL (Pick).
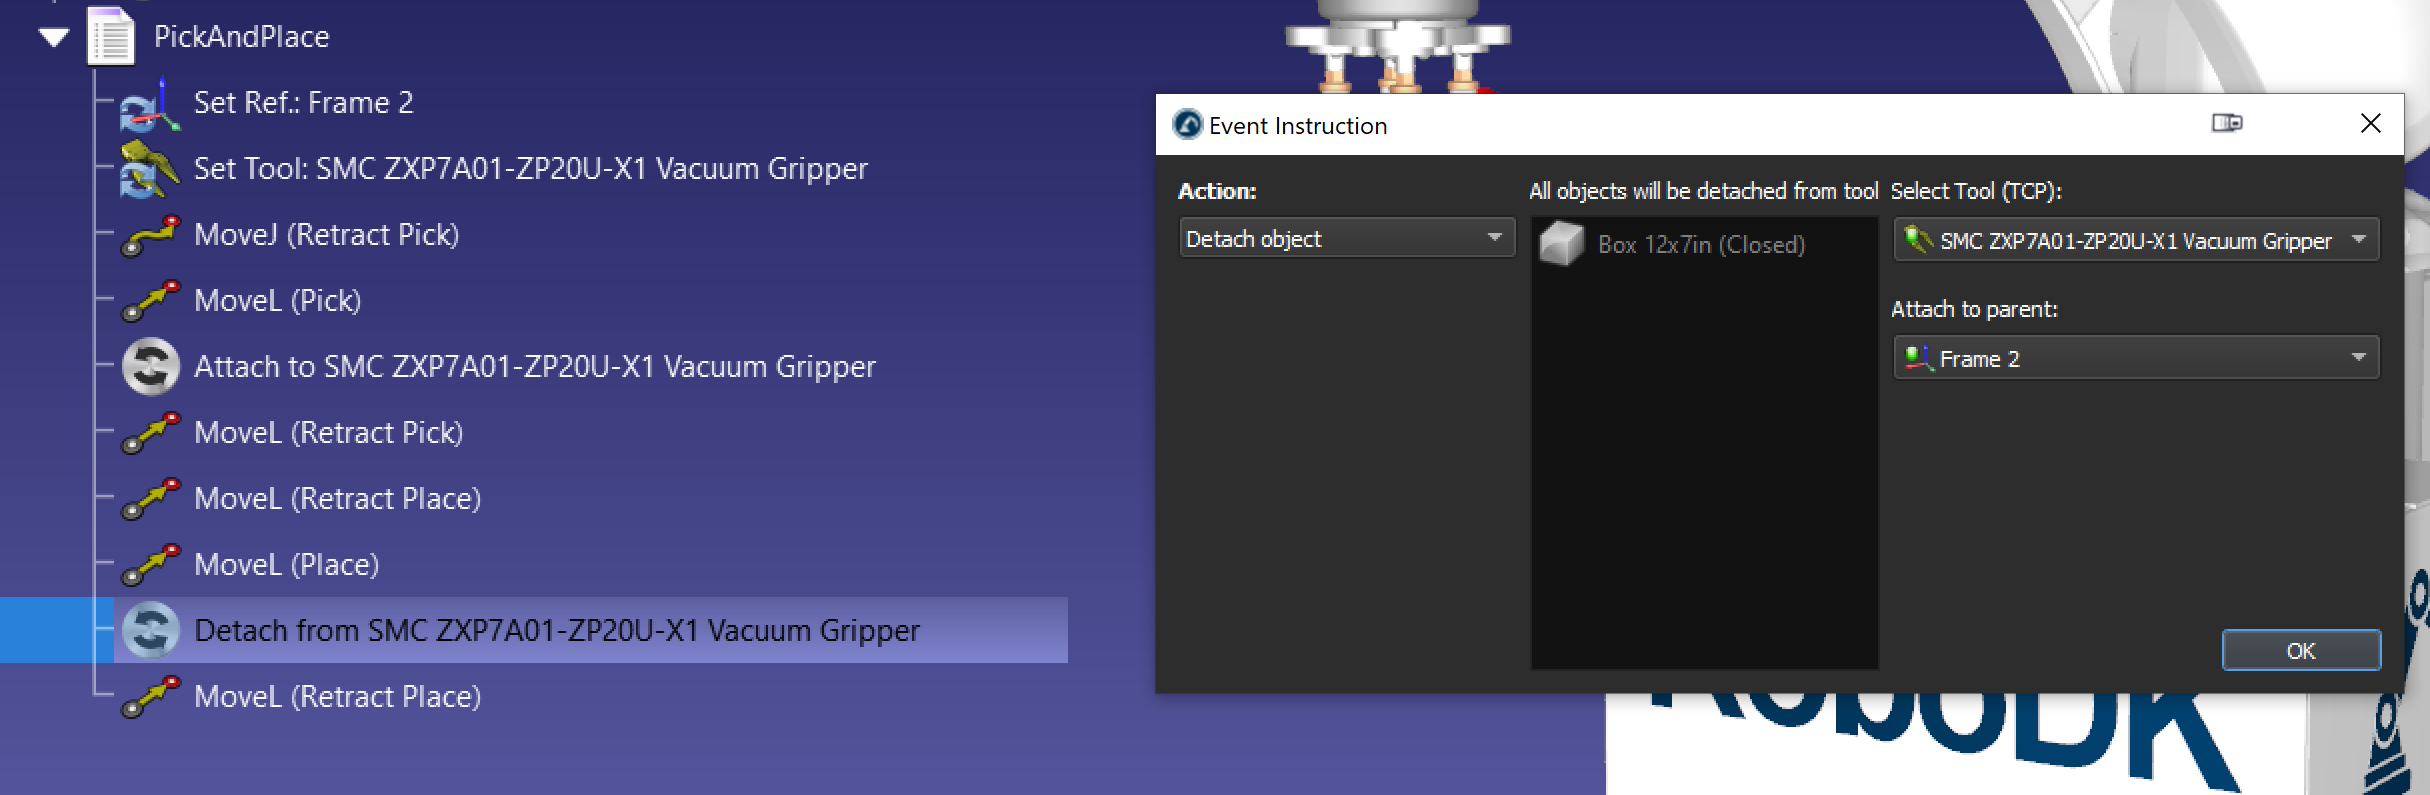
c.Add an event with the action Detach object to place the box after the MoveL (Place). The Attach to parent option allows to attach the object to a new frame once it is detached from the gripper.
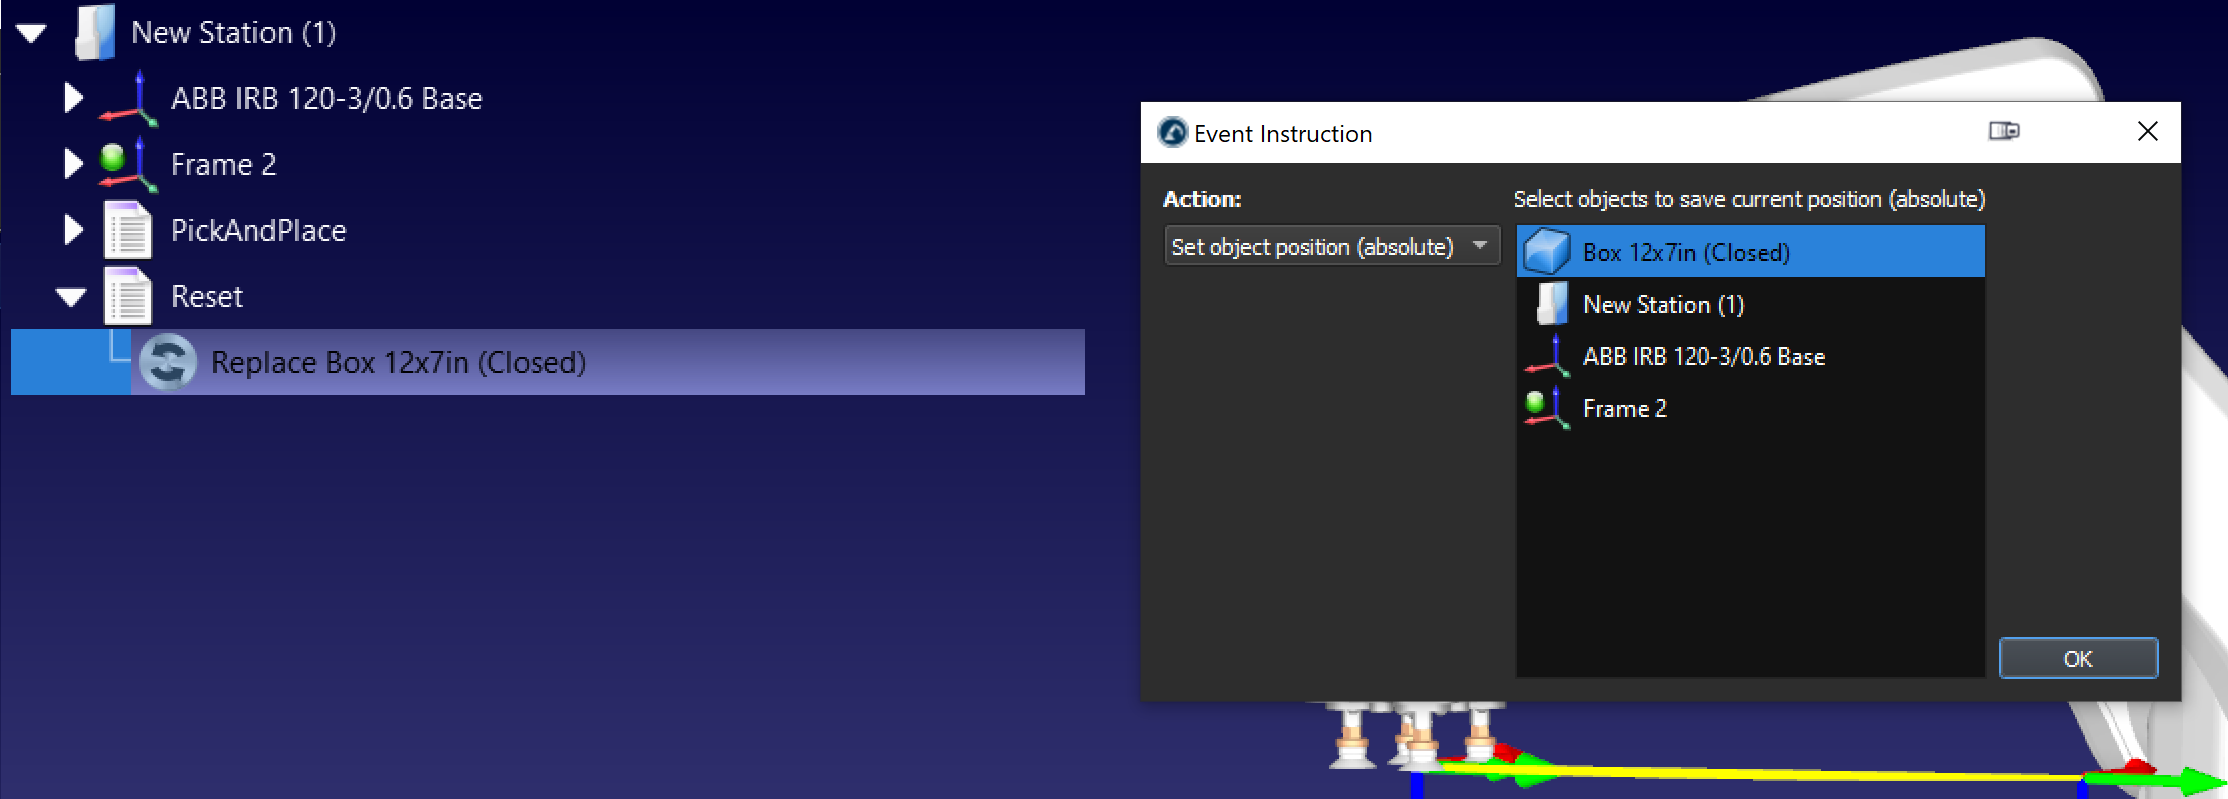
d.It is also a good practice to create a separate program with an event action Set object position to reset the box to its original position, if needed.
By following these steps, you can successfully create a basic pick-and-place station in RoboDK.