Create Targets for Pick and Place
Follow these steps to create a basic target in RoboDK for pick and place application
7.Add Pick and Place Targets:
a.Move the robot to the desired pick position.
b.Select Program → Teach Target to save the position.
c.Repeat for Pick, Retract Pick, Place, and Retract Place positions.
8.Organize the Targets:
a.Rename the targets for clarity (e.g., Approach_Pick, Pick, Place). Press F2 to rename the targets.
b.Don’t forget to create the targets under the relevant reference frames in the station tree.
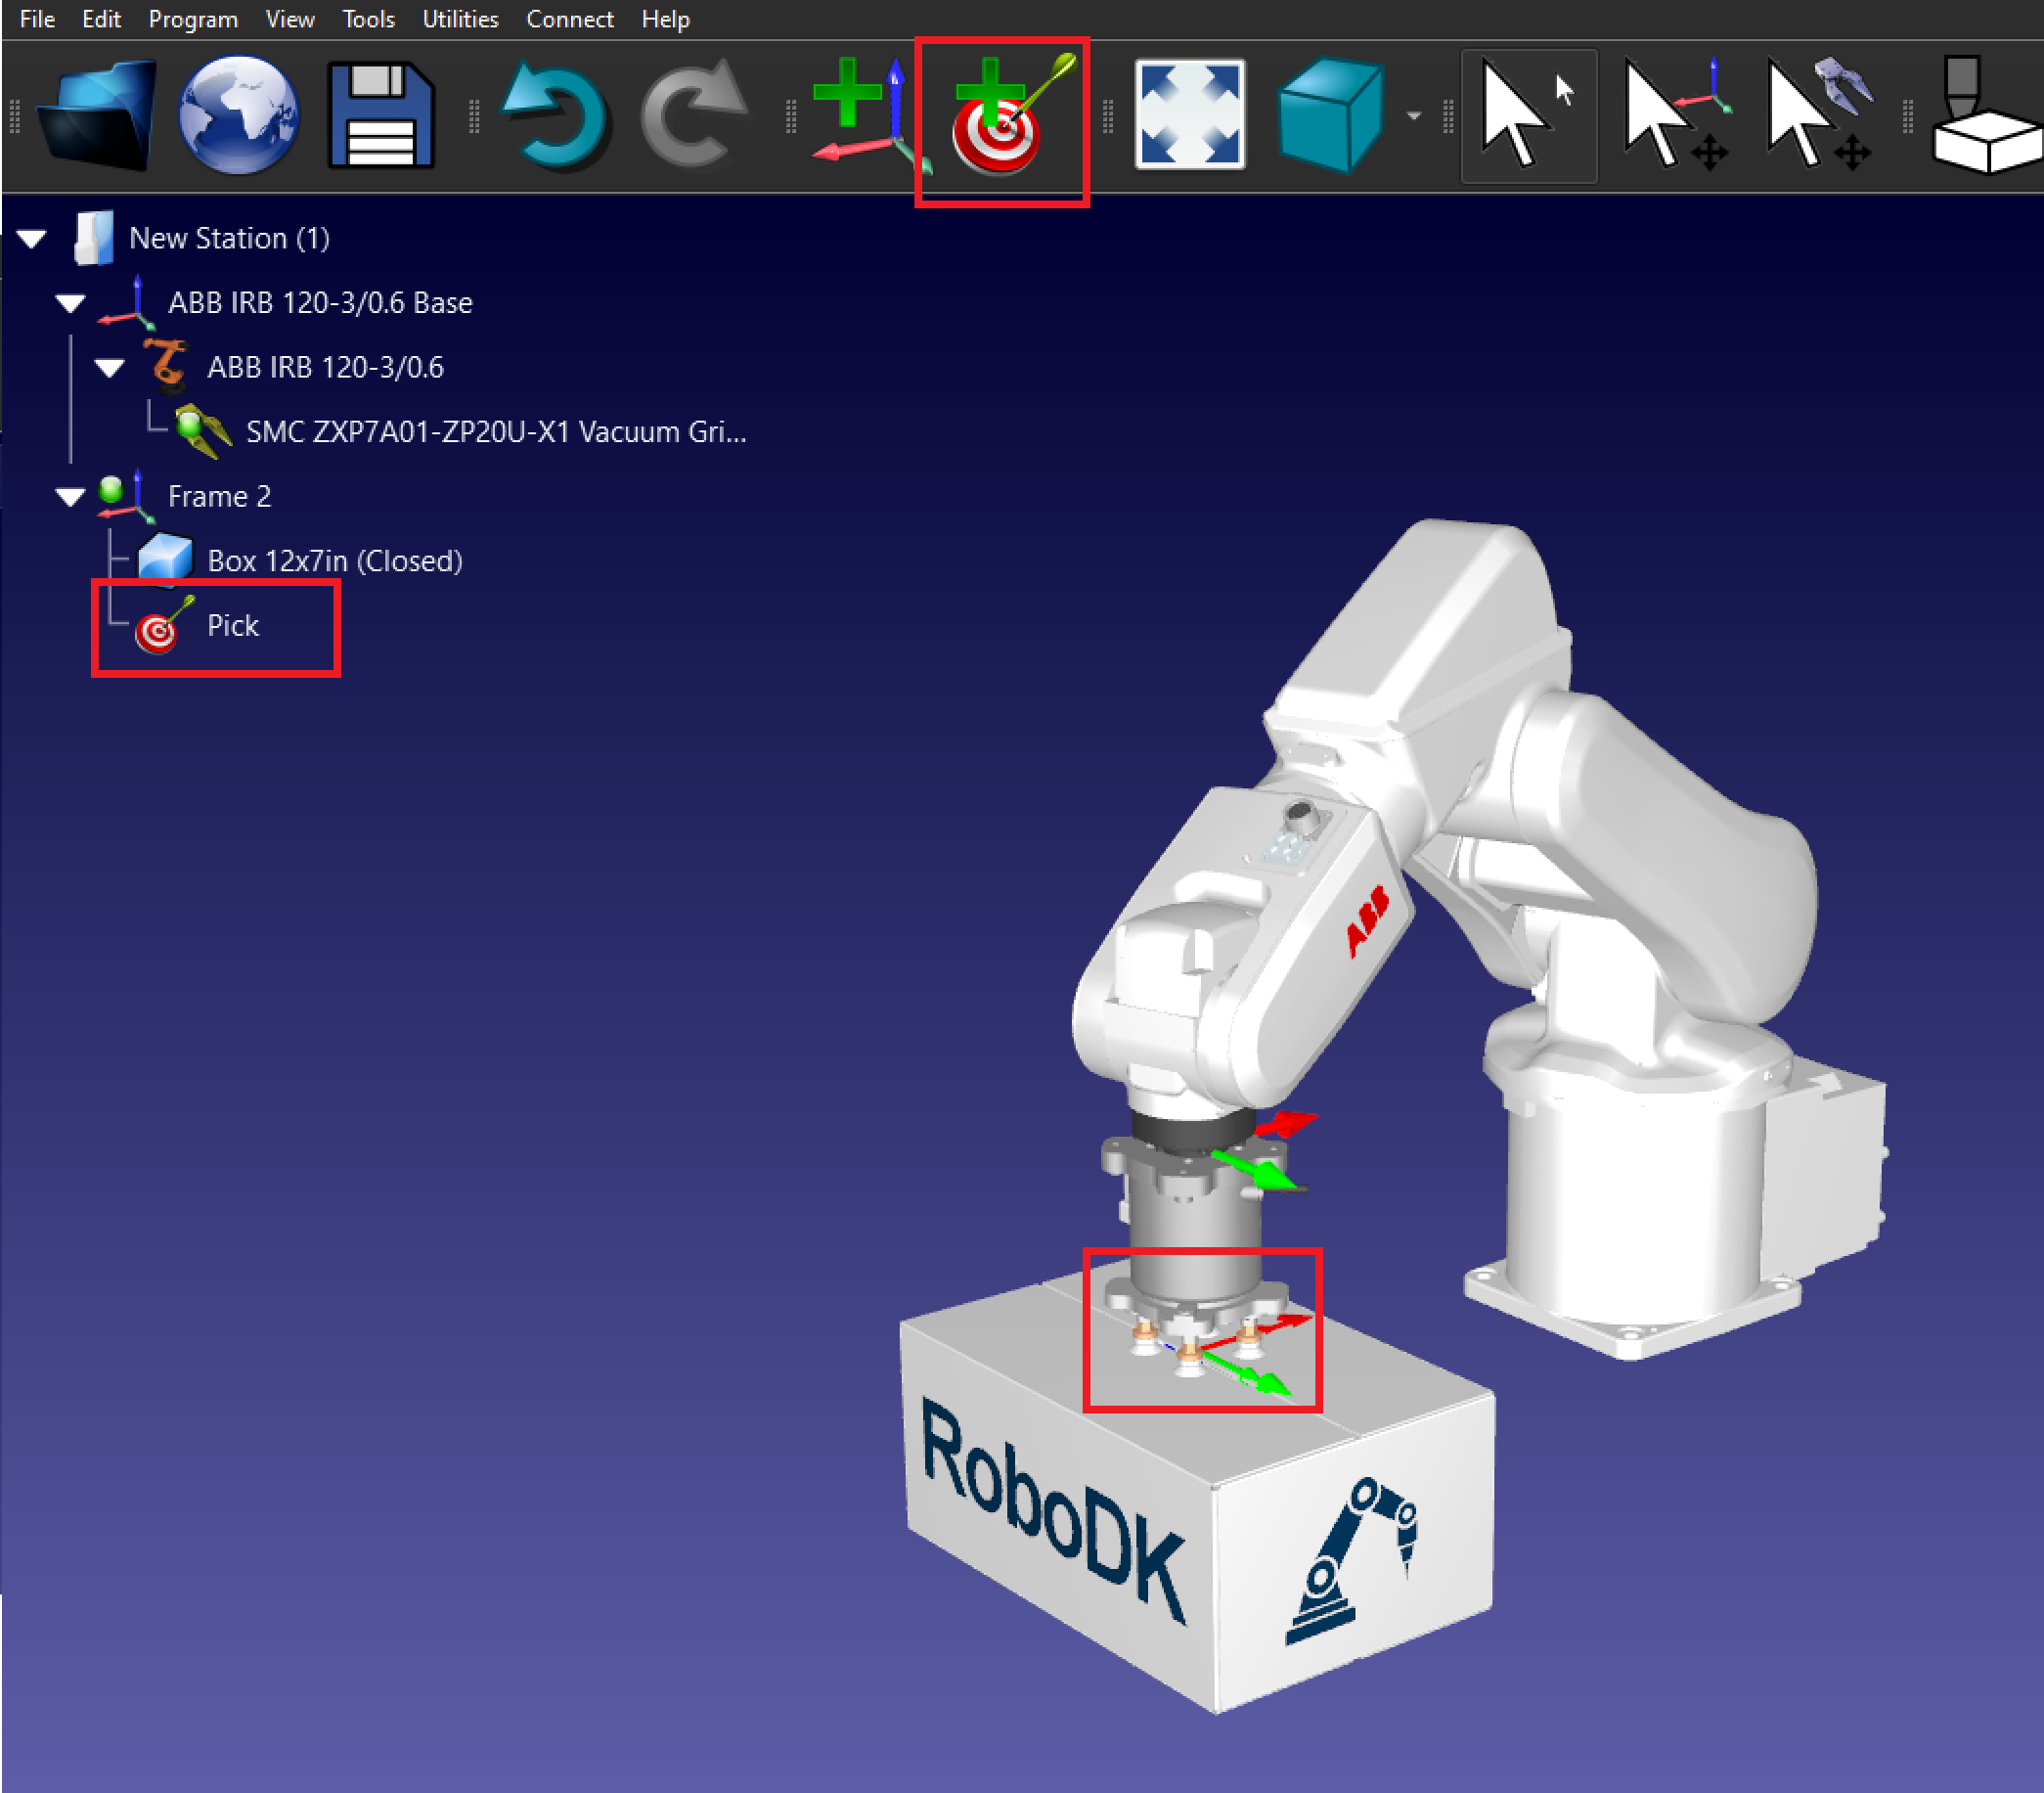
9.Create the Pick target: Place the robot over the box and create a target called Pick.
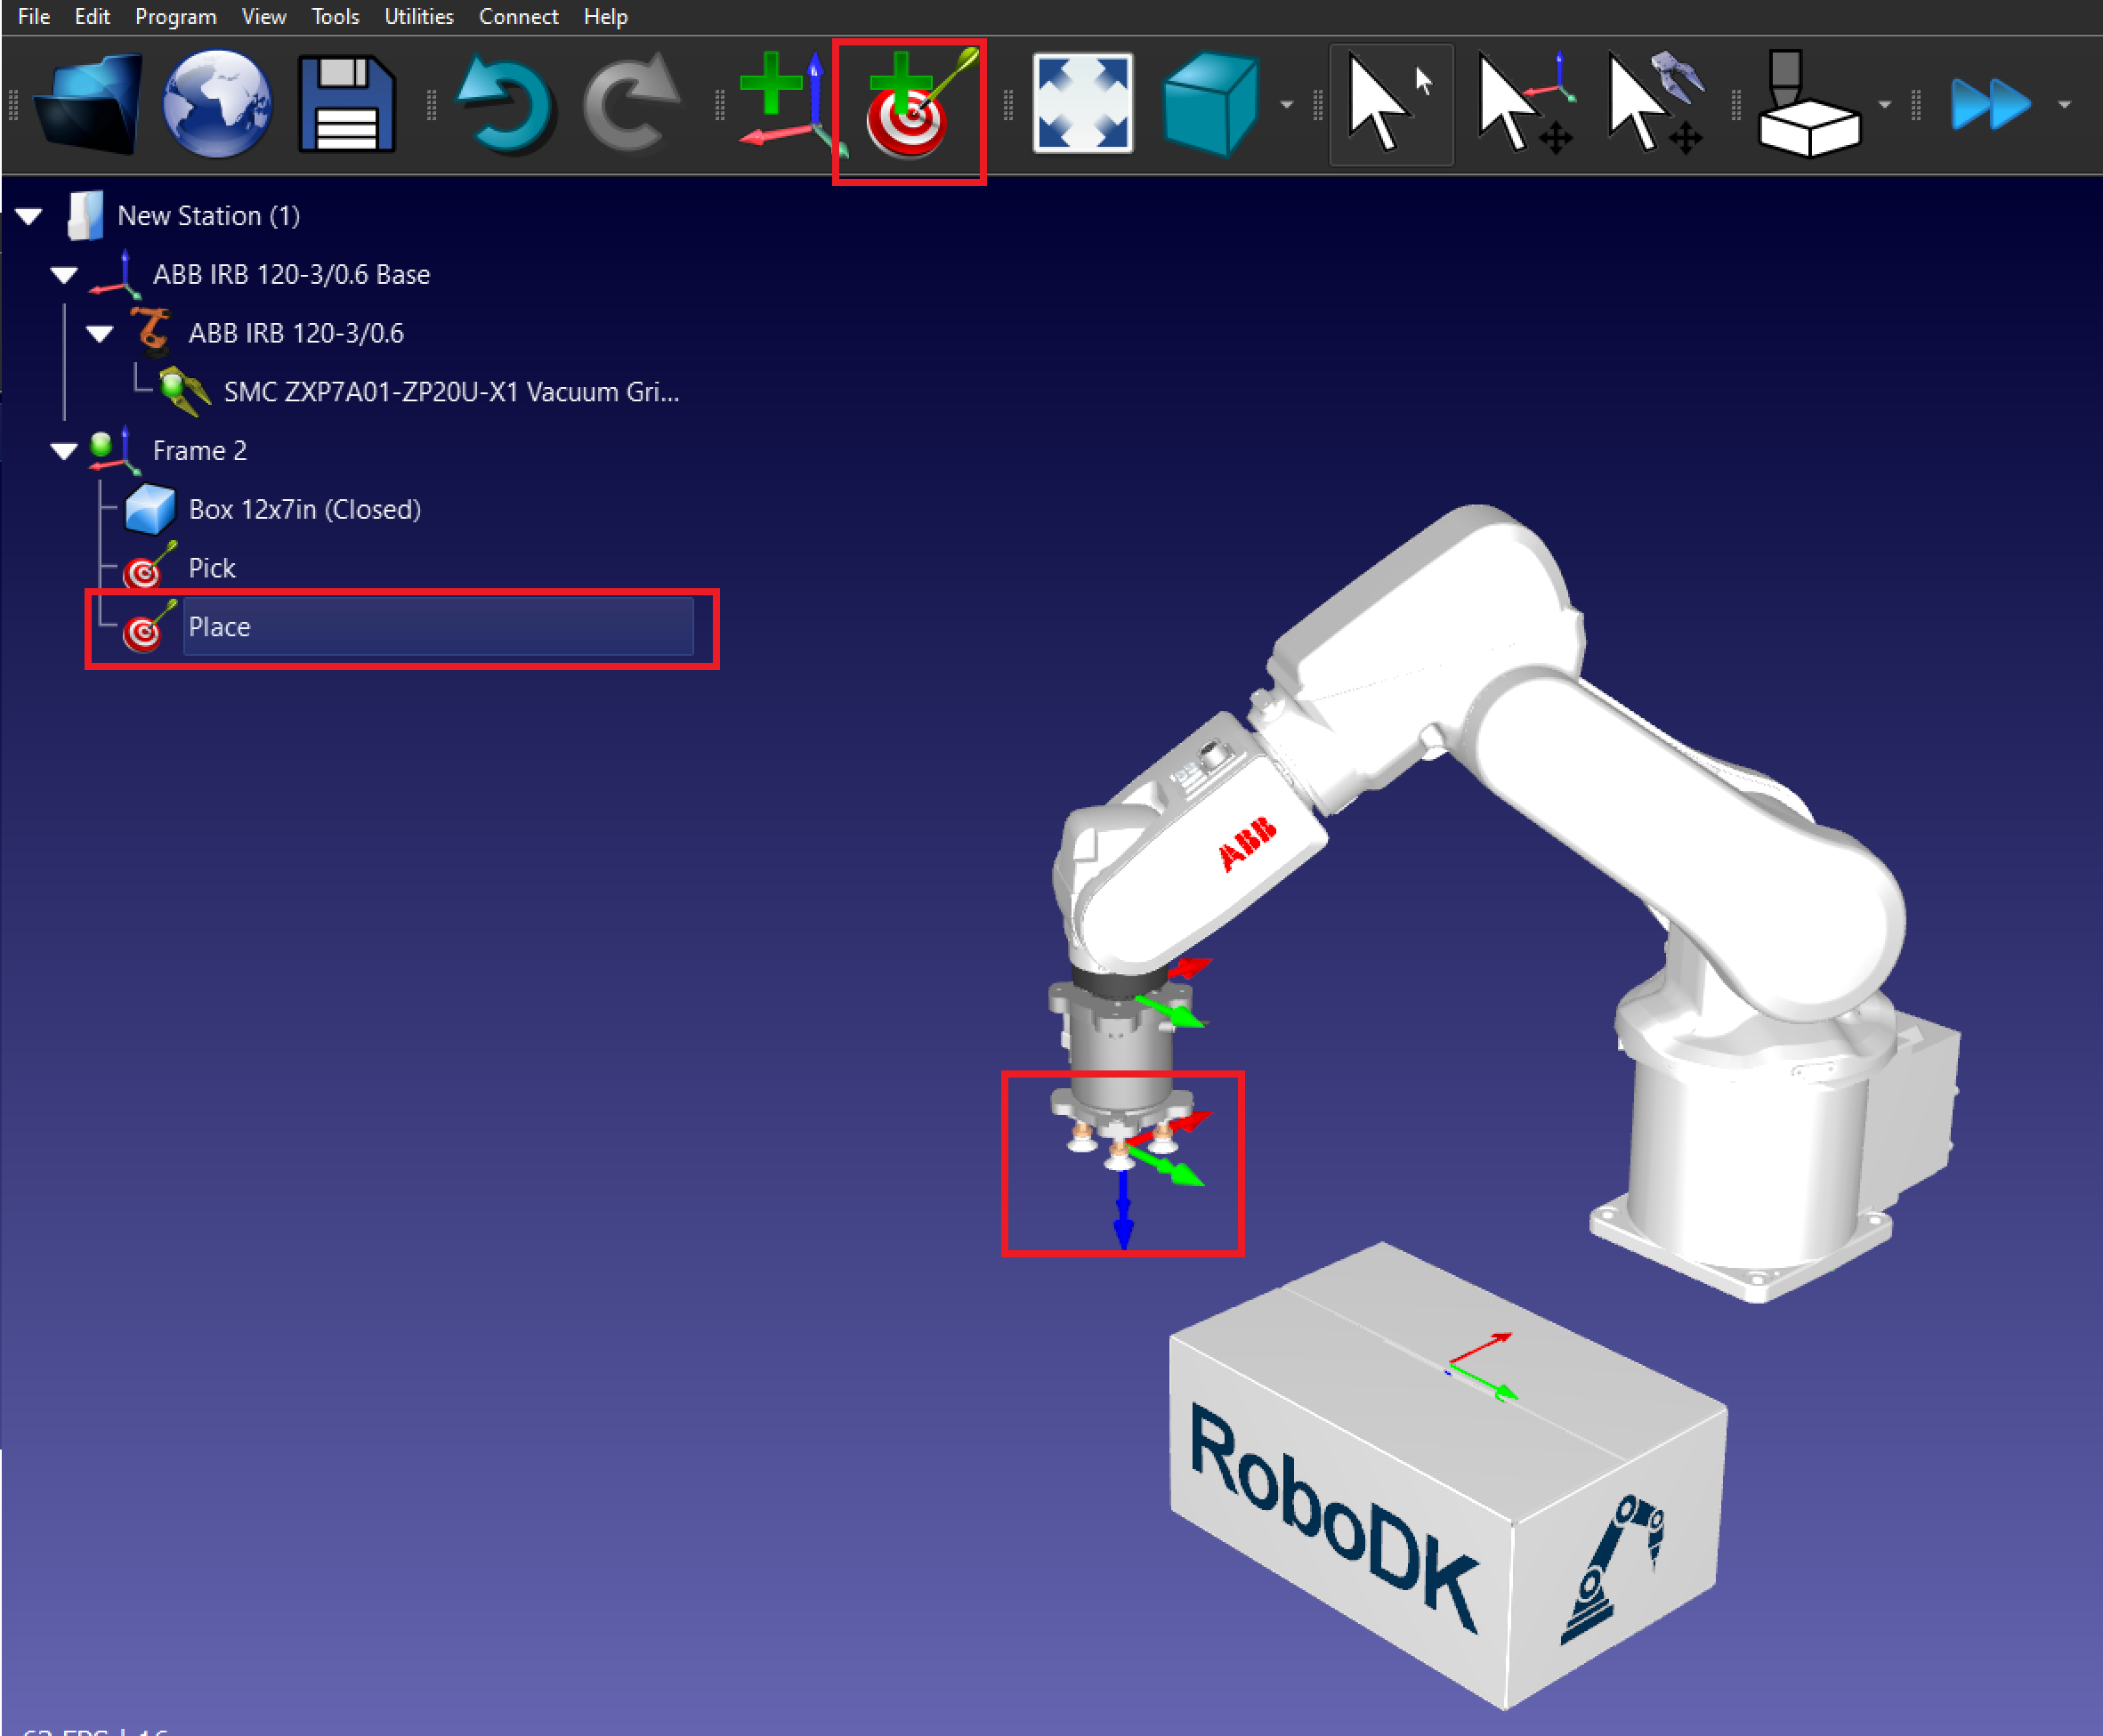
10.Create the Place target: Move the robot where you want to place the box and create a target called Place.
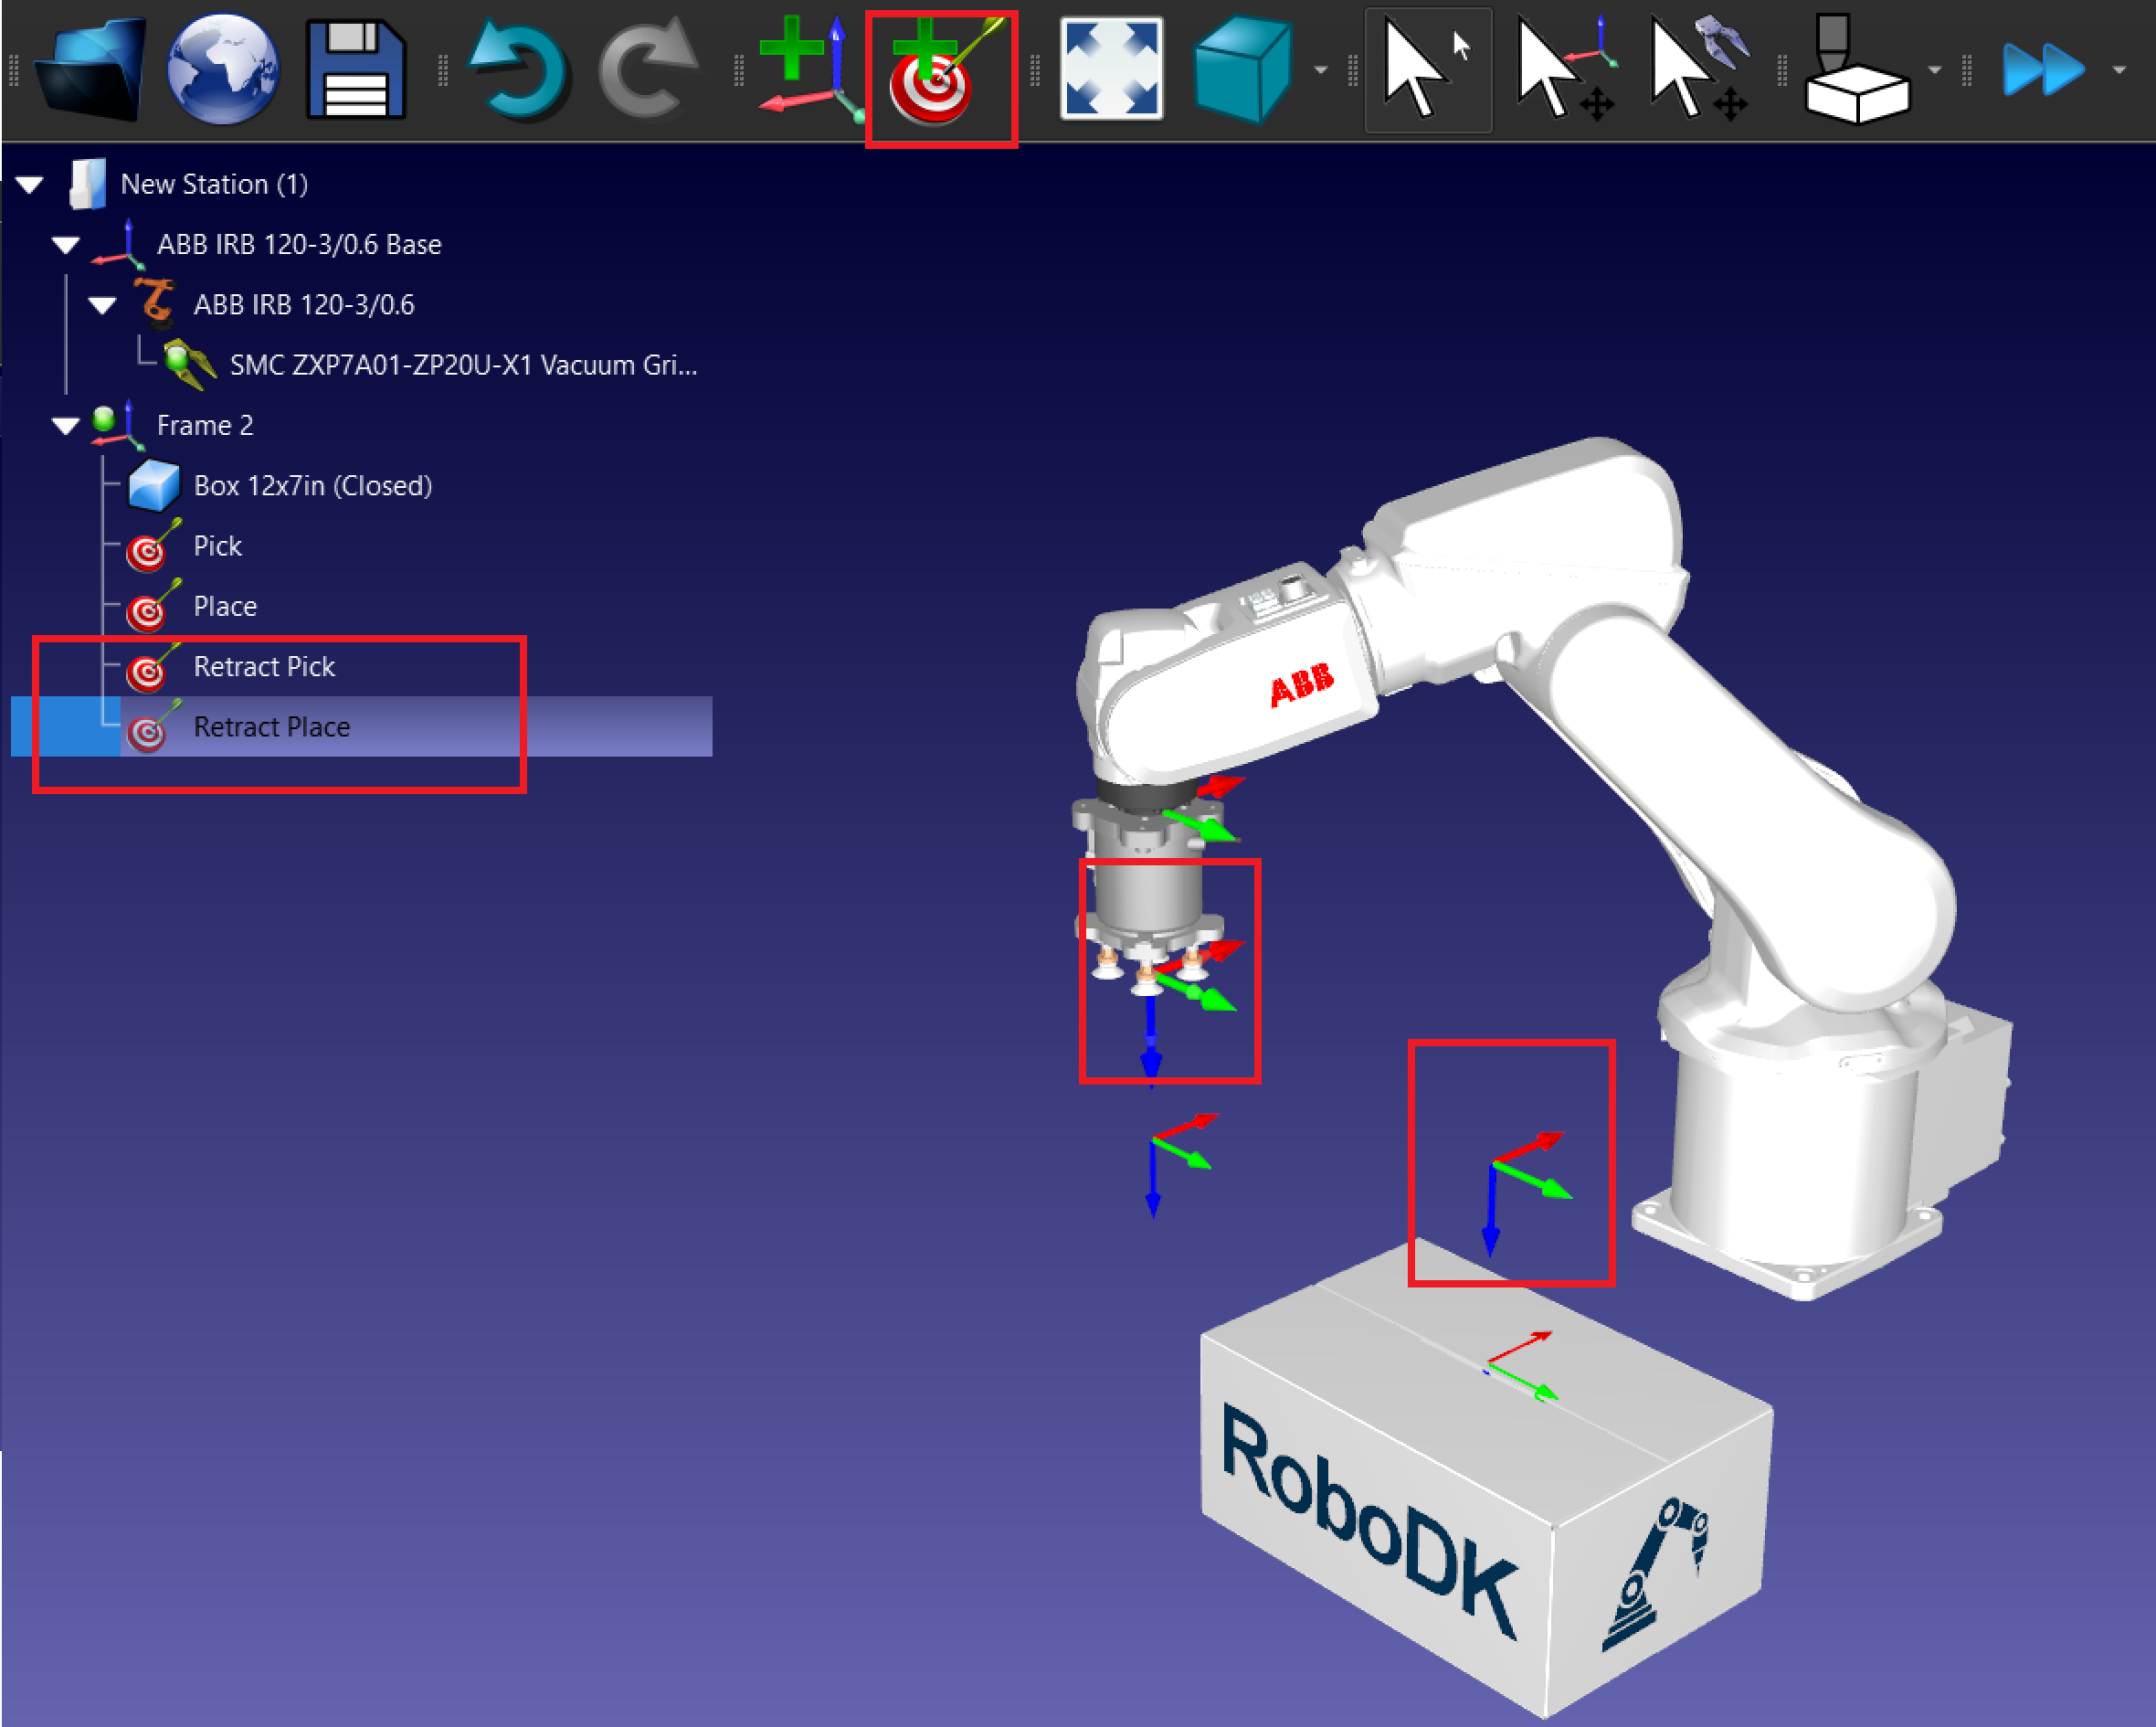
11.Create the Retract targets:
a.Move the robot the Pick target and up on the Z axis.
b.Create a new target called Pick Retract.
c.Repeat with the Place target.