Create a new RoboDK Project
These steps will show you how to create a new project (also known as station) in RoboDK for a pick and place application.
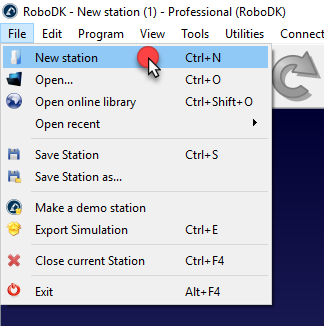
1.Open RoboDK: Launch the RoboDK application on your computer.
2.Create a new station: Select File-New Station from the main menu in RoboDK-A new, empty station will be created as your workspace.
3.Add a Robot from the Library
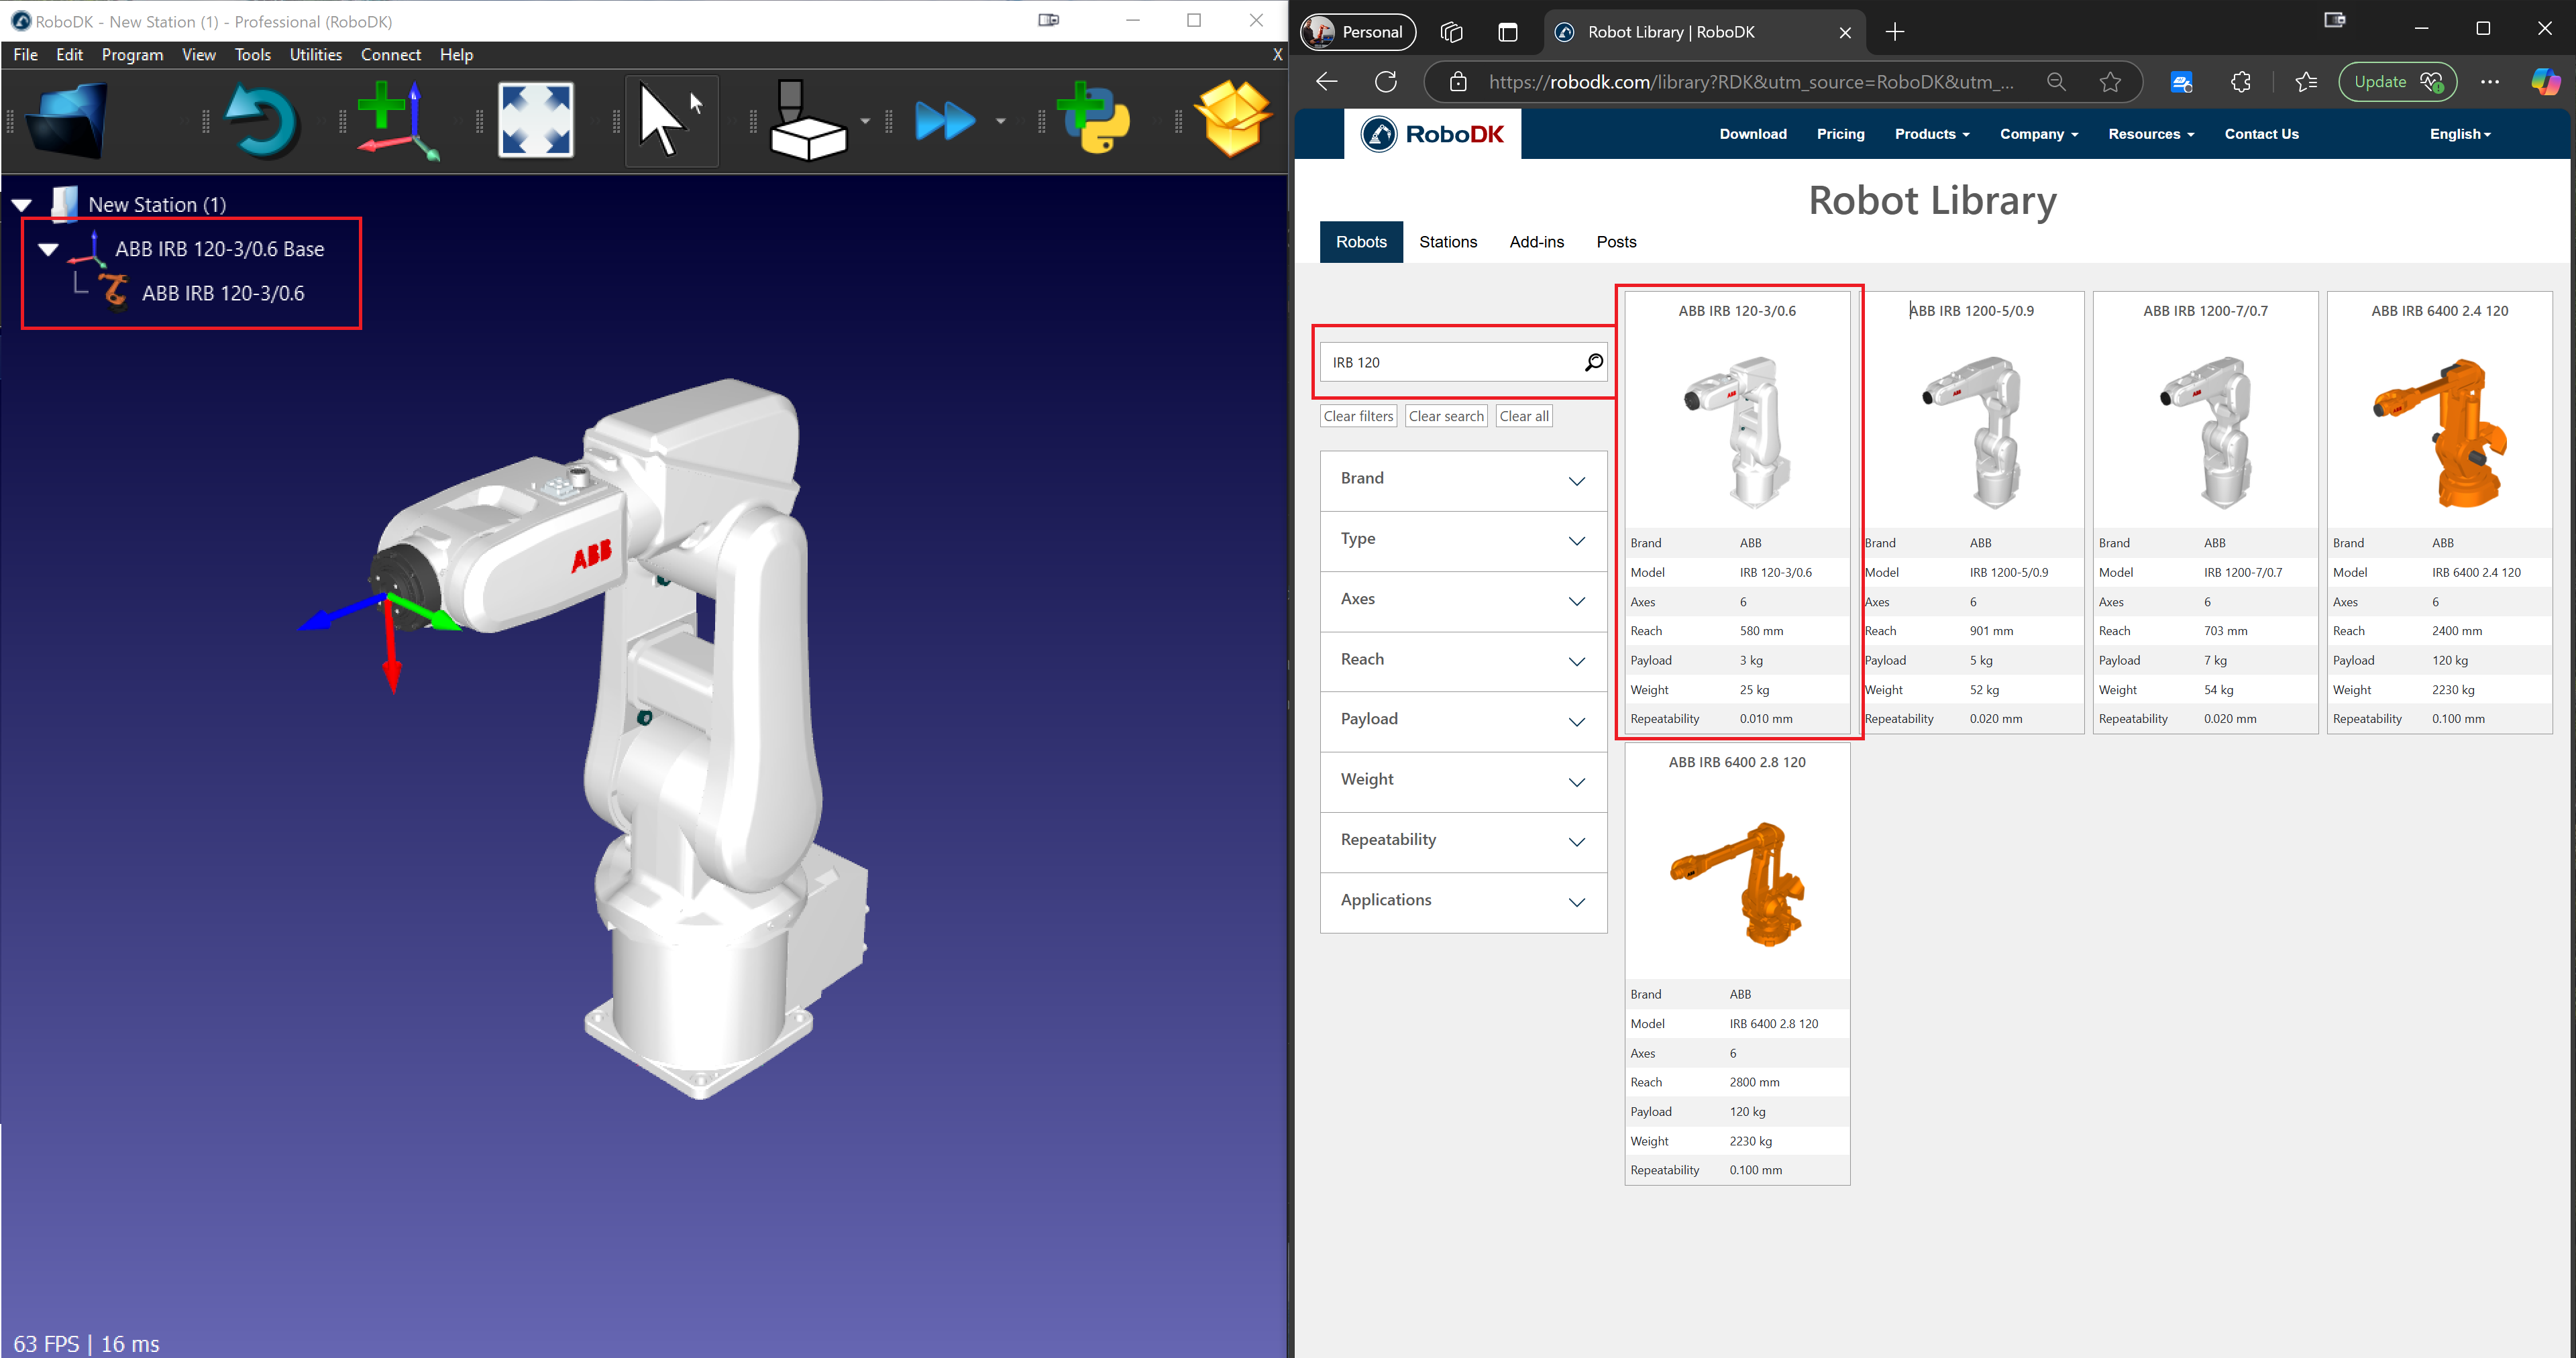
a.Open the online robot library to download a robot
i.In the main menu, select File → Open online library.
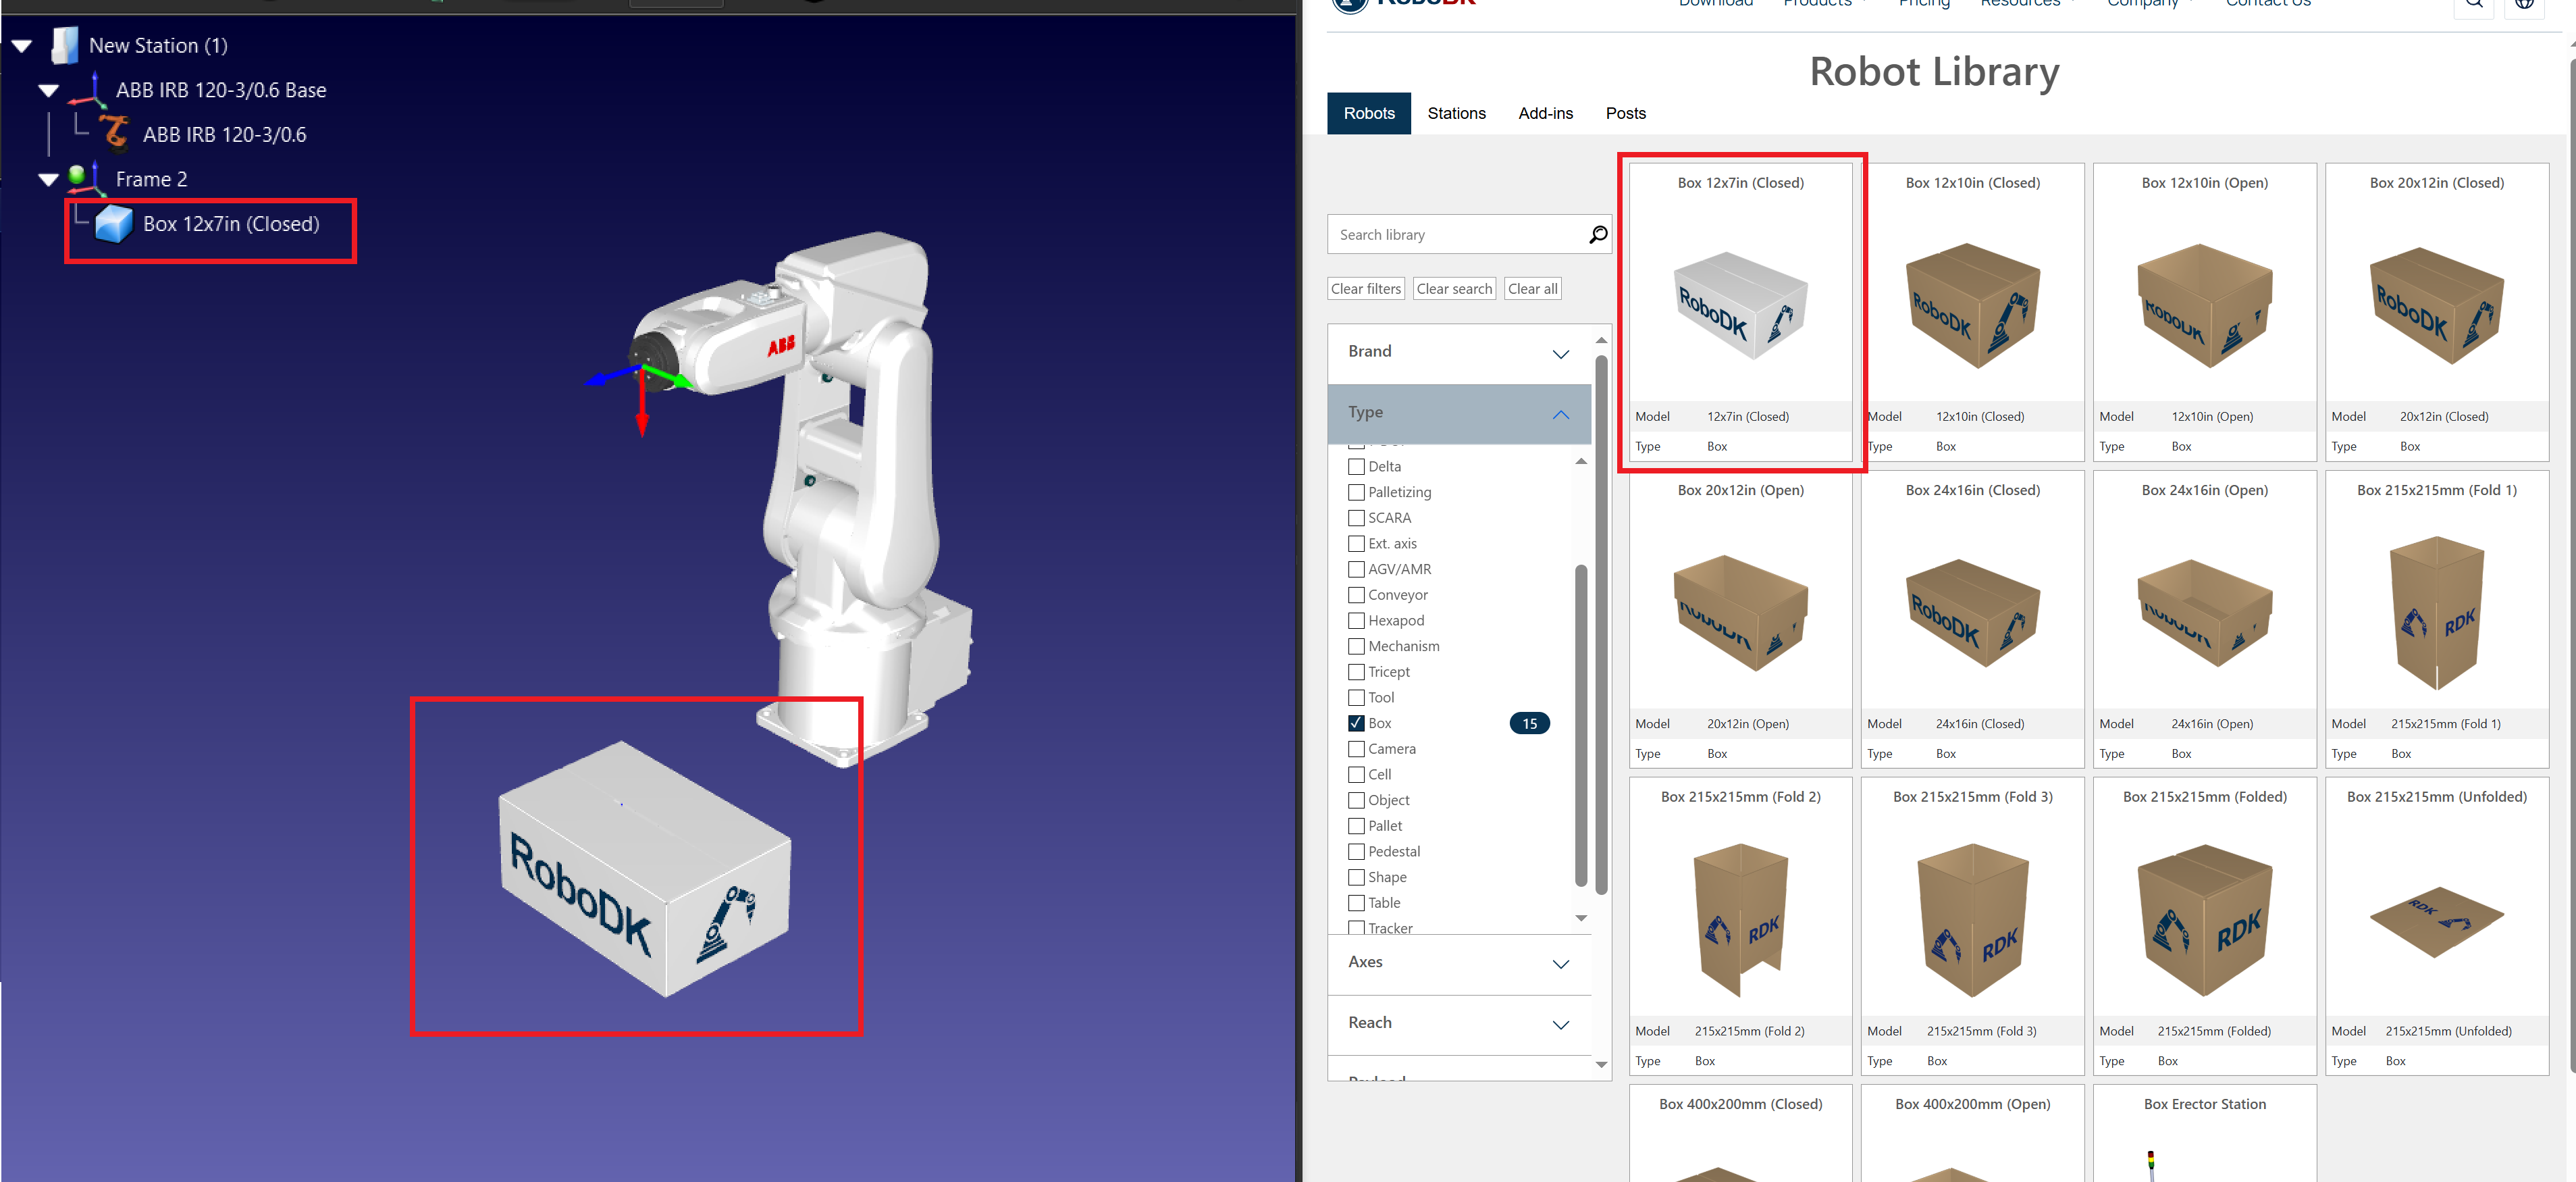
ii.The RoboDK Library window will open, displaying a variety of industrial robots.
b.Select and Import a Robot:
i.Use the search bar to find a robot suitable for pick-and-place tasks (e.g., UR10, ABB IRB 120, Fanuc LR Mate).
ii.Click on the desired robot and select Download.
c.Position the Robot in the Station:
i.The robot will automatically appear in the station.
ii.Use the Move Tool to adjust its placement if necessary.
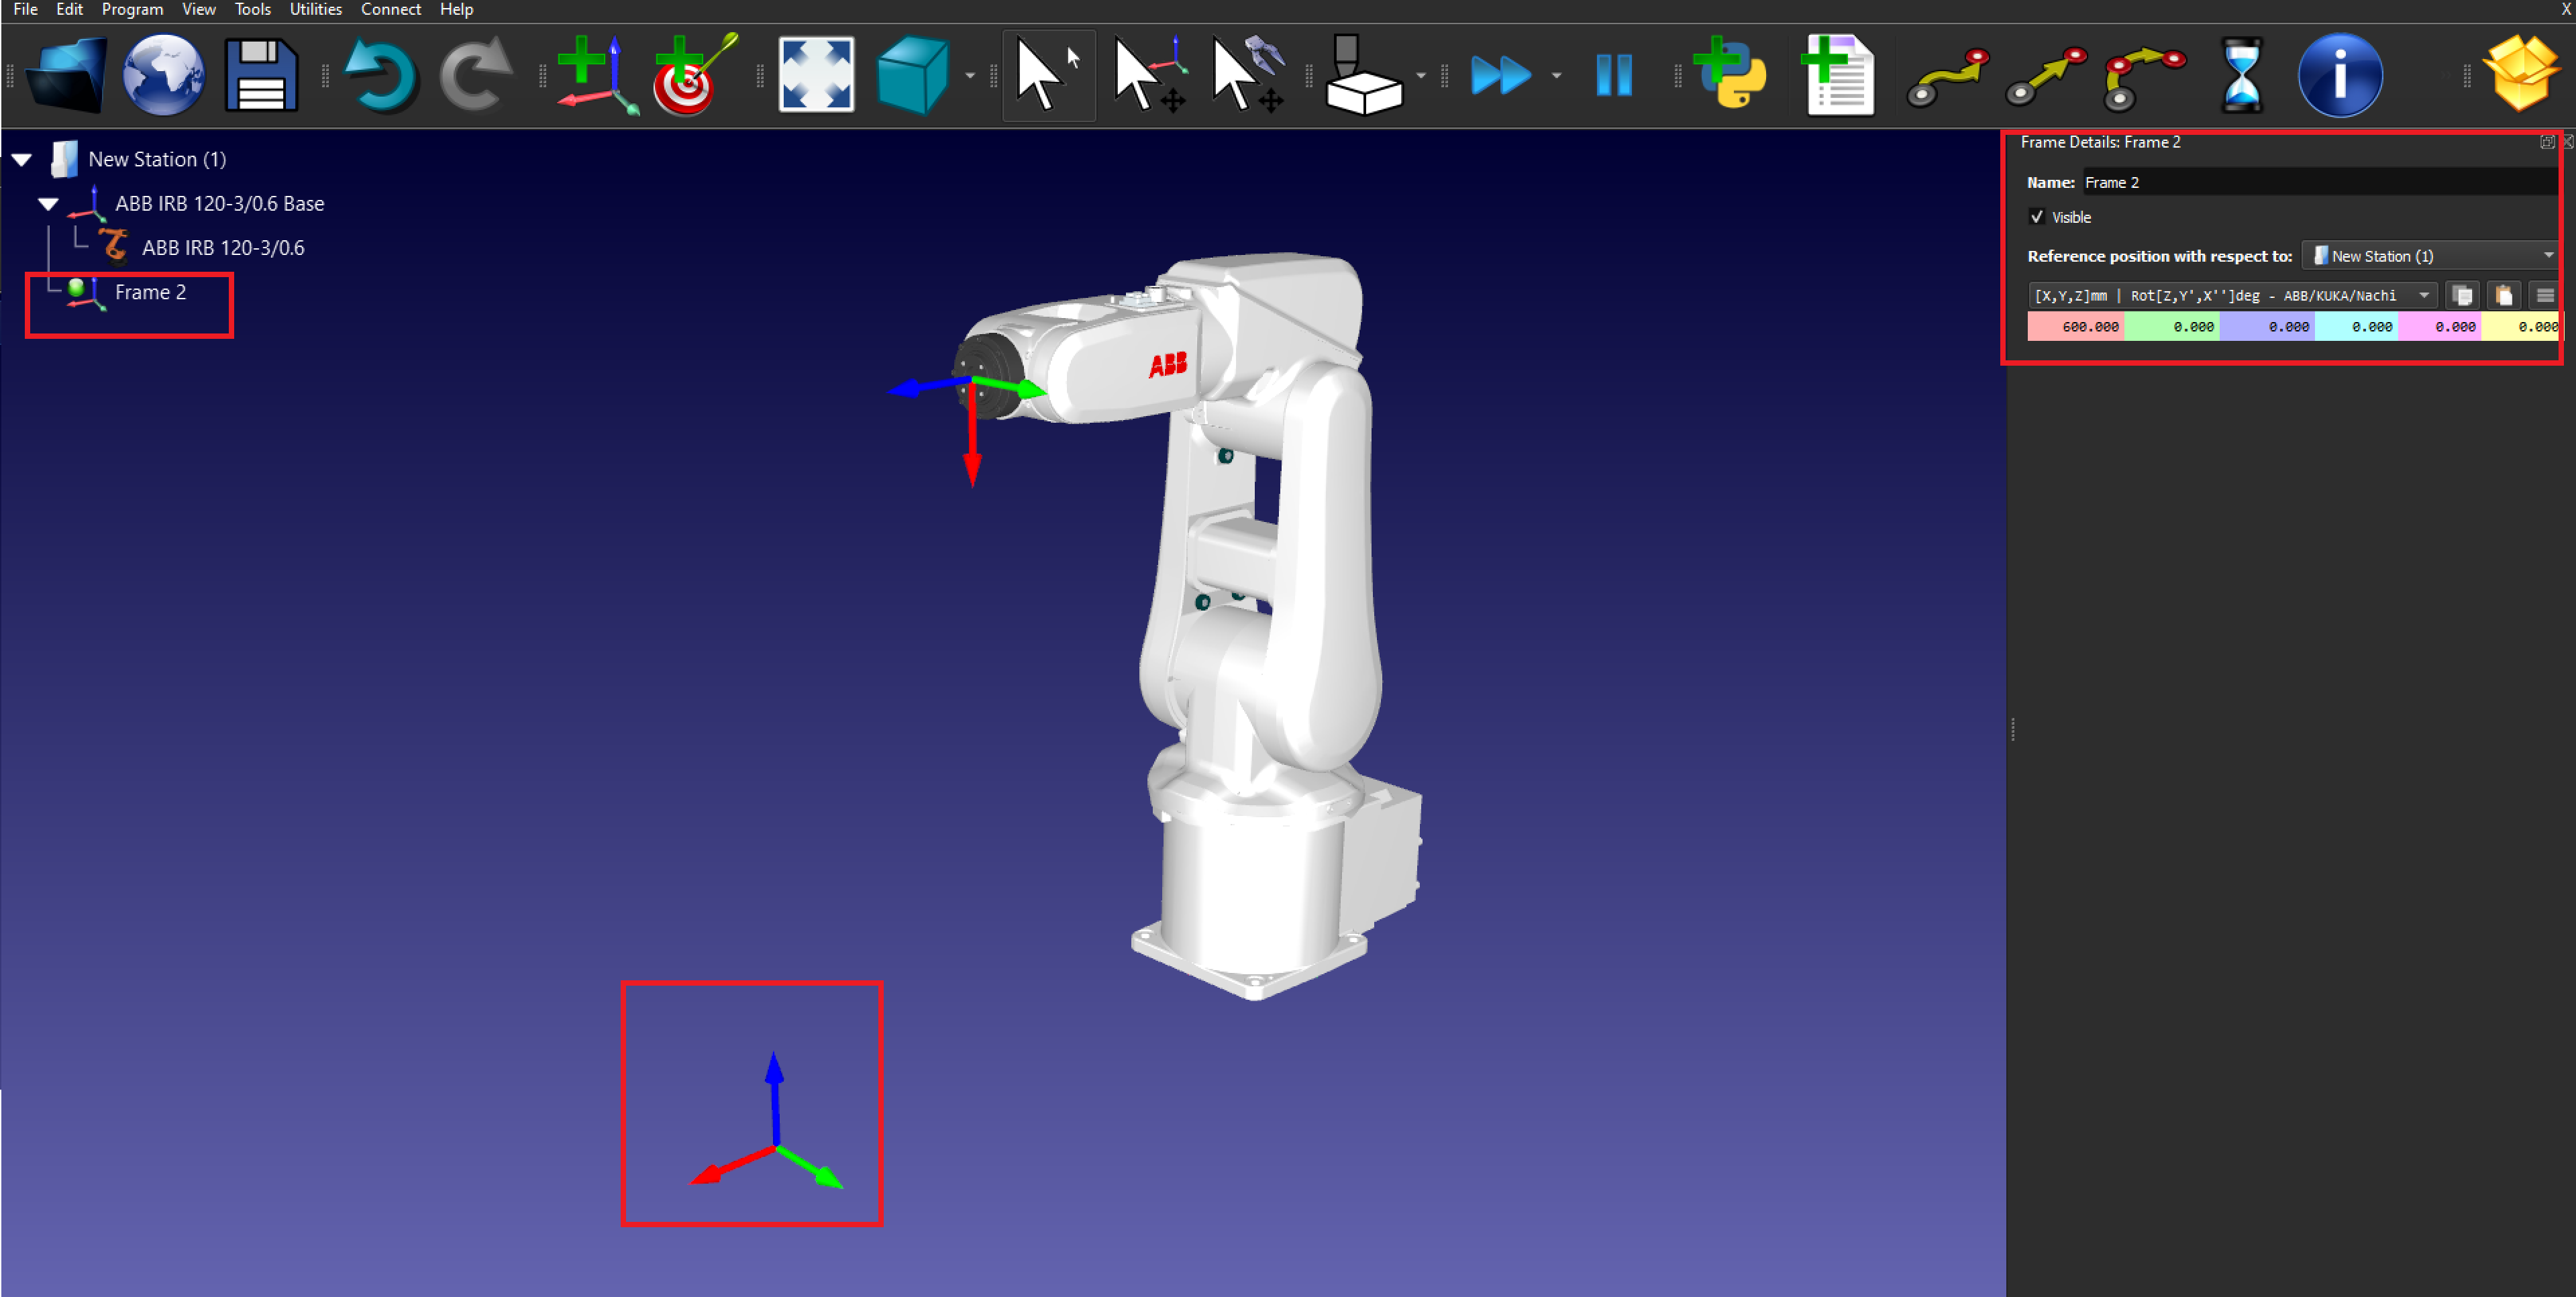
4.Add a Reference Frame
a.Create a Reference Frame:
i.Go to Program → Add Reference Frame.
ii.A new reference frame will appear in the station tree and the 3D view.
b.Position the Reference Frame:
i.Double-click the reference frame to enter coordinates (X, Y, Z) and rotation values.
ii.Click OK to save the position.
5.Import 3D Objects
a.Load Object Models:
iii.In the main menu, select File → Open.
iv.Browse and select the 3D models of objects to be picked and placed (e.g., STEP, IGES files).
b.Position the Objects:
v.Use the Move Tool to adjust object placement in the reference frame.
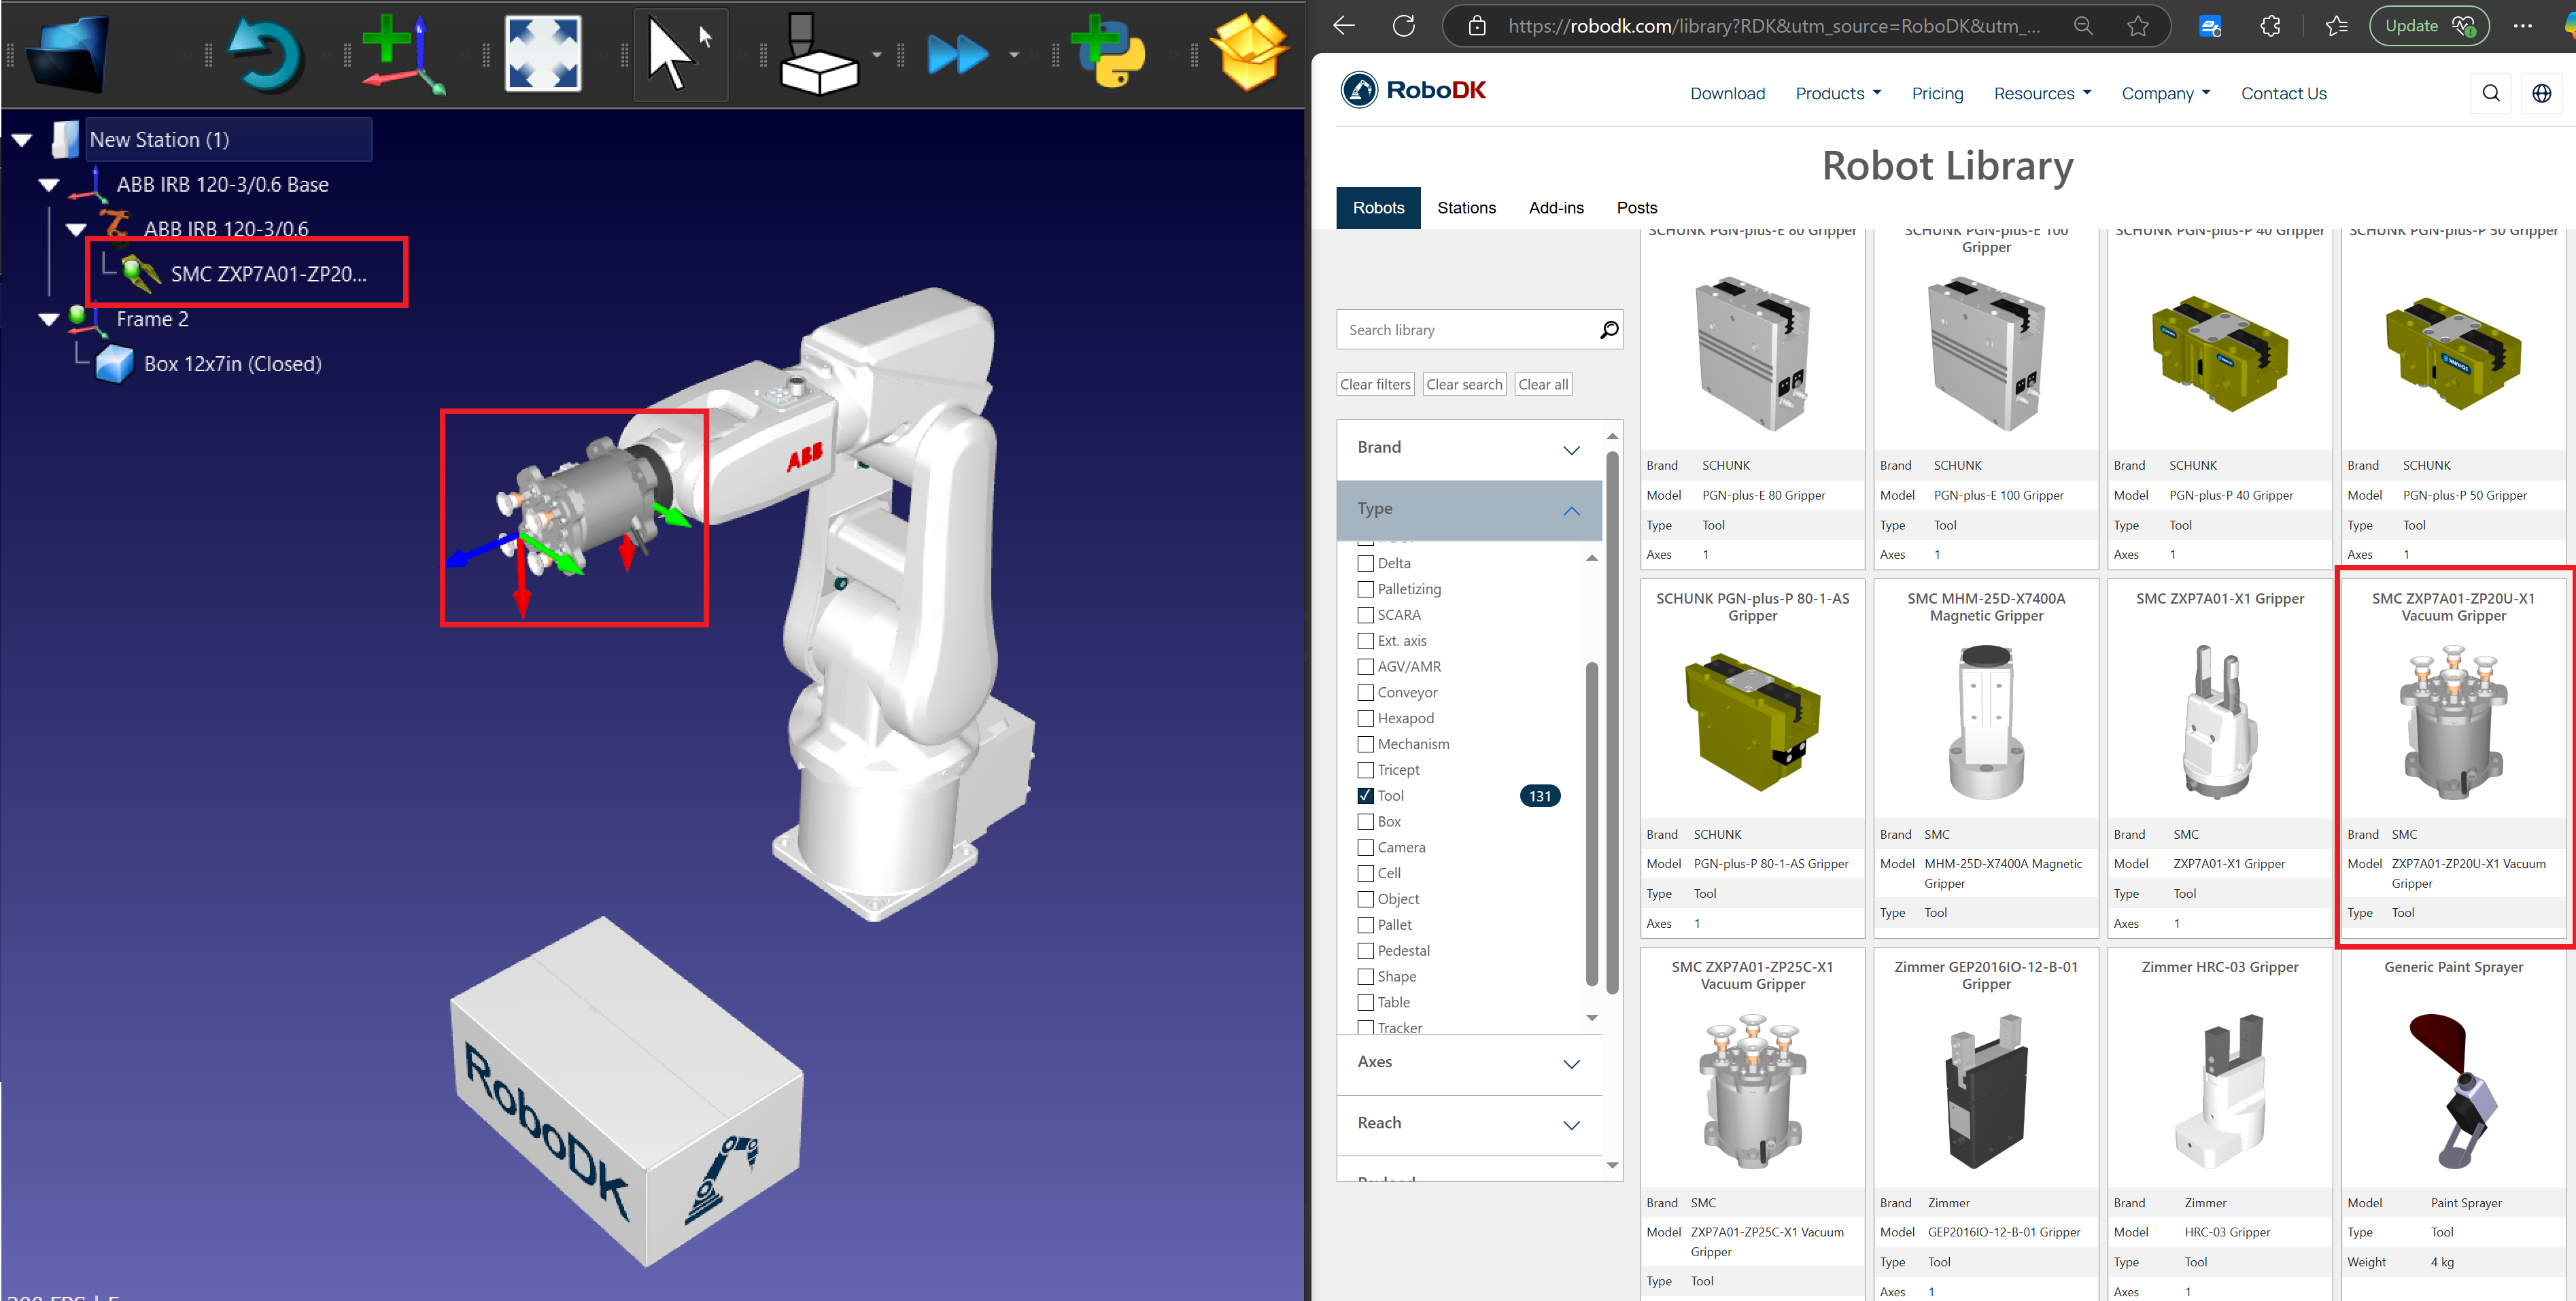
6.Add a Tool (Gripper)
a.Select a Gripper:
i.In the main menu, go to Utilities → Add Tool (TCP).
ii.Choose a gripper from the Robot Library or import a custom gripper file.
b.Attach the Tool to the Robot:
i.Right-click the gripper in the station tree and select Attach to Robot.
ii.Choose the appropriate robot flange.
c.Define the TCP (Tool Center Point): Double-click the tool and enter the TCP coordinates relative to the robot flange.