Palletizing
You can accomplish automated palletizing using the palletizing plugin. The palletizing plugin will help you create a palletizing program quickly using a visual and intuitive interface.
This example will guide you through the steps required to go from a basic palletizing station to a simulation, and finally to a real robot program you can load and execute in a robot controller.
You should load the palletizing plugin in RoboDK to enable the palletizing features.
Follow these steps to enable the palletizing plugin:
1.Select Tools➔Plug-Ins.
2.Double click on the PluginPalletizing if it is not enabled.
You should see the Palletizing entry in the menu and a new Palletizing icon in the toolbar.
To create a palletizing project, you first need to properly setup your station in RoboDK.
Follow these steps: to properly setup your station:
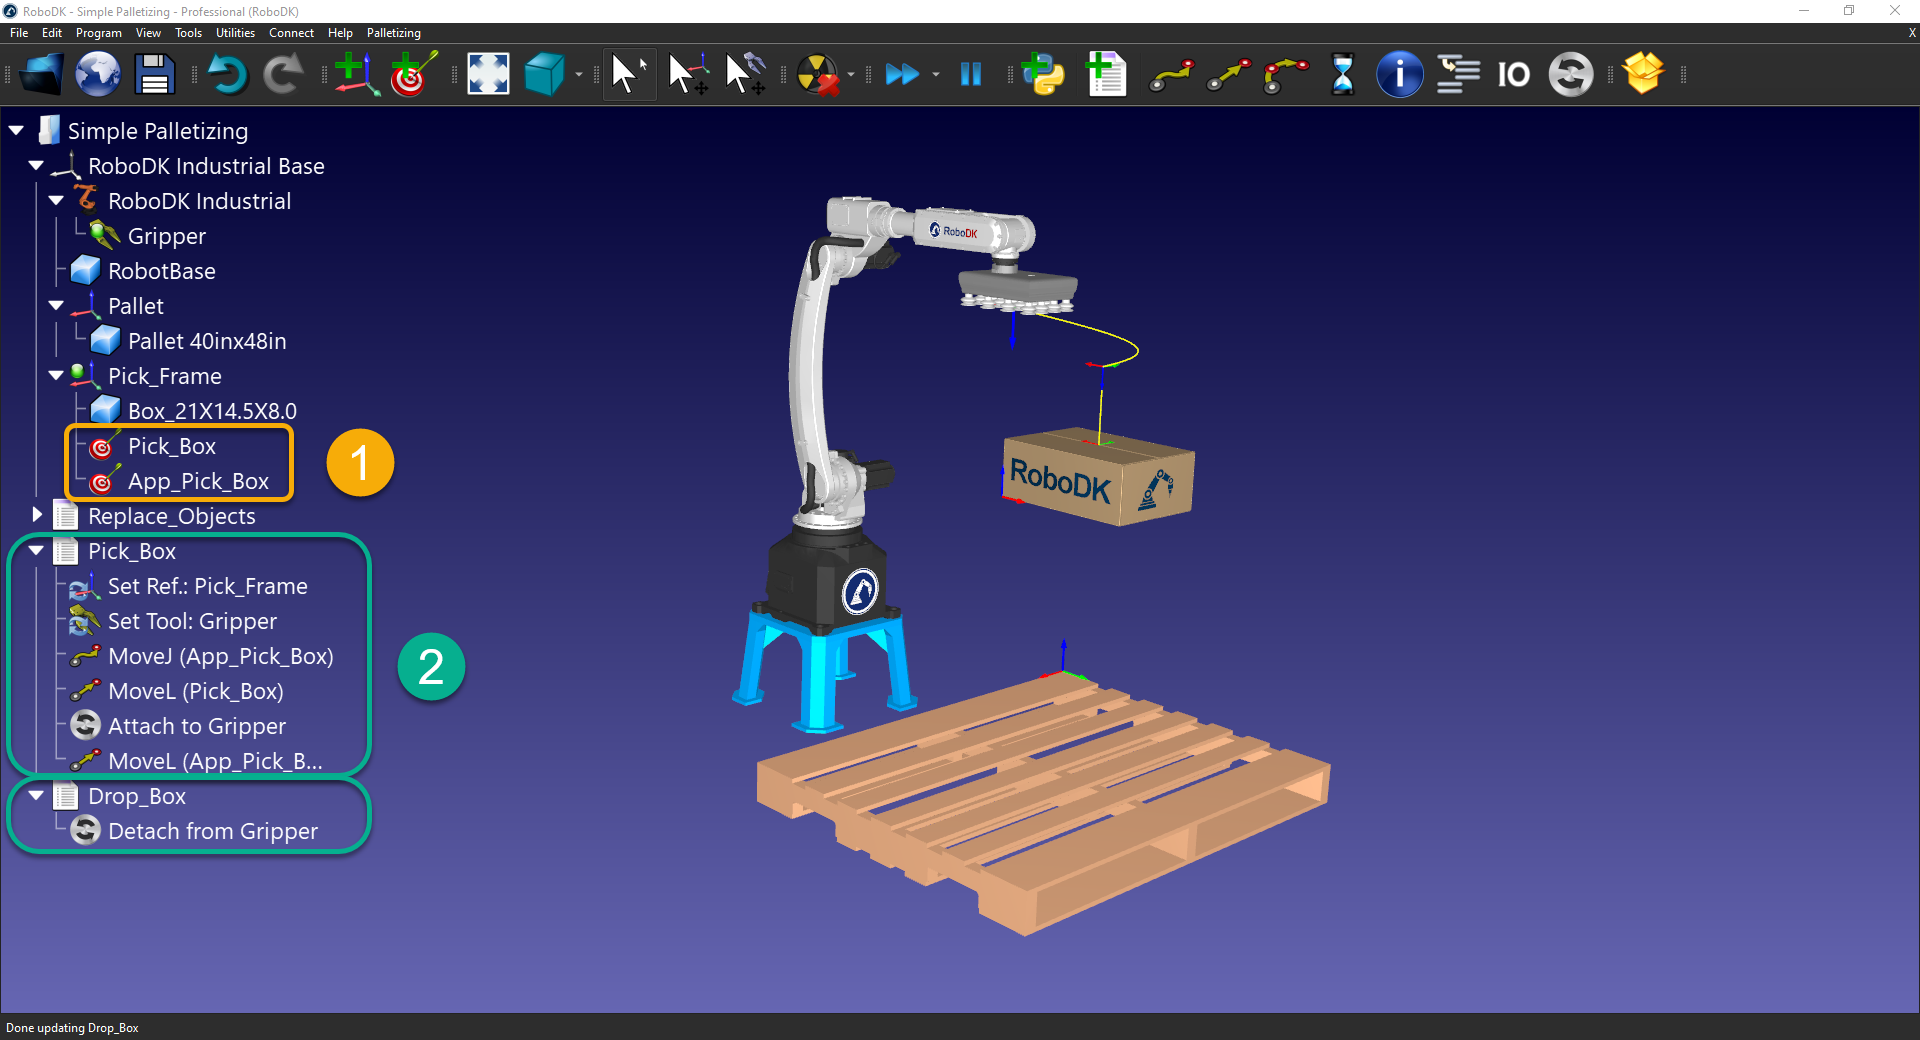
1. You should load a robot, a tool (TCP), a refence frame to pick the box (Pick_Frame), and a reference frame to build your pallet on (Pallet).
2.We also recommend you import the box you wish to stack and the pallet you want to stack on. Alternatively, you can find standard sized boxes in the RoboDK library.
3.The pallet must be aligned with the X+ and Y+ axes of the stacking frame (Pallet).

The palletizing wizard requires you to provide a subprogram to pick a new box and a program to drop the box. We recommend you create those first.
Follow these steps to create a pick program (Pick_Box) and a drop program (Drop_Box):
1. Create a Pick target where you will pick the new incoming box. We also recommend you add an approach point.
2. Create a Pick_Box and Drop_Box program.