Setup your palletizing project
When you open the main interface of the palletizing menu, you can choose between palletize, depalletize, or process setup (which includes both).
Follow these steps to set up your palletizing project:
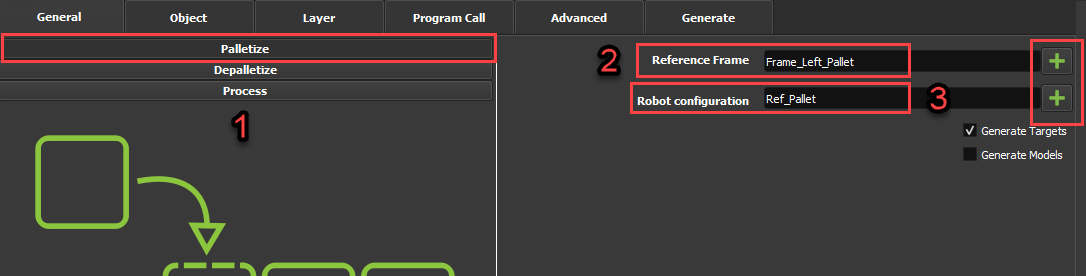
1.Select the "Palletize” option, click on the “+” button of “Reference Frame” and select your pallet reference frame. Then, click on the “+” button of “Robot Configuration” and choose the “Ref_Pallet” target we created earlier.
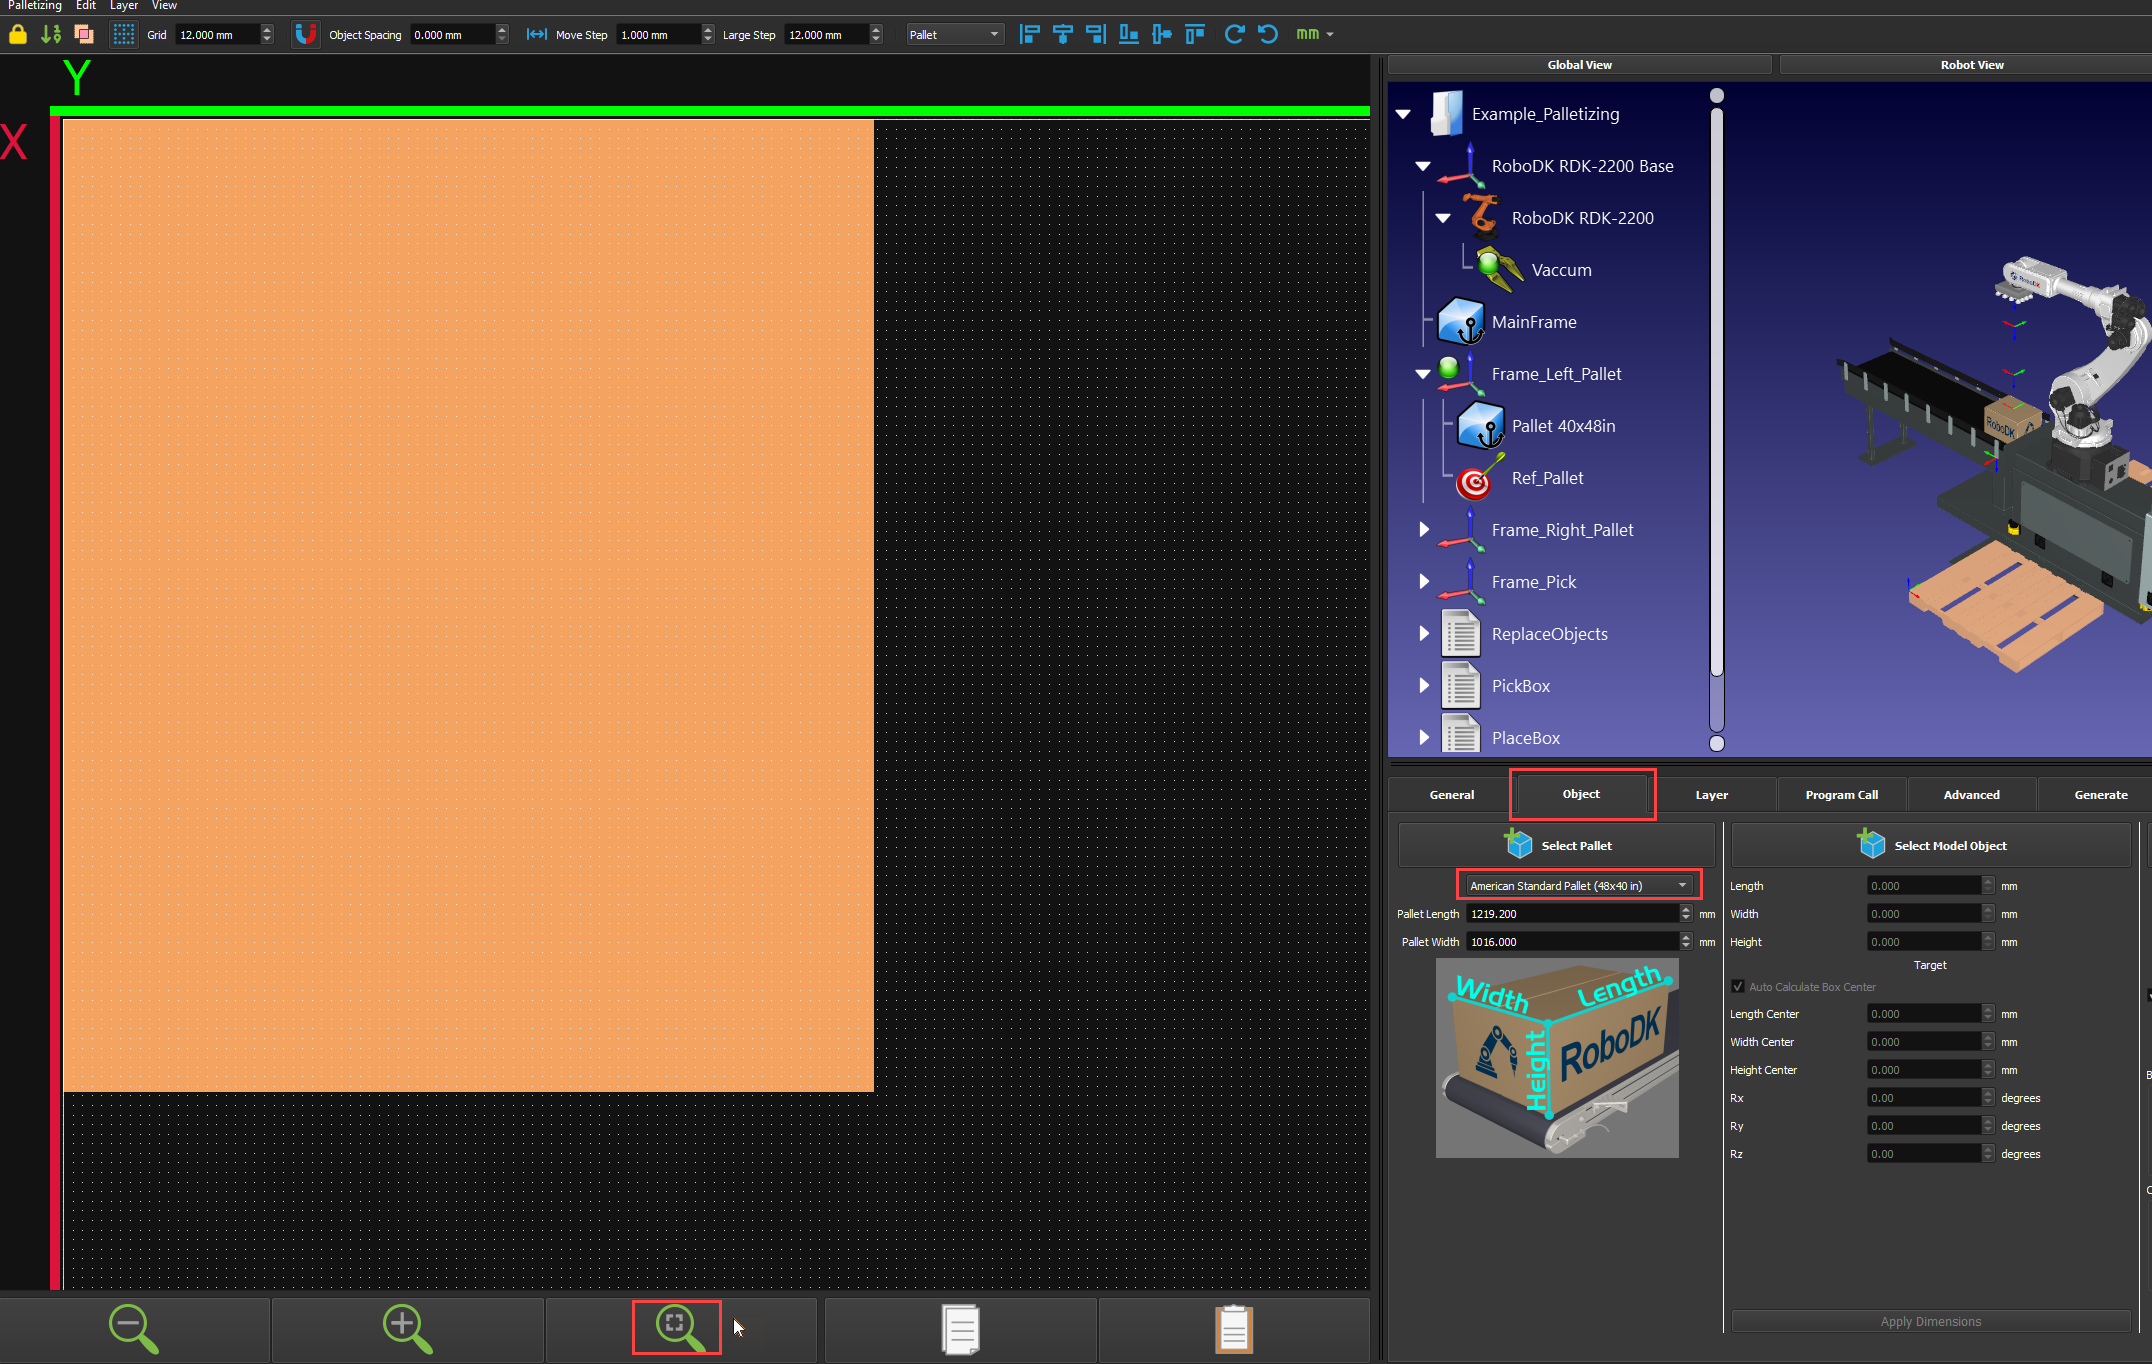
2.Select the Object tab to set up your pallet and box dimensions.
3.Select one of the presets for your pallet dimensions or enter its dimensions manually. Then click on the “Zoom to fit” icon so the 2D pallet can be properly shown in its entirety.
4.Select one of the presets for your box or enter its dimensions manually and click on “Create object”.
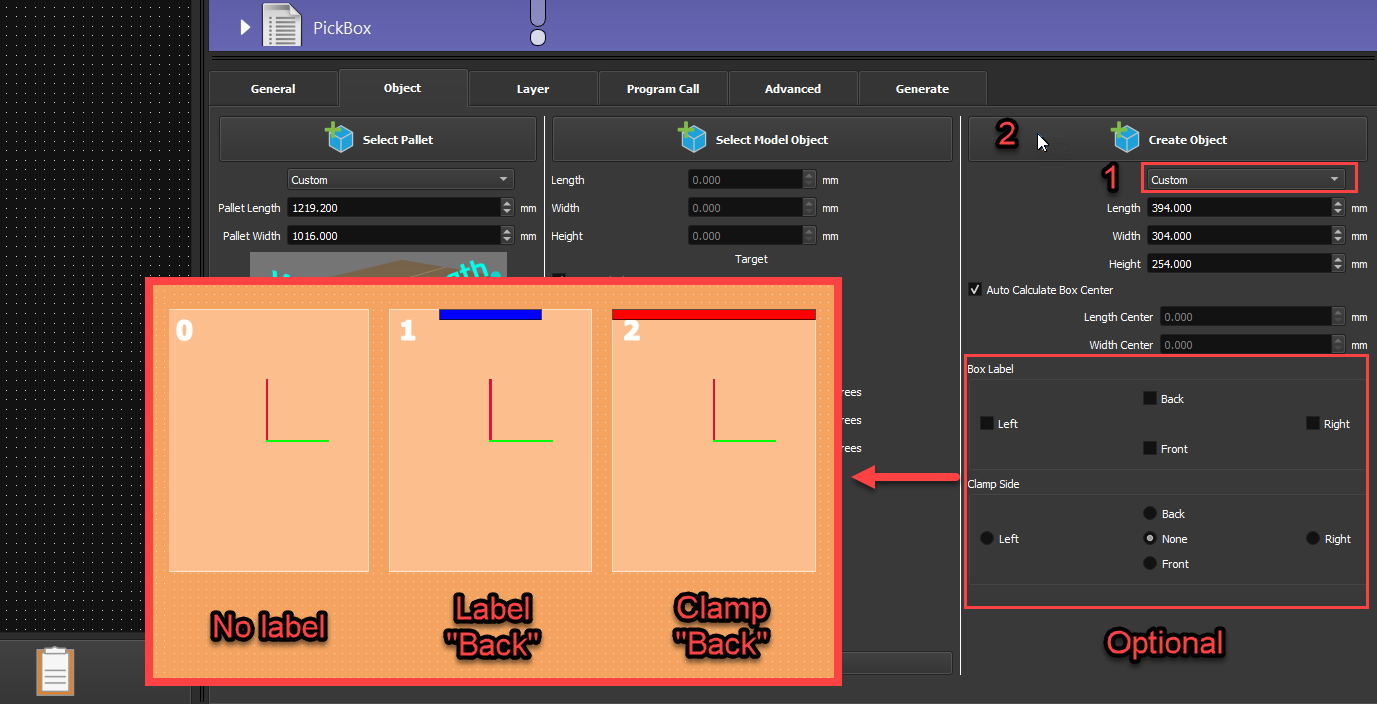
5.Once you’ve clicked on Create object, 4 boxes will appear on the left side of your screen. One box per possible 90-degree rotation. A red and a green line will show the rotation of the TCP around the Z axis.
