RoboDK Plugin for BobCAD-CAM
BobCAD-CAM Introduction
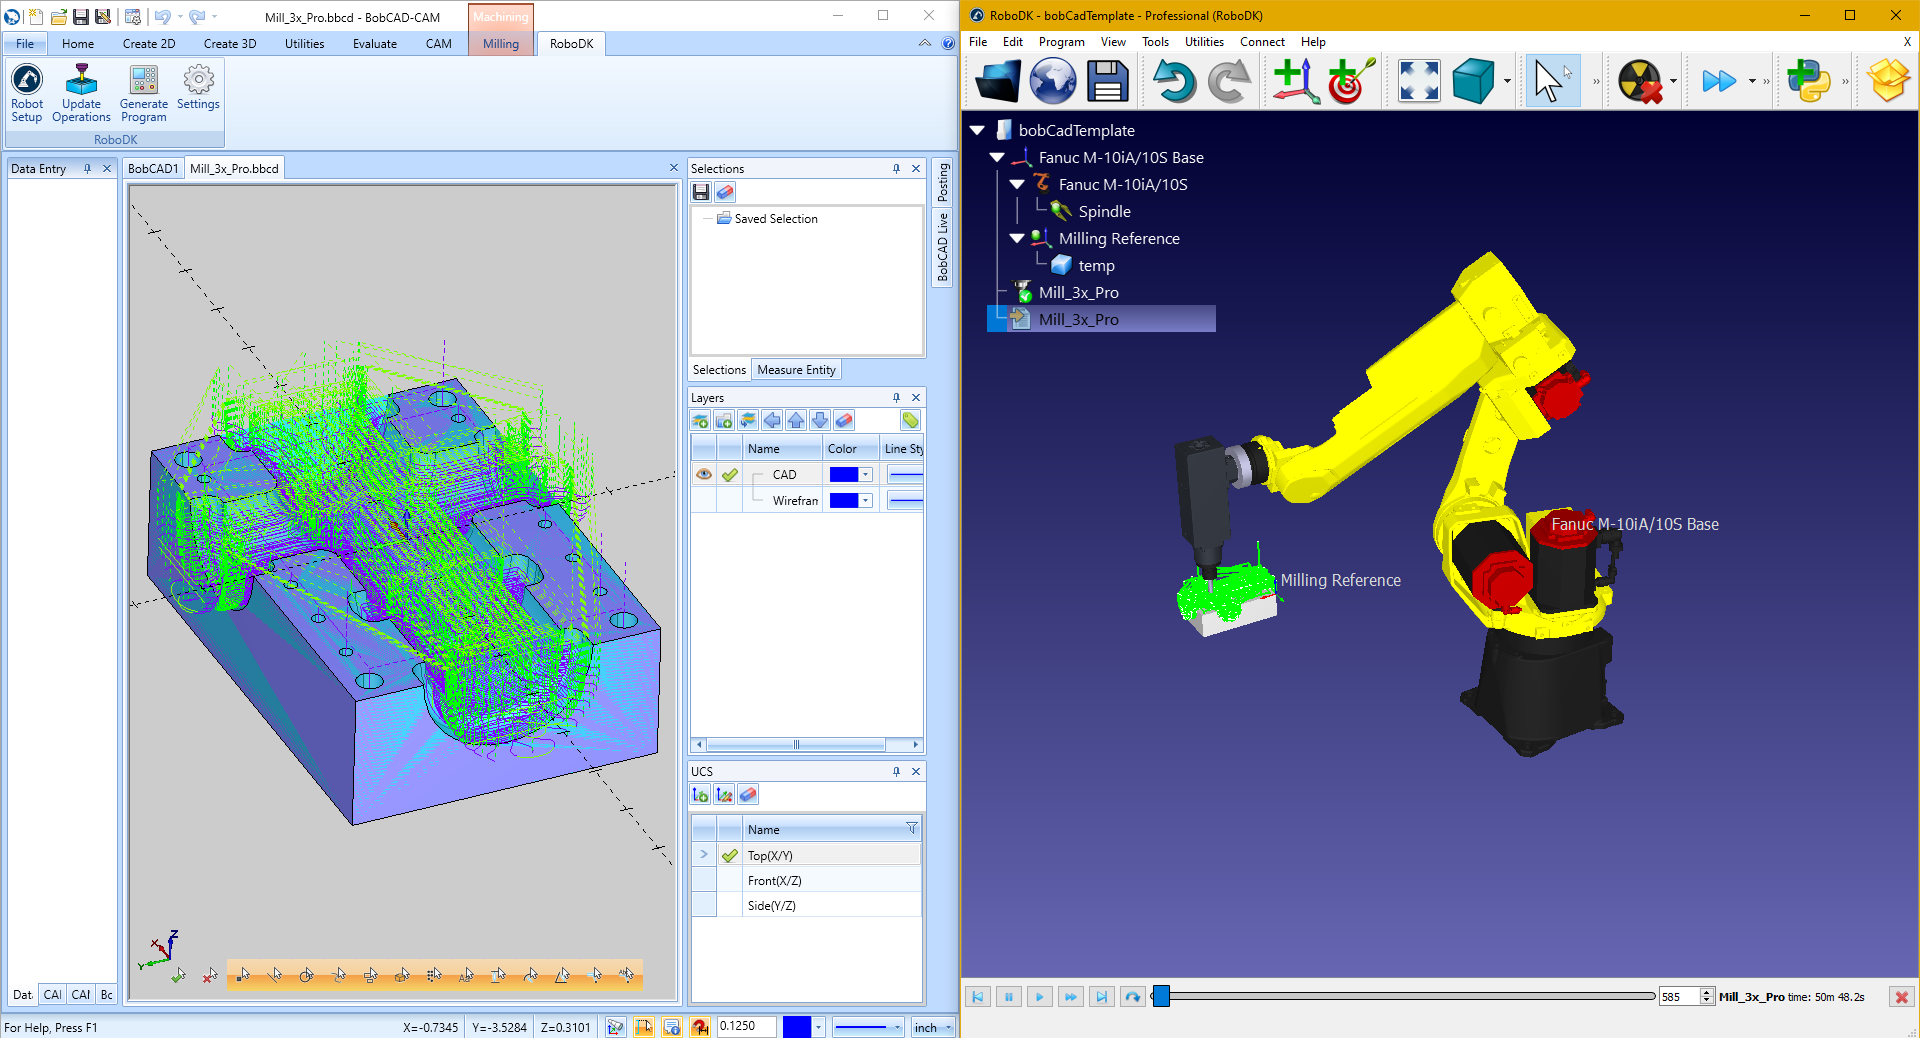
The RoboDK add-in for BobCAD-CAM allows you to quickly set up robot machining projects directly from BobCAD-CAM software. With the RoboDK integration for BobCAD-CAM software you can easily combine BobCAD-CAM machining software with RoboDK to simulate and program industrial robot arms for robot machining.
With this BobCAD add-in you can easily generate error-free programs for robot machining directly from BobCAD-CAM software. Alternatively, RoboDK also supports APT CLS and G-code machining files.
More information about RoboDK for robot machining is available in the Robot Machining Section. Learn more about BobCAD-CAM software by visiting the BobCAD website.
This document describes how to set up the RoboDK plugin for BobCAD-CAM software.
BobCAD-CAM Install
Follow these steps to install the RoboDK AddIn for BobCAD-CAM. Make sure to use BobCAD-CAM v3.4 or later.
1.Open the folder BobCAD-CAM plugin folder in RoboDK:
C:/RoboDK/Other/Plugin-BobCADCAM
Alternatively, you can download the RoboDK plugin for BobCAD-CAM:
https://robodk.com/files/upload/BobCAD-CAM-RoboDK-plugin.zip
And mark the plugin as safe:
right click on the ZIP folder, select Properties and check the option Unblock.
2.Run the Install.bat file .
If running the Install.BAT file fails, you can extract the contents of the ZIP folder to the folder:
C:\BobCAD-CAM Data\BobCAD-CAM V34
Or your equivalent installation directory. Merge the contents if needed.
3.Restart BobCAD-CAM software.
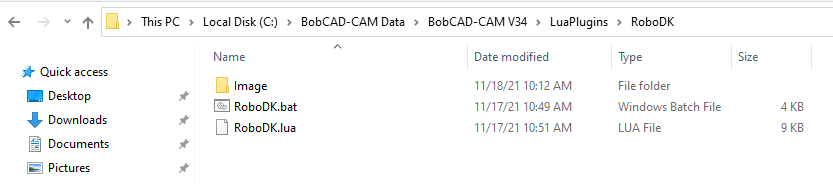
The plugin install folder should look as shown in the following image.
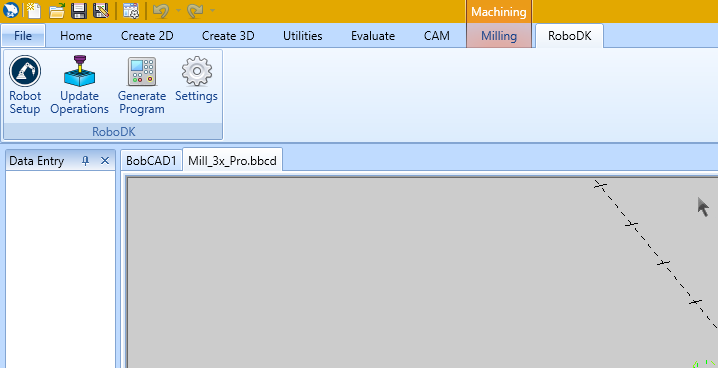
Toolbar
When you open BobCAD-CAM software you should see a RoboDK toolbar. Select this RoboDK tab to see the available options to setup your robot machining project in RoboDK.
Robot setup
The Robot setup 
You can easily change the robot, modify the tool and/or the reference frame. As an example, follow these steps to change the robot:
1.Right click the robot
2.Select Replace robot (as shown in the image)
3.Select the new robot
The RoboDK installer only provides a few robots by default, however, it is possible to download more robots from the online library.
More information about adding a robot tool is available in the Getting Started Section.
Hold Alt+Shift to move a robot tool (TCP). This is useful to set the pose of the robot before teaching a target.
Save the project to keep the changes by selecting File➔Save Station (Ctrl+S).
Update selected operations
Select the Update Operations button to send the machining toolpath from BobCAD-CAM software to RoboDK. This will override any existing robot machining projects that have the same name.
A green check mark will be displayed if the program is feasible with the selected robot. If there are any issues (such as singularities, axis limits or reach issues), a red mark will be displayed with a message of the issue.
Double click the robot machining project 
Right click a program and select Run to simulate it (or double click the program). You can also select Generate robot program (F6) to obtain the robot program that needs to be loaded on the robot controller. More information about how to generate robot programs is available in the Offline Programming section.
If required, right click a program and select Select Post Processor to change the post processor. This step may help you customize the appearance of your generated code. More information about selecting and customizing post processors is available in the post processors section.
Generate program
You can generate robot programs directly from BobCAD-CAM software once your RoboDK station is ready. To do so, select Generate Program. This option will update the robot programs according to the machining toolpath defined in your BobCAD-CAM project.
Follow these steps in RoboDK to view or modify the location of your robot programs:
1.Select Tools-Options
2.Select the Program tab
3.Select Set in the Robot programs folder
Plugin Settings
Select the Settings button to open the settings related to the RoboDK plugin for BobCAD-CAM.
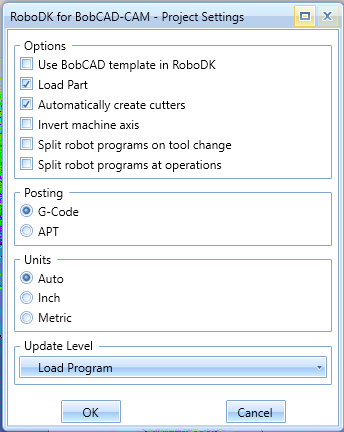
Among other things, you can modify the following options:
1.Use the BobCAD-CAM template instead of the RoboDK template (the 3D navigation and color templates in RoboDK will match BobCAD-CAM style).
2.Load and update the part in RoboDK every time you post a new machining operation. Only visible solids and surfaces will be loaded.
3.Checking the option Invert machine tool axis allows you to automatically account for your tool Z axis pointing towards the inner side of the tool (instead of pointing toward the outside).
4.Use G-Code files instead of APT files. RoboDK can read the following files to generate robot simulations and programs:
a.APT files (default option): Loads BobCAD-CAM native APT files in RoboDK. This is the preferred method for most operations.
b.G-code files: Generates G-code machining files. Note that this format depends on the post processor you select, and it is mostly designed to work with 3-axis machining toolpaths.