Example
This example shows how to load a 3D model and a selected curve (edge) from FreeCAD to RoboDK.
1.Load the model in FreeCAD by selecting the Load Model button.
2.Set up your station in RoboDK with a robot and other required objects in its surrounding environment.
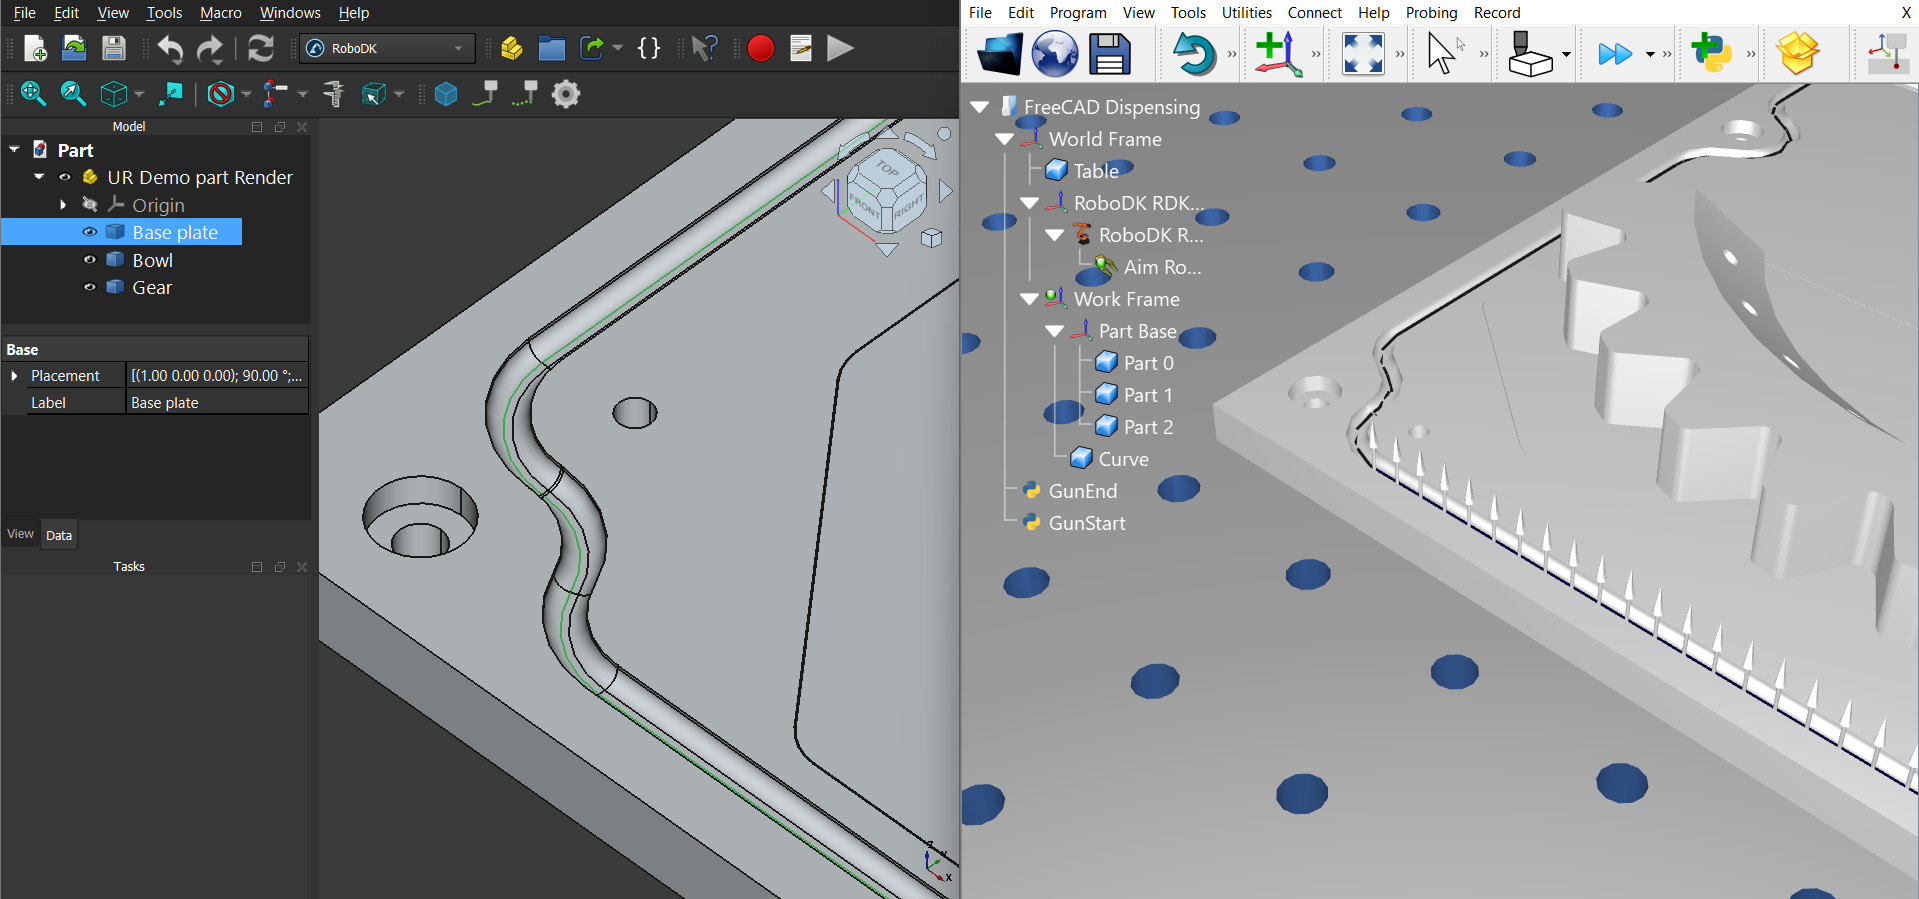
3.Select parts or bodies of your model that you would like to load in RoboDK from the FreeCAD model tree.
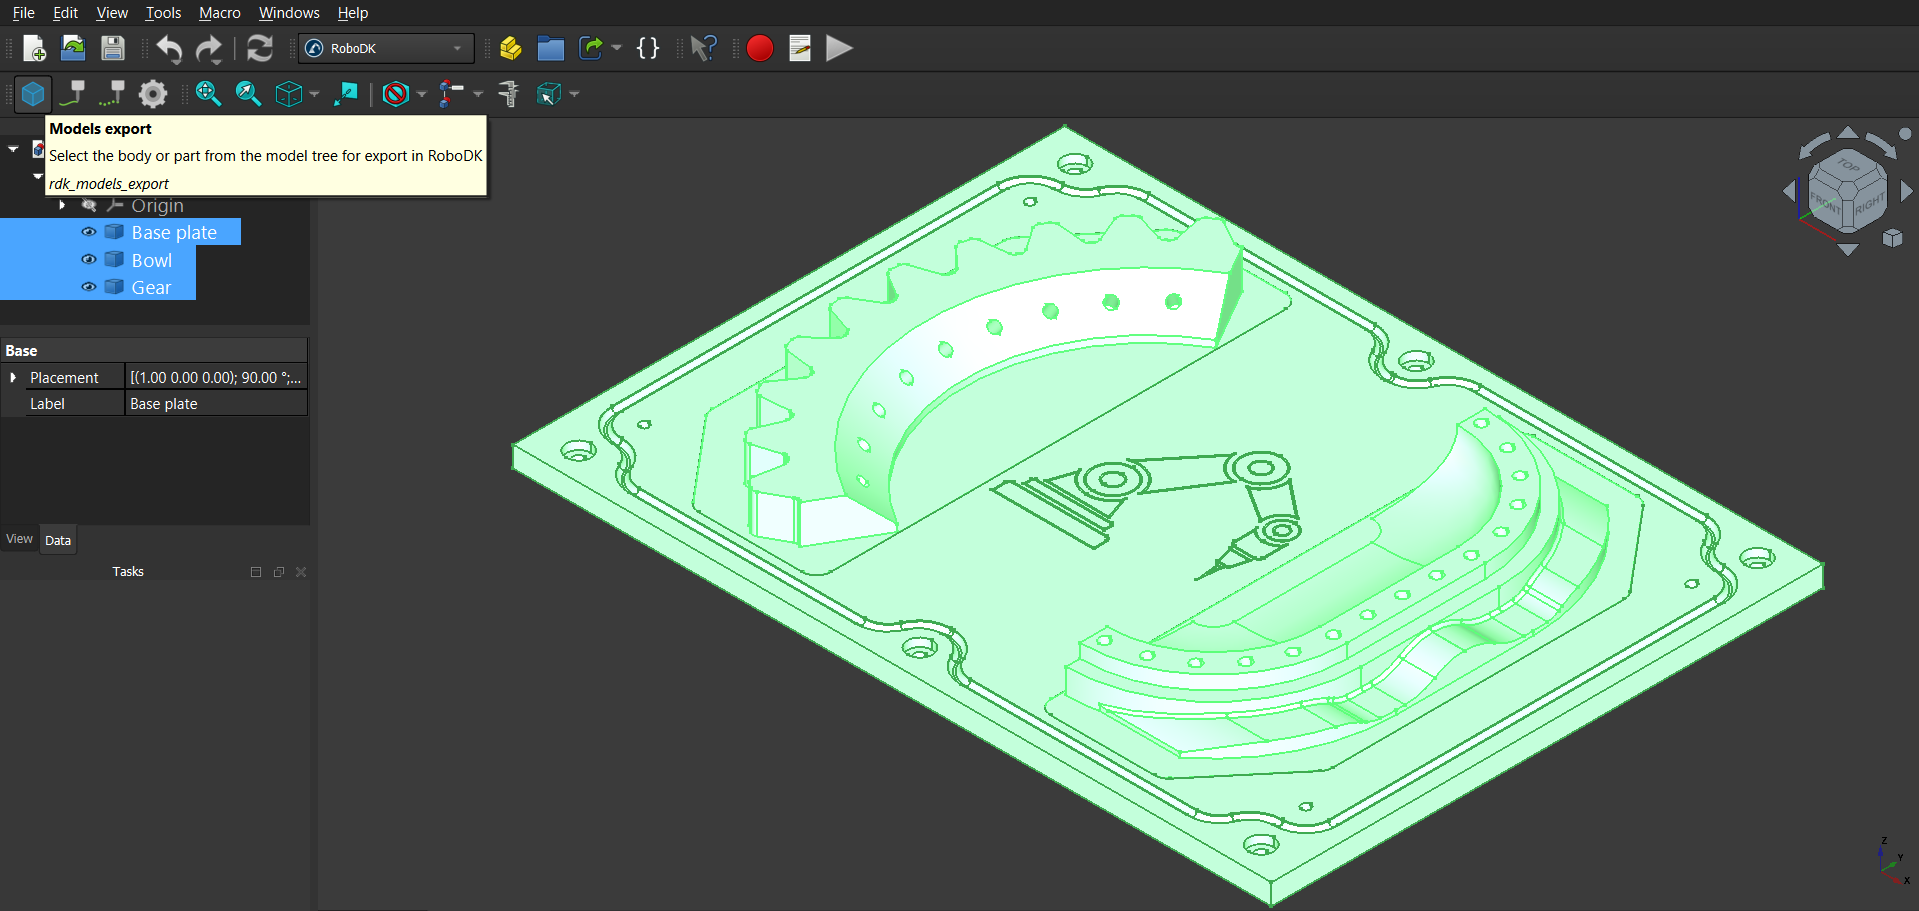
4.In the RoboDK Add-in tab from FreeCAD, select Load Model to load the selected model parts in RoboDK.
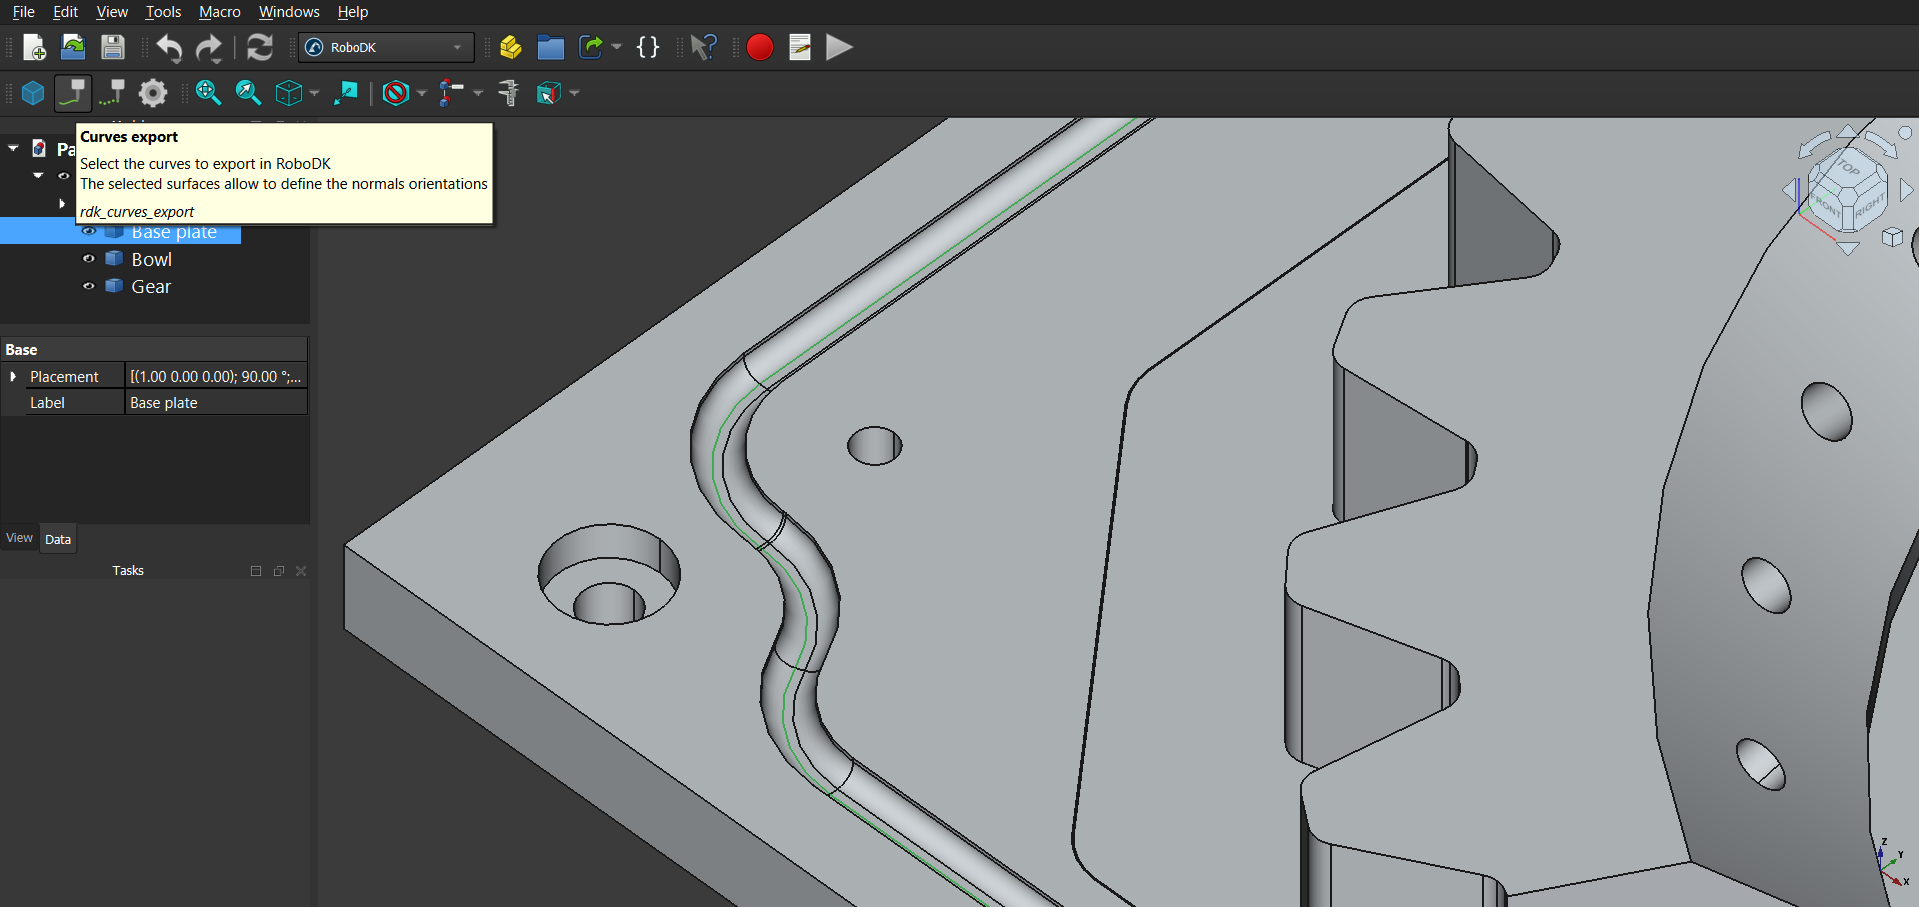
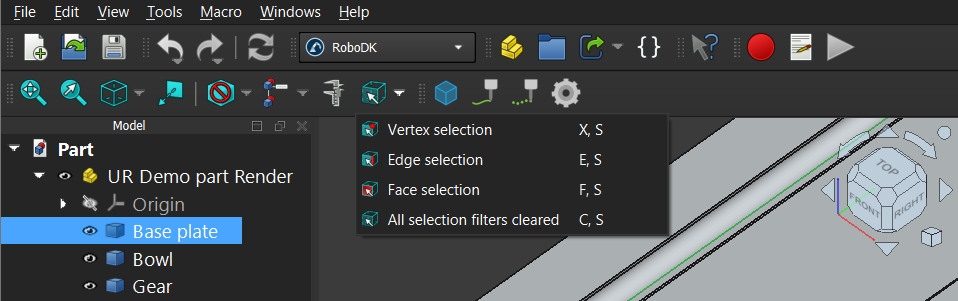
5.Select the edges (curves) that you want to see in RoboDK and click on Load Curves from the RoboDK Add-in tab in FreeCAD.
6.If you want to specify the orientation of the curve normal, select the corresponding faces to define their angle while selecting the curves.
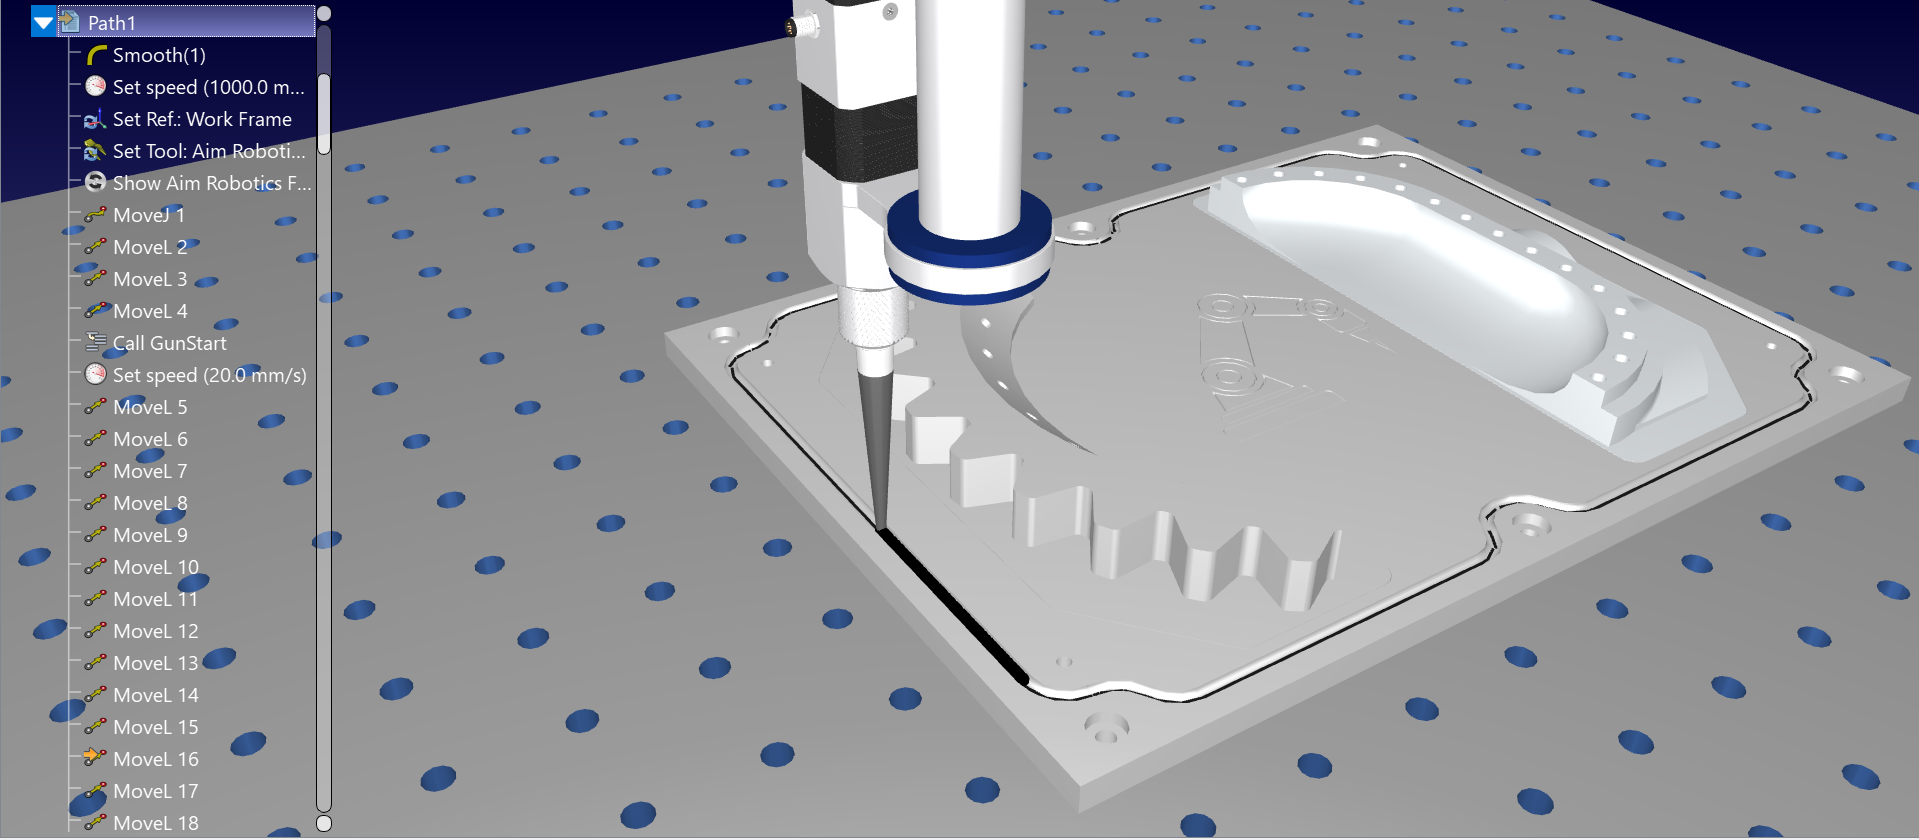
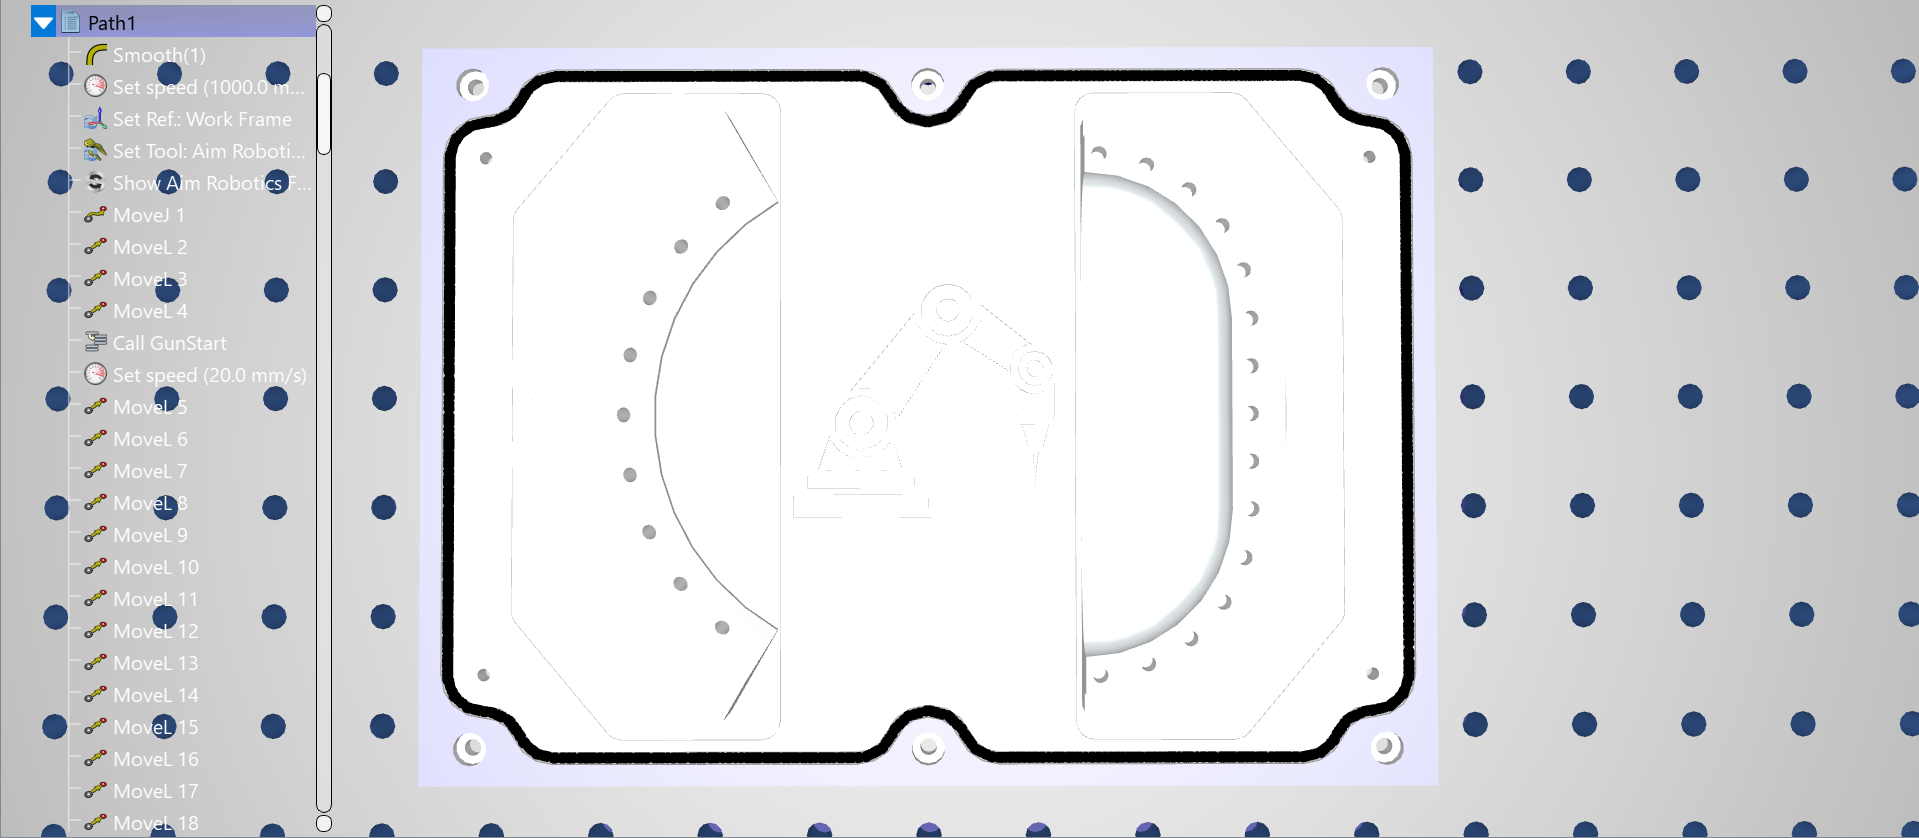
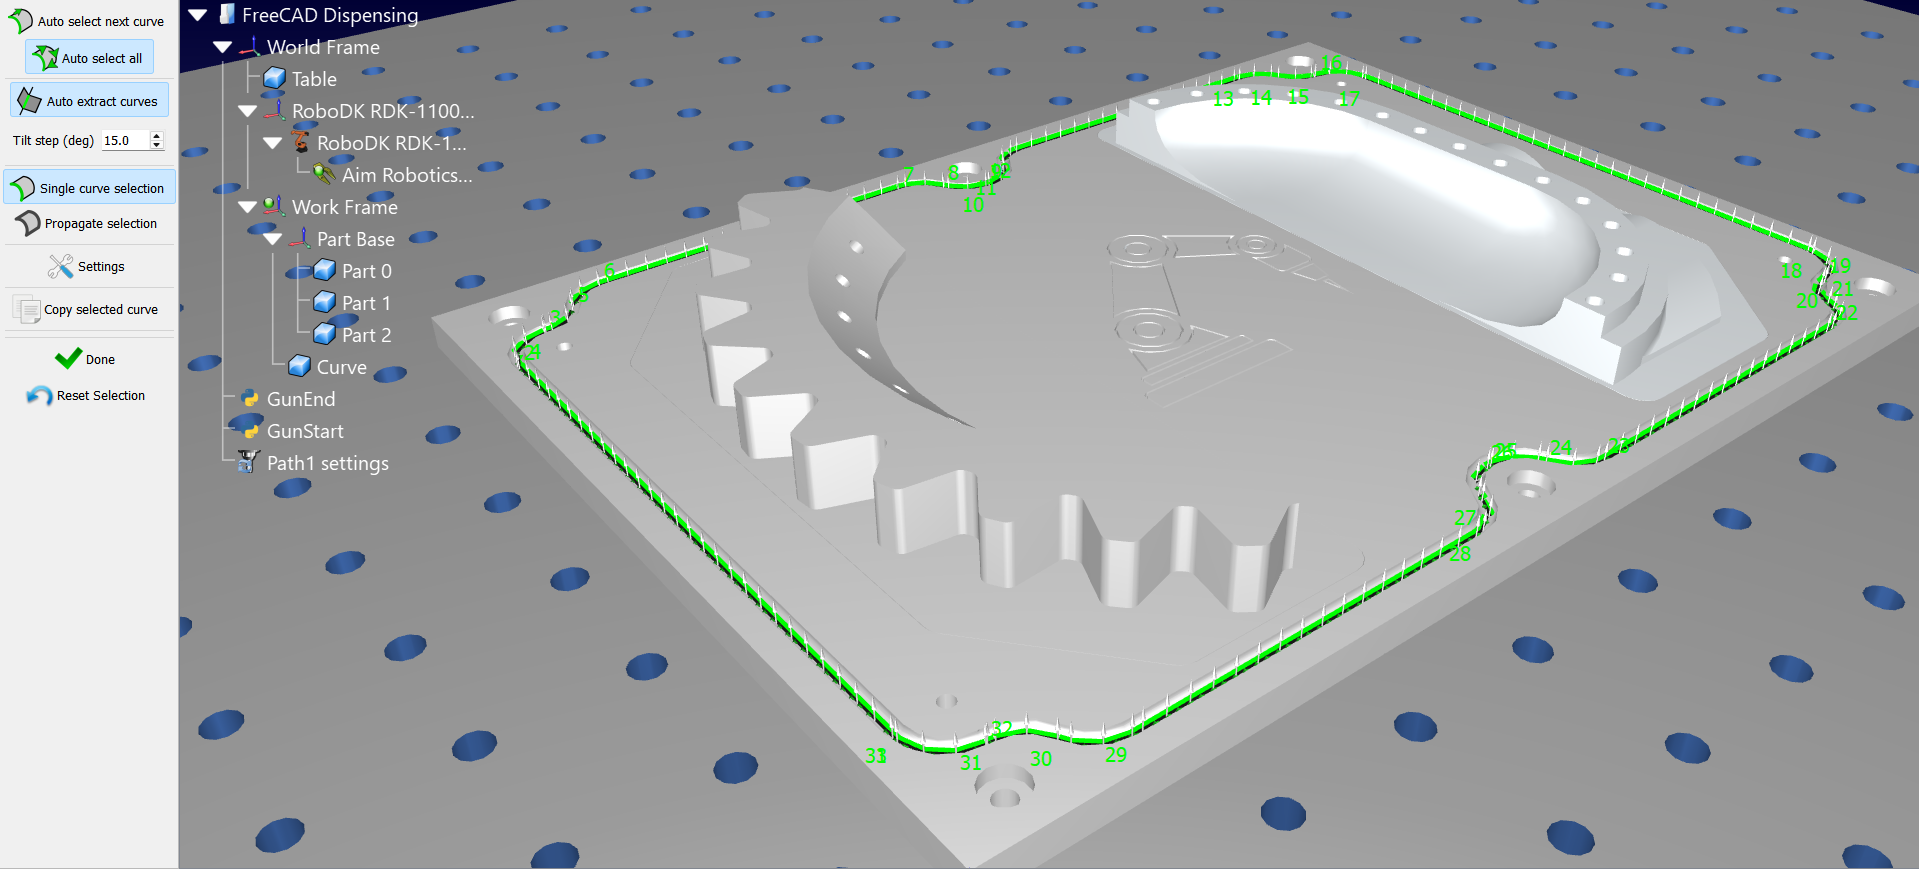
7.Check the export result in RoboDK.
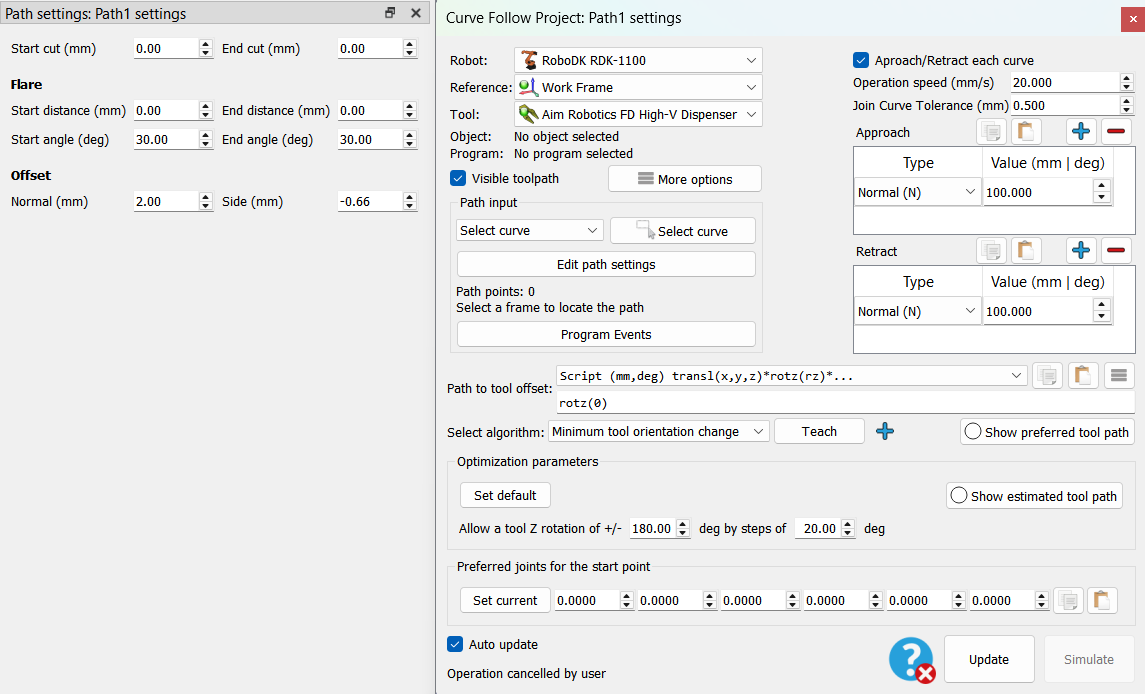
8.Create a Curve Follow Project (under Utilities) with necessary changes to parameters such as offsets and operation speed.
9.After the program for path is created for this project, right-click on it to enable Show Instructions. You can now edit the program to add GunStart and GunEnd python scripts (using Program Call Instruction) to simulate dispensing. Change the necessary parameters like color and radius of the material being dispensed by editing the GunStart script.