The default RoboDK toolbar for Autodesk Fusion 360 includes a dedicated toolbar for RoboDK with 7 commands for CAD and CAM purposes.
Tip: You can select Pin to Toolbar (from the right menu) to see a specific command on top of the toolbar.
● Auto Setup – This button allows you to load any selected geometry (curves or points). You can also select surfaces to extract curve normal. The geometry will be loaded in RoboDK together with the 3D model.
Tip: You can select multiple geometries (entities) by holding the Ctrl key. You should select the geometry before triggering the commands.
●Load Part – Loads the 3D model from Fusion 360 to RoboDK. Features such as curves or points won’t be loaded.
●Load Point(s) – Load all the points selected in RoboDK as a new object. All selected surfaces will be used to calculate point normals. These normals are important as they define the robot’s approach axis.
●Load Curve(s) – Load all the curves selected in RoboDK as a new item. All selected surfaces will be used to calculate curve normals. These normals are important as they will define the robot’s approach axis.
●Load CAM Project – Load the machining project in RoboDK. If multiple tools are used for machining RoboDK will automatically split the program to have one project settings for each tool. This behavior can be changed in Tools-Options-CAM.
●Generate Robot Program – Generate all programs available in the RoboDK project.
The main difference between Auto Setup and Load Curve(s) or Load Point(s) is that Auto Setup loads the part and creates a new Curve/Point follow project. Using Load Curve(s) or Load Point(s) is faster and will just update the existing geometry features in RoboDK, keeping previously defined settings.
Tip: Using the default settings, if you want to load more than one object from Fusion you should rename the objects once they have been loaded in RoboDK.
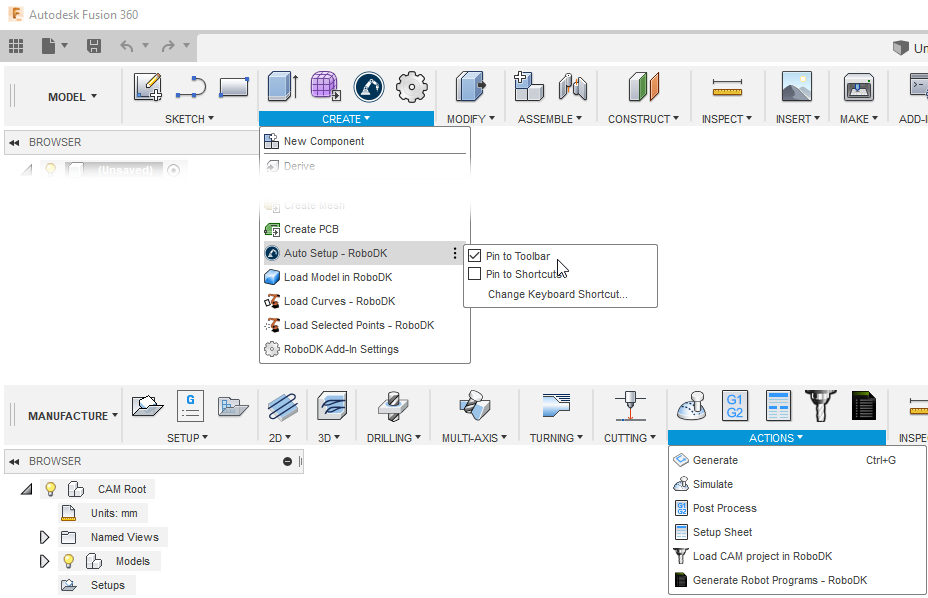
You will also find 5 commands under the CREATE tab from the MODEL Workspace (CAD features) and 2 commands under the ACTIONS tab from the MANUFACTURE Workspace (CAM features).