Manual Install
These are manual steps to setup the RoboDK plug-in for Autodesk Fusion 360. You should follow these steps if the RoboDK plug-in for Fusion was not automatically installed by default using the RoboDK installer:
1.Install Autodesk Fusion (if you haven’t done it yet).
2.Download and install RoboDK.
3.Download the RoboDK plugin for Autodesk Fusion 360.
4.Right click on the ZIP file and select Properties. Then, check the option “Unblock” if it is visible and select Apply and then OK.
5.Unzip the contents on your computer (you can place it on your Documents folder, your Desktop or the in the Fusion Add-ins folder: C:\Users\Username\AppData\Roaming\Autodesk\Autodesk Fusion 360\API\AddIns\Robodk).
Install the RoboDK plug-in in Fusion 360:
6.Open Autodesk Fusion 360.
7.Select ADD-INS-Scripts and Add-Ins (Shift+S), from the MODEL workspace.
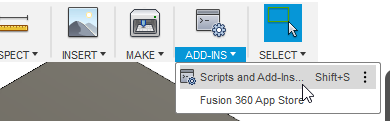
8.Select the Add-Ins tab
9.Select the green + button
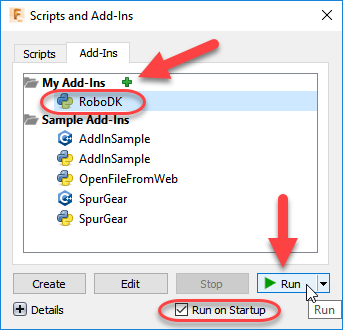
10.Enter the following path:
C:\RoboDK\Other\Plugin-Fusion360\RoboDK\
11.Check the option Run on Startup to start Fusion 360 with the RoboDK Add-In
12.Select Run
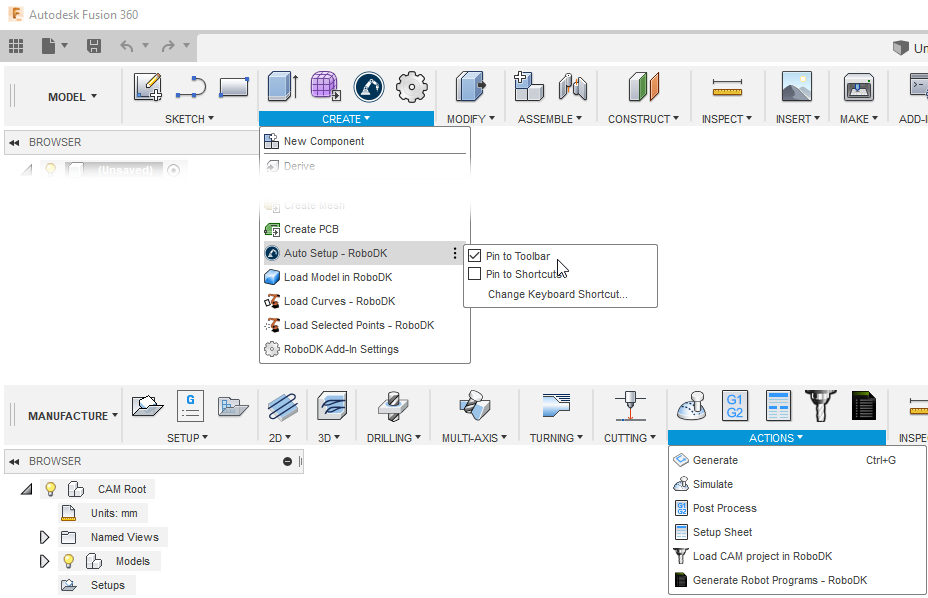
You should then see a toolbar called RoboDK in the MODEL workspace.

Furthermore, all CAD-related commands under the CREATE toolbar (from the MODEL workspace) and all CAM related commands under the ACTIONS toolbar (from the MANUFACTURE workspace).