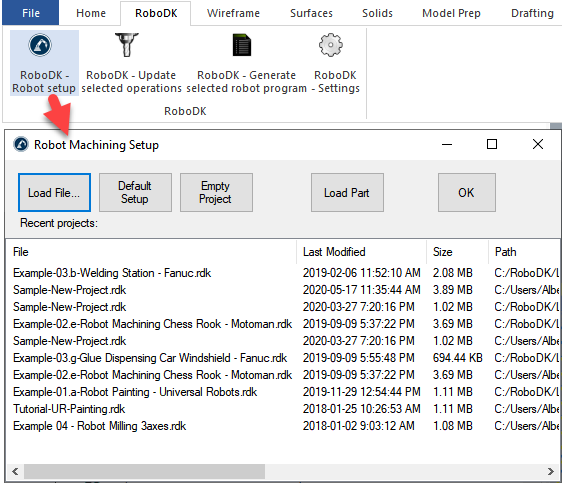
Robot setup
The Robot setup 
●Load File…: Select a file to open it with RoboDK and use it as the default project for your Mastercam project.
●Default Setup: Set up new station with a default robot, spindle and reference frame. The part will also be automatically exported to RoboDK.
●Empty Project: Open RoboDK with a new empty station to let the user build a new setup. More information to set up a new project from scratch available in the Getting Started section.
●Load Part: Load the part from Mastercam to RoboDK (the part will be saved as an STL file and loaded automatically). All visible solids and surfaces will be loaded.
Visit the robot machining section for more information about building a new setup.
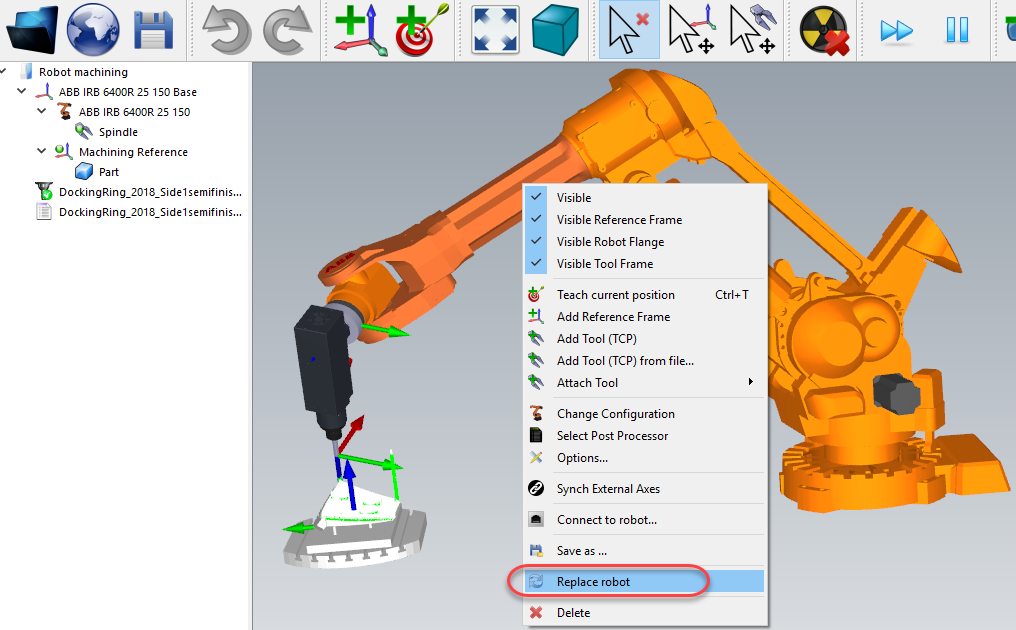
You can easily change the robot, modify the tool and/or the reference frame. As an example, follow these steps to change the robot:
1.Right click the robot
2.Select Replace robot (as shown in the image)
3.Select the new robot
The RoboDK installer only provides a few robots by default, however, it is possible to download more robots from the online library.
More information about adding a robot tool is available in the Getting Started Section.
Hold Alt+Shift to move a robot tool (TCP). This is useful to set the pose of the robot before teaching a target.
Save the project to keep the changes by selecting File➔Save Station (Ctrl+S).