Measuring the tool
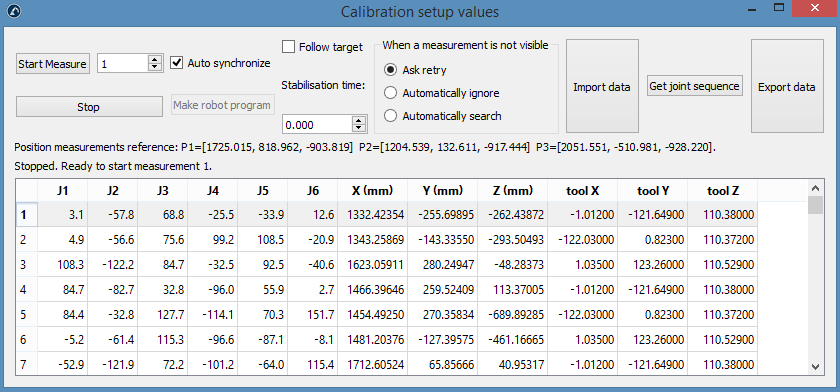
Measurements 1-6 can be performed anywhere in the tool flange as long as you measure the same target for the 6 measurements. After that, every TCP that you want to measure will add one measurement for the same TCP, in this case, you have 3 TCPs so 6+3=9 measurements in total. You can double click a measurement to continue measuring from that position.
Like the previous section: select Measure in the Tool setup section. The following window will open. Select Start Measure and the robot will move sequentially through the planned measurements. Double click a measurement to continue measuring from that position.
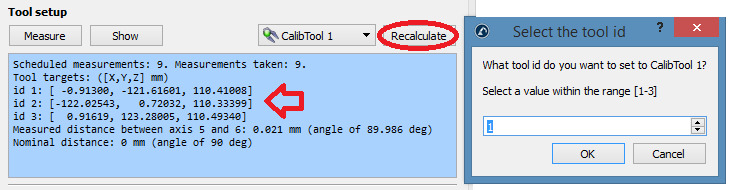
The summary will show the calibrated TCPs when the procedure is completed. The definition of the TCP (in the following image “CalibTool 1”) will be updated automatically. If you didn’t select any TCP, you can add a new one (select “Program➔Add empty Tool”) and select “Recalculate”. A new window will appear, and you must select the “id” of the tool depending on the order that you took the measurements. You can repeat the same procedure to update as many TCPs as you need (in this case 3 TCPs). The id of the tool will be automatically detected if the name of the tool ends with a number.