Run Program from RoboDK
Robot drivers provide an alternative to Offline Programming (where a program is generated, then, transferred to the robot and executed). You can run a simulation from RoboDK directly on the robot (Online Programming). More information available in the Robot Drivers section.
Follow these steps to connect to the robot from RoboDK:
1.Right click the robot in RoboDK
2.Select: 
3.Enter the IP of the robot
4.Select Connect.
There should be a green message displaying Ready if the connection succeeded.
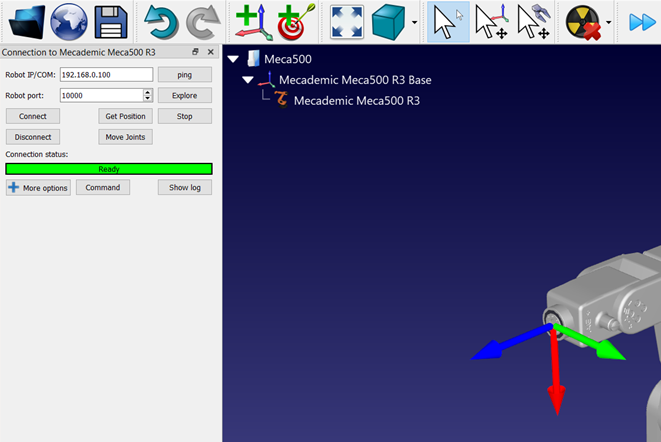
The robot can be moved by selecting Get Position, Move Joints, from the connection menu.
There are two different methods to run the program from the PC to the robot:
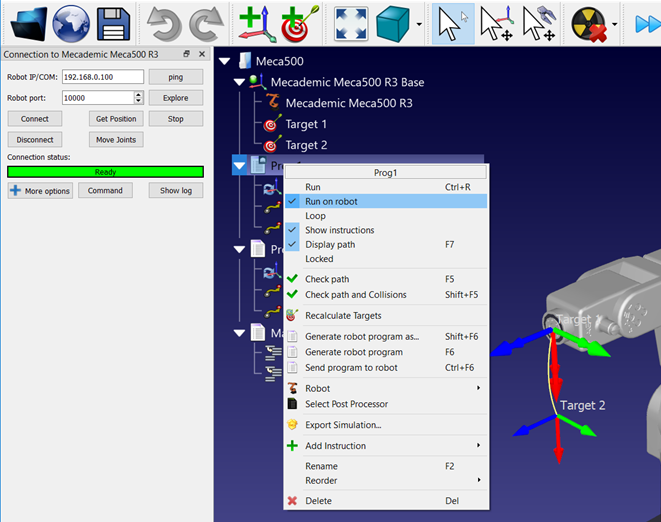
1.Run on robot step by step with feedback in RoboDK (Online Programming):
This method uses the robot as a server and each instruction is sent to the robot step by step as it is executed in the simulator. This method is useful for debugging purposes.
a.Right click the program (Print3D in this example)
b.Select Run on robot
c.Double click the program to start it (or right click and select Run)
Once this option is checked it will connect to the real robot every time we double click a program (or right click, then, select Run)
These operations are also available from the RoboDK API and it allows integrating robot programming with other applications. The API is available in Python and C# and other programming languages.
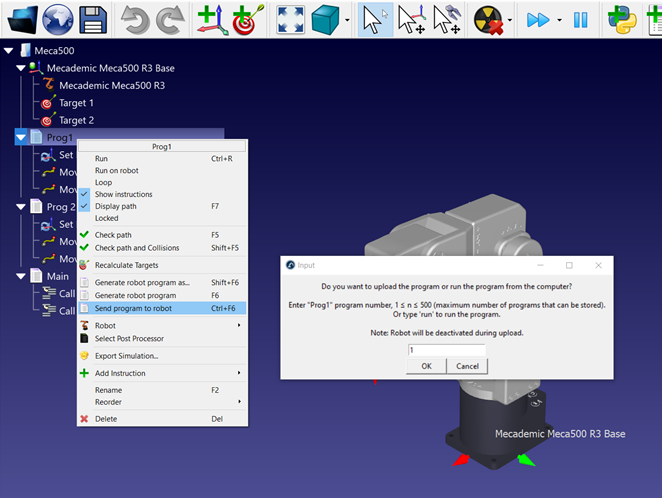
2.Send program to robot using the Mecademic post-processors. It can be used to run the program on the robot by specifying “run” as the program number. The complete program can also be saved on the robot controller as an offline program (see Robot Offline Programming):
a.Right click the program (Prog1 in this example)
b.Select Send program to robot (Ctrl+F6).