System Calibration
This section will guide you to calibrate your robot and the probe. This step only needs to be done once but it is important to obtain good accuracy results.
Before starting the calibration, it is recommended to load the 3D models of your cell. This will help you automatically avoid collisions during the calibration process. If you don’t have the 3D models of each component you can simply load planes boxes and spheres to represent the areas you don’t want to access.
Robot calibration
This section describes how to automatically calibrate your robot using RoboDK TwinTrack and your measurement system. Robot calibration allows you to improve robot accuracy to up to 0.150 mm when you generate programs offline or using TwinTrack teach by demonstration tools in RoboDK (the level of accuracy highly depends on the quality and size of the robot).
It is recommended to perform the robot calibration after you build your robot cell or you make major modifications (such as changing the payload of your tool). This helps obtaining the best accuracy.
Before you begin the calibration, you can model your cell in RoboDK to automatically avoid collisions. You can use basic geometries such as planes or cubes to avoid unwanted areas. You can also limit the joint space of the robot.
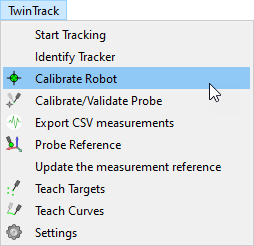
You can select TwinTrack➔Calibrate robot to start the robot calibration procedure.
This operation will guide you to calibrate the robot, including the automatic generation of points for calibration and validation. RoboDK can automatically generate points that are visible by the tracker.
The robot calibration procedure requires taking around 200 measurements. The procedure starts by taking some measurements around the home position of the robot.
Once the setup is ready and the communication with the robot are properly stablished, the calibration procedure should take 15-30 minutes.
The system requires no special fixtures or accessories, it simply tracks the position of the tool with respect to the tracker reference.
It’s fine if you miss some measurements because the targets are not visible.
Probe calibration
It is important to properly calibrate the tip of your probe and make sure it is accurate within your desired tolerances.
Calibrating the tip of the probe is accomplished by moving the tip around a static point.
Select TwinTrack➔Calibrate/Validate Probe Tip to start the tool calibration.
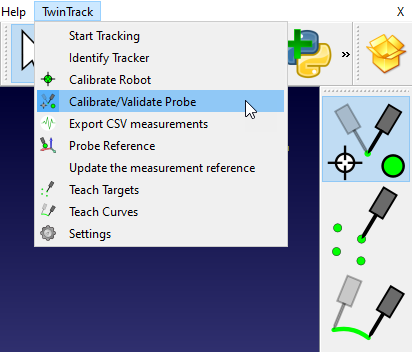
In this case, because we are using the Creaform HandyProbe, you can calibrate the probe using Creaform VXElements software and validate it using RoboDK.
To validate the tip of your probe you simply need to move around a static point and RoboDK will display the accuracy.
Programming offline
You can use the teach by demonstration features without a real robot. This means you can simulate and program your robot offline only with your measurement system before you have access to the real robot.
You simply need a part with a well-defined coordinate system that you can use as a reference.
Once you have the measurement system and your part ready you can follow these steps to define the coordinate system of your measurement device:
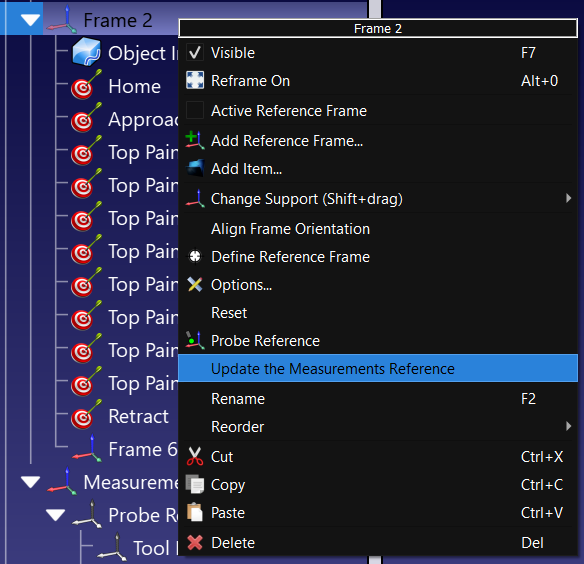
1.Right click the coordinate system of your part (or the coordinate system of jig it is attached to).
2.Select Update the Measurements Reference.
3.Follow the instructions on the screen to teach 3 points that define the coordinate system: the origin, a point on X+ and a point on Y+.
The measurement system will be updated accordingly, and you can proceed to teach points, curves or other coordinate systems.