ロボット
積層造形(または3Dプリンティング)は、デジタルファイルから三次元の立体オブジェクトを作成する作業です。産業用ロボットアームは、RoboDKを使用して3軸または5軸3Dプリンターとして機能できます。次のビデオは、RoboDKオフラインで3Dプリントをセットアップする方法を示します:ビデオを見る。
3Dプリントは、ロボットを使用して次のいずれかの方法で可能です:
●G-codeプログラム(NCファイル)をRoboDKを使用して、ロボット加工プロジェクトで示す用に、ロボットプログラムに変換。マテリアルフローの速度(押出機指令E)は、各移動の為に計算され、生成されたプログラムにプログラムイベントとして統合できます。G-codeは、RoboDKでサポートされているNCファイルの一種であり、多くの3Dプリンターでサポートされている形式でもあります。ほとんどのスライサーソフトウェアは、STLファイルを指定してG-codeが生成できます。
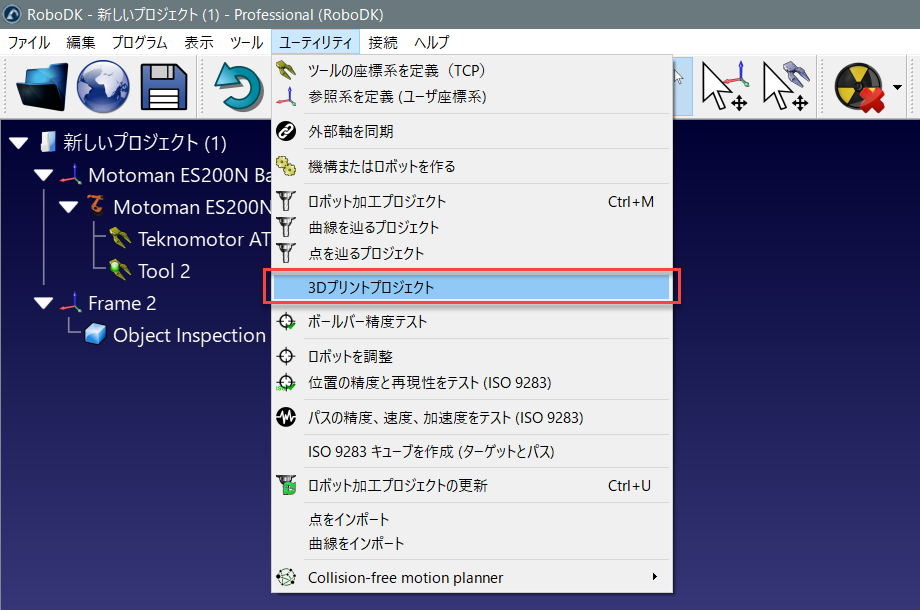
●ユーティリティ➔3Dプリントプロジェクトを選択して、3Dプリンティング設定を開きます。
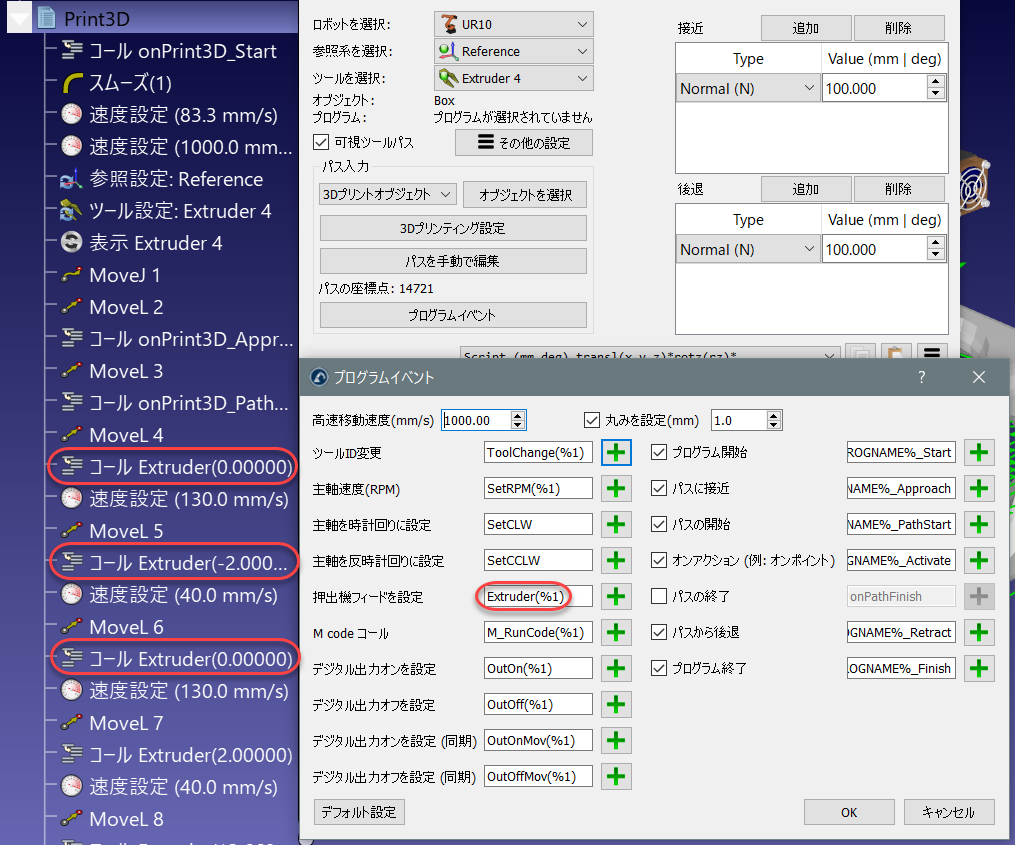
RoboDKはデフォルトで、EディレクティブをExtruderと呼ばれるプログラムのプログラムコールとして変換し、E値をパラメーターとして渡します。この動作を変更するには、プログラムイベントを選択して下さい。
押出機の値(E)は、各移動の前に押し出す必要がある材料の量を表します。この値は、ロボットの速度と点と点の間の距離を考慮して、ロボットから押出機フィードを駆動する為に使用できます。
または、ポストプロセッサーを使用して押出機フィード用に計算し、それに応じて適切なコードを生成することもできます。次の項目で実例を示します。
ロボット3Dプリント用のポストプロセッサ#Print3Dpost
この項目では、3Dプリント用の移動指示を実行する前に、ロボットのポストプロセッサーが押出機の速度を計算する為の変更を示します。あるいは、これらの操作は、押し出しプログラムコール(押し出しを駆動するデフォルトのコマンド)を使用して、ロボットコントローラーで行うこともできます。
ロボットポストプロセッサーをカスタマイズすることにより、プログラムをロボットに送信する前に、3Dプリント用の押出機の統合を容易にすることができます。このようなタスクを可能にするには、ロボットポストプロセッサーでプログラムが生成される時に、いくつかの計算を行い、カスタマイズされたコードを出す必要があります。
最初は、Extruderコールをインターセプトし、ポストプロセッサーのRunCode部分内の新しいExtruder値(E値)を読み取ることです。次のセクションは、プログラムから生成されたすべてのプログラムコールを処理します:
def RunCode(self, code, is_function_call = False):
if is_function_call:
if code.startswith("Extruder("):
# Intercept the extruder command.
# if the program call is Extruder(123.56)
# we extract the number as a string
# and convert it to a number
self.PRINT_E_NEW = float(code[9:-1])
# Skip the program call generation
return
else:
self.addline(code + "()")
else:
# Output program code
self.addline(code)
押出機の値(length/E)は、ロボットポストプロセッサでPRINT_E_NEW変数として保存されます。
新しい直線移動の指示ごとに、new_moveと言う関数呼び出しを実行する必要があります。MoveLコマンドの最初にこの呼び出しが追加できます:
def MoveL(self, pose, joints, conf_RLF=None):
"""Add a linear movement"""
# Handle 3D printing Extruder integration
self.new_move(pose)
...
押出機の増分を計算する為に、ポストプロセッサーのヘッダーに次の変数を追加する必要があります:
# 3D Printing Extruder Setup Parameters:
PRINT_E_AO = 5 # Analog Output ID to command the extruder flow
PRINT_SPEED_2_SIGNAL = 0.10 # Ratio to convert the speed/flow to an analog output signal
PRINT_FLOW_MAX_SIGNAL = 24 # Maximum signal to provide to the Extruder
PRINT_ACCEL_MMSS = -1 # Acceleration, -1 assumes constant speed if we use rounding/blending
# Internal 3D Printing Parameters
PRINT_POSE_LAST = None # Last pose printed
PRINT_E_LAST = 0 # Last Extruder length
PRINT_E_NEW = None # New Extruder Length
PRINT_LAST_SIGNAL = None # Last extruder signal
最後に、移動距離、ロボットの速度、ロボットの加速度に応じて適切な押出機フィードのコマンドを生成する新しい手順を定義する必要があります。これは、押出機フィードが特定のアナログ出力またはカスタマイズされたプログラムコールによって駆動されることを前提としています。
def MoveLプログラム定義の前に次のコードを追加する必要があります。
def calculate_time(self, distance, Vmax, Amax=-1):
"""Calculate the time to move a distance with Amax acceleration and Vmax speed"""
if Amax < 0:
# Assume constant speed (appropriate smoothing/rounding parameter must be set)
Ttot = distance/Vmax
else:
# Assume we accelerate and decelerate
tacc = Vmax/Amax;
Xacc = 0.5*Amax*tacc*tacc;
if distance <= 2*Xacc:
# Vmax is not reached
tacc = sqrt(distance/Amax)
Ttot = tacc*2
else:
# Vmax is reached
Xvmax = distance - 2*Xacc
Tvmax = Xvmax/Vmax
Ttot = 2*tacc + Tvmax
return Ttot
def new_move(self, new_pose):
"""Implement the action on the extruder for 3D printing, if applicable"""
if self.PRINT_E_NEW isNone or new_pose is None:
return
# Skip the first move and remember the pose
if self.PRINT_POSE_LAST isNone:
self.PRINT_POSE_LAST = new_pose
return
# Calculate the increase of material for the next movement
add_material = self.PRINT_E_NEW - self.PRINT_E_LAST
self.PRINT_E_LAST = self.PRINT_E_NEW
# Calculate the robot speed and Extruder signal
extruder_signal = 0
if add_material > 0:
distance_mm = norm(subs3(self.PRINT_POSE_LAST.Pos(), new_pose.Pos()))
# Calculate movement time in seconds
time_s = self.calculate_time(distance_mm, self.SPEED_MMS, self.PRINT_ACCEL_MMSS)
# Avoid division by 0
if time_s > 0:
# This may look redundant but it allows you to account for accelerations and we can apply small speed adjustments
speed_mms = distance_mm / time_s
# Calculate the extruder speed in RPM*Ratio (PRINT_SPEED_2_SIGNAL)
extruder_signal = speed_mms * self.PRINT_SPEED_2_SIGNAL
# Make sure the signal is within the accepted values
extruder_signal = max(0,min(self.PRINT_FLOW_MAX_SIGNAL, extruder_signal))
# Update the extruder speed when required
if self.PRINT_LAST_SIGNAL isNone or abs(extruder_signal - self.PRINT_LAST_SIGNAL) > 1e-6:
self.PRINT_LAST_SIGNAL = extruder_signal
# Use the built-in setDO function to set an analog output
self.setDO(self.PRINT_E_AO, "%.3f" % extruder_signal)
# Alternatively, provoke a program call and handle the integration with the robot controller
#self.addline('ExtruderSpeed(%.3f)' % extruder_signal)
# Remember the last pose
self.PRINT_POSE_LAST = new_pose