Add-in Manager
The Add-in Manager is a tool within RoboDK that allows users to install, manage, and configure RoboDK add-ins. In fact, the Add-in Manager is a RoboDK add-in itself!
The Add-in Manager simplifies the process of installing, updating and exporting add-ins by providing a complete user interface where users can browse available add-ins, enable or disable them, manage dependencies, view detailed information about each add-in, and package them for deployment.
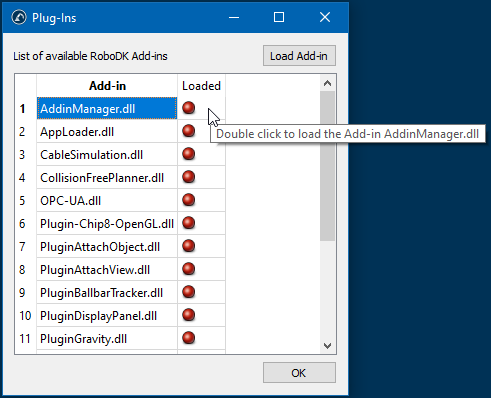
To use the Add-in Manager you must first enable the Add-in Manager plugin in the RoboDK settings:
1.Select Tools➔Add-ins (Shift+I)
2.Enable the Add-in manager plugin if it is not enabled.
3.Select Tools➔Add-in Manager (Shift+A)
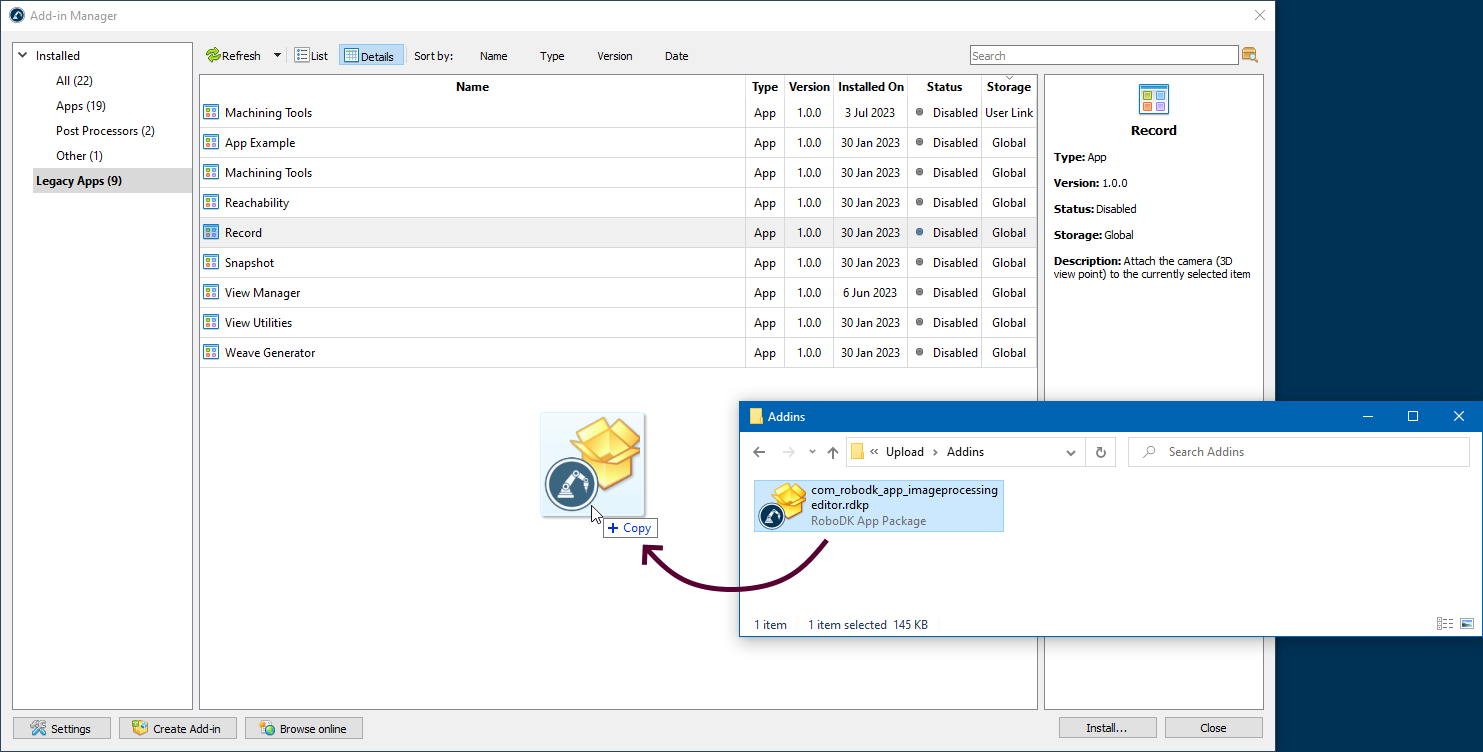
User Interface
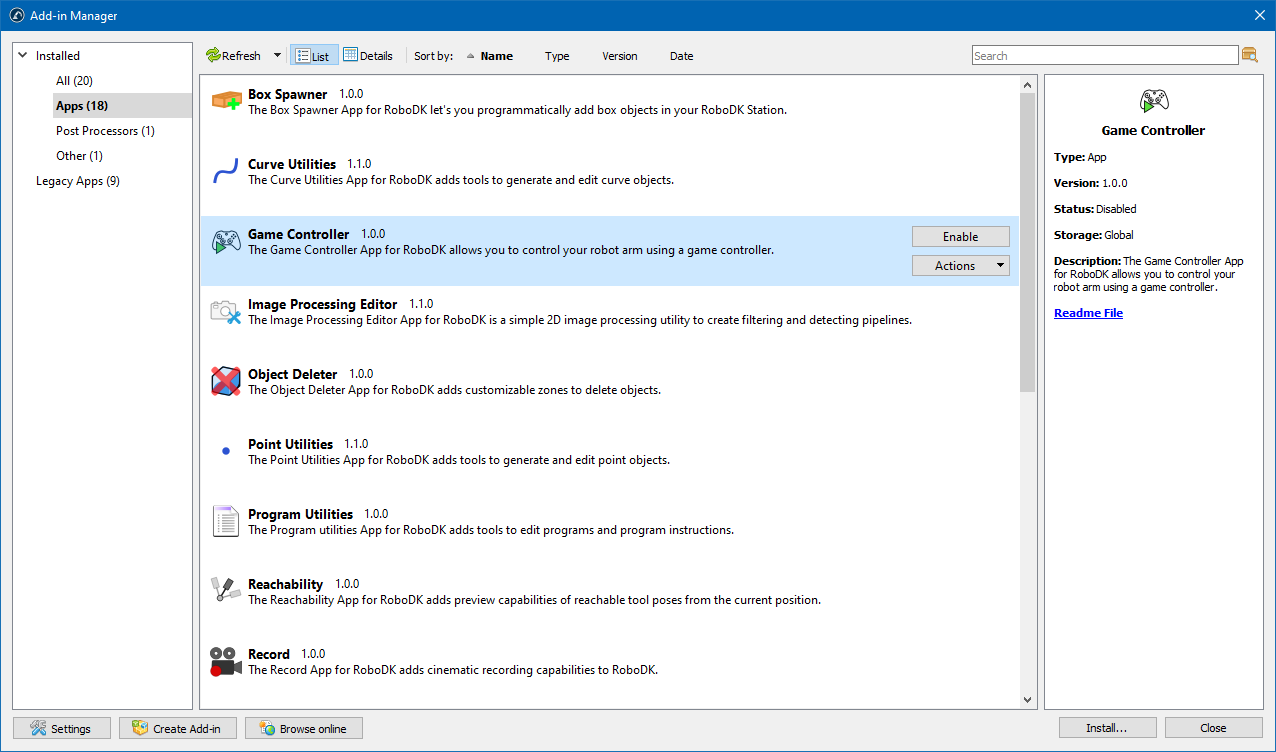
The Add-in Manager window contains five key areas:
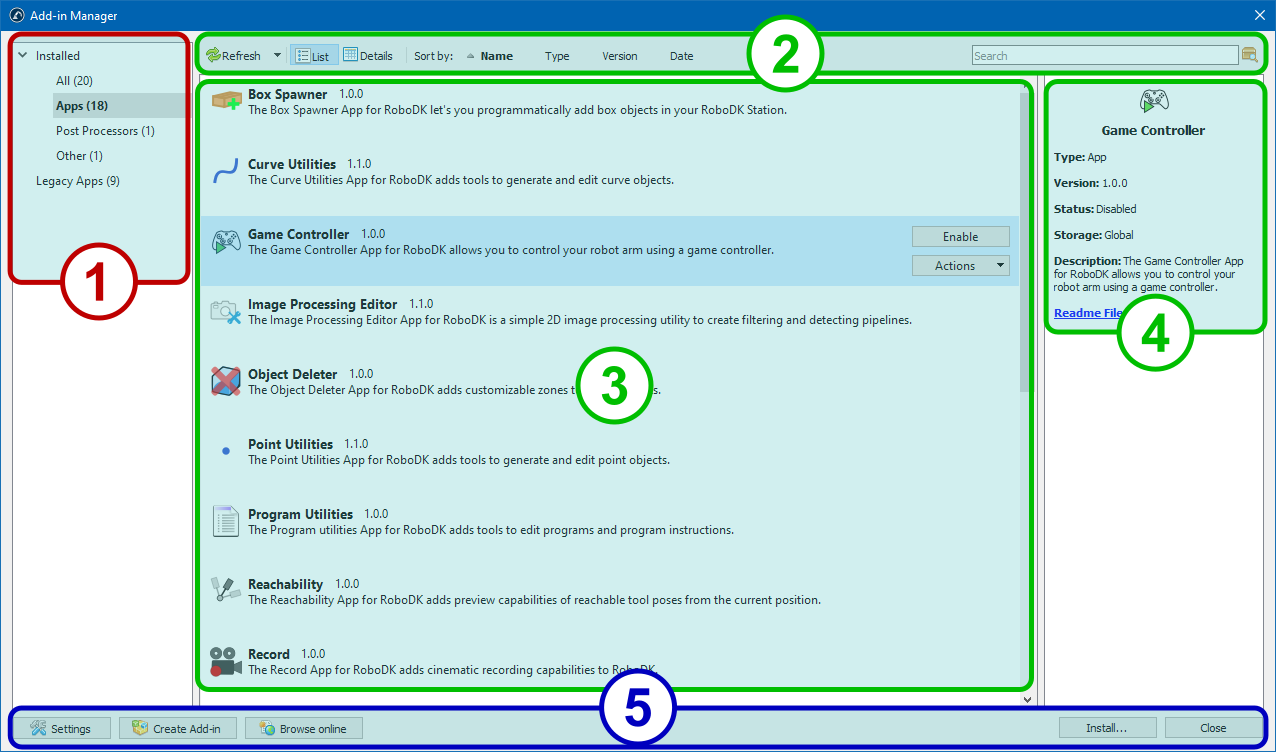
1.The left pane categorizes add-ins by type (Apps, Post Processors, Robot Drivers, etc.). It's designed to let you find your favorite add-ins more easily.
2.The upper toolbar is intended for controlling the modes of displaying the list of add-ins, sorting and searching for add-ins by name or description. It also contains a button to update the list of installed add-ons or instantly disable all of them.

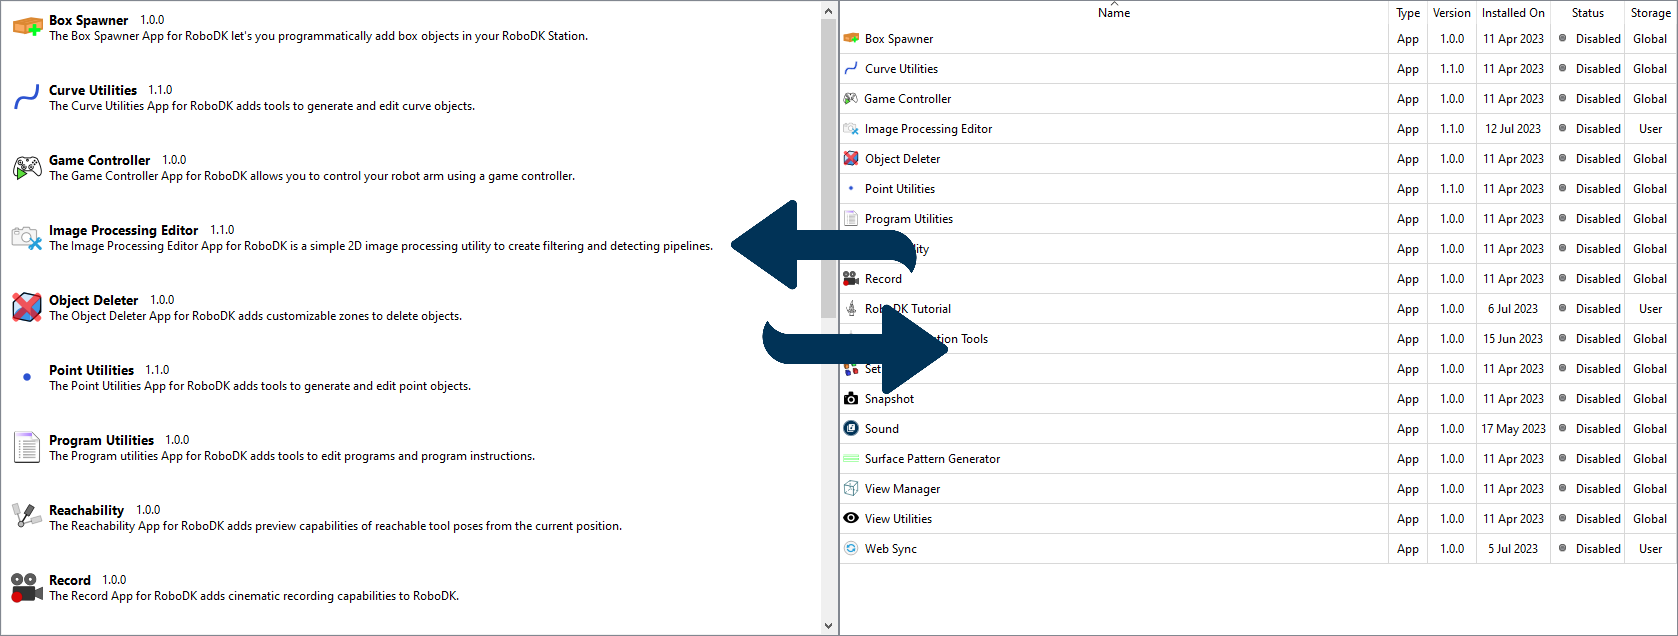
3.The main area displays add-ins as a list or a table (the details view).
4.The description area contains information about the type of selected add-in, its current status and location, a description and a link to documentation.
5.The lower panel contains the buttons for performing auxiliary functions: opening the Add-in Manager settings, running the Add-in Creator, opening the RoboDK Add-in Marketplace, installing a new add-in or closing the window.
Managing add-ins
An individual add-in is managed using the context menu, which can be called by right-clicking on the selected add-in in the list or table. In the list mode you can also press the Actions button to call the context menu.

●Enable/Disable: enables or disables the add-in. The analog of this menu item is the Enable/Disable button in list mode or double-click in table mode.
●Reload: forces the Add-in Manager to re-read all configuration files (manifests) of the add-in. This is useful in rare cases when the files of the add-in have been modified on disk.
●Terminate sub-processes: terminates all running applications belonging to the add-in. This function is only available for add-ins of type App.
●Edit...: loads the add-in assets and the manifest into the Add-in Creator to create a derivative version of the add-in.
●Install requirements...: installs additional modules for add-ins of the App type. This menu item allows you to start the process of automatically installing the required modules in case you refused to do so when installing the Add-in.
●Create package...: opens the Add-in Creator wizard to create a RoboDK package (.rdkp file) from an existing Legacy App.
●Open Add-in location: opens an explorer window in the folder where the add-in files are located.
●Uninstall: disables the add-in and completely removes it from the disk.
Installing new add-in
Installing a new add-in is done by clicking the Install... button on the bottom panel and then searching for the .rdkp file on disk. It can also be done by drag-and-dropping the file from a folder to the Add-in Manager window.
Before installing the add-in, the Add-in Manager will ask you for the desired location of the add-in.
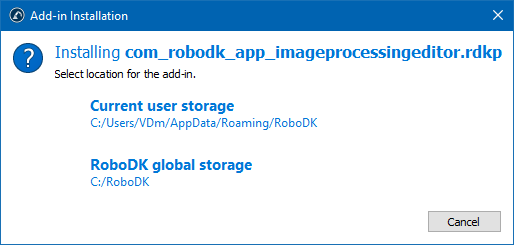
●Current user storage installs the add-in to one of the folders of the current user running on the system. This option is useful if the add-in should be available to only one user or if the current user has insufficient access rights to install add-ins to the RoboDK folder.
●RoboDK global storage installs the add-in to the main program folder. In this case, the add-on will be available to all users working on the computer. An attempt to install to the global storage may fail if the current user does not have write permissions to the RoboDK folder.