Import the marker
You should import the marker in RoboDK to indicate where the location of the marker is with respect to the robot and other objects.
Follow these steps to properly place the marker:
1.In your RoboDK station, create a new reference frame.
2.Right-Click the new reference frame and select “Add Item…”.
3.Find and select the marker PNG created with the Fiducial Marker Generator.
4.Adjust the scale of the virtual marker to match the size of the real marker:
Example: The Charuco Diamond marker is 106.186mm x 106.186mm by default. If the size of the printed marker is 280mm x 280mm, then a scale factor of 2.63688 → ( 280 / 106.186 ) must be applied. This can be done by double-clicking the marker object, selecting More Options ➔ Apply Scale.
5.Align the center of the marker to the reference frame origin, with the Y axis pointing to the top ID.
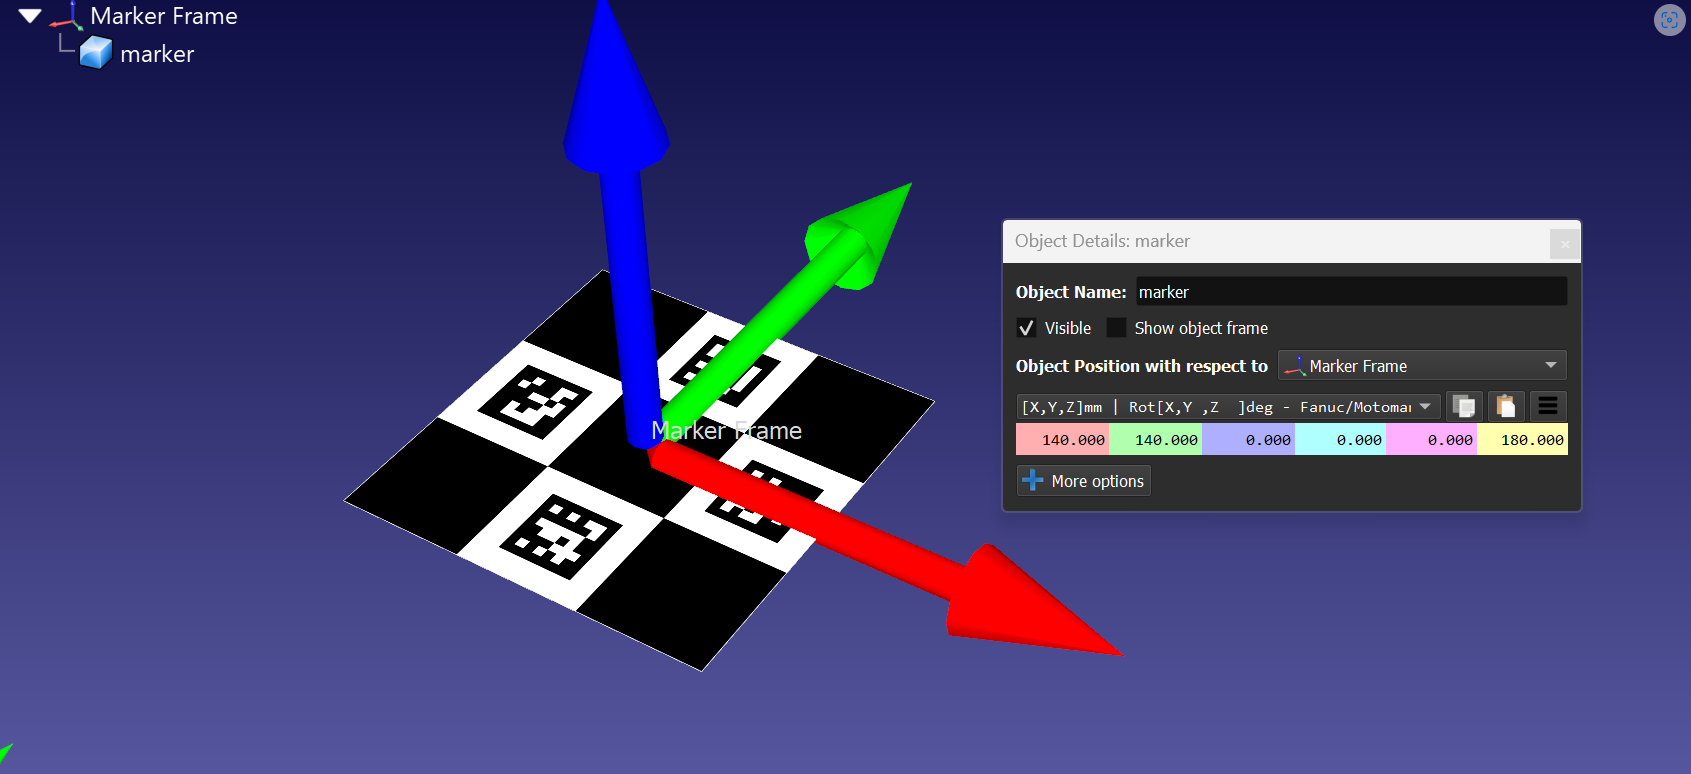
Example: To move the marker, double click the marker object and modify the object position with respect to the marker frame. For our example, the marker needed to be moved 140mm on X, moved 140mm on Y, and rotated 180° on the Z axis. See image below for an example of the correct position.
6.Place the marker frame in the station to align station objects relative to the marker.