Collision Detection
Select Tools➔
Follow these steps to safely check a program for collisions:
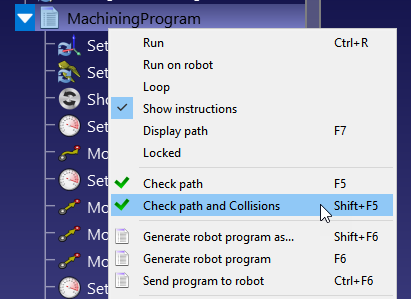
1.Right click a program.
2.Select Check path and Collisions (Shift+F5). This option quickly checks if the path is feasible (same as Check path – F5) and then validates that there are no collisions.
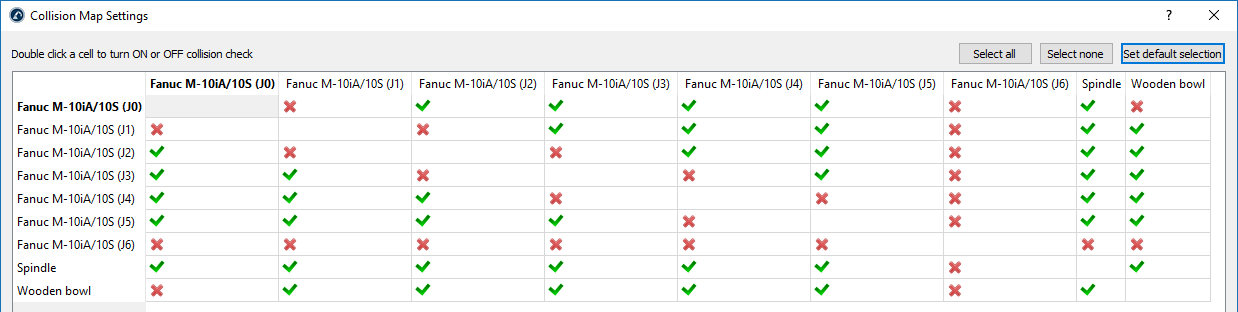
Collision Map
You can specify if the interaction between any pair of objects needs to be checked for collisions.
Select Tools➔
By default, RoboDK checks collisions between all moving objects in the station, including all robot links, objects and tools. As an exception, consecutive robot joints are not checked for collisions as they may always in contact.
Faster Collision Detection
Collision detection speed highly depends on many factors.
1.The number of pairs of checks defined in the collision map. Having a collision map with less checks will be faster.
2.The robot step used for collision checking. The collision step can be modified in the Tools➔Options➔Motion menu. Linear movements use the step in millimeters and joint movements use the step in degrees. A larger step will provide faster collision checking but the result may be less accurate.
3.Computer power: more computer power (faster CPU) and more processing threads will allow you to have faster collision checking.
4.The complexity of the 3D files. Geometries with higher level of detail, such as rounded areas, usually require more computation power. Simplifying these geometries and reducing the number of triangles will help you speed up collision checking.
You should consider the following guidelines for better collision checking:
1.Choose STEP or IGES formats over STL files for better performance and compatibility.
2.Simplify geometry as much as possible.
3.Use the simplify mesh addin to automatically simplify complex geometry: https://robodk.com/addins.
4.To identify improperly grouped features, enable bounding box previews via Tools➔Options➔Other➔Draw bounding boxes (when collision check is activated). Ensure bounding boxes do not encompass multiple separate elements.
5.Avoid using the “Simplify Object…” feature found in Tools➔Options➔Display. It consolidates all surfaces into a single element, resulting in one extensive bounding box, which goes against the previous point.
6.Have collision-specific objects in the environment: duplicate objects and remove surfaces that cannot be reached, or import a version with simpler geometries (e.g., convex hulls). Use the original object for visual purposes only and exclude it from the collision map.
7.Using the API, dynamically update the collision map or set items invisible when they should not be part of the collision detection.