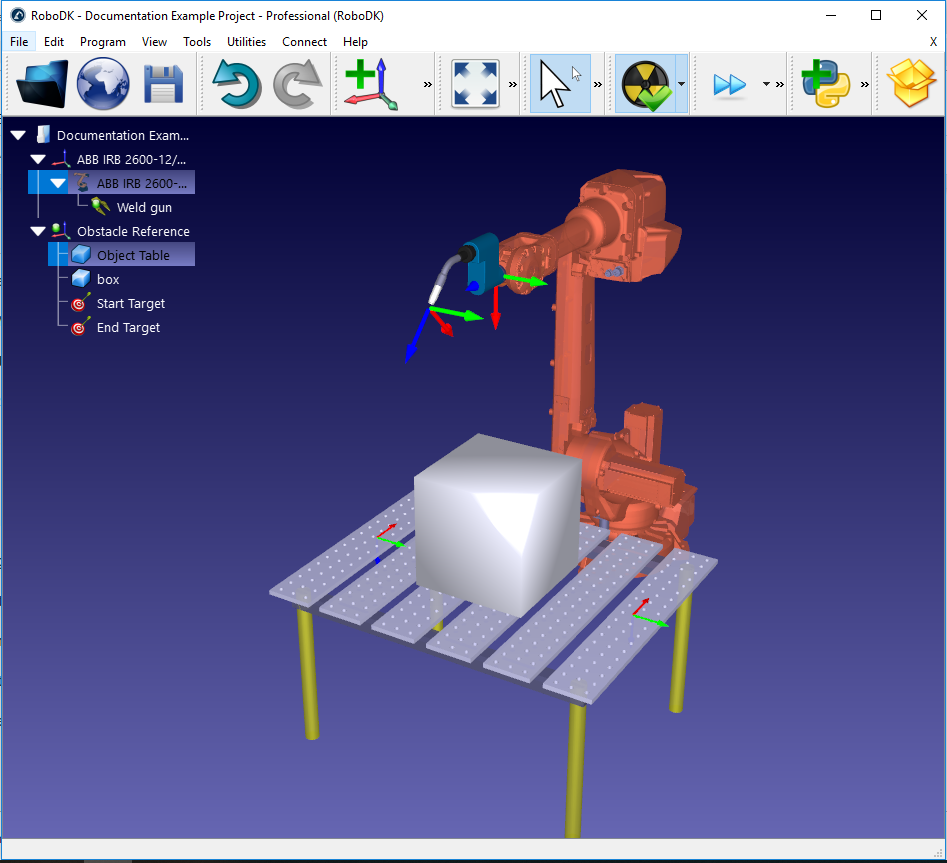
Setup for Motion Planning
To use the motion planner, there needs to be a robot, ideally with a tool. It also makes sense to have at least one object within the workspace otherwise collision-avoidance is not needed. It can be helpful to have at least two targets assigned which will serve as the start and end locations for the generated collision-free path.
The example welding setup can be created using the following process:
1.Select a robot:
a.Select File➔
b.Use the filters to find your robot. For example, select the ABB IRB 2600-12/1.85 (choose the following filters: ABB (brand), 10-20 kg payload and 1500-2000mm reach.
c.Select Download and the robot should automatically appear on the main screen.
2.Select a tool:
a.From the same online library, filter by Type➔Tool (click Reset filter first to remove the previous filters)
b.Download a tool, e.g. the "Weld Gun"
c.The tool should be automatically attached to the robot
d.Once the tool is loaded, the Online library can be closed
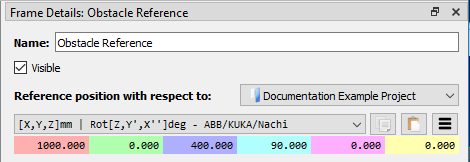
3.Add a reference frame:
a.Select Program➔
b.Select the new reference frame in the tree and press F2 to rename it to "Obstacle Reference"
4.Add some objects:
a.Select File➔
b.Select an object, such as the "Object Table.wrl"
c.Drag and drop the object onto the Obstacle Reference within the station tree.
d.Select another object, such as "box.stl" and drag this onto the Obstacle Reference also.
e.Move the table in front of the robot by doing the following:
i.Right click on the Obstacle Reference and choose "Options" (or just double click on the reference in the tree) to bring up the Frame Details panel
ii.Enter the following values in the panel named Reference position with respect to: Project: 1000, 0, 400, 90, 0, 0
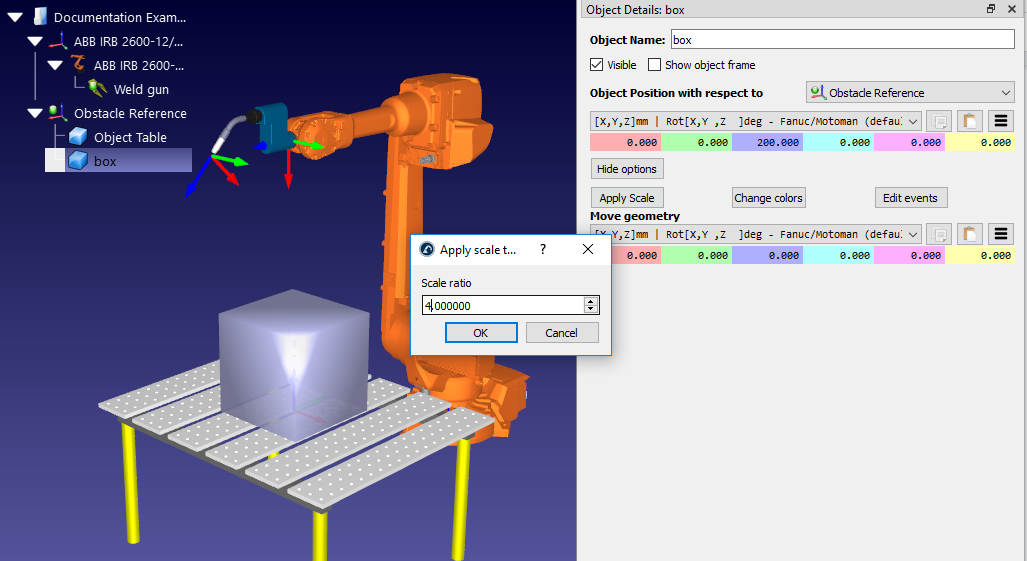
f.If necessary, increase the size and position of your object (e.g. the "box") by following these steps:
iii.Right click on the object in the station tree and choose Options (or just double click on the object in the tree) to bring up the Object Details panel
iv.Scale the box by clicking More options…➔Apply Scale and enter "4.0" in the Scale ratio
v.Move the box onto the table by entering the following values in the panel named Object position with respect to Obstacle Reference: 0, 0, 200, 0, 0, 0
5.Create targets:
a.Select Program➔
b.Select the new Target in the station tree and select F2 to rename it to Start Target
c.Move the target by doing this:
vi.Right click on the target in the station tree and choose Options (or press F3) to bring up the Start Target panel.
vii.Enter the following values in the Target position with respect to Obstacle Reference panels: 500, 0, 0, 90, 0, 180
d.Create a second target, in the same way, and rename it End Target. Using the same method as before, move it to the location: -500, 0, 0, 90, 0, 180