Tips and Best Practices
The motion planner is easy to use, but there are some best practices which will improve the programming workflow.
The construction phase can take a long time to run. This can become cumbersome during the early stages of programming when the layout of the robot cell is changing constantly. Every time an object is added to the workspace or moved around, the entire roadmap needs to be re-generated.
To reduce the time spent waiting for the roadmap to be generated, it is a good idea to use smaller parameters at first.
For example, you can usually generate a collision-free map with the following within 10-15 seconds:
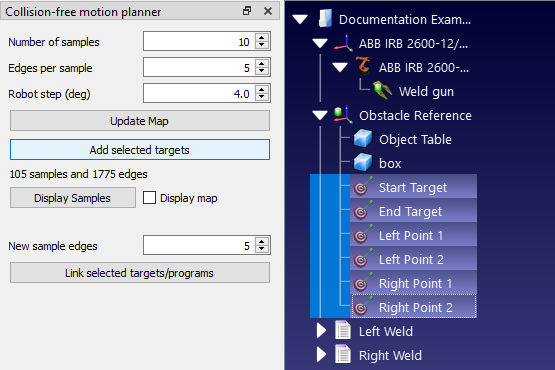
1.Number of samples: 10.
2.Edges per sample: 5.
3.Robot step (deg): 4.0.
This will not produce the most efficient collision-free motion, but it will allow the cell design to be altered much quicker.
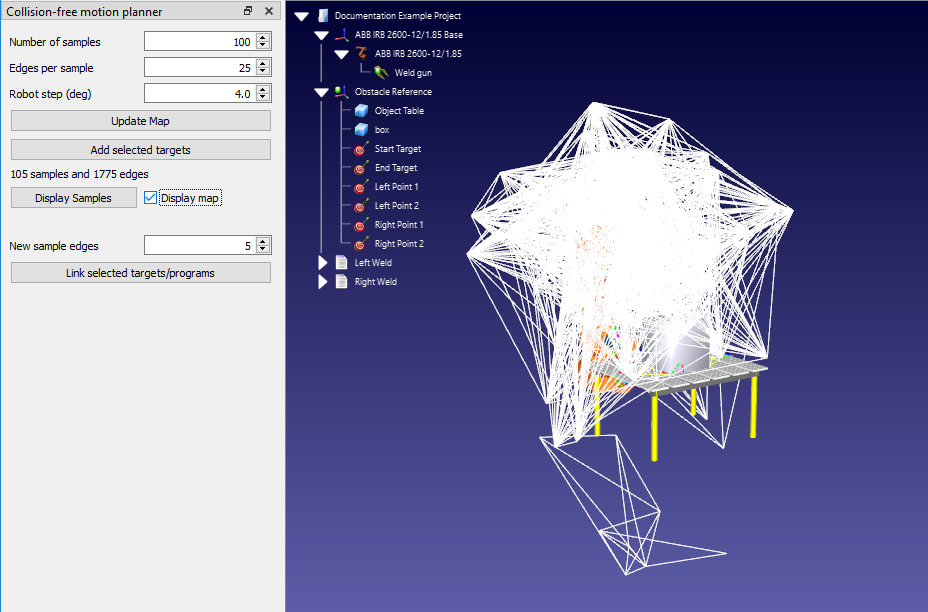
When the locations of all objects in the cell have been decided, then a larger map can be generated (e.g. with the default parameters of 100, 25, 4.0).
Finally, before generating the robot program, it may be a good idea to generate an even larger roadmap (e.g. with parameters of 500, 50, 2.0). This will take a long time to generate but will produce the most efficient motions.
Setting the robot joint limits (as described in the previous section Constrain Joint Limits) has a dual benefit. Firstly, it can make the construction phase quicker in some cases. Secondly, it ensures that the roadmap actually contains locations which will be useful for the robot program. It is easy to forget about this vital step.
Properly define the collision map
Collision detection is triggered when 2 objects collide. You can specify the correlation between each moving object in the Collision Map settings. Reducing the number of interactions (green check marks) will speed up collision checking.
The time it takes to calculate collision-free paths mostly depends on the time required to check for collisions. Therefore, you should follow the best practices for faster collision checking described in the collision detection section. Among other things, you can increase the robot step for collision checking, constrain the joint limits or simplify the 3D geometry to speed up collision checking.
The term "collision-avoidance" suggests that the motion planner will always avoid collisions in all situations. This is certainly true in the simulation environment. However, in the real world, the robot can still collide with objects if it comes too close to them. This usually occurs because of slight differences between the simulated robot and the physical robot.
A common instance of such collisions is when the robot "clips" the edge of an object when moving away from a task. This can usually be avoided by including an "offset" in the program. See this blog article for more information about using offsets effectively.
Not all areas of the robot's workspace are equal. The robot will have more "reachability" in some areas of its workspace than others. In areas with high reachability, the robot will be able to access points from many orientations. In areas with low reachability, the robot will only be able to access points from one or two orientations.
Sometimes, the motion planner will fail to find a path between two targets in the workspace. Often, this problem can be solved by simply increasing the number of samples in the roadmap, but not always.
If the motion planner continually fails to connect targets, ensure that the task is located within the area of the robot's workspace with most reachability. View the robot's workspace by opening the robot panel (right click on the robot in the station tree and choose Options) and selecting Show for current tool in the WorkSpace section.