Computer Vision
RoboDK provides many utilities to simulate, develop and deploy computer vision systems. RoboDK allows you to simulate 2D and 3D cameras to develop and train your computer vision algorithms. You can also integrate real 2D and 3D cameras.
This document will guide you through some steps to simulate cameras.

Simulated Camera
Simulated cameras allow you to see what the camera sees. You can specify the camera parameters such as the sensor size, pixel size, field of view and you’ll be able to see a simulated view of the camera. You can attach cameras to a robot or keep them stationary.
Adding a camera view
Adding a camera requires you to attach it to an anchor point to determine their location. This is usually done with a reference frame.
1.Select Program ➔ Add Reference Frame to create a new coordinate system. More information in the Getting started section.
2.Place the frame at the desired camera location, where XYZ coordinates are the camera location, the Z+ axis represents the aim direction, and the Y+ axis represents the down direction.
3.Select Connect➔Simulate 2D camera and select the reference frame.
You now have a default camera attached to the anchor point.
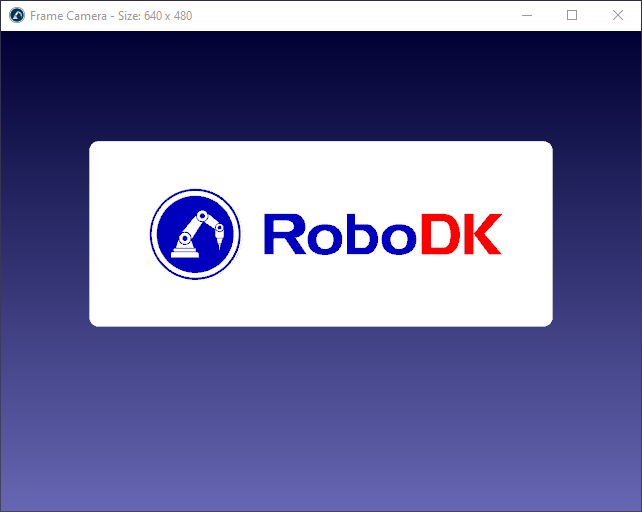
Camera preview window
The camera preview window allows you to see what the camera sees. This window is automatically opened when a new camera is added.
To re-open a camera preview window, you can simply double click the camera item in the tree. You can also right click it in the tree and select Show camera. By default, the preview window can be resized, minimized, or closed (see the next section for more options).
When the preview window is opened, the camera workspace is also shown the 3D environment. You can disable the camera workspace by right clicking the camera and selecting Show camera workspace.
Camera settings
The camera settings allow you to customize the parameters of your camera to have a realistic view of your camera in the simulated environment of RoboDK.
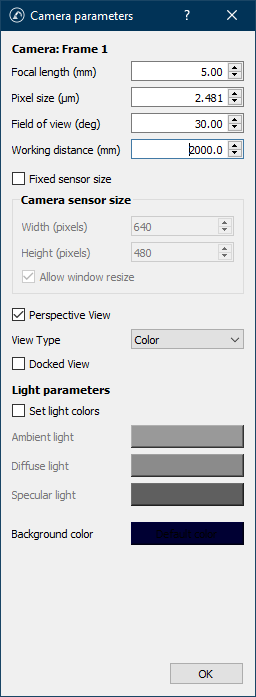
To edit the settings of a camera, right click it in the tree and select Camera settings. RoboDK provides the following default settings for newly added cameras:
●Camera: Provides the anchor name (Frame 1)
●Focal length (mm): focal length, in millimeters (5.00). This is the distance between the virtual optical center of the lens and the virtual camera image sensor. Changing this value will affect the pixel size.
●Pixel size (μm): pixel size, in micrometers (2.481). Changing this value will affect the field of view.
●Field of view (deg): field of view (FOV), in degrees (30.0). This affects the size of the area that can be perceived by the camera. Changing this value will affect the pixel size.
●Working distance (mm): working distance, in millimeters (2000.0). This is how far the camera can perceive the environment, and objects beyond that distance will not be part of the image.
●Fixed sensor size: If left uncheck, the camera sensor size (or resolution) is set by the size of the camera preview window, which can be resized by the user.
●Camera sensor size: For a fixed sensor size, provides the width and height of the camera, in pixels. Resizing the preview window will not affect the size.
●Allow window resize: Allow the user to resize the preview window without affecting the sensor size. For instance, resize the window to 720p while keeping the resolution to 4K.
●Perspective View: Unchecking this will turn the camera into an orthographic camera, removing perspectives.
●View Type: Determines the camera view type, such as Color, Grayscale or Depth. The view type will change the output image according to the relevant data.
●Docked View: allow the preview window to be dragged to the tool bars, as opposed to a sperate, floating window.
●Set light colors: Overrides the default light colors with your own (ambient, diffuse and specular light colors). It does not affect the background color, and it is only compatible with the Color view type.
●Background color: color of the unknown, of infinity. This is the color used if no object are encountered from the camera sensor to the working distance.
Accessing the simulated camera image through the API
It is possible to access the camera image for all view types through the API. For instance, you can retrieve the color image (8 bits), grayscale image (8 bits) and depth map (8 bits or 32 bits) as a disk file or as plain data.
Accessing the data of the simulated camera allows you to process it externally, either through a third-party imaging library or your own.
Although RoboDK does not provide its on imaging library nor is associated with one, our Python API provides sample code to process 2D and 3D image data. The following topics are covered:
●Fetch the image data and display it as a livestream.
●Calibrate a pinhole camera using a chessboard pattern.
●Estimate the camera pose using supported patterns.
●Appose the simulated camera image on an hardware camera feed for augmented reality.
●Read barcodes and QR codes.
●Detect features like blobs, reference image, surface area, contours, image moments, and more.
●Retrieve depth maps, process them into point clouds, reconstruct meshes, create a 3D livestream.
To access our Python API examples, follow this link: https://robodk.com/doc/en/PythonAPI/examples.html.
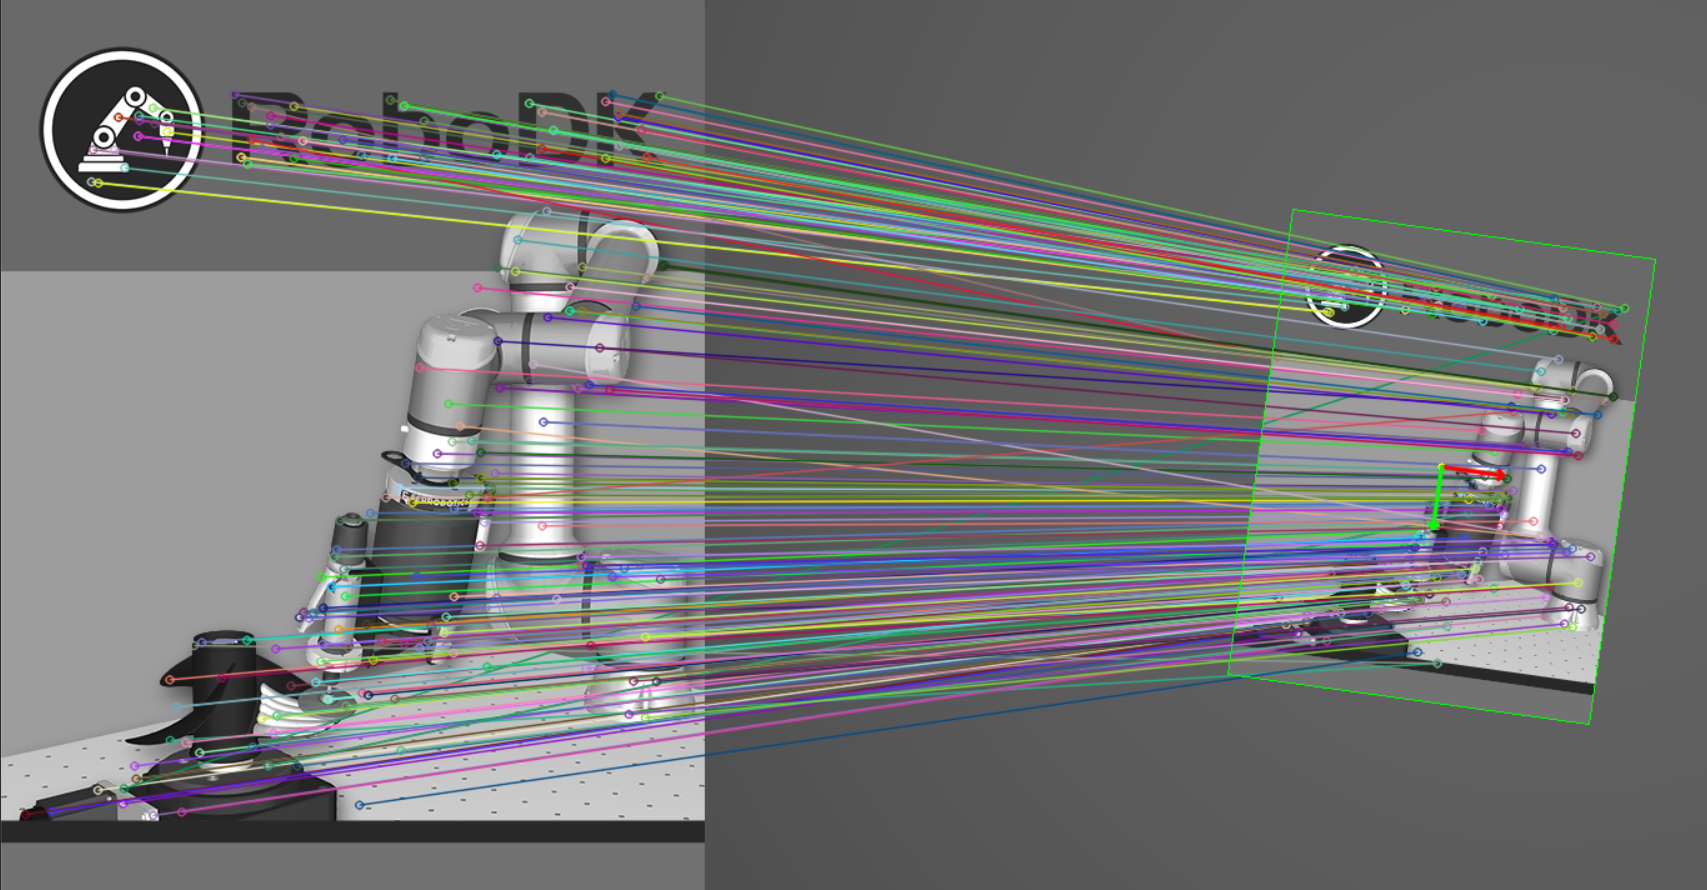
Hand-eye calibration
Hand-eye calibration is the process of calibrating the position of the camera with respect to the robot flange or tool.
RoboDK allows you to simulate the process of hand-eye calibration. You can use the same procedure to calibrate real cameras with respect to the robot flange or tool.
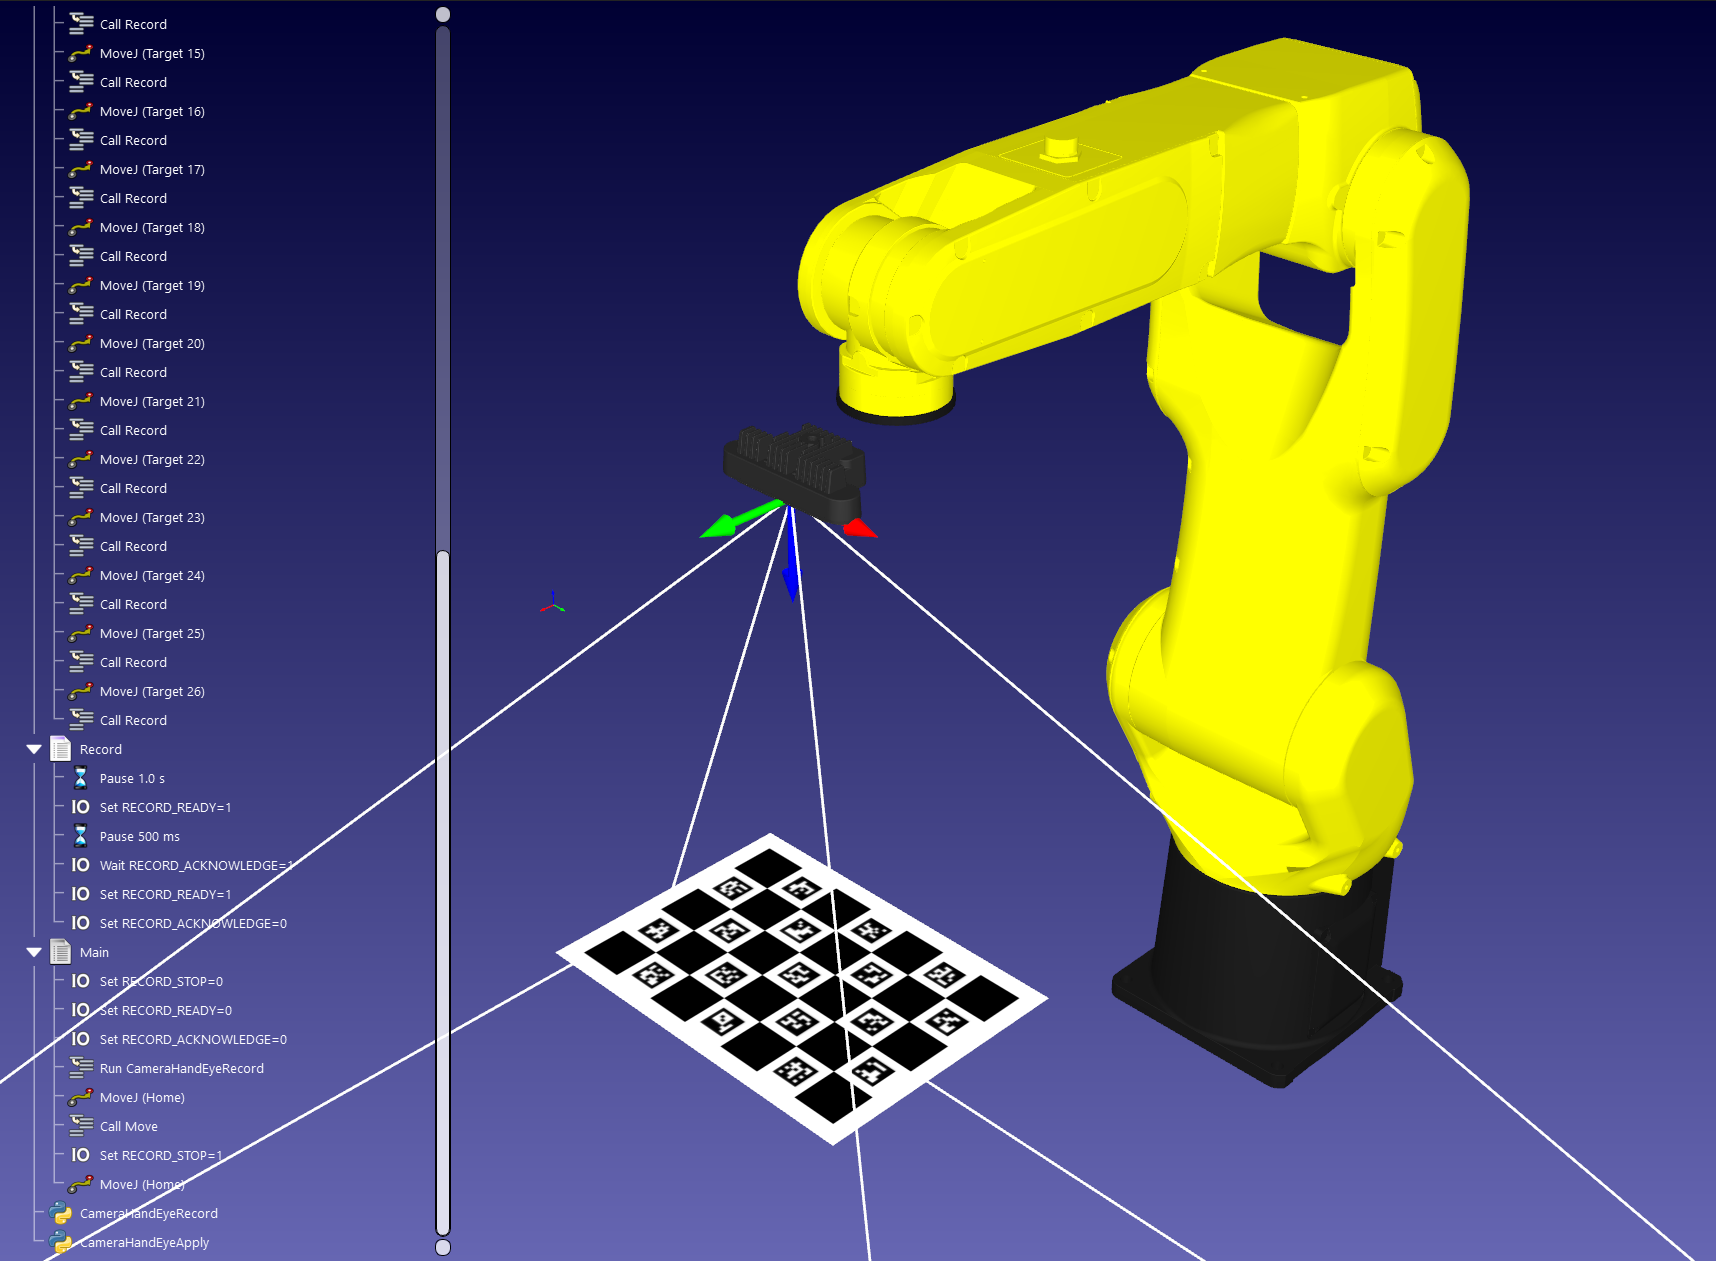
You can find a fully working example in the examples section of the RoboDK API for Python: https://robodk.com/doc/en/PythonAPI/examples.html#camera-hand-eye-calibration.
Camera Simulation Examples
This section provides some examples to integrate computer vision with your manufacturing process.
Most examples that integrate computer vision require some coding to get the full potential of computer vision algorithms.
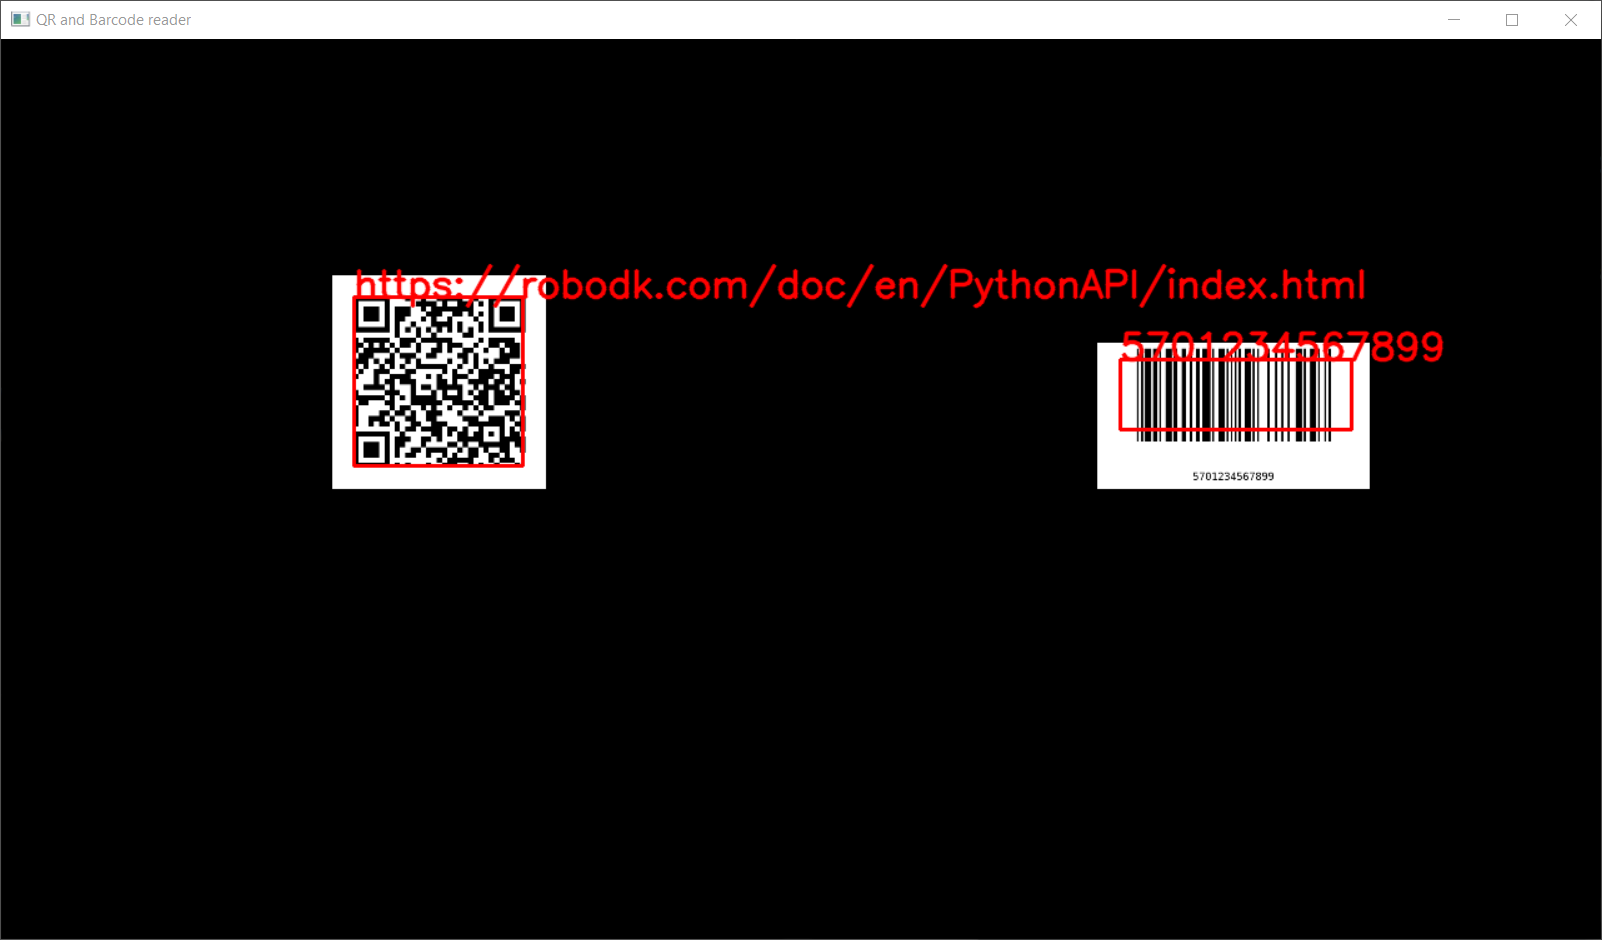
Barcode reading
You can automatically read barcodes, including QR codes, EAN-13 and UPC-A 1D barcodes by using a simulated camera in RoboDK.
You can drag and drop barcode images in RoboDK and create a new simulated camera that points to your barcode.
You’ll find the example in the RoboDK Python API section: https://robodk.com/doc/en/PythonAPI/examples.html#qr-codes-and-barcodes
Object detection
You can get the estimate of the position of an object (2D pose) by using a simulated camera in RoboDK.
You can find the example in the RoboDK API examples section: https://robodk.com/doc/en/PythonAPI/examples.html#object-detection