Create Targets
Robot positions are recorded as Targets. A Cartesian target defines the position of the tool with respect to a coordinate system. A Joint target defines the position of the robot given robot joint values.
Follow these steps to create two targets as a new home target and approach target respectively:
1.Double click the robot to show the robot panel.
2.Select Paint gun as the Tool Frame. Once a tool or a reference frame becomes active it will show a green dot in the tree icon.
3.Select Frame 2 as the Reference Frame.
4.Hold the Alt key and move the robot by dragging it through the TCP or the robot flange to a safe position, free of collisions with any objects. Alternatively, move the coordinates of the Tool Frame (TCP) with respect to the reference Frame.
5.Use the Other configurations section to switch between different robot configurations and make sure that none of the robot axes are close to the axis limits.
6.Select Program➔
In this example, the robot joint coordinates used for the first target are: [-150, -75, -90, -60, 70, 110] deg. You can copy these joint values from the text and paste 
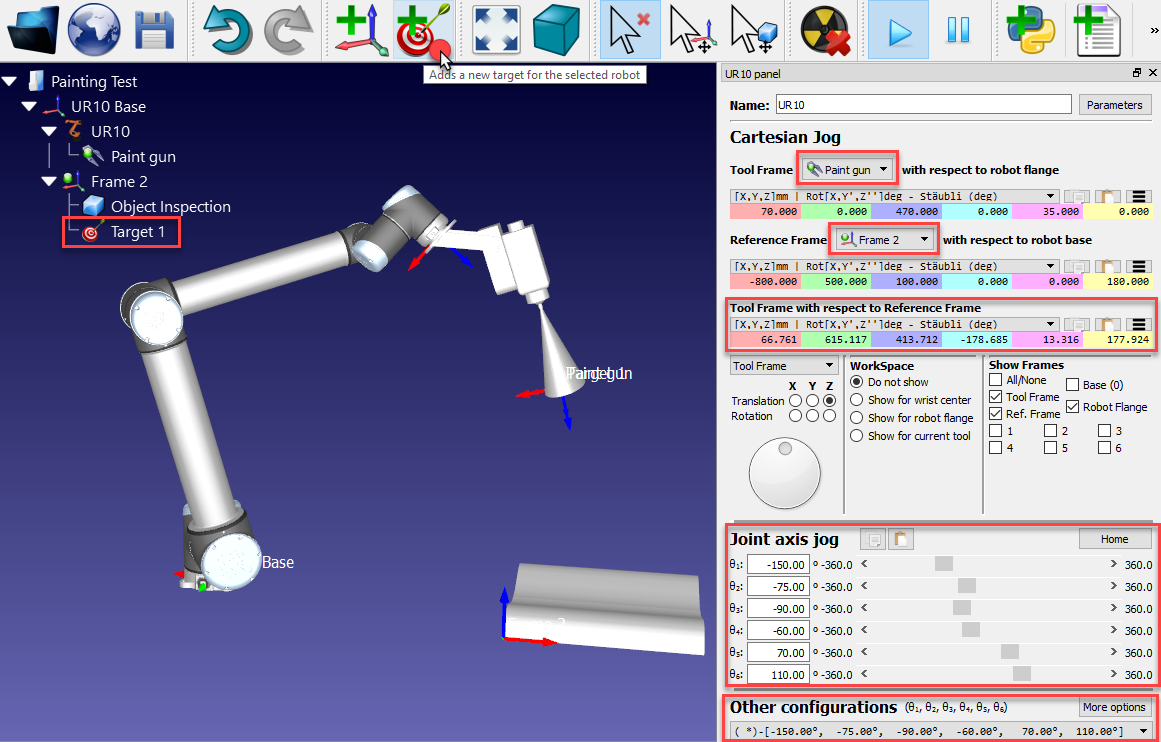
7.Rename the first target as Home by pressing F2. Alternatively, select Tools➔Rename item.
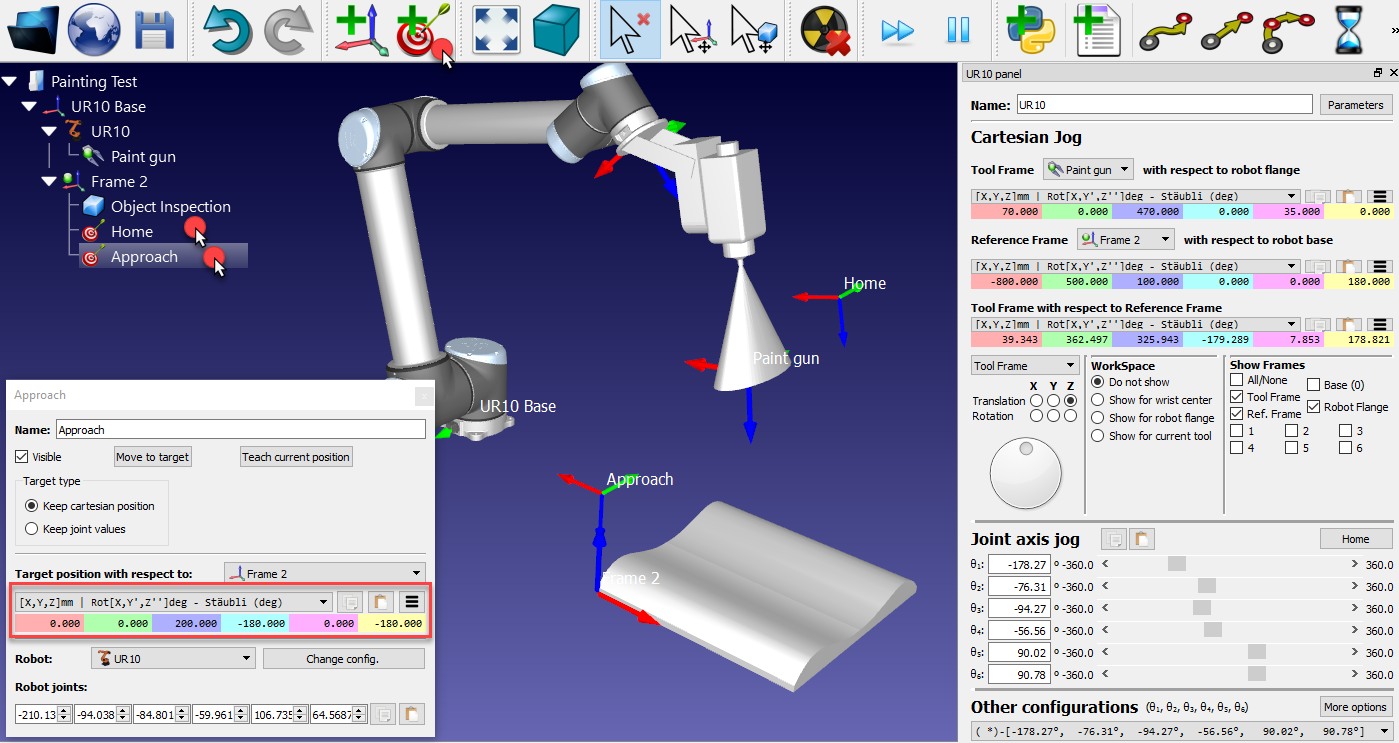
8.Move the robot closer to one edge of the part (by dragging the tool using the Alt key, entering coordinates or jogging the axis manually). In this example we used the following robot joint coordinates [0,0,200,180,0,180] deg.
9.Select Program➔
10.Rename the target to Approach as shown in step 7.
11.Select the Home target and the Approach target alternatively to see the robot moving between the two targets.
12.Right click the target and select Teach Current Position (Alt+double click) if a different position needs to be recorded for one of the targets.
13.Right click the target and select 
If required, provide different values to define the targets.