Using Scripts
You can customize your simulation by using scripts. The RoboDK API allows you to customize the simulation as much as desired. RoboDK integrates with Python and by using a sample script or using the RoboDK API you can improve the result of your simulation.
By default, RoboDK installs Python and a set of sample scripts that allow you to improve simulations. This includes simulating a paint gun, simulating 2D cameras, converting SVG files to robot programs, automatically setting a TCP given a standoff, programming robots using Python, simulating discrete events, etc. Other programming languages can also be used, such as C#, C++ or Matlab. More information is available in the RoboDK API section.
In this example, we will add an existing sample script that will simulate the behavior of the paint gun. You can also change the color of the spray with a transparent color (by selecting Tools➔Change color tool - Shift+T) or load the existing model with appropriate colors (available from the local library as paint_gun.tool or the online library, note that the Set Tool instruction might need to be updated to link to the new tool).
1.Select File➔
2.Navigate to C:/RoboDK/Library/Macros/ to see some sample macros.
3.Select SprayOn.
4.Select Open. A new Python object 
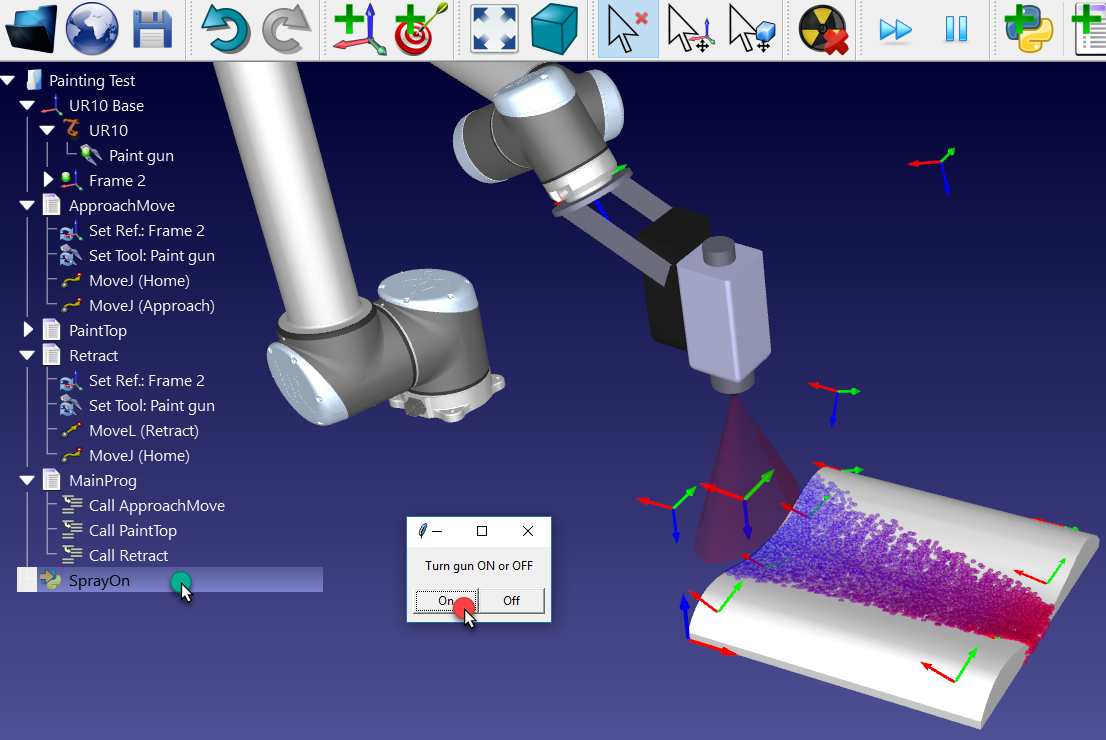
5.Double click the SprayOn macro to test it.
6.Select On to activate it.
7.Hold Alt key, drag the robot flange and move the robot along the surface with the Paint gun.
You should see the trace of the paint gun. The color and transparency should change depending on how close or far the TCP is from the surface.
Select Esc once to clear the simulated paint.
8.Double click the same SprayOn program and select Off to turn the particle simulation Off.
To better understand what happens behind the scenes, it is possible to view or edit the Python code the following way:
1.Right click
2.Select Edit Python Script.
A new window (text editor) will appear showing the code that models the spray behavior and how Python is integrated with RoboDK.
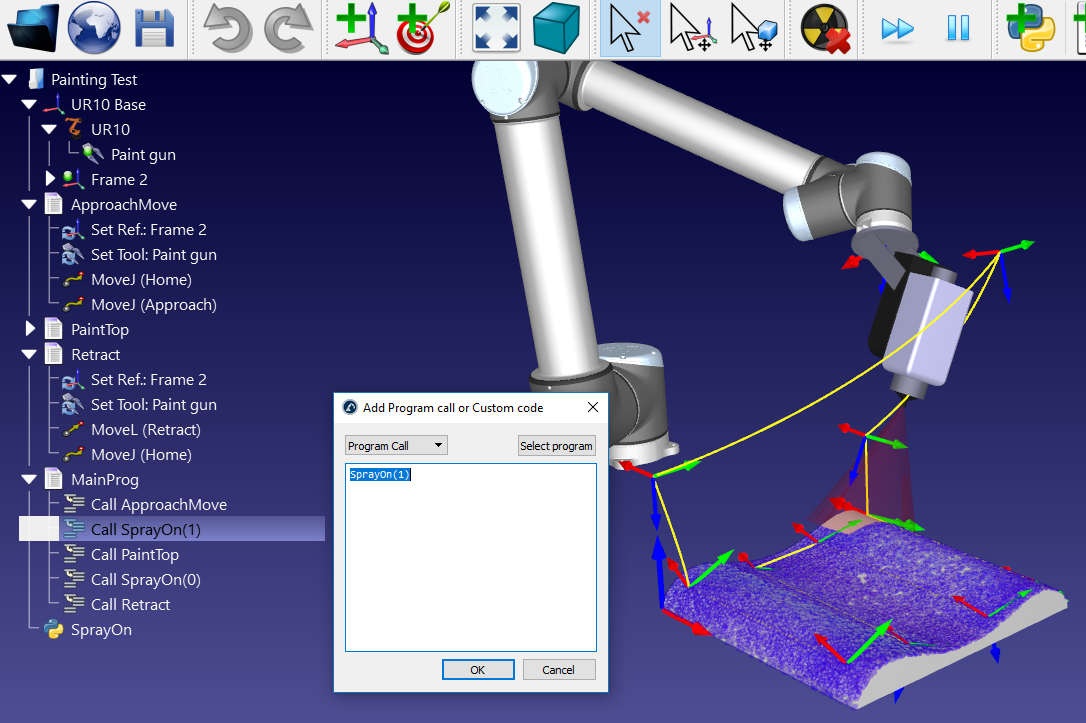
To take the spray simulation into account in the main program we can follow these steps:
1.Right click the instruction Call ApproachMove.
2.Select Add Instruction➔
3.Enter SprayOn(1).
4.Select OK.
5.Repeat the same operation after the PaintTop program setting SprayOn(0), as shown in the following image.
If necessary, reorder the instructions by drag & dropping them within the program.
6.Run the MainProg program. After two iterations, the result should look like as shown in the image (simulating at normal speed).
It is also possible to create new macros:
1.Select Program➔
2.Right click the new program and select Edit Python Script.
RoboDK supports setting the robot speed within the program, setting digital outputs, waiting for digital inputs, displaying messages, etc. These instructions are available under the Program menu.