JAKA robots
This section of the documentation provides an overview of the typical operation of JAKA robots using RoboDK software to send a program to the JAKA robot controller app.
The available features include:
1.Controlling the robot in real-time using the driver and “Run on Robot”.
2.Sending a program to the JAKA Zu app using the post-processor and “Send program to Robot” or manually load the program into JAKA Zu by importing the .zip file generated by RoboDK.
Send a Program to the JAKA Controller through RoboDK
You can send a program to your JAKA robot controller with just a few clicks from a RoboDK simulation.
You should follow these steps to load a program from RoboDK into JAKA Zu:
1.Launch the JAKA Zu app and connect to the robot in the JAKA Zu app.
2.Power on and enable the JAKA Zu robot.
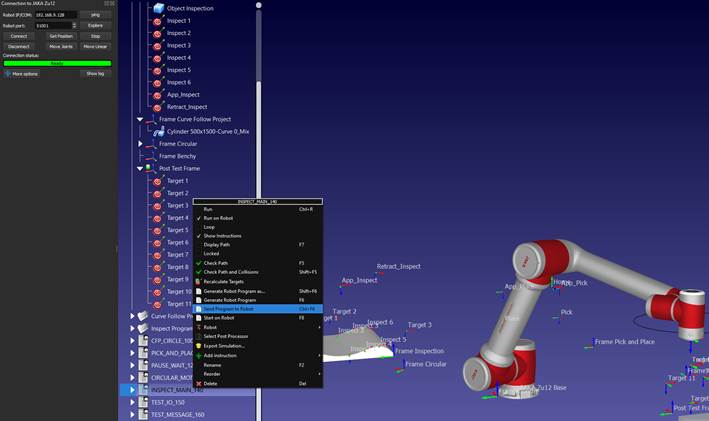
3.In the RoboDK toolbar, select Connect➔Connect Robot.
Under More options, make sure you have the JAKA driver selected: apijaka.py.
4.Use your robot IP and port to connect the robot in RoboDK.
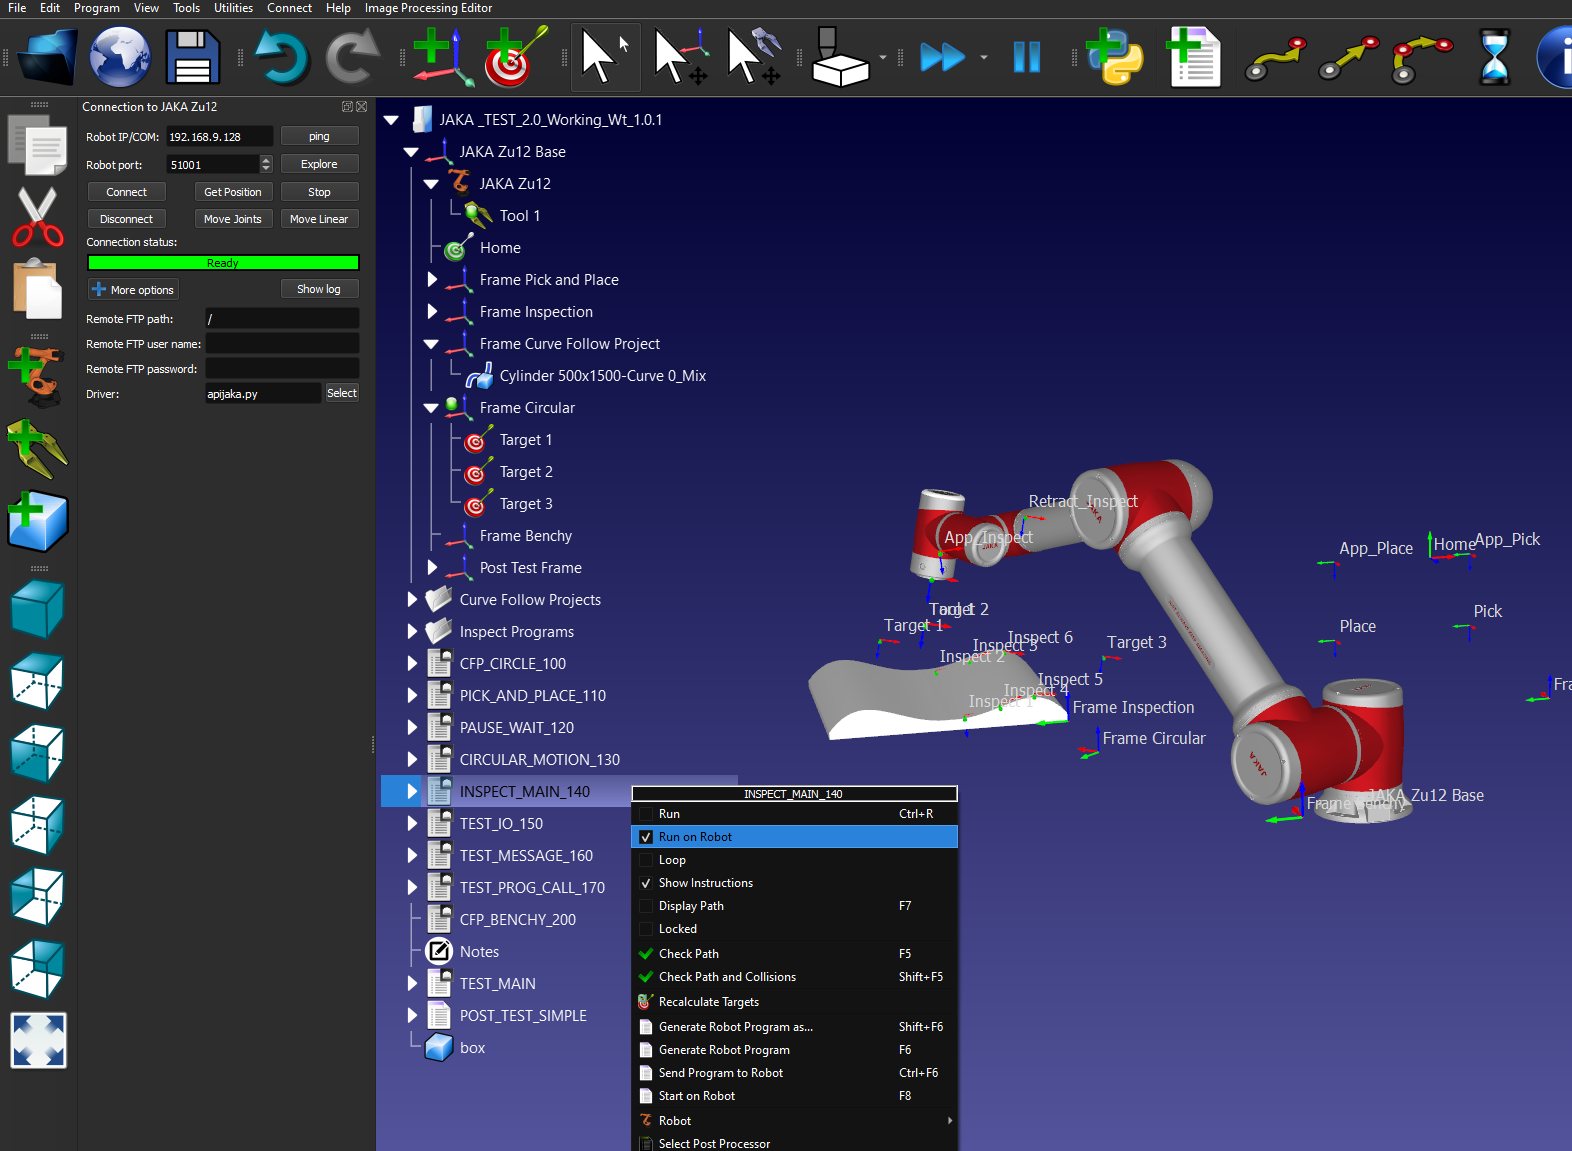
5.Right-click the program you want to send to JAKA Zu and select Send Program to Robot.
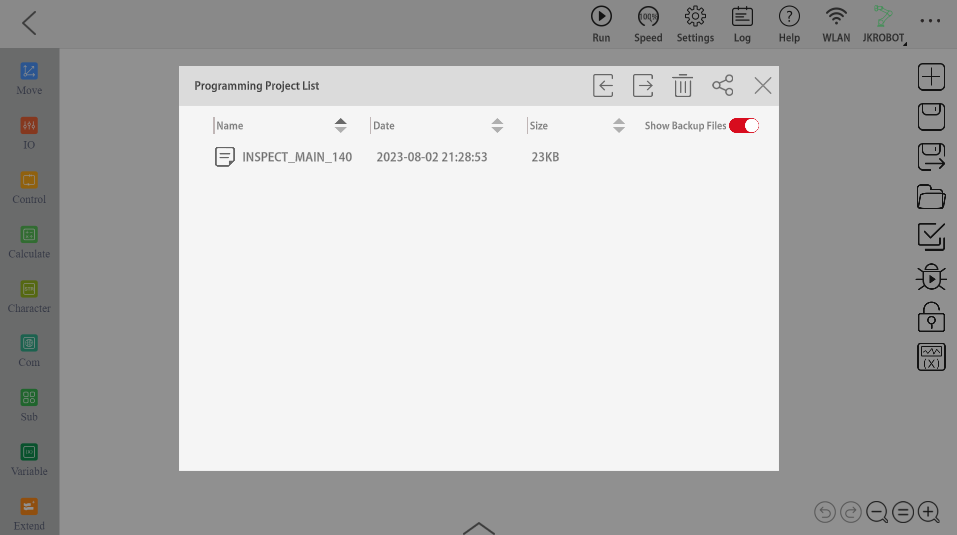
6.In JAKA Zu, navigate to the Programming Control tab.
7.Open the Programming Project List by clicking the folder icon and select the imported program.
Manually Import a Program to the JAKA Controller
You can manually import robot programs generated from RoboDK to your JAKA robot controller.
You should follow these steps to import a RoboDK program into JAKA Zu:
1.Launch the JAKA Zu app and connect to the robot in the JAKA Zu app.
2.Power on and enable the JAKA Zu robot.
3.Right-click the program you want to import to JAKA Zu and select Generate Robot Program as….
4.Select the location you would like the program to be saved.
5.In JAKA Zu, navigate to the Programming Control tab.
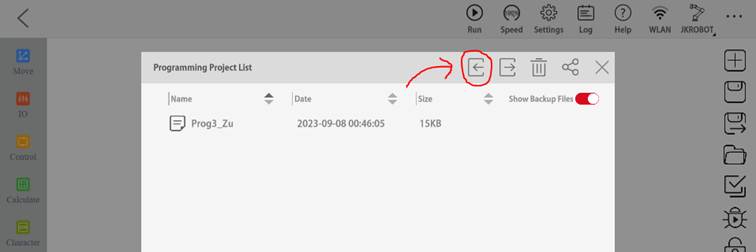
6.Open the Programming Project List by clicking the folder icon and click on the import icon.
7.Locate and select the .zip file generated by RoboDK.
8.Open the Programming Project List and select the imported program.
Manually replace the robot reference frame
The following steps show how to manually configure the robot reference frame in the JAKA Zu app.
First, you should create a custom JAKA Zu frame:
1.In JAKA Zu, navigate to Settings ➔ Operation Settings ➔ User Coordinate System.
2.Click on the edit button to set X, Y, Z, RX, RY, and RZ values for a custom frame.
3.Select confirm to save the frame to JAKA Zu.
Then, you should replace the imported frame by the JAKA Zu frame:
4.Follow the steps listed in Send a Program to JAKA Zu.
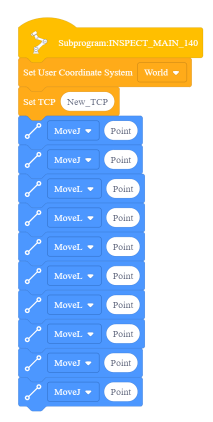
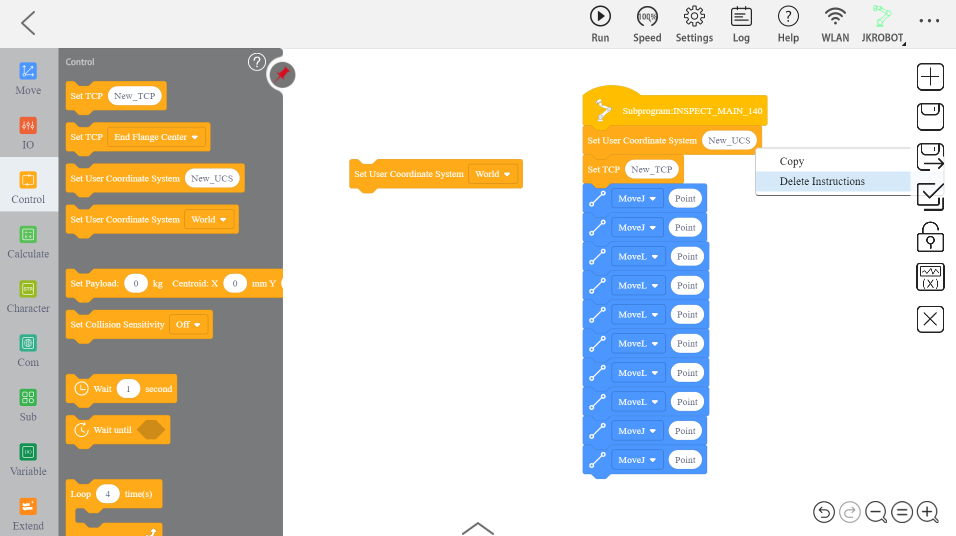
5.Open the Control tab in the sidebar and locate the “Set User Coordinate System” tile containing the dropdown box.
6.Remove the “New_UCS” tile that was automatically imported by right clicking it and selecting delete.
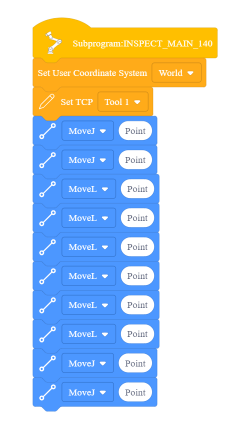
7.Replace the removed tile with the “Set User Coordinate System” tile and select the custom frame from the dropdown.
Manually replace the robot tool (TCP)
You can also manually configure the TCP through the JAKA Zu app. The following steps describe this process.
First, you should create a custom JAKA Zu tool:
1.In JAKA Zu, navigate to Settings ➔ Operation Settings ➔ TCP Settings.
2.Click on the edit button to set X, Y, Z, RX, RY, and RZ values for the custom TCP.
3.Select confirm to save the tool to JAKA Zu.
Then, you should replace the imported tool by the JAKA Zu tool:
4.Follow the steps listed in Send a Program to JAKA Zu.
5.Open the Control tab in the sidebar and locate the “Set TCP” tile containing the dropdown box.
6.Remove the “New_TCP” tile that was automatically imported by right clicking it and selecting delete.
7.Replace the removed tile with the “Set TCP” dropdown tile.
8.Select the desired tool from the dropdown menu.

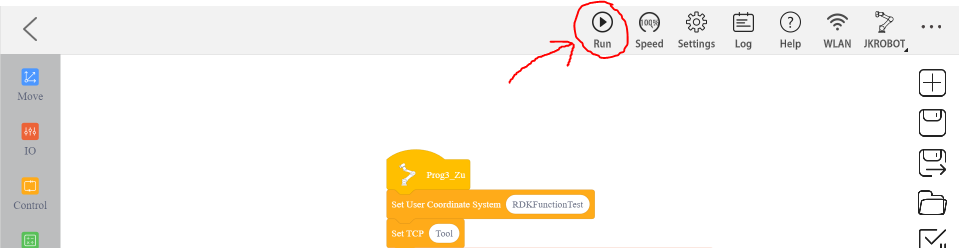
Start a robot program
Follow these steps to start a robot program on a JAKA robot.
1.Follow the steps listed in Send a Program to JAKA Zu.
2.In the top toolbar, select “Run”.
RoboDK driver for JAKA
A connection between RoboDK and the JAKA robot can be established to move the robot automatically from a connected PC using RoboDK. This allows using the RoboDK Run on robot option for online programming and debugging. The connection can be established through a standard Ethernet connection (TCP/IP).
Follow these steps to set up the RoboDK driver for JAKA online programming:
1.Launch the JAKA Zu app and connect to the robot in the JAKA Zu app.
2.Power on and enable the JAKA Zu robot.
3.In the RoboDK toolbar, select Connect ➔ Connect Robot.
4.Under “More options”, select the JAKA driver: apijaka.py.
5.Use your robot IP and port to connect the robot in RoboDK.
6.You can now move the JAKA robot directly from RoboDK
a.To move the robot to a target in RoboDK, double click the target in in the station tree and select the “Move Joints” or “Move Linear” buttons in the connection interface to effectuate a joint or linear move to the target.
b.To run a program on the robot using the driver, right click on the desired program and select the “Run on Robot” option. Then, double click the program to run it on the robot.
Retrieving the IP address from the JAKA virtual simulator
To retrieve an IP address from the virtual simulator, you must decode the Base64 string that is required in the Robot Address field shown below:
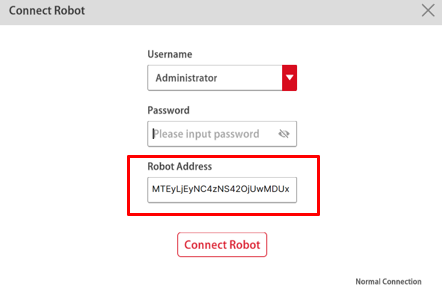
Using tools like https://www.base64decode.net/ you can retrieve the Robot IP and Port from the robot address.


In this example, the IP is 112.124.35.6 and the port is 50051.