Universal Robots
Universal Robots (UR) can be programmed with RoboDK using two different methods: URP files and Script files.
1.The Graphical User-Interface (URP files): URP programs are created using the teach pendant’s touch screen of the robot. A URP program can have one or more SCRIPT files as subprograms. URP programs are transformed into SCRIPT programs behind the scenes on the robot controller before execution.
2.Script files: Script programs use the UR Script programming language. Like any other programming language, UR Script has variables, types, flow of control statements, function etc. In addition, UR Script has several built-in variables and functions which control the I/O and the movements of the robot.
With RoboDK you can generate SCRIPT and URP files that can be executed by a UR robot. Additionally, it is possible to execute programs on the robot from RoboDK if the robot is connected to the computer.
RoboDK can also import SCRIPT files to the simulator. This allows you to simulate SCRIPT programs, modify them and re-export them.
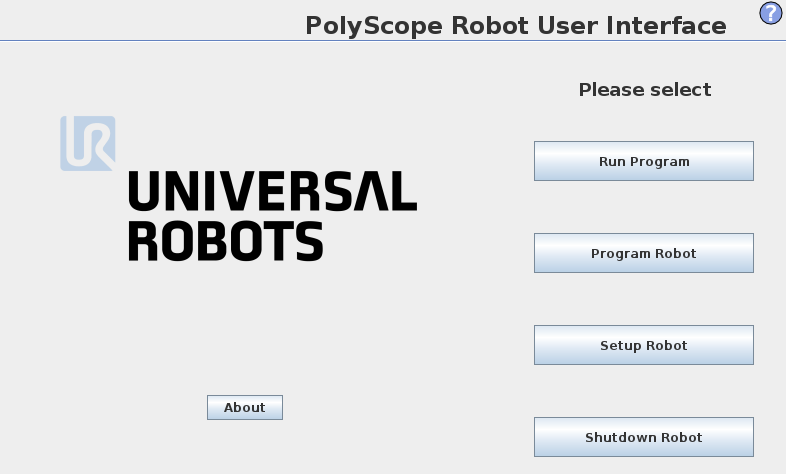
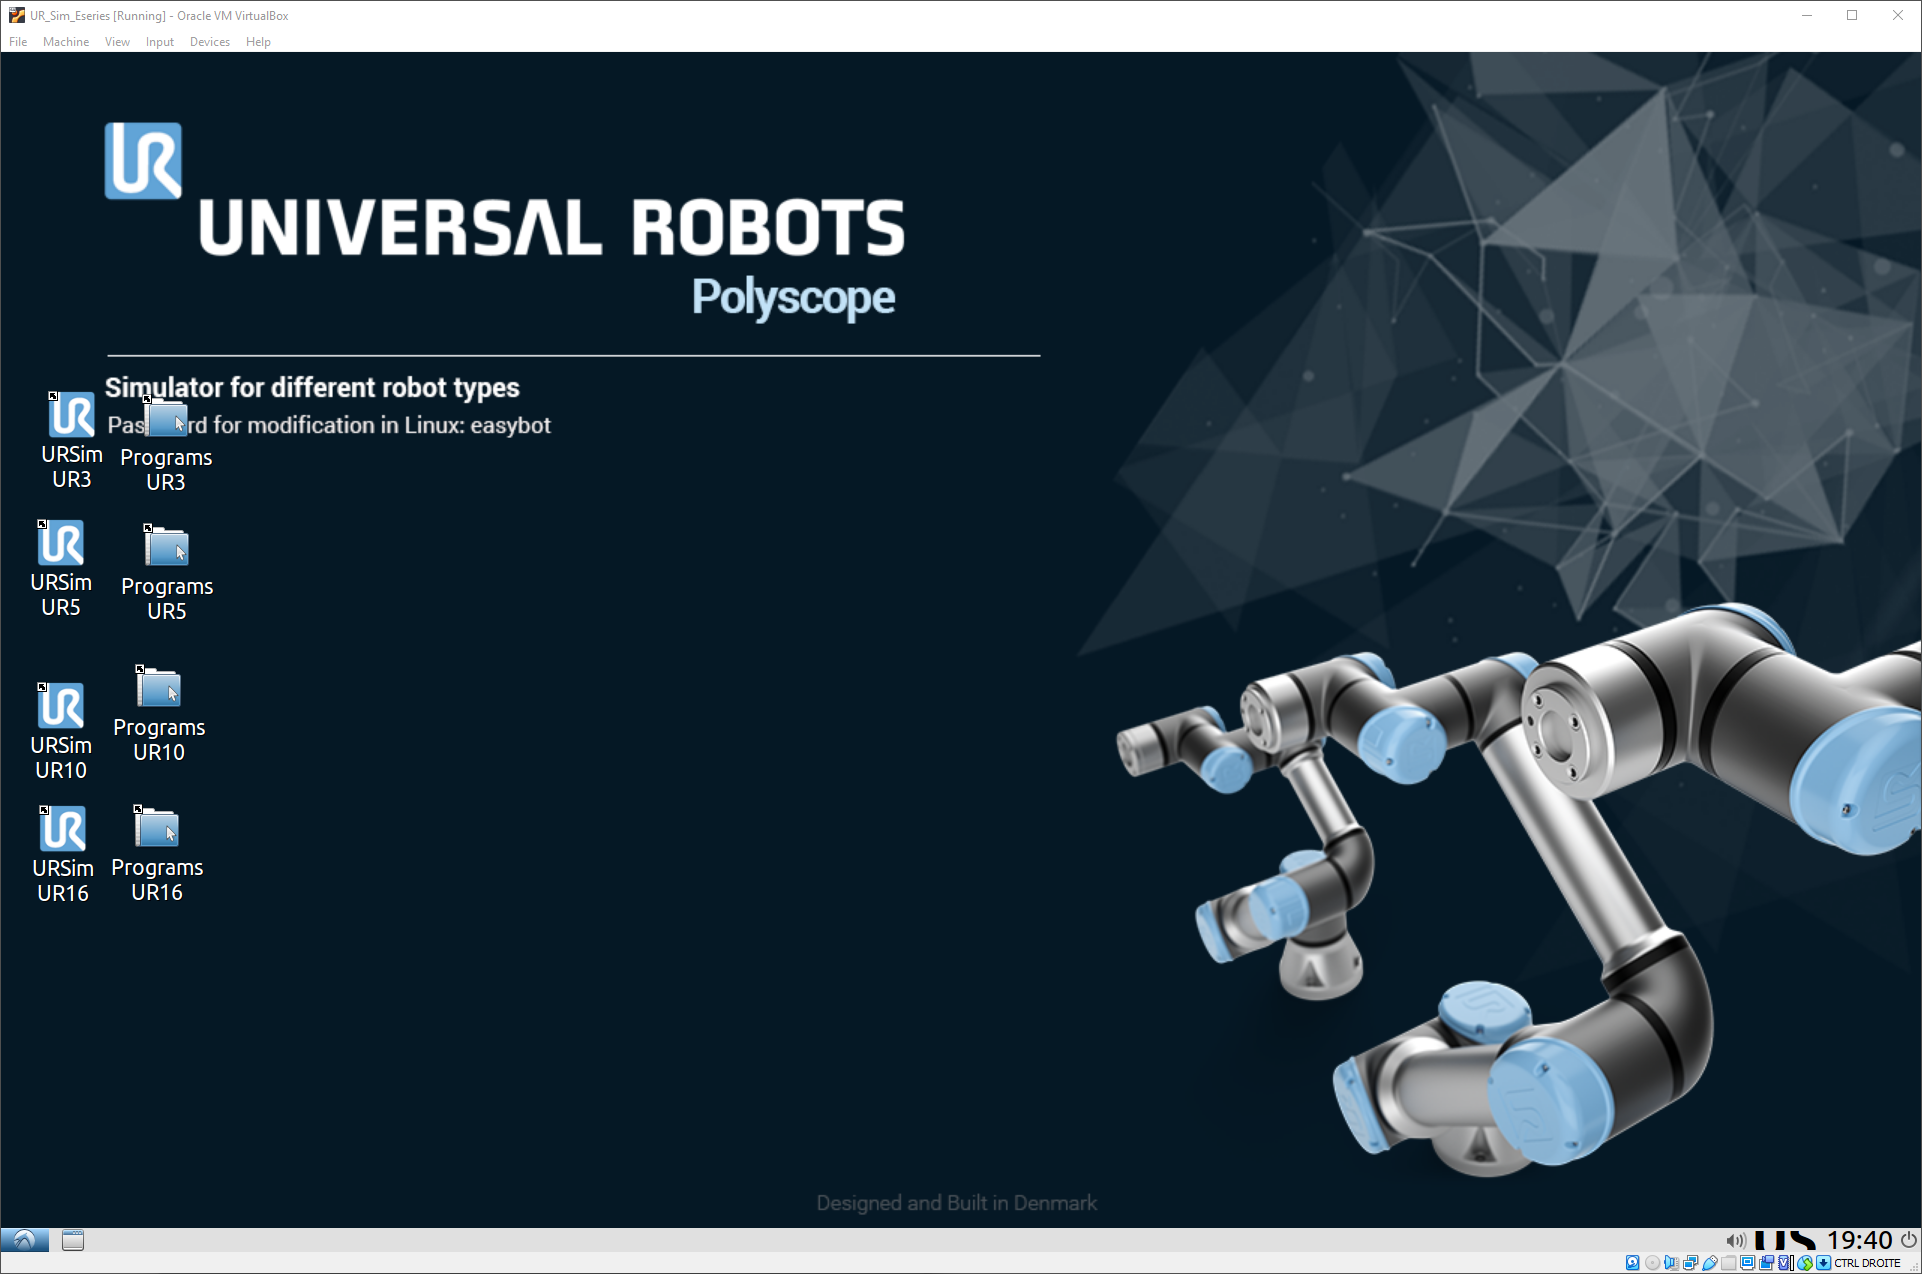
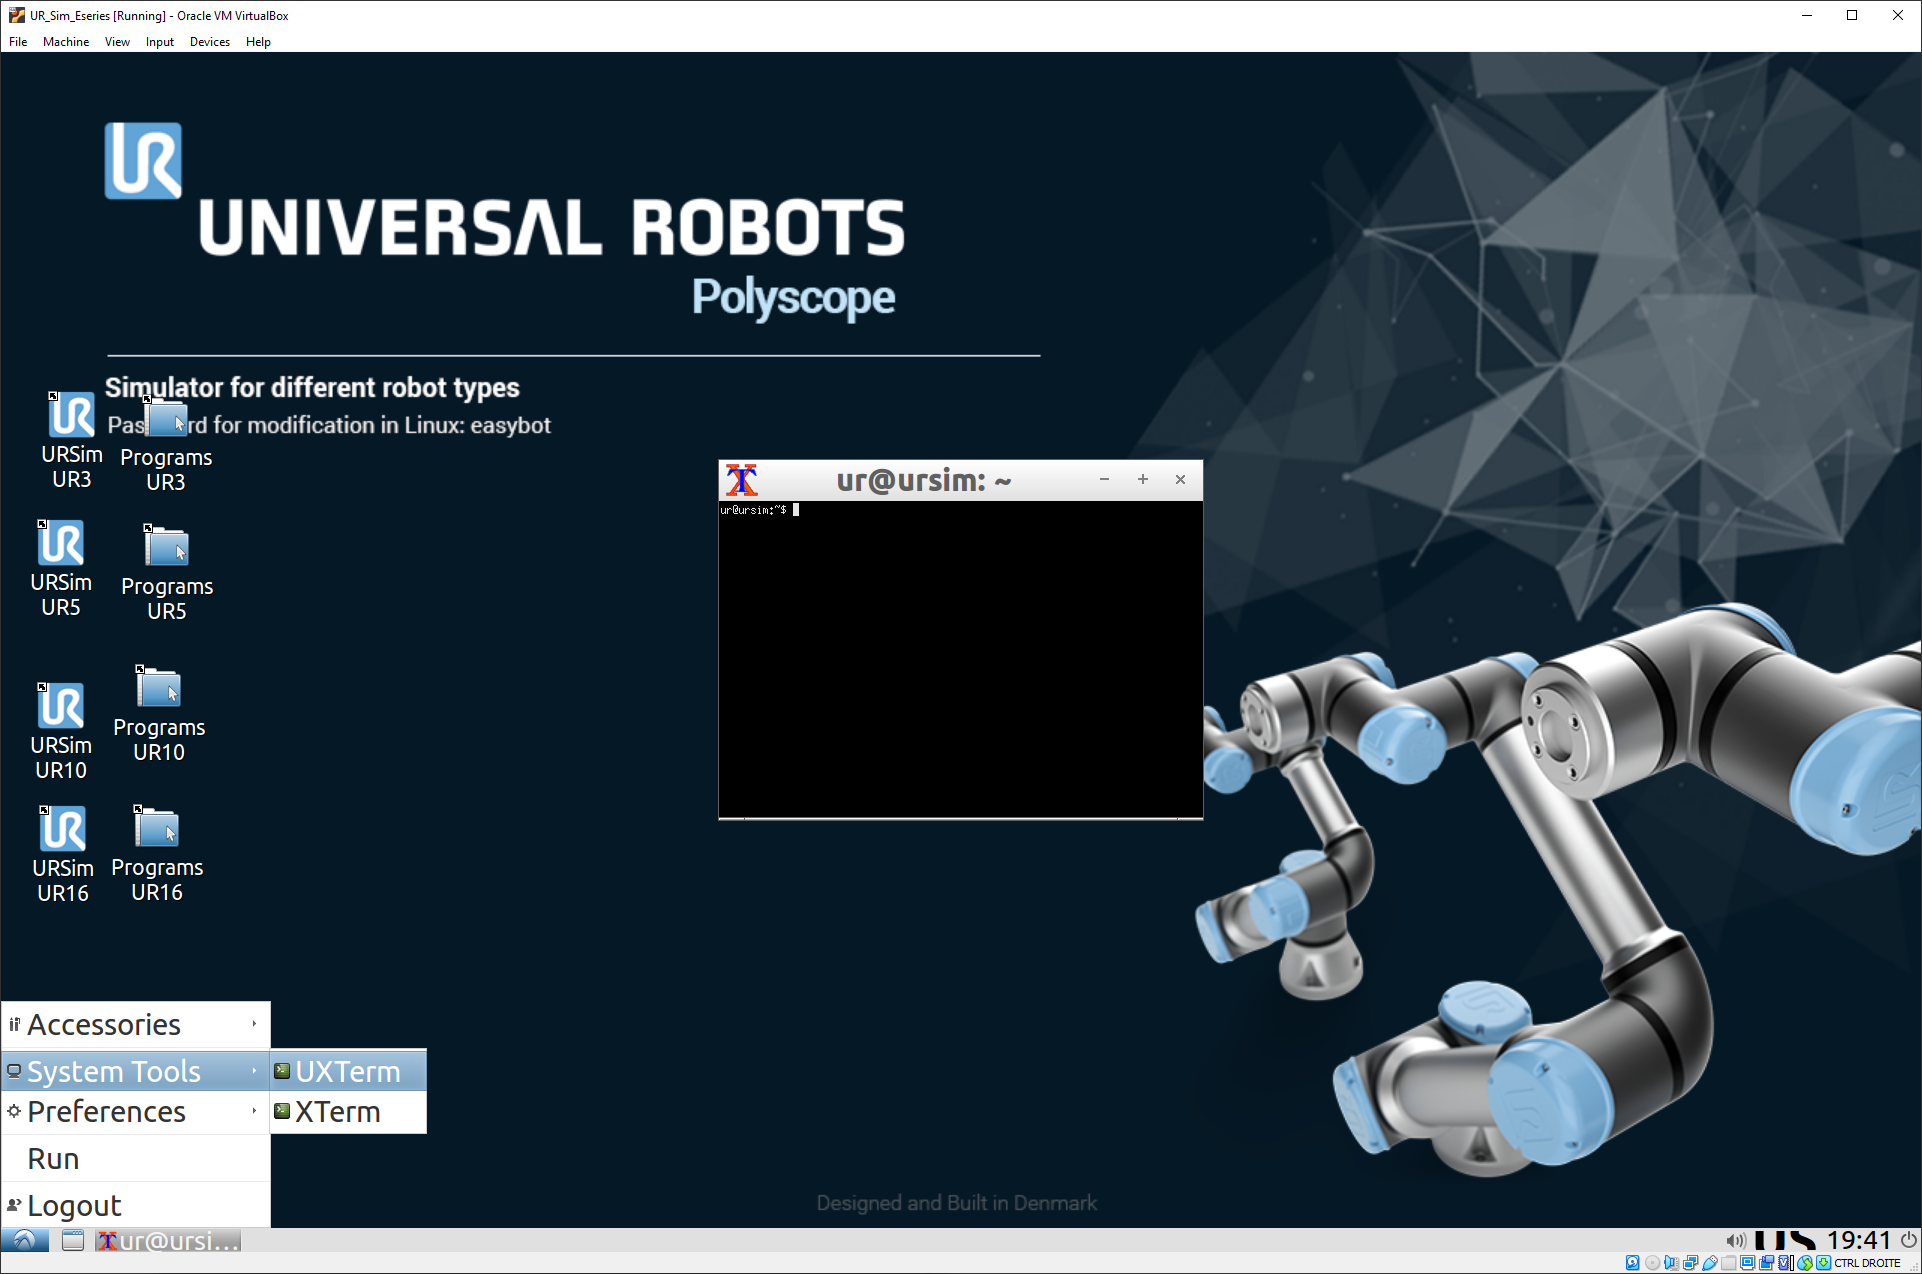
The Graphical User Interface of a UR robot is called PolyScope (as shown in the following image).
Retrieve the UR robot IP
The IP of the robot is required execute programs directly from the RoboDK simulator. It is also possible to transfer program files through FTP.
The IP of the robot can be retrieved from the About menu in the UR’s teach pendant main screen.

The robot must be connected to the computer through an Ethernet connection (direct connection or through a network). A Ping test allows testing if the Network link has properly been stablished.
Run Program from RoboDK
Robot drivers provide an alternative to Offline Programming (where a program is generated, then, transferred to the robot and executed). You can run a simulation from RoboDK directly on the robot (Online Programming). More information available in the Robot Drivers section.
RoboDK offers two different drivers: apiur and DriverUR. The apiur driver is legacy, but can still be used to control modern systems based on PolyScope 5.22 and below. The DriverUR is the preferred driver for connecting to the modern UR robots.
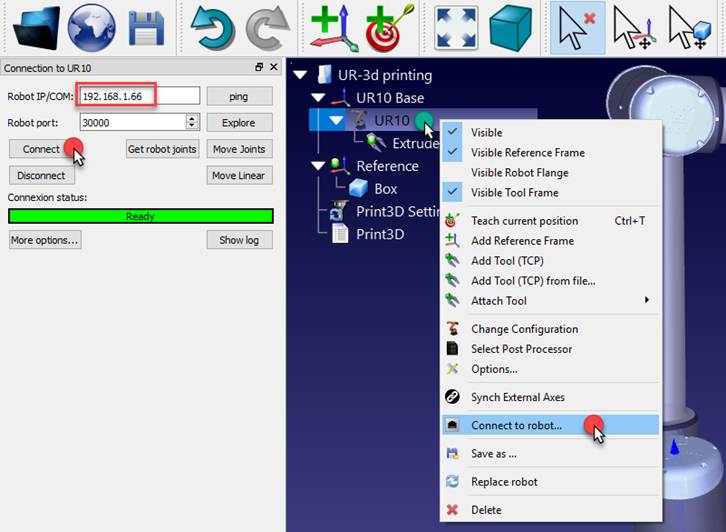
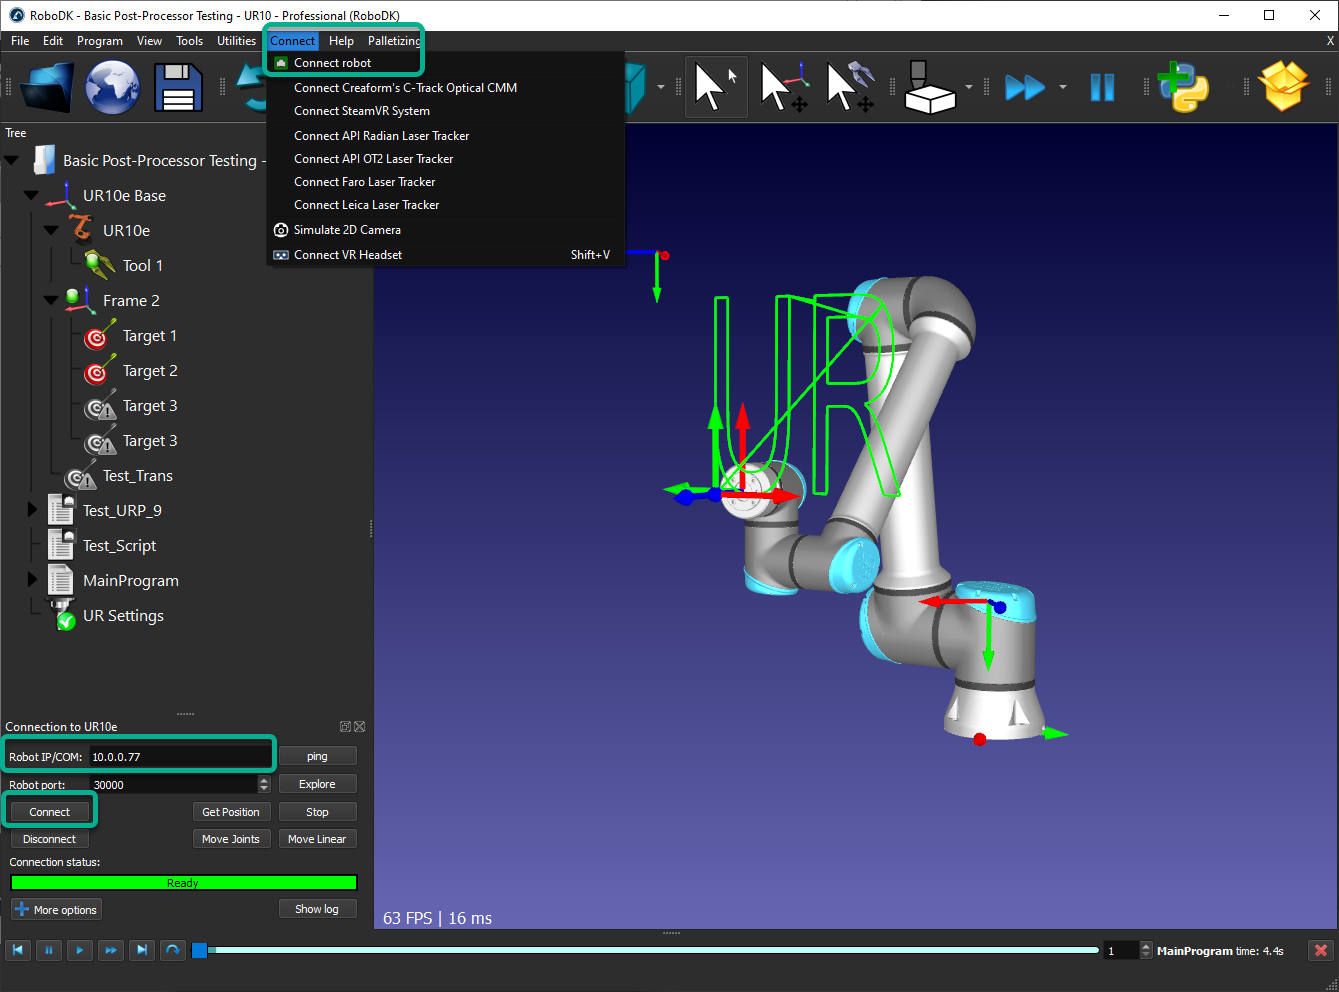
Follow these steps to connect to the robot from RoboDK:
1.Right click the robot in RoboDK
2.Select: 
3.Enter the IP of the robot
4.Click the More options button to know exactly which driver is being used and to be able to change it (optional).
5.Select Connect.
There should be a green message displaying Ready if the connection succeeded.
The robot can be moved by selecting Get robot joints, Move Joints and Move Linear, from the connection menu.
There are two different methods to run the program from the PC to the robot:
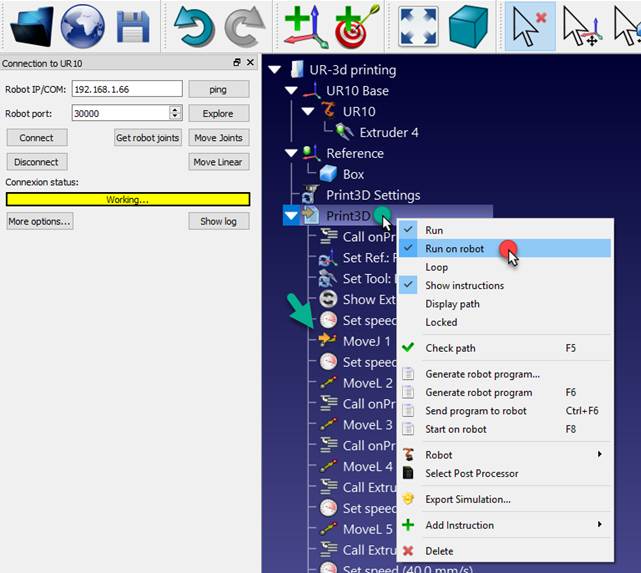
1.Run on robot step by step with feedback in RoboDK (Online Programming):
This method uses the robot as a server and each instruction is sent to the robot step by step as it is executed in the simulator. This method is useful for debugging purposes.
a.Right click the program (Print3D in this example)
b.Select Run on robot
c.Double click the program to start it (or right click and select Run)
Once this option is checked it will connect to the real robot every time we double click a program (or right click, then, select Run)
These operations are also available from the RoboDK API and it allows integrating robot programming with other applications. The API is available in Python and C# and other programming languages.
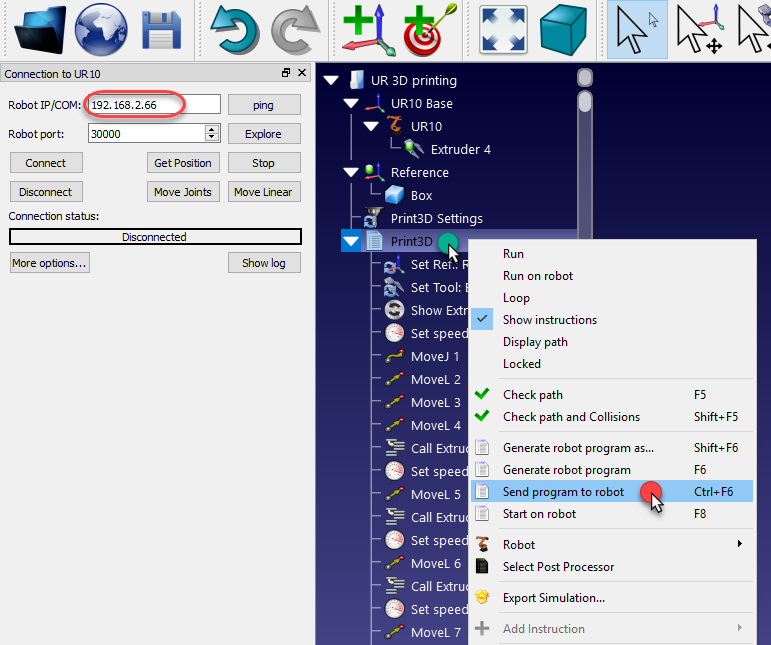
2.Send program to robot generates the complete program, transfers it to the robot and starts the program on the real robot (Robot Offline Programming):
a.Right click the program (Print3D in this example)
b.Select Send program to robot (Ctrl+F6).
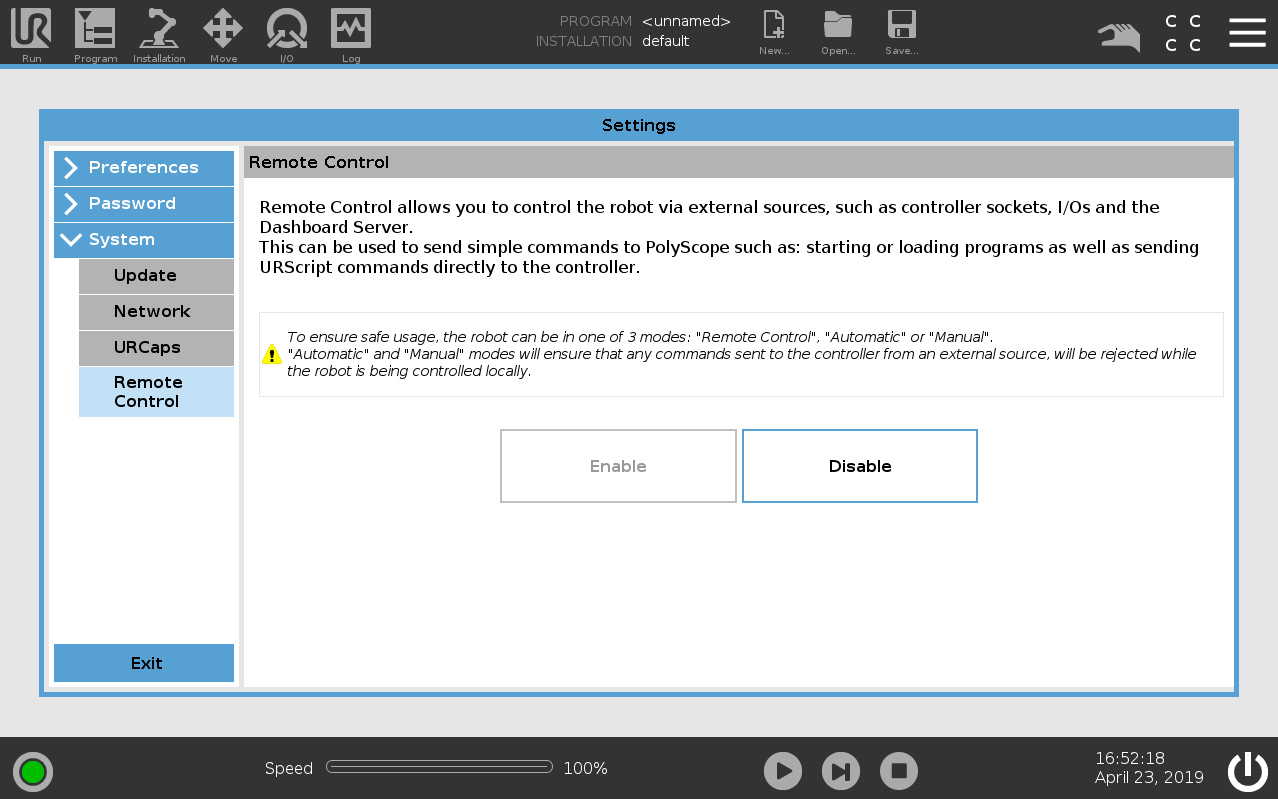
How to enable Remote Control on URe
You should enable the Remote Control option on the UR robot controller if you have a URe robot (UR3e, UR5e or UR10e).
Follow these steps to enable URe’s Remote Control:
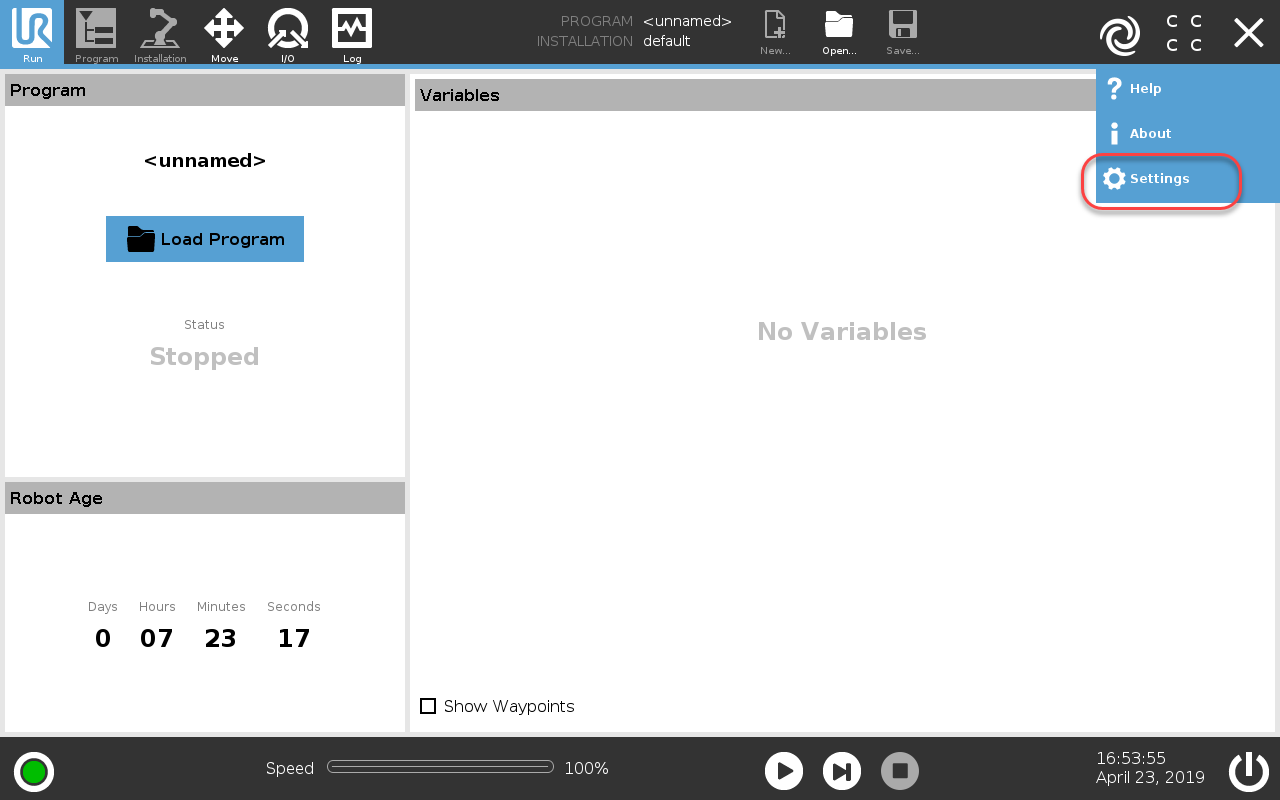
1.Select the Settings menu from the top right button
2.Select System-Remote Control
3.Select Enable
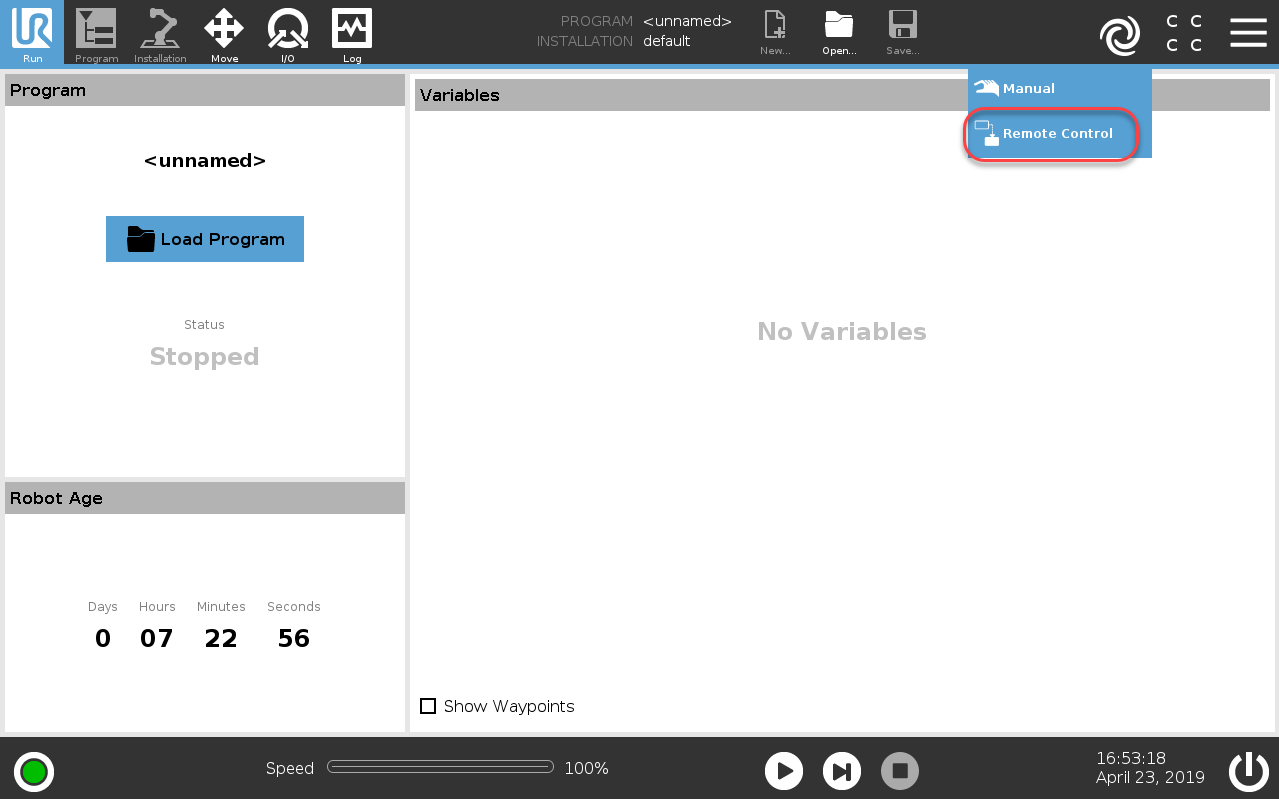
4.Change the mode of operation to Remote Control
Network connection details
The RoboDK driver connections to UR control systems are bidirectional. This means that the driver not only connects to the remote system as a client, but also acts as a server at the same time, waiting for a counter connection from the control system. That counter connection from the UR control system to the RoboDK computer is considered by the latter as an external incoming connection. Such connections are most often blocked by the operating system firewall. If completely disabling the firewall on your system is not acceptable, then use the table below to accept the necessary inbound and outbound connections:
Purpose | Direction | Protocol | Port Number (apiur) | Port Number (DriverUR) |
Secondary Interface | RoboDK → UR | TCP | 30002 | 30002 |
Real-Time Interface (RTDE) | RoboDK → UR | TCP | not used | 30004 |
Reverse Interface | UR → RoboDK | TCP | 30000 | 50001 |
Script Sender | UR → RoboDK | TCP | not used | 50002 |
Trajectory Interface | UR → RoboDK | TCP | not used | 50003 |
Script Command Interface | UR → RoboDK | TCP | not used | 50004 |
Run a Program on the UR controller
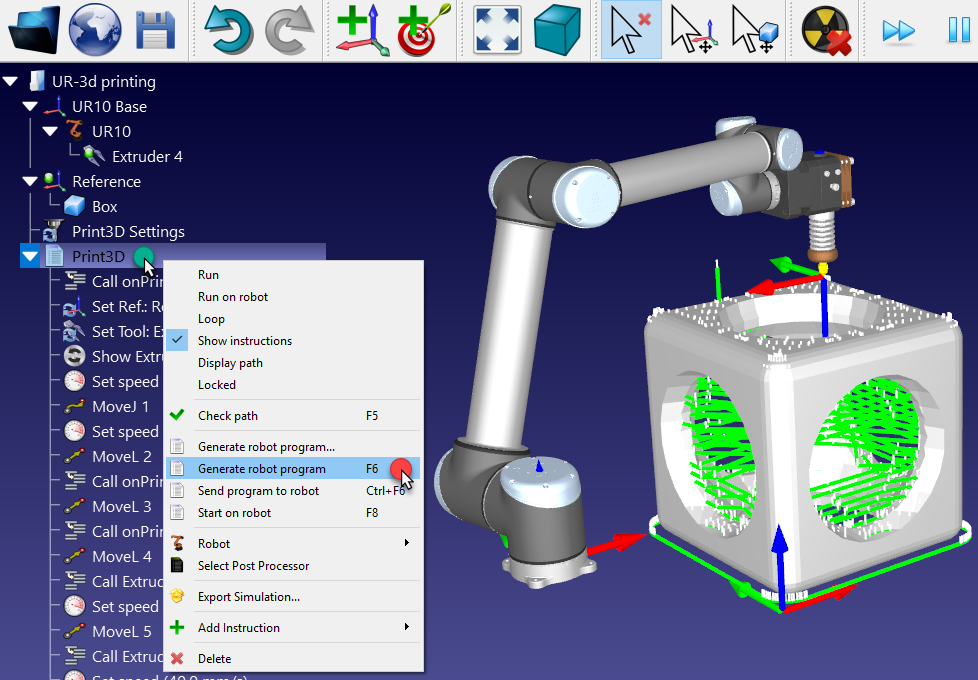
Once your RoboDK simulation is ready you can generate a SCRIPT and/or a URP program. These two files can be executed by the robot controller. Follow these steps to generate a SCRIPT and a URP program from your robot simulation:
1.Right click a program (Print3D in this example)
2.Select Generate robot program F6
The program will be displayed in a text editor (this behavior can be changed in the menu: Tools➔Options➔Program).
Transferring the SCRIPT and URP files can be done through SFTP transfer or a USB drive.
How to load a URP program
The following steps summarize the procedure to load a URP file on the Universal Robots robot.
1.Right click the program and select Select Post Processor
2.Select Universal Robots URP
These first 2 steps are optional as the default post also generates a URP file, however, it will allow you to generate a user-readable URP program instead of a URP program that executes a script file.
3.Right click the program and select Generate robot program (F6)
4.Save the generated URP file(s) to a USB memory disk.
5.Connect the USB memory disk to the robot teach pendant (UR’s Polyscope)
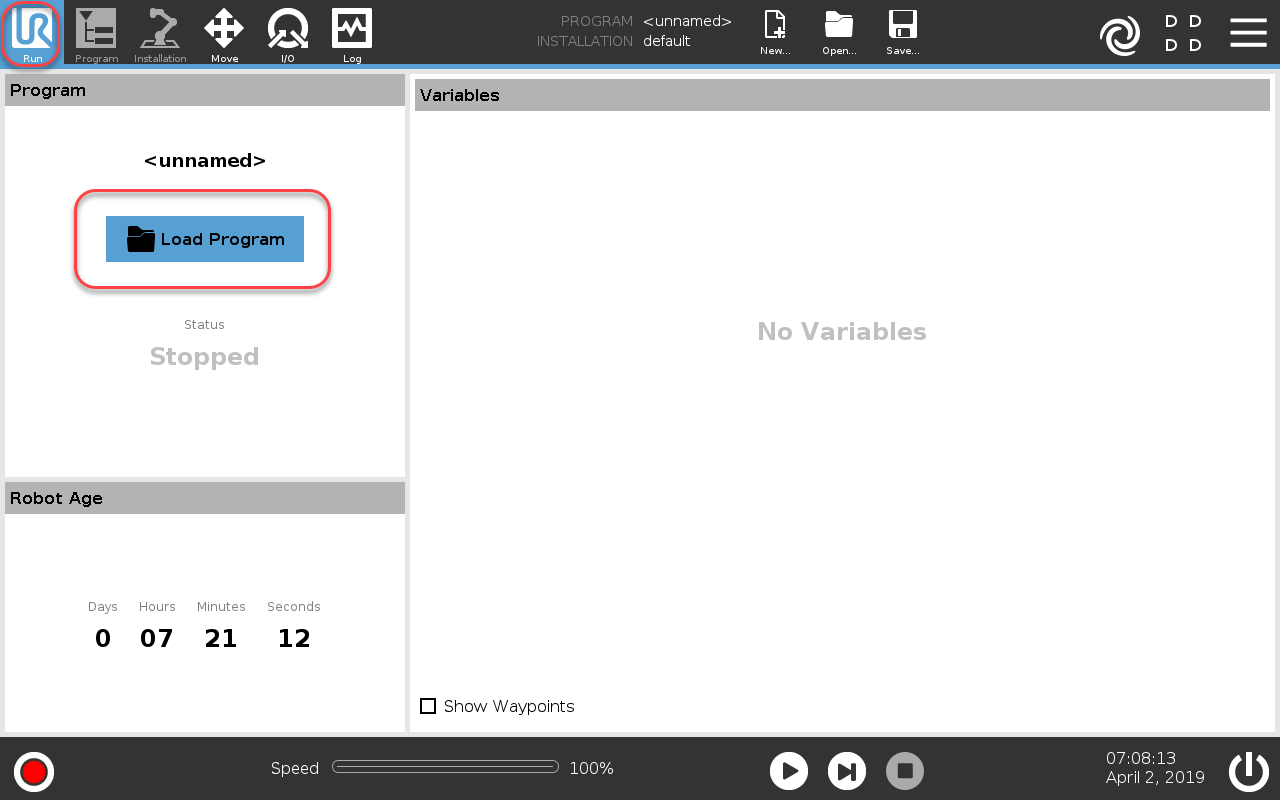
6.On the robot teach pendant: Select the Run tab
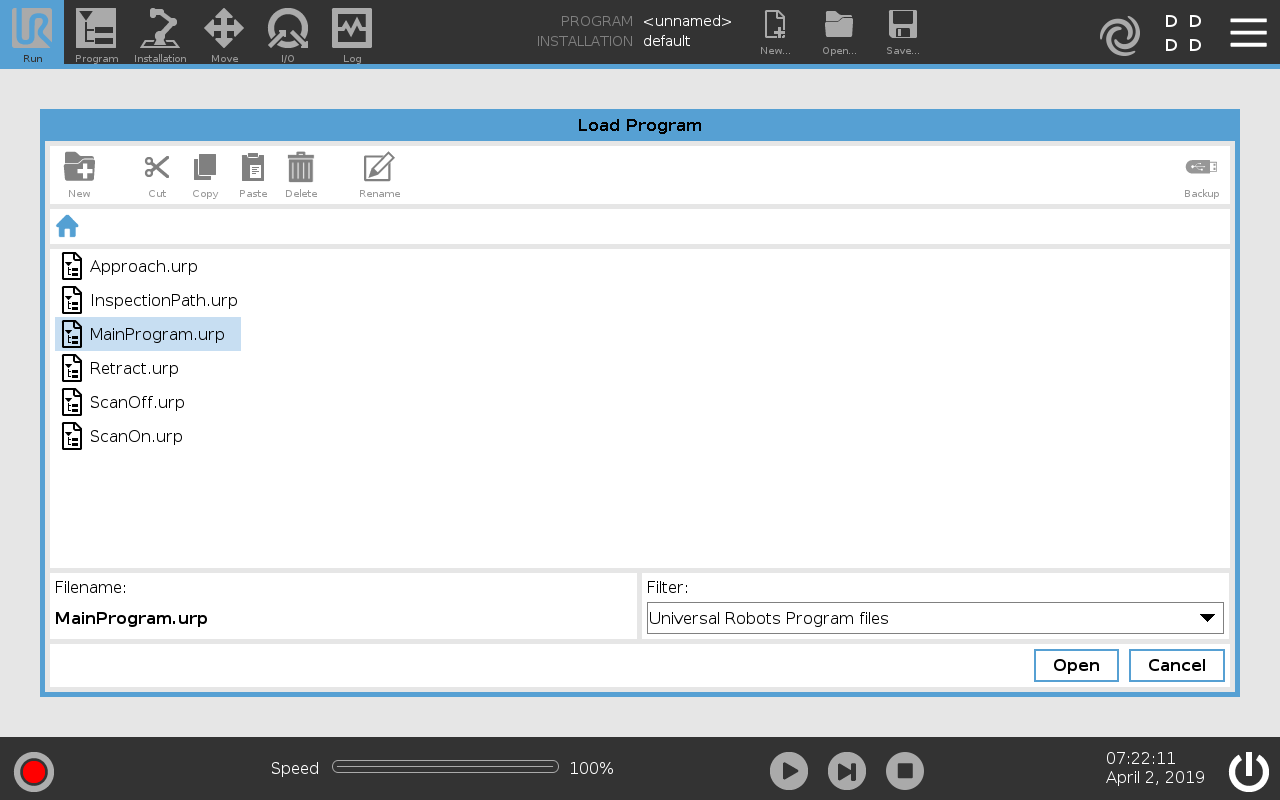
7.Select Load Program and load the program generated from RoboDK
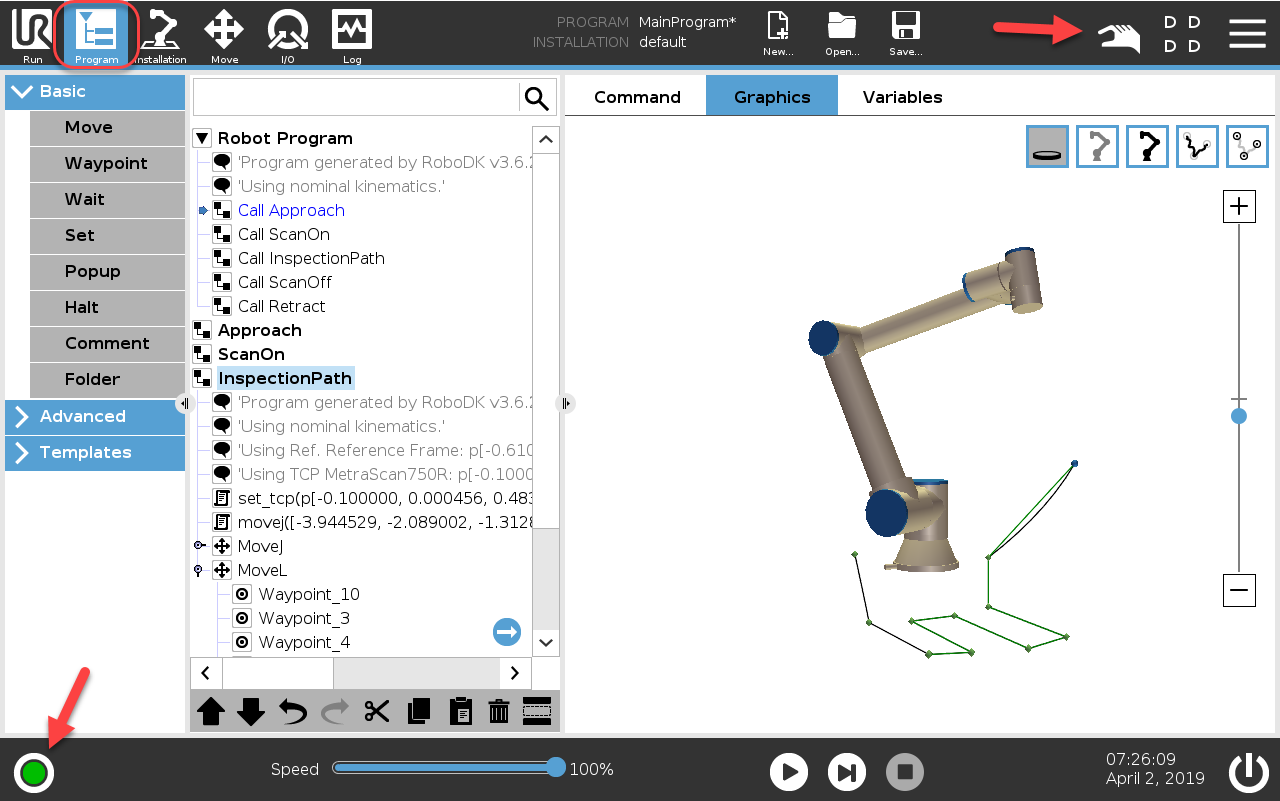
8.Select the Program tab and select the Play button to start it
9.Select the Play button to start the program.
How to load a Script file
The following steps and images summarize the procedure to execute a SCRIPT program on the robot. These steps are not required to run a URP program file:
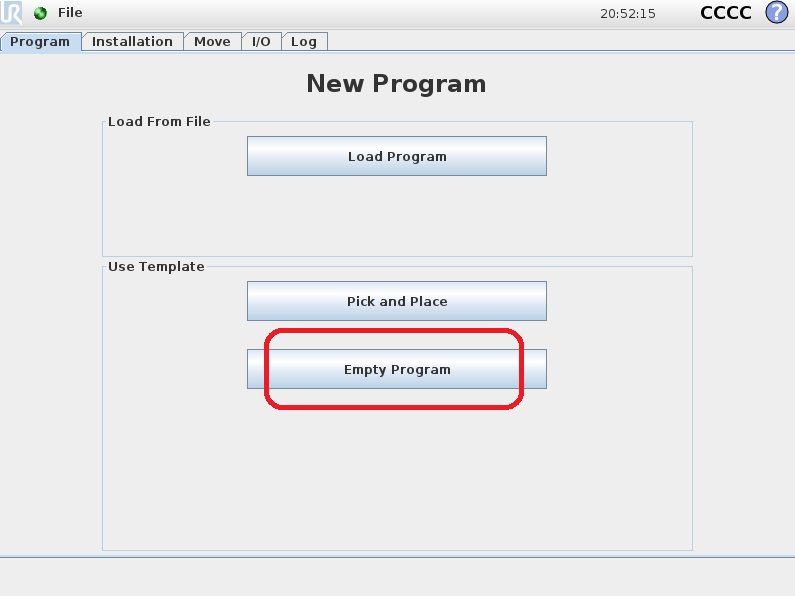
1.Select Program Robot on the main screen of the teach pendant
2.Select Empty Program
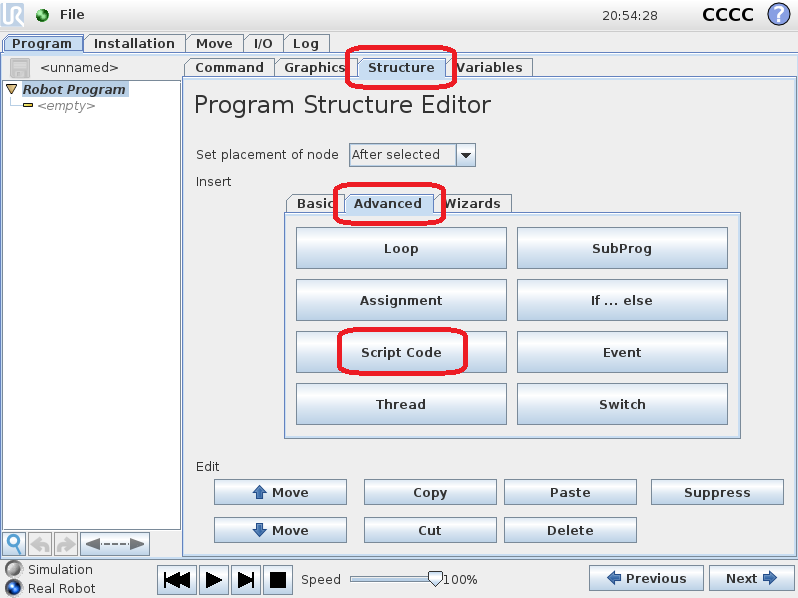
3.Select the Structure tab
4.Select the Advanced tab
5.Select Script code
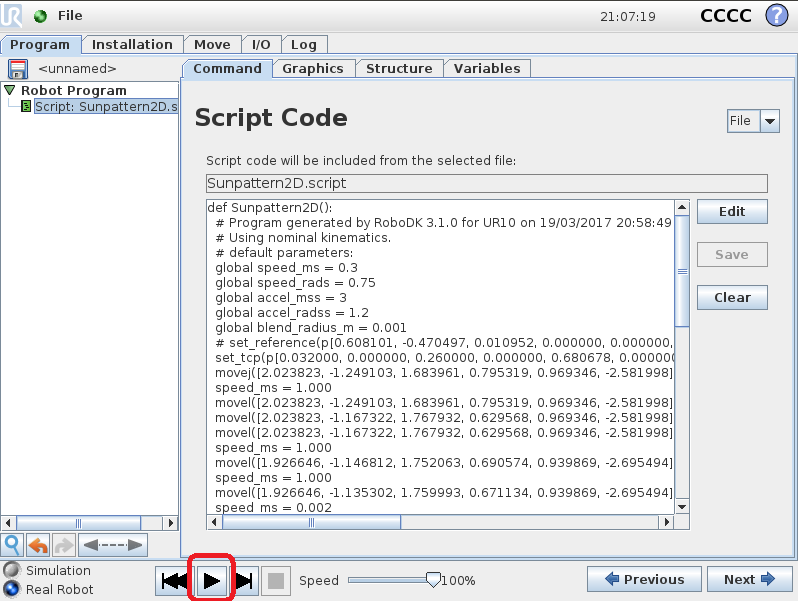
6.Select File (as shown in the image)
7.Select the script file generated by RoboDK
8.Select the play icon to run the program
9.Select File➔Save to save the changes
10.Finally, the program can be executed

Transfer a Program (FTP)
A SCRIPT program generated from RoboDK (such as by pressing F6) can be transferred to the robot using a USB disk or by FTP transfer if the robot and the computer are connected.
It is recommended to install FileZilla Client on the default path or directly inside the RoboDK install folder so that it is detected automatically by RoboDK:
C:\RoboDK\FileZilla FTP Client\
To transfer a file through FTP:
1.Right click a robot, select Connect to robot... and select Explore. FileZilla Client will open (software for FTP transfer).
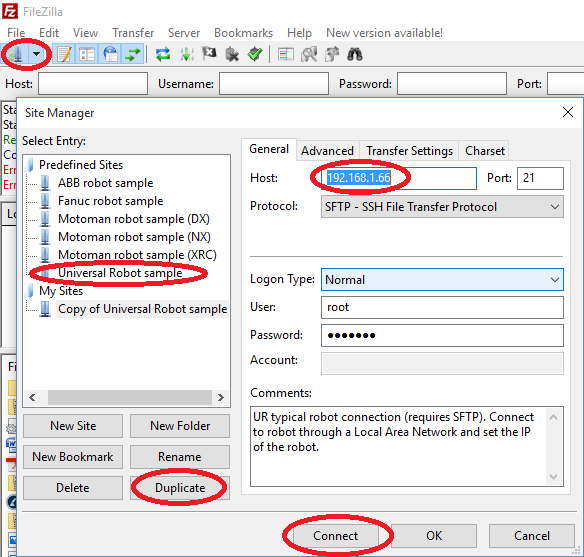
2.Select File➔Site Manager...
3.Enter the IP of the robot (192.168.1.66 in this example).
4.Enter the port (21 for FTP and 22 for SFTP)
5.Enter the Protocol: by default, the file transfer protocol is FTP. However, UR controllers only support SFTP.
6.Enter the user name (default for UR is: root)
7.Enter the password (default for UR is: easybot)
8.Select Connect.
9.Transfer the SCRIPT file previously generated to the robot.
The SCRIPT programs are usually stored in the folder /Programs/ on the robot controller.
UR Monitoring
There is a script available in the library that allows you to monitor the state of a UR robot and update the position of the real robot in RoboDK.
1.Select File➔Open
2.Load the Macro UR_ActivateMonitoring.py from: C:/RoboDK/Library/Macros/. A new Python object will we added in the station.
3.Make sure the IP of the robot is properly provided in the robot connection parameters.
4.Double click the macro to start monitoring.
The simulator will update the position of the robot and will create targets as the real robot is moved. Among other things, it is possible to monitor the robot speed, acceleration and motor currents.
Using the RobotiQ gripper
RoboDK supports generating programs for Universal Robots that can operate RobotiQ grippers. You can operate the RobotiQ gripper by generating a program offline and by using the RoboDK driver for UR robots.
Using the RobotiQ gripper from RoboDK
You can operate the RobotiQ gripper directly from the UR controller by generating programs offline using RoboDK.
To add support for RobotiQ grippers you should select the Universal_Robots_RobotiQ post processor:
1.Right click a program or your robot
2.Select Select Post Processor
3.Select Universal Robots RobotiQ
You can then generate program calls that can operate the RobotiQ gripper. For example: rq_move_and_wait( 255 ) to open the gripper or rq_move_and_wait( 0 ) to close the gripper.

Once you have the program ready in RoboDK, you can run it on the robot using one of these 2 methods:
- Right click a program (such as the GripperOpenClose) and select Send Program to Robot
- Right click a program (such as the GripperOpenClose) and select Generate Program (this second option requires you to manually load the program on the robot).
This method of operation does not require using the driver.
Using the RobotiQ gripper with the driver
You can operate the RobotiQ gripper directly from RoboDK using the driver (Run on robot option). The RoboDK driver for UR and RobotiQ allows you to run programs step by step from RoboDK and see the pointer being run anytime from RoboDK.
It is important to make sure you can connect to the robot to use this feature. You may need administrator privileges on Windows and/or add a Windows Firewall rule to allow this communication (if you disable the Windows Firewall it may help troubleshoot if the issue is related to the Firewall).
You should follow these steps to add support to moving the RobotiQ gripper directly from RoboDK:
1.Download the following script file:
https://robodk.com/files/upload/progrobodk-rq.zip
https://robodk.com/files/upload/progrobodk-rq-no-tool-com.zip.
2.Unzip the progrobodk.script file here:
C:/RoboDK/bin/progrobodk.script
3.Make sure to restart the driver if it was running (double click Disconnect, then, Connect).
4.Select Tools-Options-Drivers
5.Uncheck the option: Manage program calls with RoboDK when connected to a robot.
To properly operate the gripper using the driver (for example, opening/closing the gripper), you should use the program call to rq_move_and_wait by passing a parameter within the range 0-255.
Example:
rq_move_and_wait( 0 ) # Fully close the gripper
rq_move_and_wait( 255 ) # Fully open the gripper
The number passed as an argument is required by the driver.
Circular vs Linear movements
UR robots support circular movements and linear movements, however, you may see errors on the teach pendant if you use the driver for UR robots.
You may see the following errors when you use the UR robot driver ("Run on robot" option) because the driver doesn’t apply all the default filters you have in the UR post processor by default. These filters help clean the code so the UR controller can run the program without issues.
These errors include:
1.Circular arc with infinite radius (CIRCULAR_ARC_WITH_INFINITE_RADIUS): you may see this error when you try to make a circular movement with a large radius. The post processor automatically converts these movements to linear movements.
2.Circular arc with zero radius (CIRCULAR_ARC_WITH_ZERO_RADIUS): you may see this error with small circular movements. The post processor may remove these movements or convert them to linear moves.
You should not see these errors when you generate the program offline (right click a program and select Generate program, or F6) or automatically send them to the robot (right click a program and select Send program to robot, or Ctrl+F6). These two methods of generating the program use the post processor instead of the driver.
If you still experience errors generating the program offline (not using the driver), you can automatically convert arc moves to linear moves by following these steps:
- Select Tools-Options-Program.
- Set Minimum arc size to 1 mm.
- Set Maximum arc size to 0.5 mm.
- Set Minimum step size to 0.5 mm: this will make sure you don't export points closer than 0.5 mm so the blend radius has some effect, you can increase it more to have fewer jerky movements.
URSim Installation guide
The URSim allows you to emulate the behavior of the real Universal Robots robot controller on your computer. This allows you to get familiar with the controller and test programs you generate using RoboDK. This section will guide you to install URSim.
Download URSim requirements
You should download the official URSim image from Universal Robots website and Oracle VM VirtualBox from the official websites.
1.Download the most up-to-date Offline Simulator for Non Linux from this link: https://www.universal-robots.com/download/?query=ursim.

3.Download and install Oracle VM VirtualBox software from the following link: https://www.virtualbox.org/wiki/Downloads.
4.Create a folder on your hard drive and call it URSim.
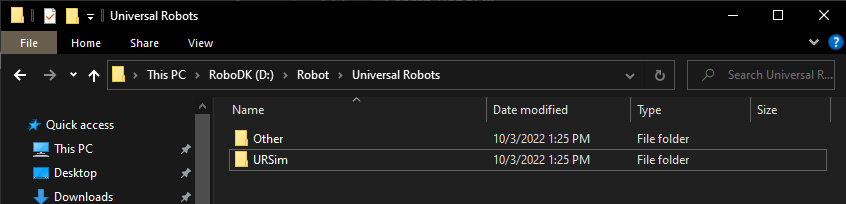
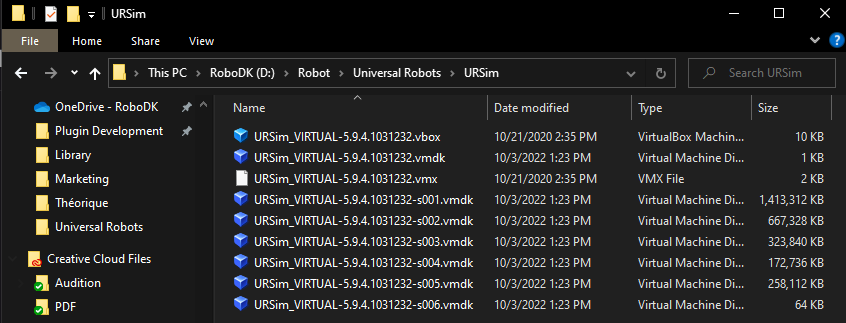
5.Extract the contents of the downloaded URSim file (.zip file or .rar) to the URSim folder.
VirtualBox setup for URSim
This section shows how you can create a new virtual machine using Oracle VM VirtualBox to simulate the Universal Robots controller.
Follow these steps to create a new Linux machine and load the downloaded controller image:
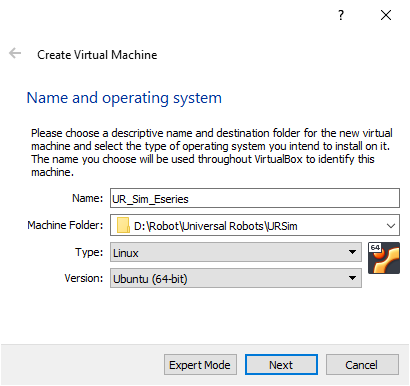
1.Start VirtualBox and press “New”.

2.Set the name to UR_Sim_Eseries and set the Machine folder to the folder that you created. Set the type to Linux and the Version to Ubuntu (64 bit).
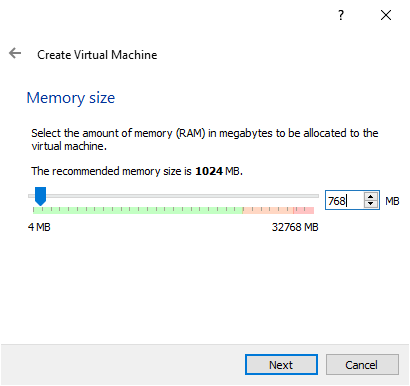
3.Set the Memory size to 768 MB and press “Next”.
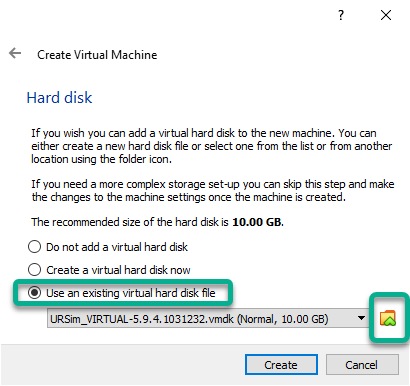
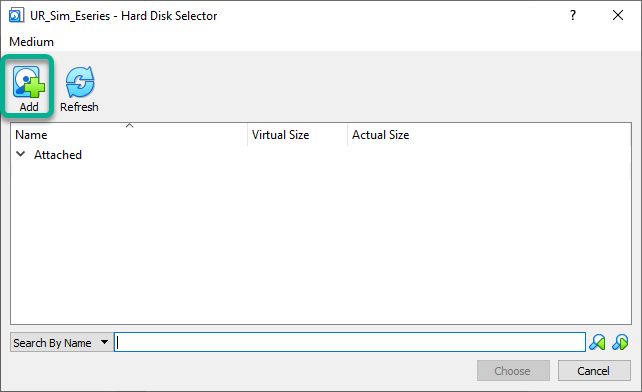
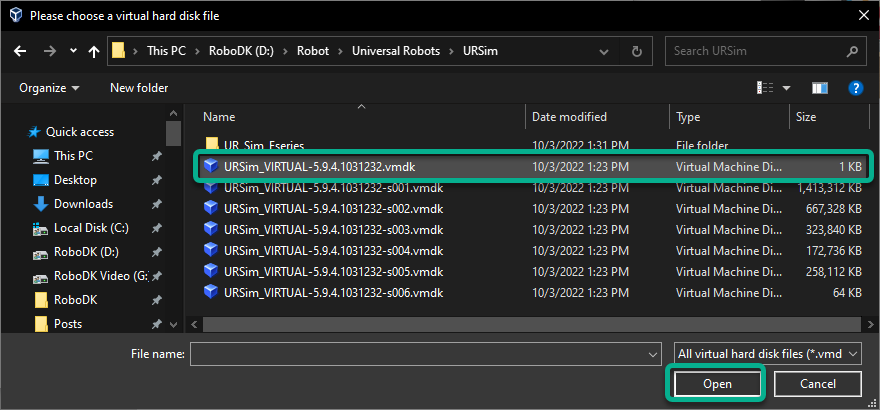
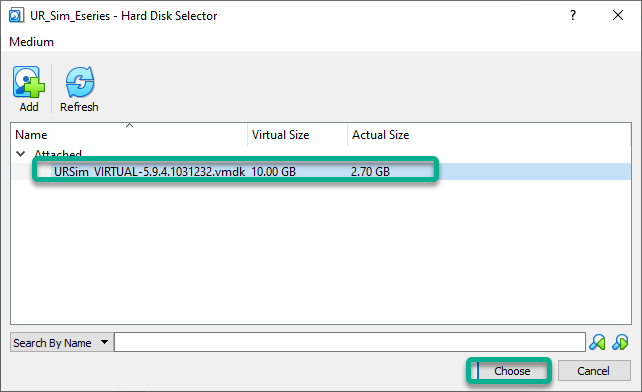
4.Select Use an existing virtual hard disk file and define the path to the folder where the zipped file was unpacked. Press “Create”.

5.Press “Start” to start the virtual machine.
6.If an error saying “Hardware acceleration is not available” is shown, then you may need to reboot the computer and change a BIOS setting to enable virtualization. With virtualization enabled you can then restart Windows, VirtualBox and the virtual machine.
7.The virtual machine should now start.
Shared Folder between Windows and URSim
You can optionally setup a shared folder between the Windows computer and the emulated controller to easly transfer program files.
Follow these steps to map the RoboDK programs folder with a new folder in the emulated UR robot controller:
1.This section explains how to have a shared folder between Windows and URSim to transfer programs.
2.Open the VM of URSim.
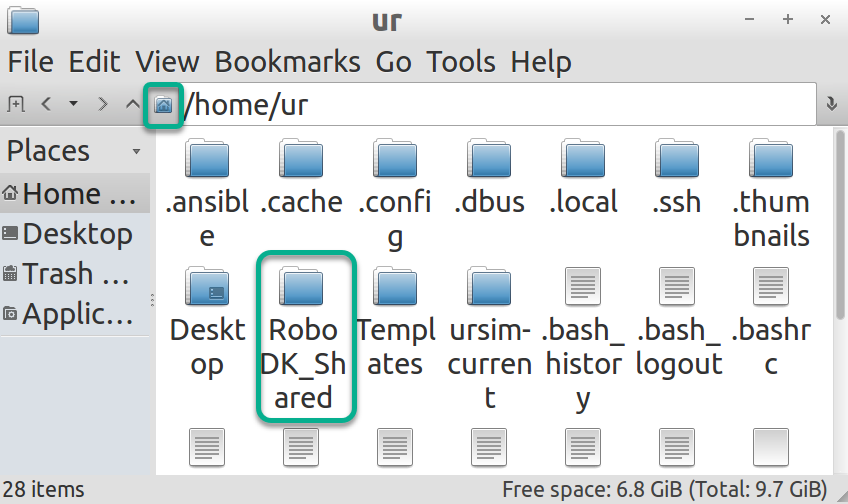
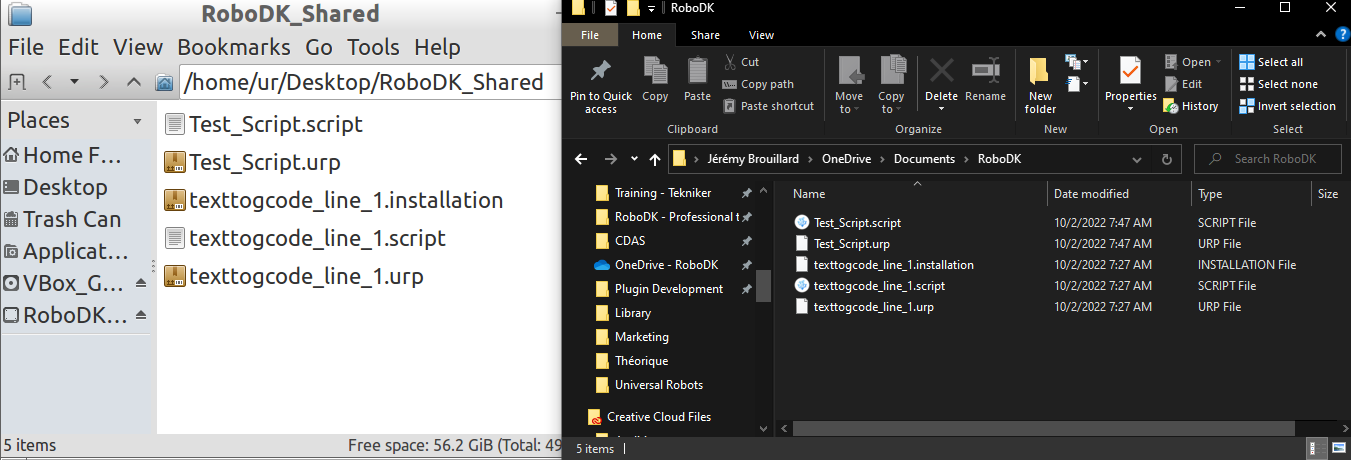
3.Create a folder in Linux Ubunto and name it “RoboDK_Shared” under “/home/ur/”.
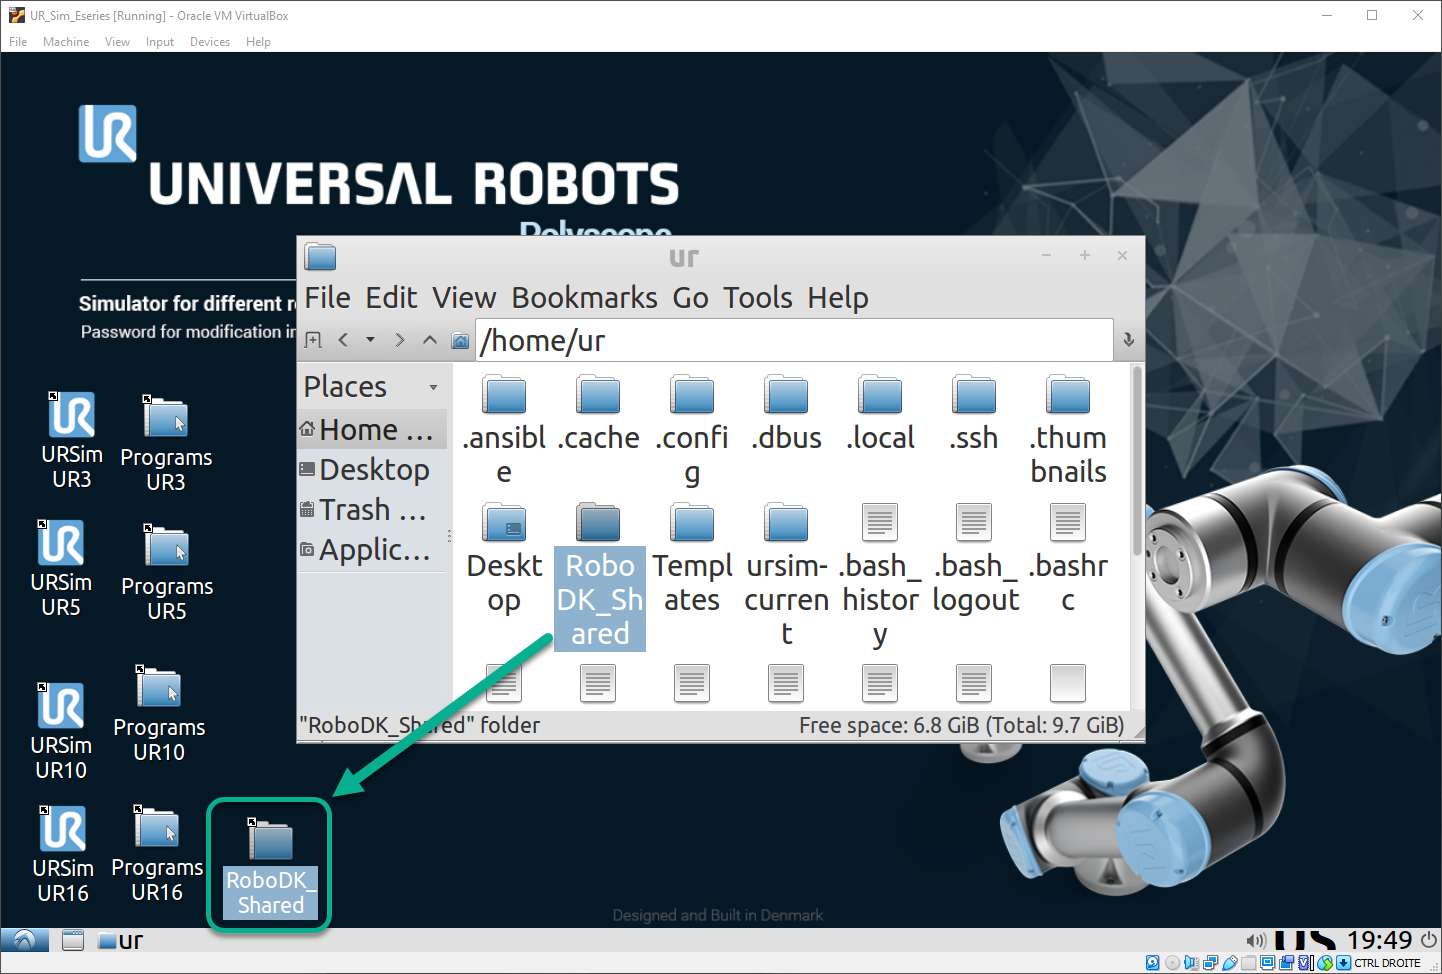
4.Create a shortcut on the desktop by drag-and-dropping the “RoboDK_Shared” folder on the Desktop.
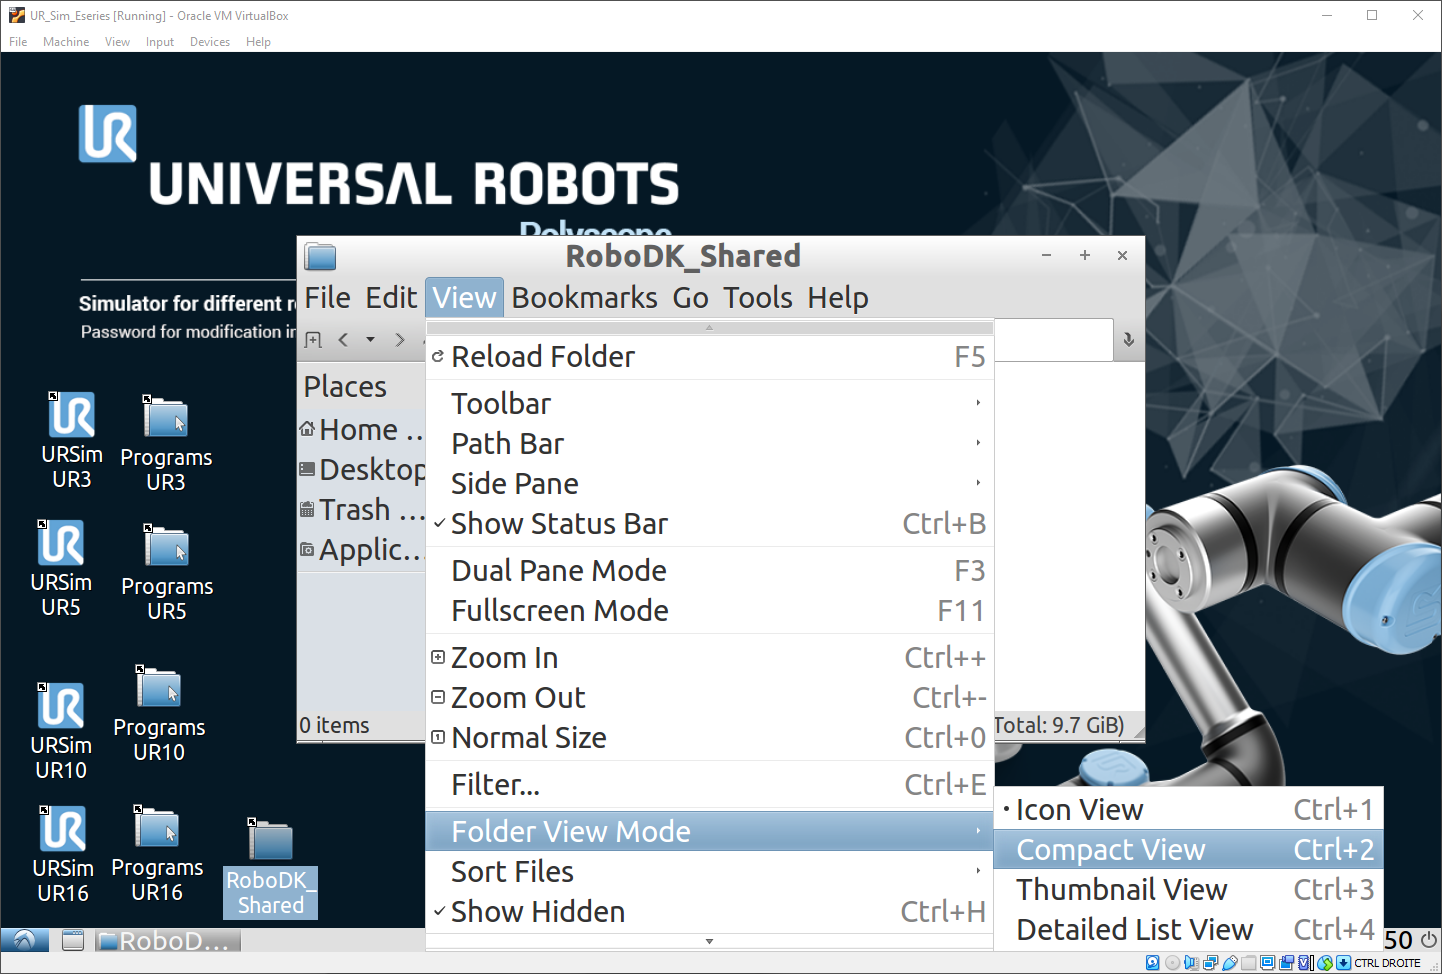
5.Open RoboDK_Shared.
6.Select View➔Folder View Mode➔Compact View.
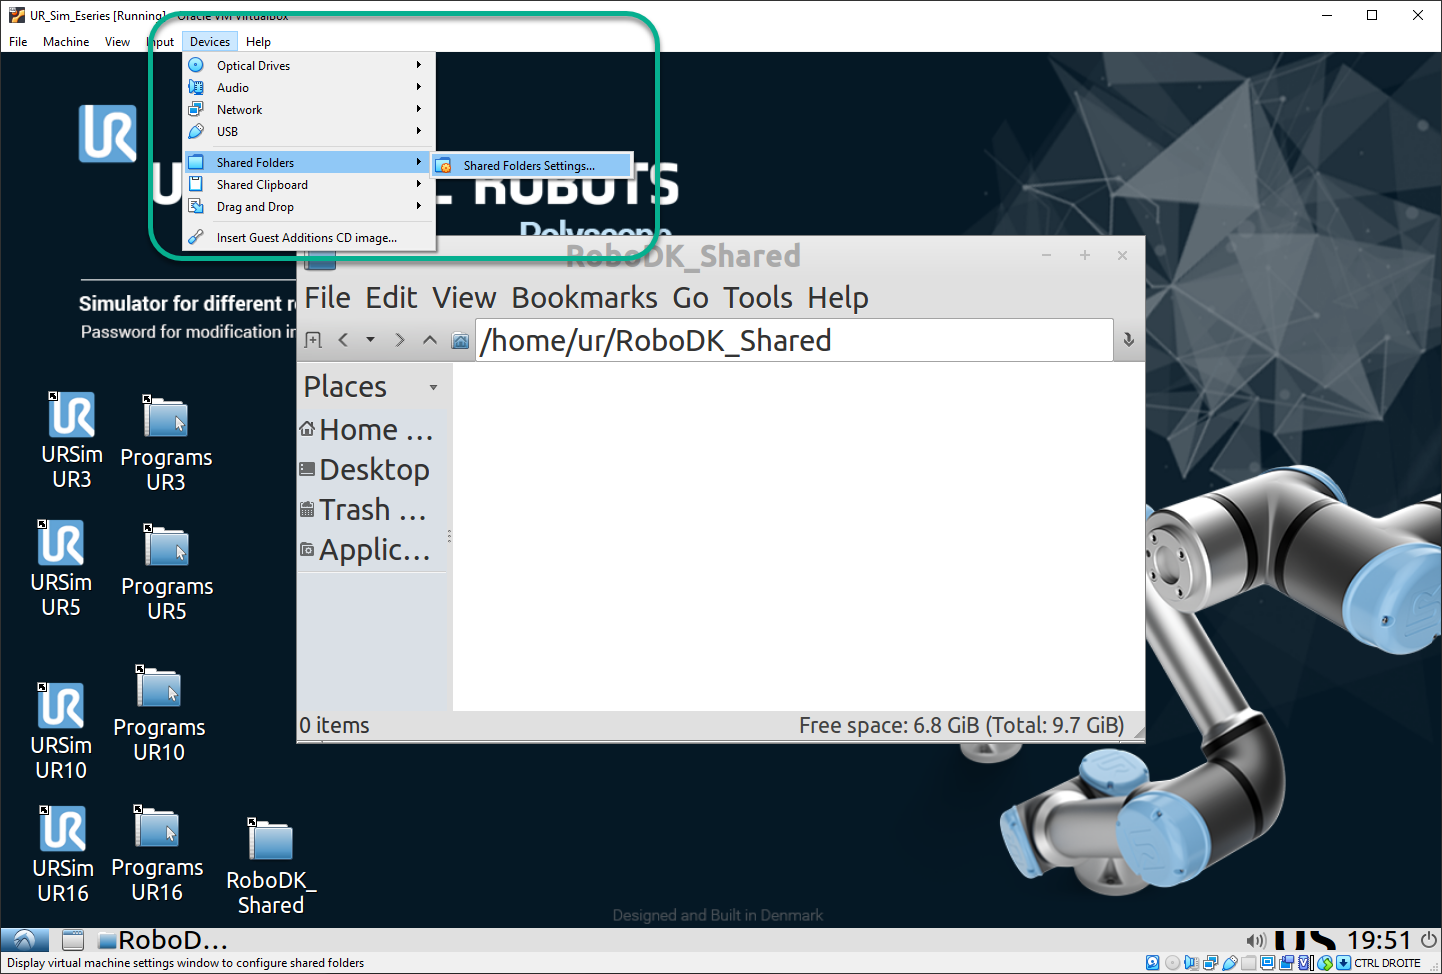
7.From the top menu in the VirtualBox window, select Devices➔Shared Folders➔Shared Folders Settings.
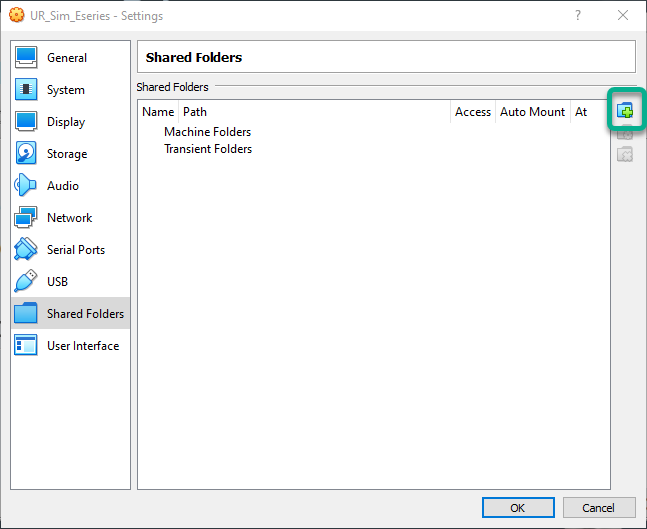
8.Add a new Shared folders by using the button shown in the following image.
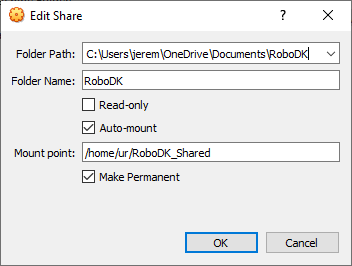
9.Select path for shared folder in Windows (you can use any folder on your computer).
10.Check “Auto-mount” and “Make Permanent”.
11.Mount point: /home/ur/RoboDK_Shared
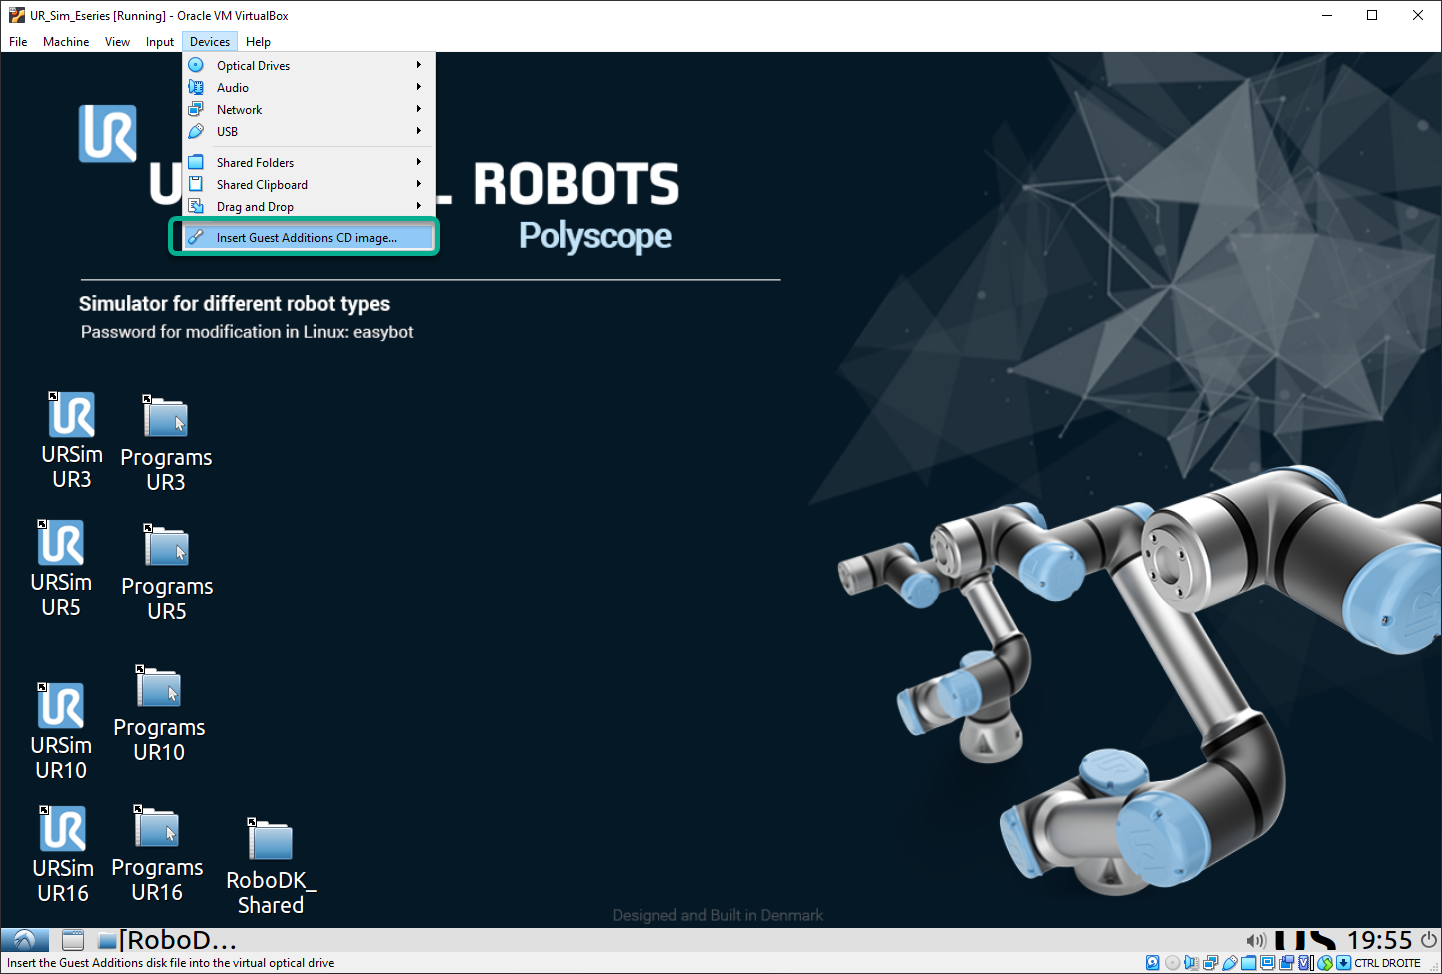
12.From the top VirtualBox menu, select Devices➔Insert Guest Additions CD Image.
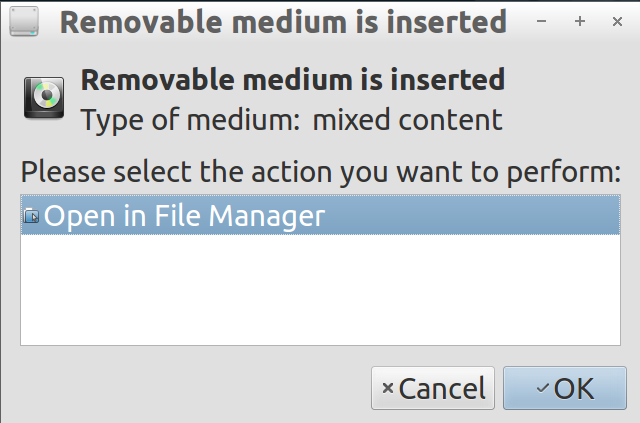
13.Select “Open in File Manager” and press “OK”.
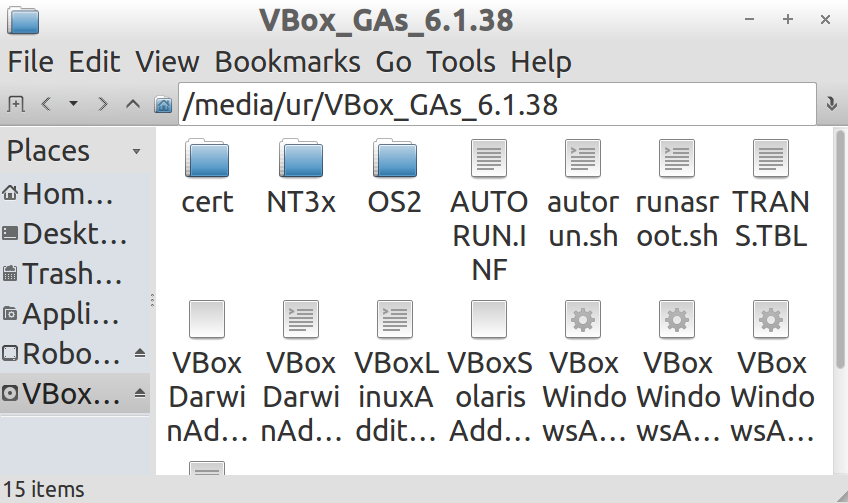
14.Open folder to: /media/ur/VBox_Gas_6.1.38 (VBox version may vary).
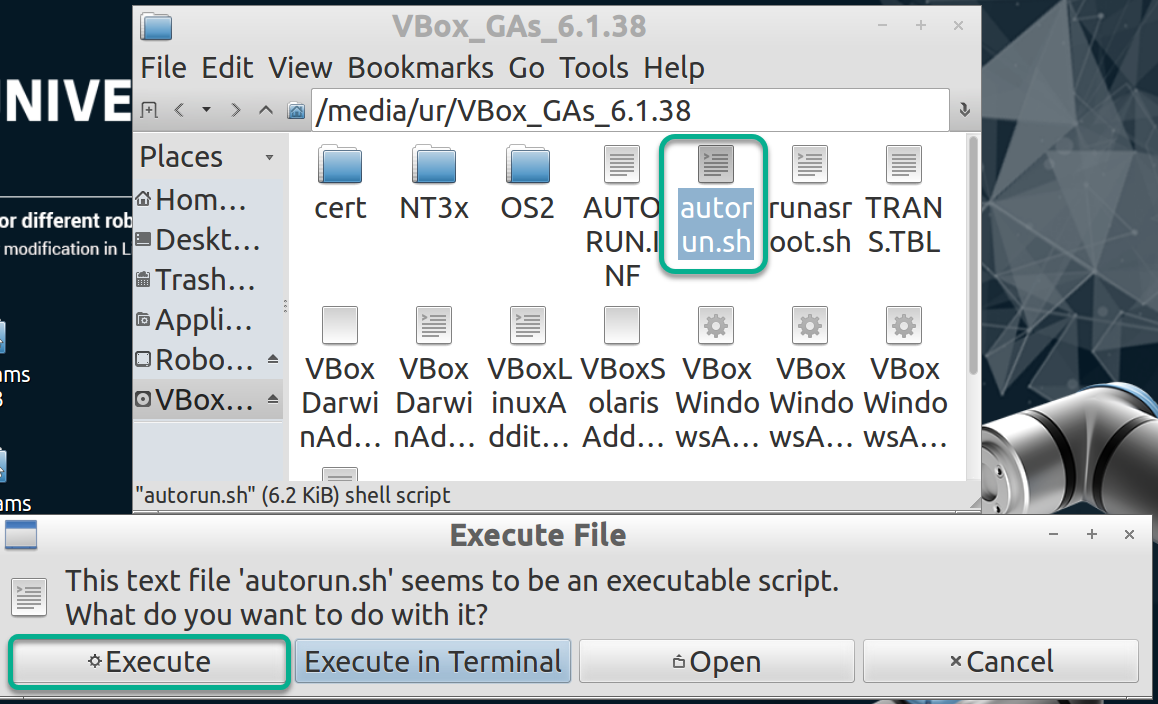
15.Double-click the “autorun.sh” file and select “Execute” (the password is “easybot”). The script may take a little while to run.
16.Reboot the Virtual Machine.
17.Open the terminal: Select the Start button➔System Tools➔UXTerm.
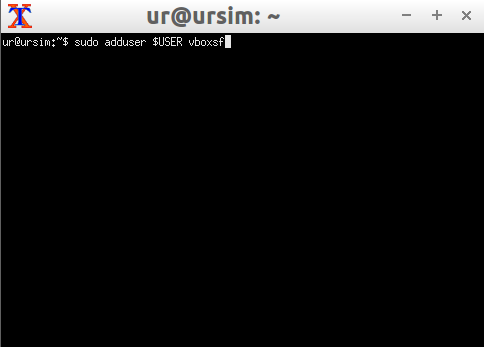
18.Type in the terminal: sudo adduser $USER vboxsf and press “Enter”.
19.Reboot VM.
20.If you generate new files with RoboDK in your Windows shared folder, you can press “View” → “Reload Folder” or press “F5” in your VM shared folder “RoboDK_Shared”.
Use the RoboDK Driver with the UR Sim
You can test the connection between RoboDK and the Universal Robots controller by using URSim.
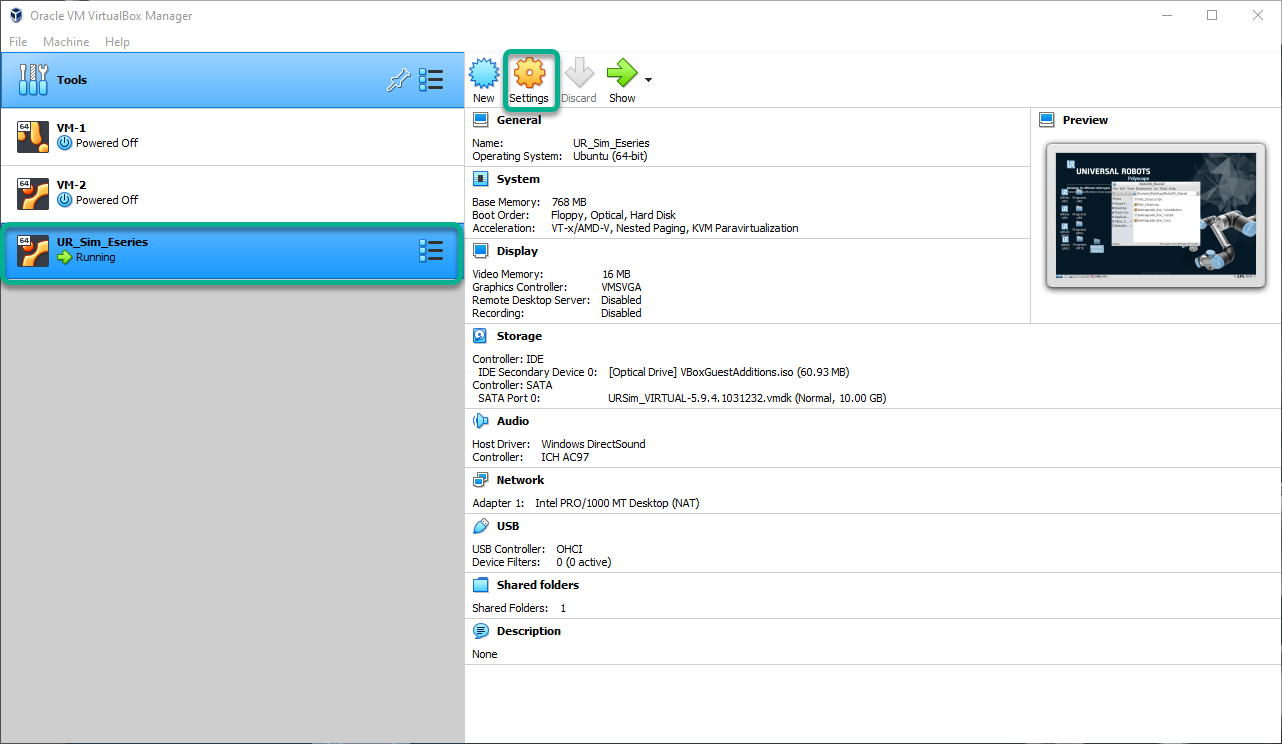
1.In the Oracle VM VirtualBox Manager.
2.Select the UR_Sim_Eseries VM and press Settings.
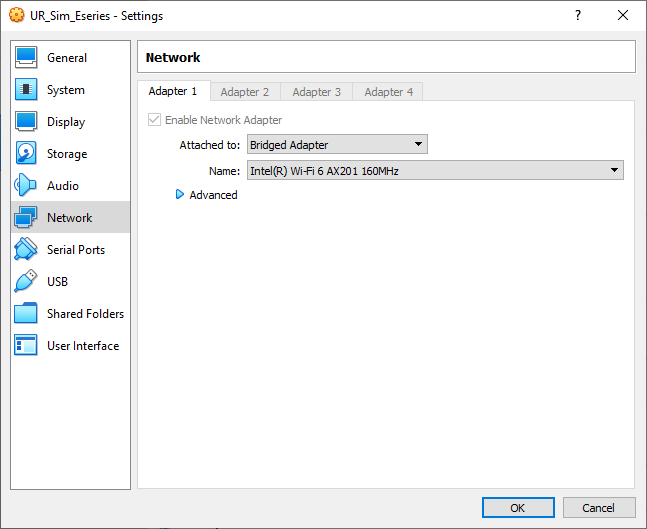
3.Select Network➔Attached to: and select Bridge Adapter and press OK.
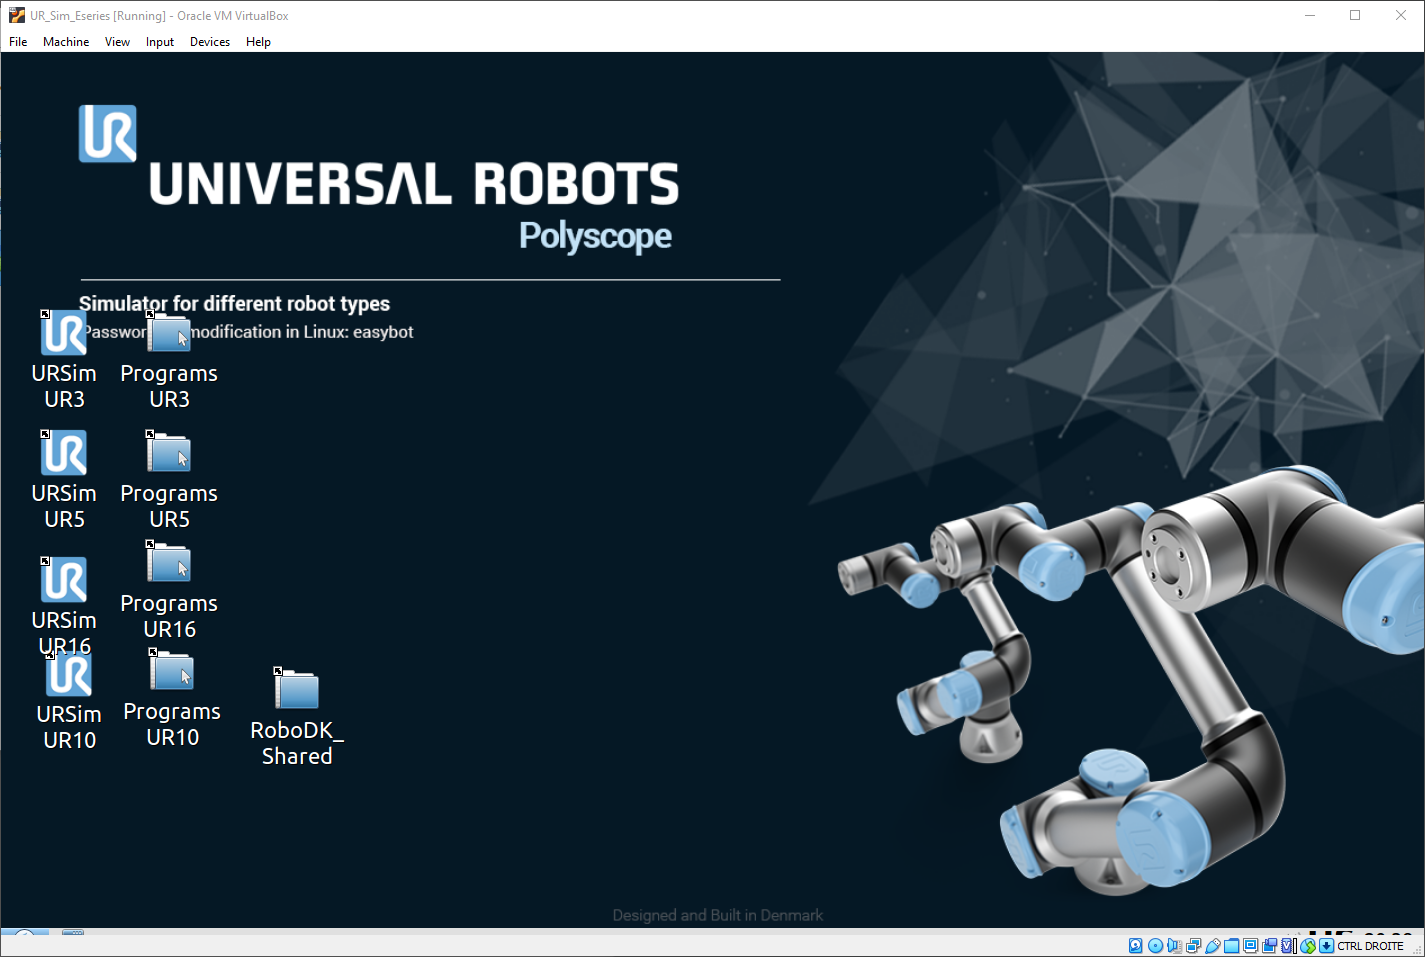
4.Launch the URSim Virtual Machine.
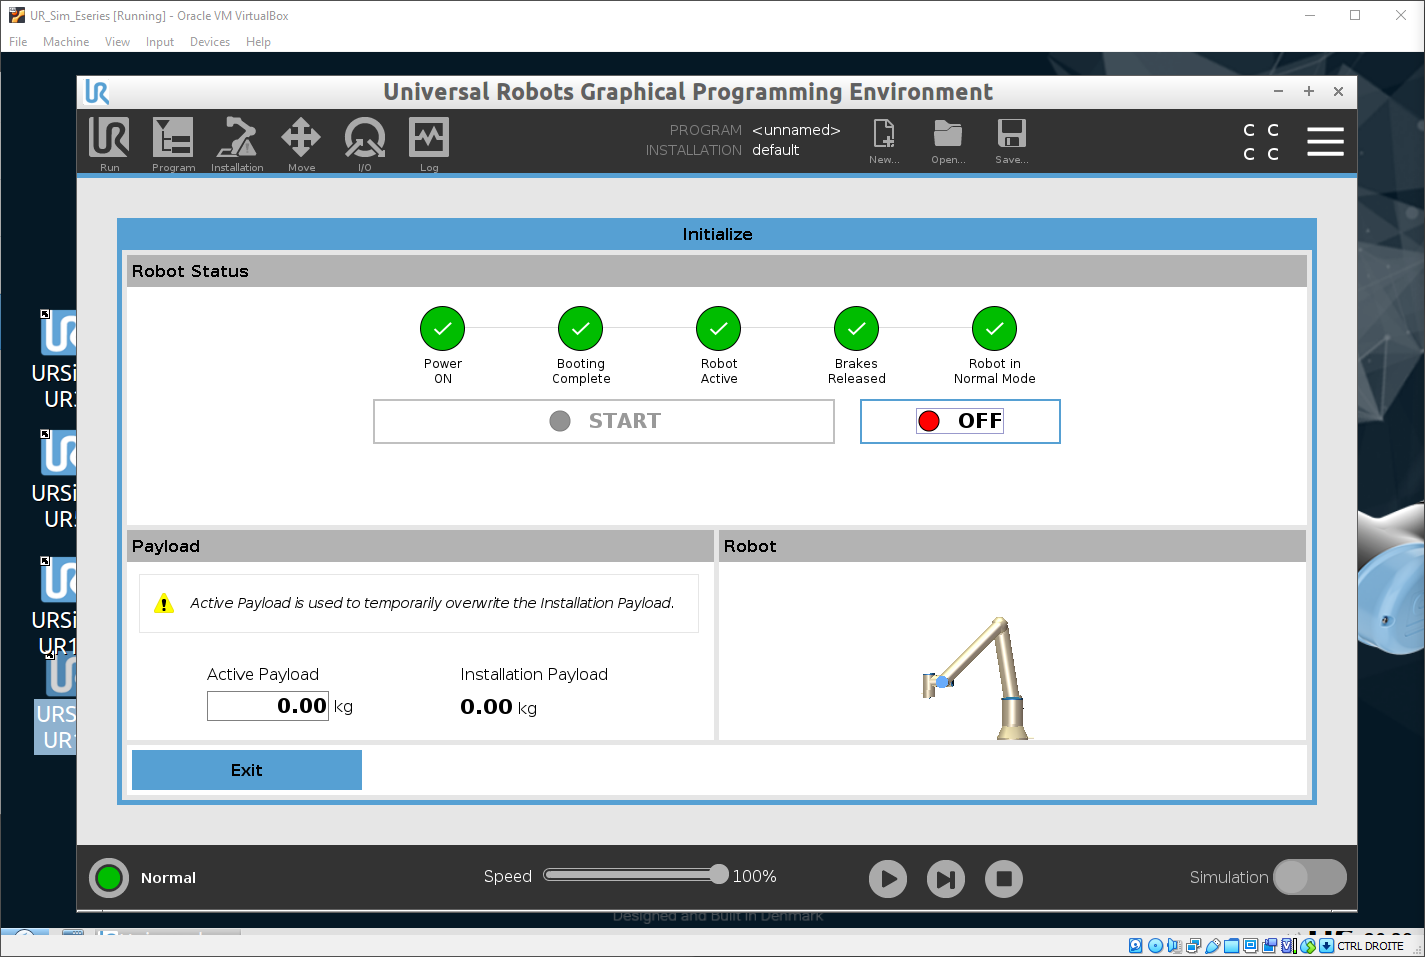
5.Launch Polyscope with your preferred UR model.
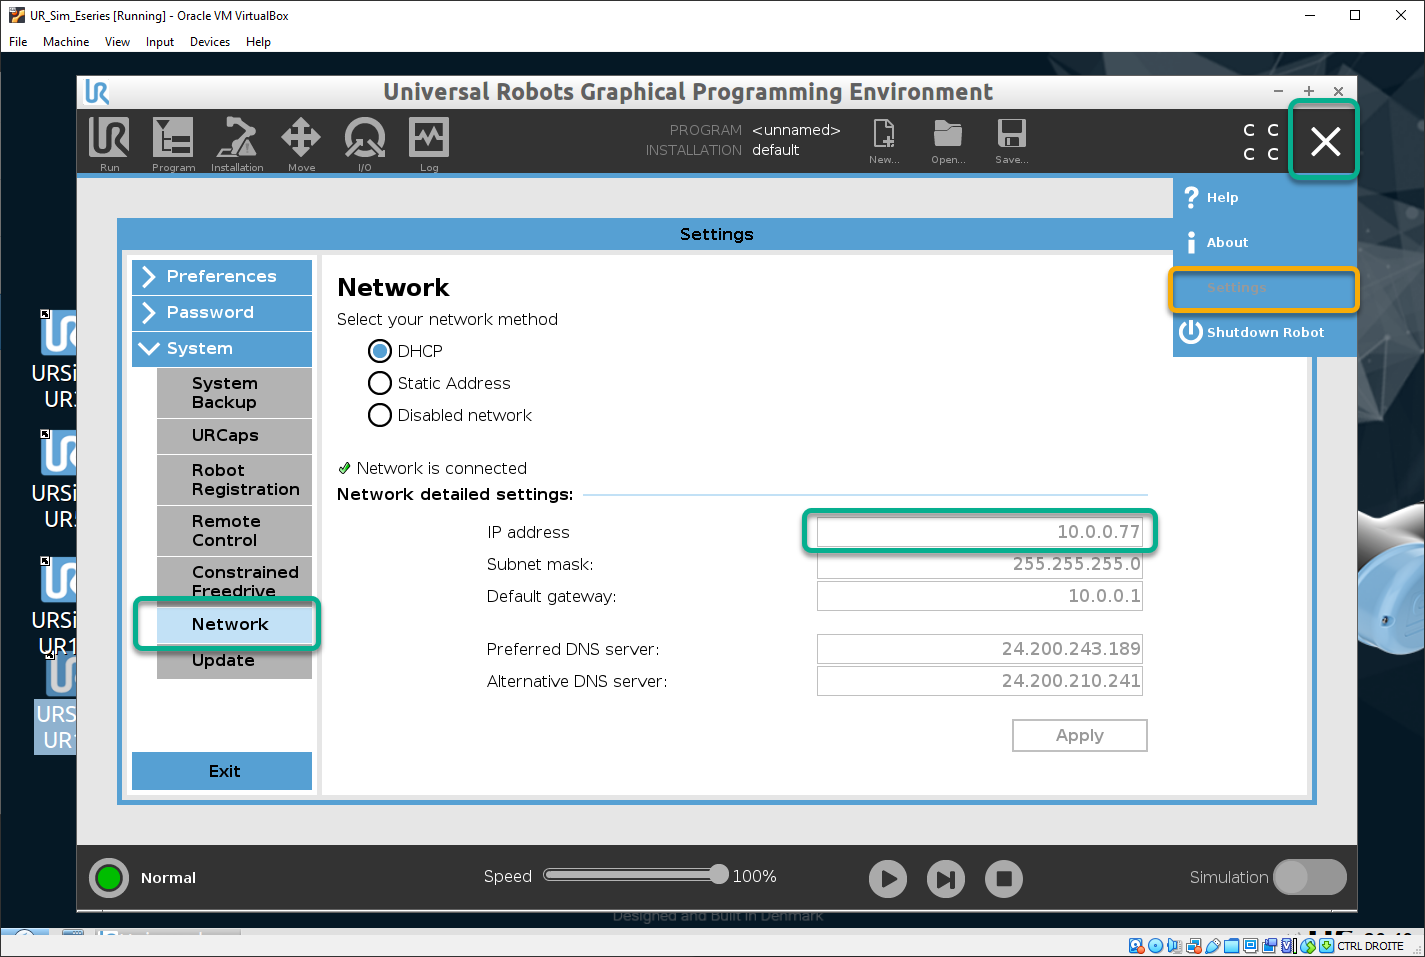
6.Retrieve the simulator IP address.

7.Go to the “Move” window of the URSim.
8.Open in RoboDK station with the same UR model.
9.Select Connect➔Connect Robot.
10.Enter the UR Sim IP address and press Connect.
11.Use Get Position to retrieve the position of the URSim robot and apply it to RoboDK.
12.Use Move Joints to move the URSim robot to the position of the RoboDK robot.
13.Right-click a RoboDK program, select “Run on robot” and “Run” to run the program simultaneously in RoboDK and un URSim.
Update Robot Kinematics
Following the steps in this section is optional and only required under certain circumstances when accuracy is required in offline programming. This section explains how to input the unique kinematic values of your UR robot in RoboDK to accurately simulate the robot.
UR controller kinematics are unique for each robot. The kinematics are the dimensions that define the robot in the form of the DH table (Denavit Hartenberg). RoboDK simulator uses the nominal UR kinematics by default, therefore, you may see from 2 mm to 10 mm discrepancy between the simulator kinematics and the controller kinematics.
To make the simulation exactly match the real robot you can import your UR robot-specific kinematics by simply opening a URP file created with the teach pendant.
You can also load the URP file manually by following this procedure:
1.Retrieve a URP file generated using the real robot (not using RoboDK or the UR simulator)
2.Open your robot in RoboDK. You'll find your UR robot in the RoboDK library. You can also use a UR robot available in one of your existing RoboDK stations.
3.Select Tools-Run Script
4.Select UR_LoadControllerKinematics
5.Select the URP file extracted from the robot controller.
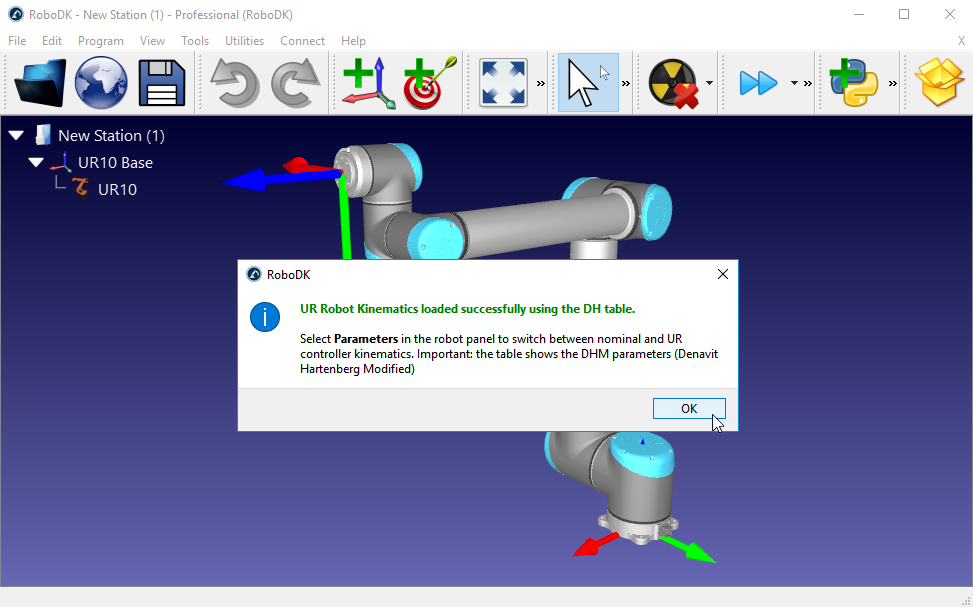
You should see a message as shown in the following image. You may see warning message if you did not load a valid URP file or you did not select the right UR robot.
When this procedure is completed, you can right click a robot and select Save as .robot. These parameters are saved with the robot file and you can use the robot file instead of repeating this procedure for every new project.
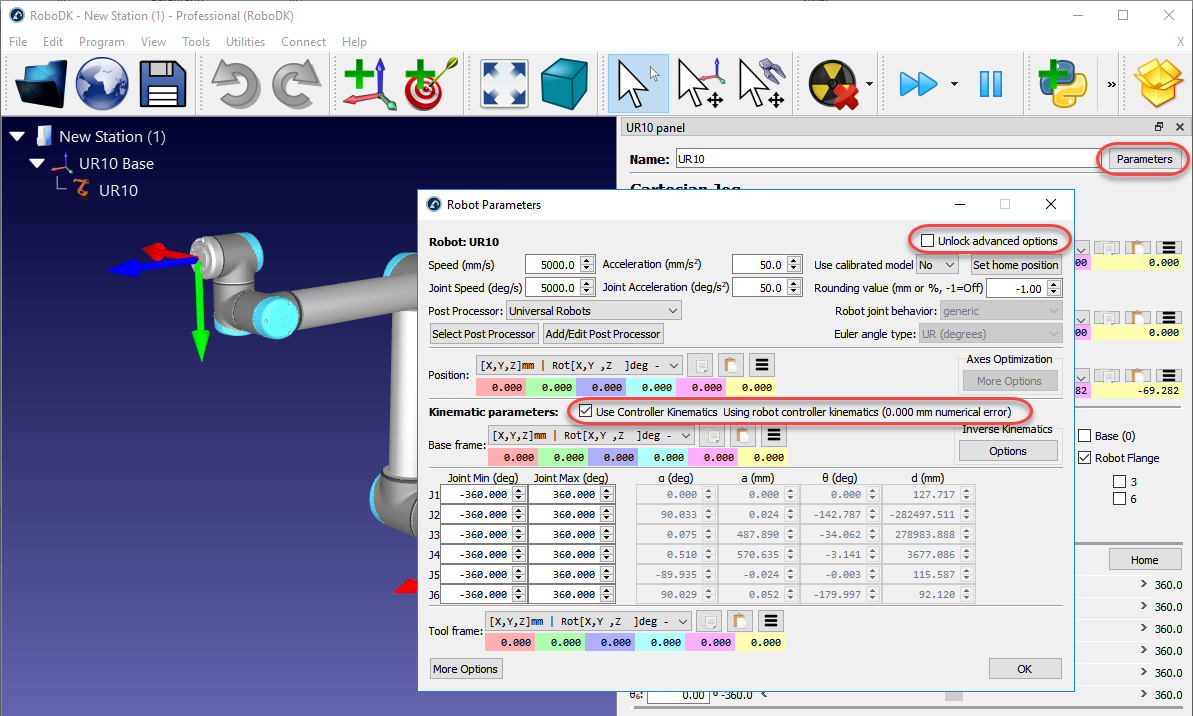
RoboDK extracts the information specific to your robot from the URP file and takes it into account for simulation and offline programming in the robot file. You can change this setting and revert to the default kinematics in the robot parameters menu as shown in the following image.

You’ll notice that the Pose information displayed in the teach pendant matches the kinematics displayed in RoboDK (make sure you remove the tool frame and reference frame on RoboDK and the UR robot to make the comparison).
UR kinematics change from one robot to another one because each robot is calibrated in the factory by UR. Other robot vendors such as KUKA, ABB, Motoman or Fanuc do not calibrate their robots unless you purchase the so-called Absolute Accuracy option. The Absolute Accuracy options may take into account up to 40 calibration parameters or more.
This procedure is not the same as RoboDK’s robot calibration. Robot calibration helps improving the accuracy of the real robot.