Probe Assembly
This section explains how you can assemble the probe for RoboDK TwinTrack. You’ll need the parts required to build the probe described in the previous section. You’ll also need a soldering iron kit.
Follow these steps to assemble the probe:
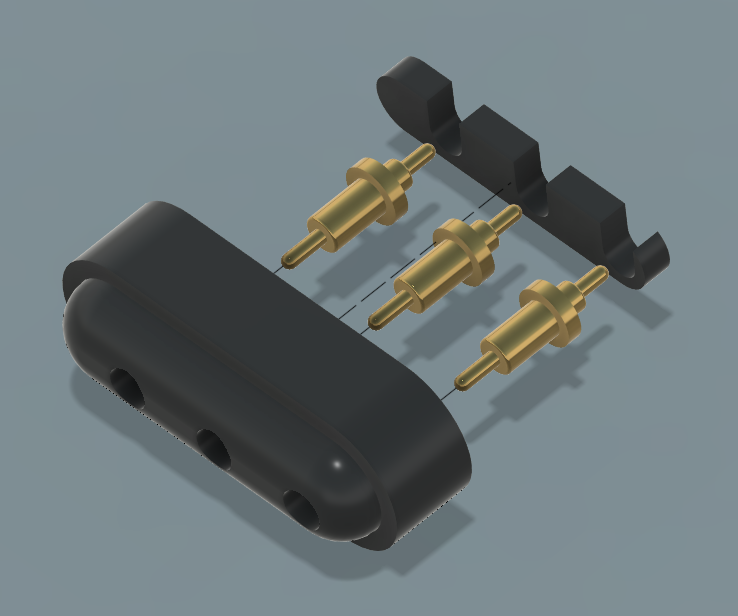
1.Assemble the connector as follow and glue the printed pieces together.
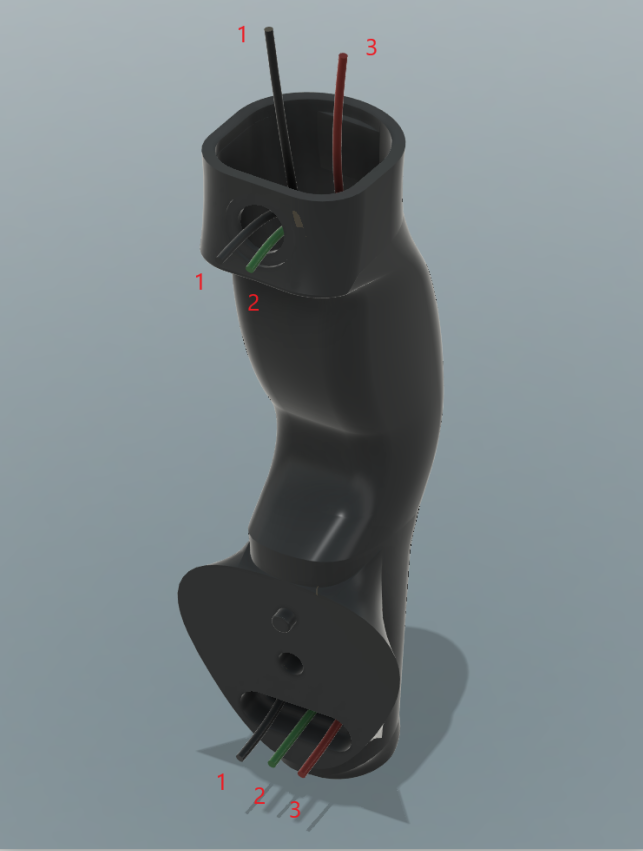
2.Install the wires inside the main body and through the top piece as shown in the following image. Note that the ground wire is connected to both switches.
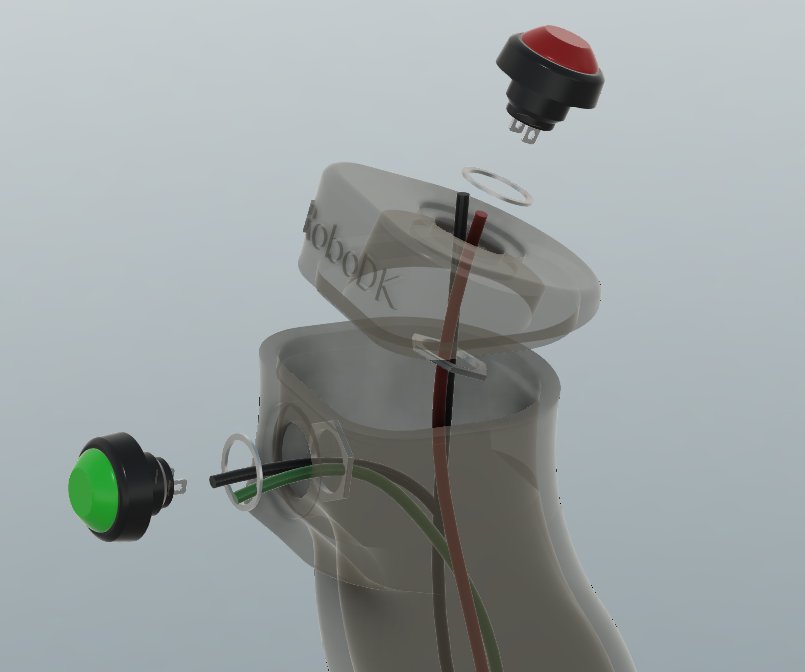
3.Connect the wires to the switches. The 2 pairs of wires should go through the switch nuts. Also, the wire of the red switch should go through the top part. You should then solder the switches (in that order).
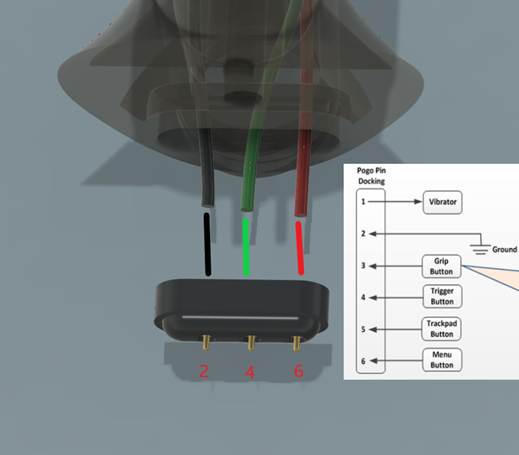
4.Solder the connector to the correct wires. Make sure to place the cables on the right connectors.
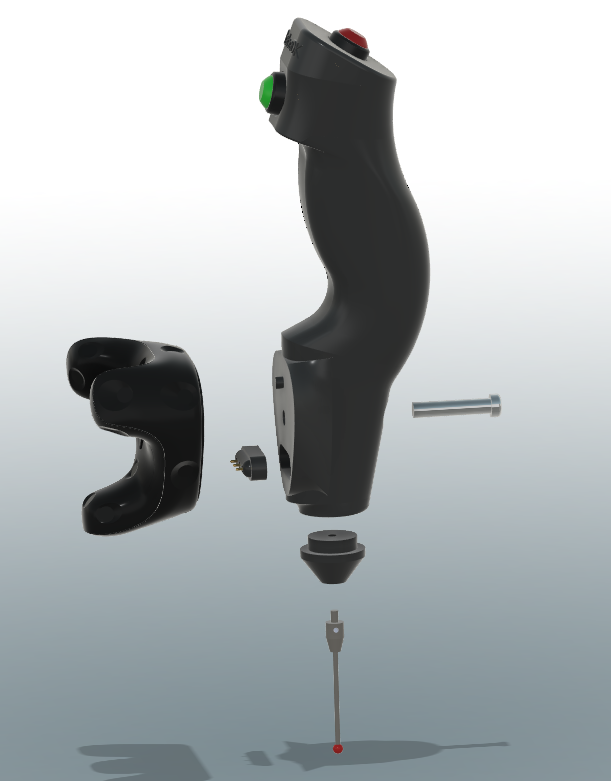
5.Assemble the rest of the probe as shown in the following image.