This post contains no questions or suggestions. On the contrary, it contains a ready-to-use solution to support remote control of Hanwha collaborative robots via RoboDK. All necessary files are available to RoboDK team on GitHub in my private repository.
Follow the steps below to configure RoboDK to work with Hanwha robots.
Step 1. Setup the Robot IP address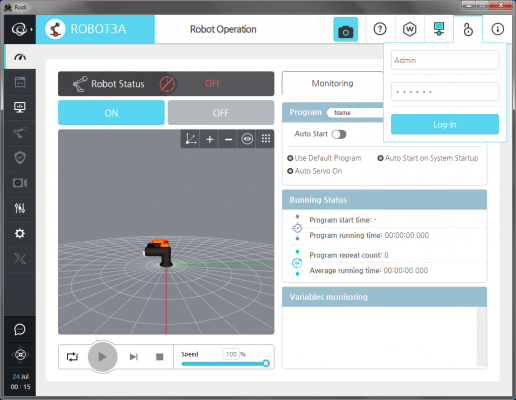
Step 2. Install the RoboDK Connector Plug-in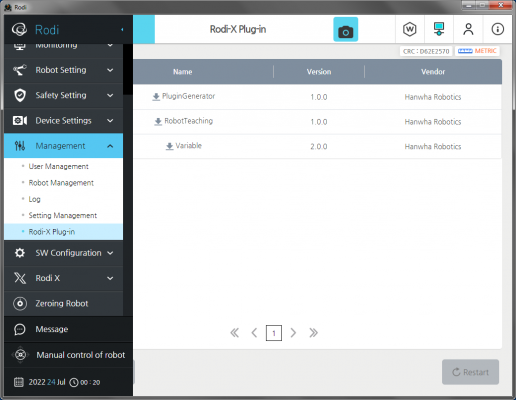
Demonstration
On Monday I will try to record a video with a real robot.
Best regards,
Dmitry Lavygin
PhD, Senior Researcher
Follow the steps below to configure RoboDK to work with Hanwha robots.
Step 1. Setup the Robot IP address
- Log in as Administrator
Quote:Default Passwords
Login: Admin
Password: 170502
or
Login: user
Password: hcr5
* by default the "user" account also has administrator privileges.
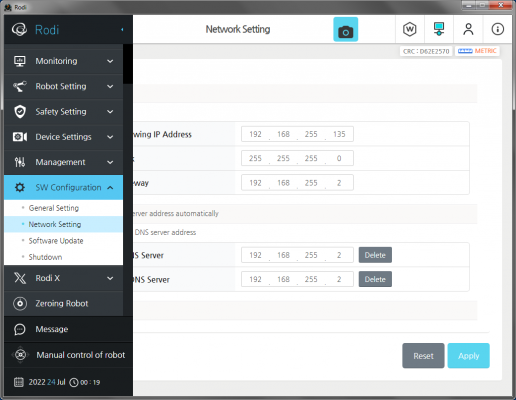
- Open SW Configuration ⇒ Network Setting and fill in the parameters of your local network, in particular the IP address and subnet mask. Click Apply and agree to reboot if the system asks you to do so.
Step 2. Install the RoboDK Connector Plug-in
- Log in as Administrator
- Prepare a USB flash drive with the RoboDK.asar file on it and plug it into the robot controller or the teaching pendant.
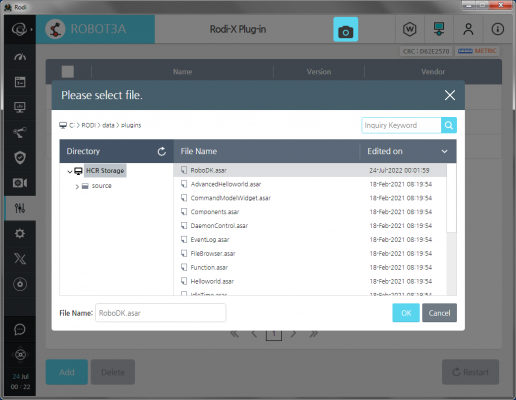
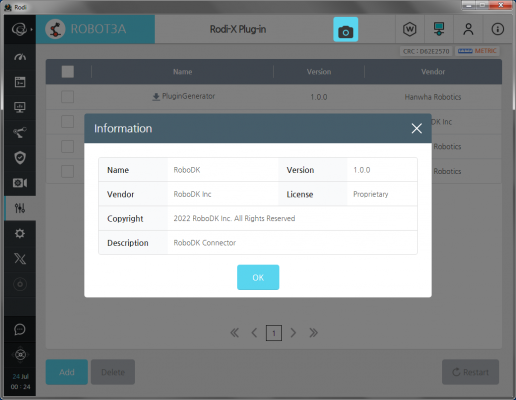
- Open Management ⇒ Rodi-X Plug-in and click Add button to open the Select File dialog.
- Choose RoboDK.asar and click OK.
- Press the Restart button.
- After reloading, you will be able to see information about the plugin.
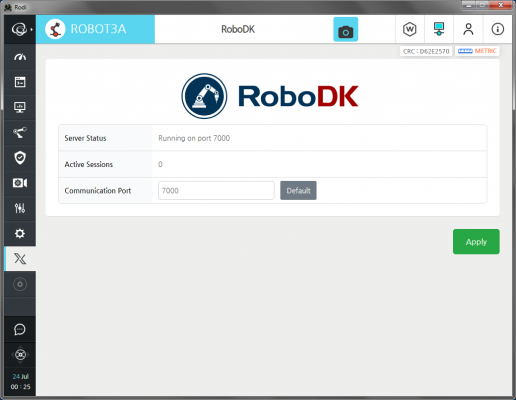
- Open Rodi X ⇒ RoboDK and make sure that the Server Status field contains no error messages. If the TCP 7000 port appears to be occupied by another application, you can change it by entering another value in the Communication Port field and clicking Apply.
- Now the robot is ready for remote control.
- Copy the file hanwha.py to the folder /RoboDK/api/Robot (default path in Windows: C:\RoboDK\api\Robot).
- Set up your RoboDK project and place one of the Hanwha robots in it. For example, the HCR-3.
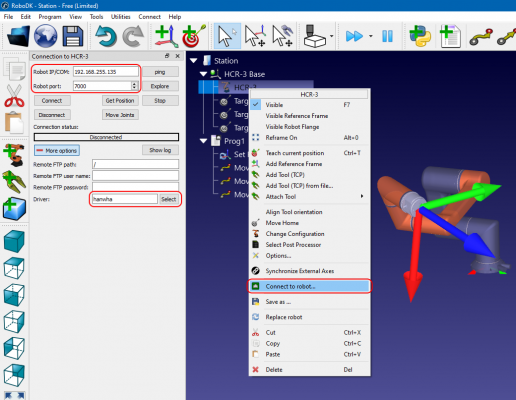
- Right-click on the robot in the project tree and select Connect to robot...
- In the Connection to HCR-3 window, fill in the Robot IP/COM and Robot port fields (use the robot's IP address and the port number from the RoboDK Plug-in).
- In the same window, click the More options button and type hanwha in the Driver field (or use the Select button to select the appropriate driver from the list).
- Click the Connect button and if all the settings are correct, you will see Ready in the Connection status bar.
- Check the system operation by pressing the Get Position and Move Joints buttons. Be careful, if the servo drives are on, then after pressing Move Joints the robot will start moving to the position set by RoboDK.
Demonstration
On Monday I will try to record a video with a real robot.
Best regards,
Dmitry Lavygin
PhD, Senior Researcher


