Joining materials is a vital task in manufacturing and assembly. But, most traditional methods require human hands. Here are 11 ways to join materials with a robot.
Welding, screwing, clamping, gluing… there are many different ways to join different materials together. Although automated machining (e.g. CNC milling) has been around for decades, most joining tasks have traditionally required human workers.
But, things are changing. You can now achieve a huge variety of joining tasks with a robot.
Here are 11 great ways to join material with a robot, plus a tip about how you can use your favorite method with offline programming.
1. Roller Hemmings
Hemming is a joining method which is widely used in the automotive industry. It involves running a roller around the edge of two sheets of formed material. This roller applies a consistent pressure which bends the edge of one sheet of material over another.
There are a range of tool options available for robotic hemming from various different suppliers. In March 2019, for example, Comau announced a revolutionary new robot tool — the Smart Hemmer. This follows on from their previous RHevo hemmer and is targeted at lightweight and electric vehicle manufacturing.
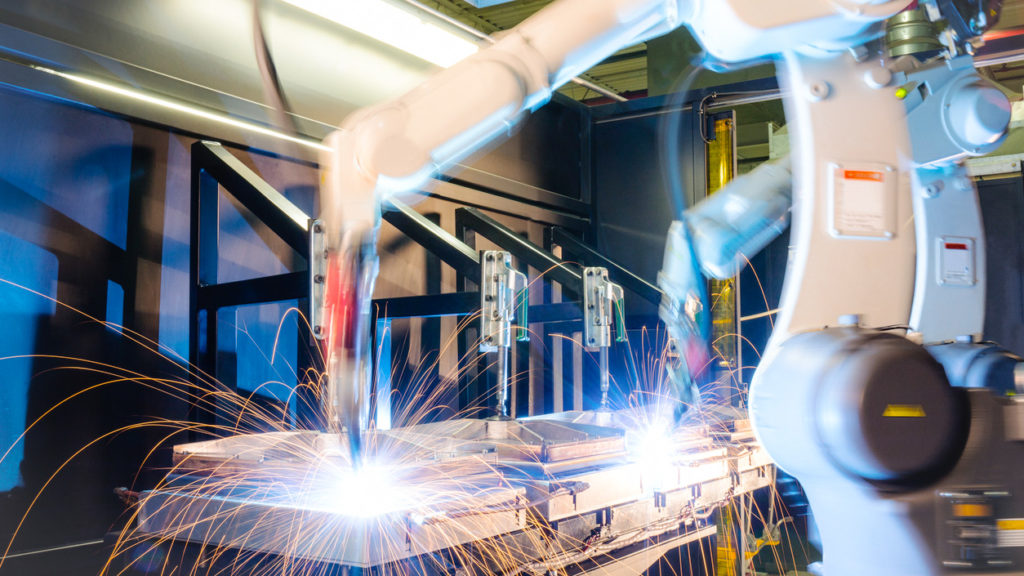
2. Traditional Welding
Of course, we can’t talk about joining materials without mentioning welding. Traditional welding methods (e.g. arc welding, spot welding) are very common. Welding works by heating two metallic materials, usually with gas or electricity, which melts the material together. Sometimes a filler material is melted at the same time to avoid gaps.
Robotic welding is widespread. As the Robotics Industry Association (RIA) states “there are dozens of robotic welding processes out there.”
It is very easy to use robots for welding and there are many benefits, including more consistent weld quality, better use of skilled workers, and higher productivity. See our article The Simple Way to Flawless Robot Welding for more.
3. Laser Welding
A related method is laser welding. Like traditional welding, it involves melting two metallic materials together. However, this time the melting is achieved by use of a laser.
One advantage of this method is that it provides high-accuracy and can be used in high-volume applications. This makes it particularly suitable for robotics. Other advantages include the low heat of the laser, the high strength of the resulting welds, and the ability to handle complex joins.
4. Stir Welding
Despite the name, stir welding (or friction welding) is quite a different method of joining materials than traditional welding. For one thing, it doesn’t melt the material.
The process uses a flat, spinning tool which is pressed into the surface of the two pieces of material along the join. The resulting friction causes the materials to soften and mesh together. As it doesn’t require melting the material, it can be used with non-metallic materials, like plastic.
From a robotic control perspective, stir welding is somewhat similar to robotic incremental forming, a process which forms sheet material by bending via applying constant pressure.
5. Nuts and Bolts
The previous methods all join the materials together by deforming them, either through melting or bending. However, you can also join materials with mechanical fastenings. A typical method is with nuts and bolts.

Although is very easy for us humans to attach a nut to a bolt by hand, this can be quite a tough task to achieve robotically. After drilling the hole, the task involves delicate assembly motions to thread the bolt onto the nut, requiring both nut and bolt to be held in place to tighten them.
One solution is to only use the robot for the task of tightening either the bolt or nut and use a nutrunner tool.
6. Riveting
Rivets provide a permanent mechnanical fastening between two materials. The rivet is inserted into holes in both materials and a riveting tool deforms the rivet to clamp the two materials together.
There are various tools available for robotic riveting. Tools like Robo-Rivet are compatible with a selection of different rivet types. Some riveting tools are “self-piercing” so don’t even require a hole to be drilled.
7. Nailing
A nail-gun is a common hand tool in joinery. It’s also a good tool for robotic operation as it only requires the robot to position the tool and activate the gun.
Tools like the Yaskawa Simple Nailer can insert many nails per minute for building wooden pallets. However, you can also use robots for smaller, tabletop nailing applications. For example, this test application uses a UR robot with a standard nail-gun — in it, the gun is operated manually but all the user needs to do now is rig up the tool’s button electronically for a completely automated setup.
8. Screwing
Screws are a quick and easy mechanical fastener, with the benefit that they can be easily removed. Screwing is also a simple task to achieve with a robot. The tools are magnetized so the screws remain attached to the screwdriver tip until they are screwed in place.
Robotic screwing tools are often used in conjunction with automatic screw feeders. These supply one screw at a time to the robot. See this example with a UR collaborative robot and this one from FANUC for a high-speed electronic assembly application.
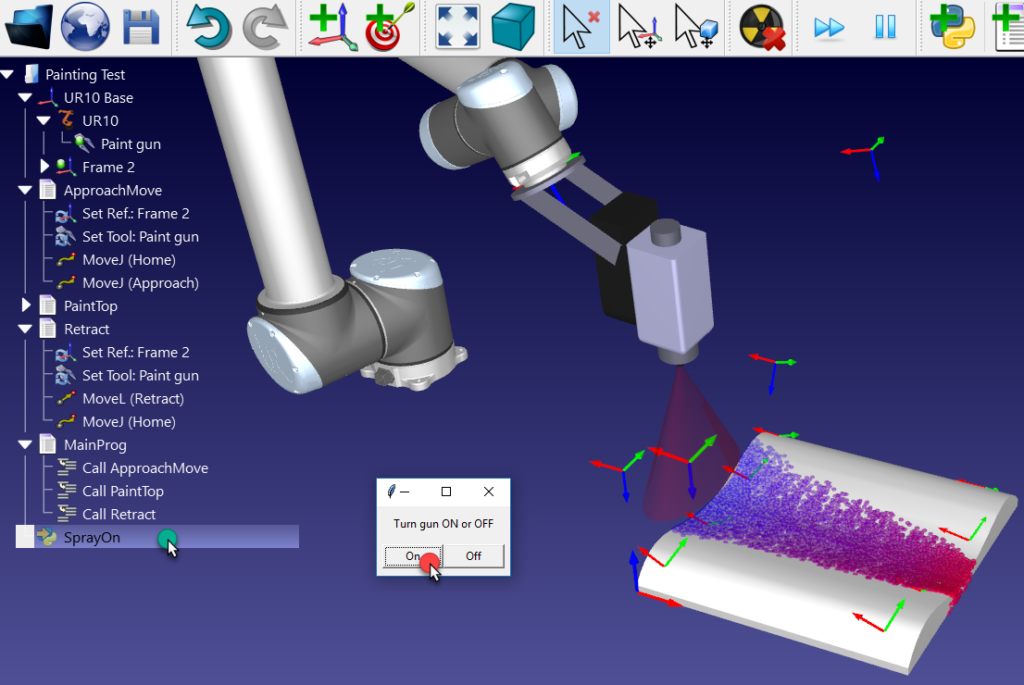
9. Glue Adhesive
We’ve now covered bending, melting, and mechanical fastening. The final type of process for joining materials is to use some sort of adhesive. The adhesive is applied to one or both of the materials and then they are stuck together.
Gluing is an easy task for robotics as it basically just involves following a line. Gluing tools provide a constant stream of adhesive that can be matched with the speed of the robot to provide a consistent bead size, which is efficient and cost-effective.
10. Soldering
Soldering is similar to some of the welding techniques mentioned at the start of this article. The main difference is that the filler material (the solder) has a lower melting point than the surrounding metal so the process doesn’t damage the material.
Soldering tools are often used with robots within the electronics industry, where components are soldered to circuit boards.
11. Your Preferred Method
As you can see, there are a huge variety of different tools that you could choose to join different materials together with a robot. I’ve listed 10 methods, but for each of these methods there are many robot-compatible tools available on the market.
Once you’ve picked your preferred tool and method, you can easily add it to RoboDK and start programming your application with offline programming.
For instructions, see our article The 5 Minute Guide to Use Any End Effector with RoboDK
What method of joining materials would you like to use with a robot? Tell us in the comments below or join the discussion on LinkedIn, Twitter, Facebook, Instagram or in the RoboDK Forum.