In industrial robotics, customization is not just a “nice to have.” It’s a necessity for flexible operational success. Custom tools and macros can be a driving force behind this flexibility.
Both custom tools and macros allow to automate more complex robot tasks and adapt the basic robotic hardware to your needs.
RoboDK offers various features for creating powerful robot macros. With these, you can take your robot deployments to new heights by adding extra functionality that would not be available otherwise. And with its support for custom tools, there’s no limit to the accessories you can add to your robot.
Here’s how you can harness the power of custom macros and tools:
The Role of Robot Macros in Streamlining Complex Tasks
In the context of industrial robotics, a macro is essentially a pre-defined sequence of commands or scripts that allows you to automate complex programming tasks.
A macro script will, for example, convert a specific input or robot command into a desired output. They can be used to control the simulated robot within RoboDK or the physical robot in your workspace.
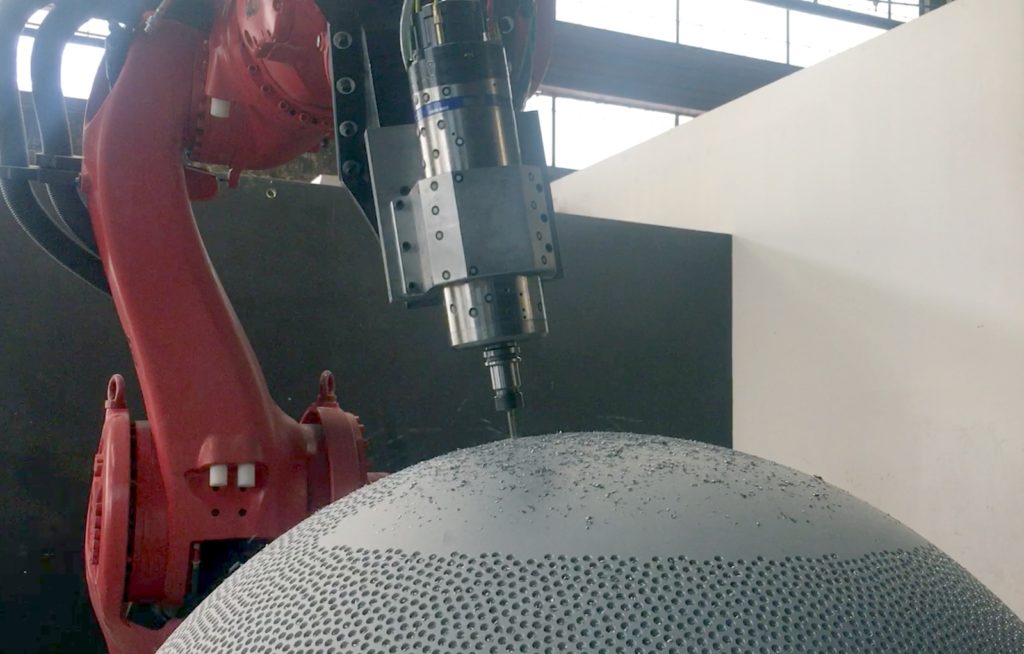
An example could be using a robot arm for a welding task. Macros could automate the arm’s motion along the desired welding path, operate a specific welding tool, and even adjust welding parameters on the fly to accommodate more complex welding operations.
Creating Your First Robot Macro in RoboDK
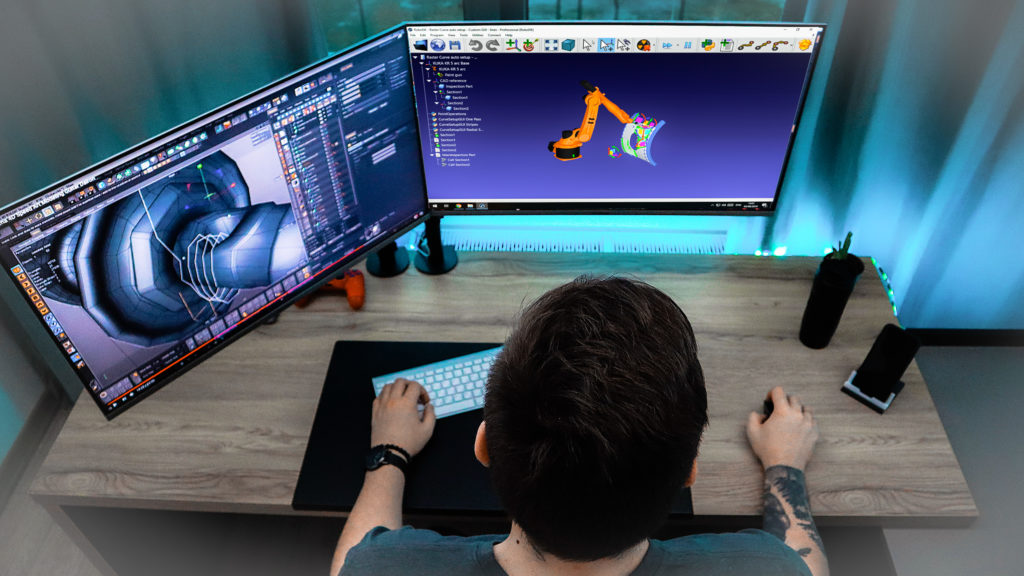
How can you create a macro for your robot application within RoboDK.
Here is the process that you can take:
- Create your simulation without the macro first. Use as much of the basic RoboDK functionality as you can, to identify where a custom macro is really required. You may find that you don’t need a macro, as RoboDK has an impressive range of in-built functionality.
- Choose your programming language. You can program macros in RoboDK using whichever programming language you are most comfortable using. RoboDK’s API seamlessly integrates with popular languages like Python, C#, C++, and Matlab.
- Create and optimize your macro scripts. Create a macro script that carries out your desired functionality. Keep it simple — you only want to add the functionality that is really required.
- Activate and thoroughly test the macro. Load the macro into the RoboDK simulation environment and put it through its paces. You will probably need to tweak the script to get it ready.
- Continuously improve. The most useful macros are those that have been optimized over time. Where possible, improve existing macros when you notice ways you could improve them.
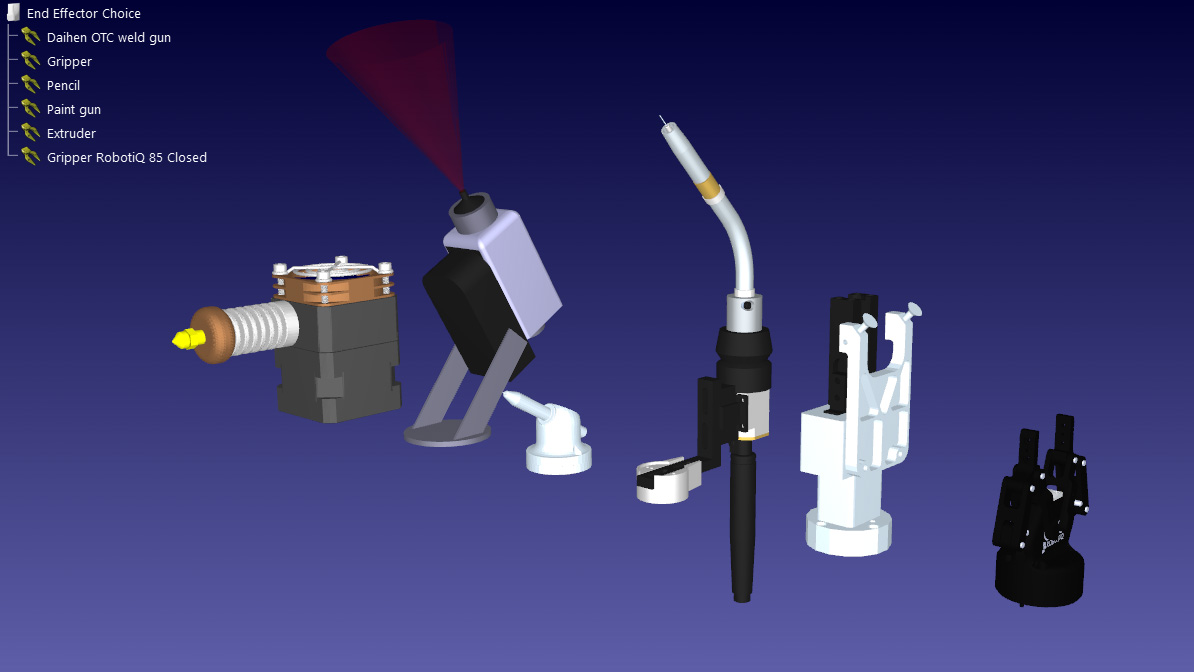
Custom Tools: An Essential Asset in RoboDK
A related concept within RoboDK is custom tools. These allow you to add any tool or end effector to your robot application.
There are too many robot tools on the market to incorporate all of them in our Robot Library. By providing this method to integrate custom tools, we have opened up any tool to the power of RoboDK… even tools that you have custom designed yourself for your application!
You can find a complete guide to adding custom tools in our article The 5 Minute Guide to Use Any End Effector with RoboDK.
7 Example Macros to Help You Get Started
It’s easier to understand what you can achieve with macros when you see ones that already exist.
Macro functionality can be complex, such as running entire routines with your robot, or simple, such as turning on a single output to activate a tool.
Here are just 7 of the many macros that are included in RoboDK:
- CameraLiveStream — This macro demonstrates some of the basic functionalities to handle 2D cameras with the RoboDK API, such as setting camera parameters and displaying a live stream.
- DoPointWeld — This macro simulates a spot weld gun, allowing you to turn the gun on and off. This is ideal for welding applications such as those in automotive manufacturing.
- Draw_SVG — This macro programs a robot to draw a picture using an SVG image file as an input. This can be especially useful when you are designing personalized products for your customers.
- MirrorRealRobot — This macro creates a bridge that moves the physical robot to match your simulated robot. For example, you can use it to control your robot with a 3D mouse or other input device.
- SetTool_ID — This simple macro updates the robot’s tool to a given identification number that you pass as an argument. One use case is in CNC machining, where tool changes are frequent.
- SpindleOn — This macro allows you to add a trace or spray deposition for surface coating of materials. It activates the spindle.
- WaitDI — This macro simulates the waiting for a virtual input that would be a physical wait in a physical task.
These are just a few examples of robot macros that already exist in RoboDK. As you can see, there is a wide range of uses for such a simple programming concept.

The Intersection of Robot Macros and Custom Tools: A Paradigm Shift in Industrial Robotics
Both robot macros and custom tools are simple but immensely powerful concepts that can bring your robot deployments to another level.
By combining the two concepts, you can build robot applications that incorporate any functionality that you need.
If you are not sure how to program a particular macro functionality, a good place to start is in our RoboDK documentation which includes extensive instructions to guide you through the process. There is also a helpful section on adding custom tools.
If you are stuck and have any questions about developing scripts, a good place to add your question is in the RoboDK Forum where a community of robot programmers are waiting to help.
What functionality would you like to add with a macro or custom tool? Tell us in the comments below or join the discussion on LinkedIn, Twitter, Facebook, Instagram, or in the RoboDK Forum.. Also, check out our extensive video collection and subscribe to the RoboDK YouTube Channel