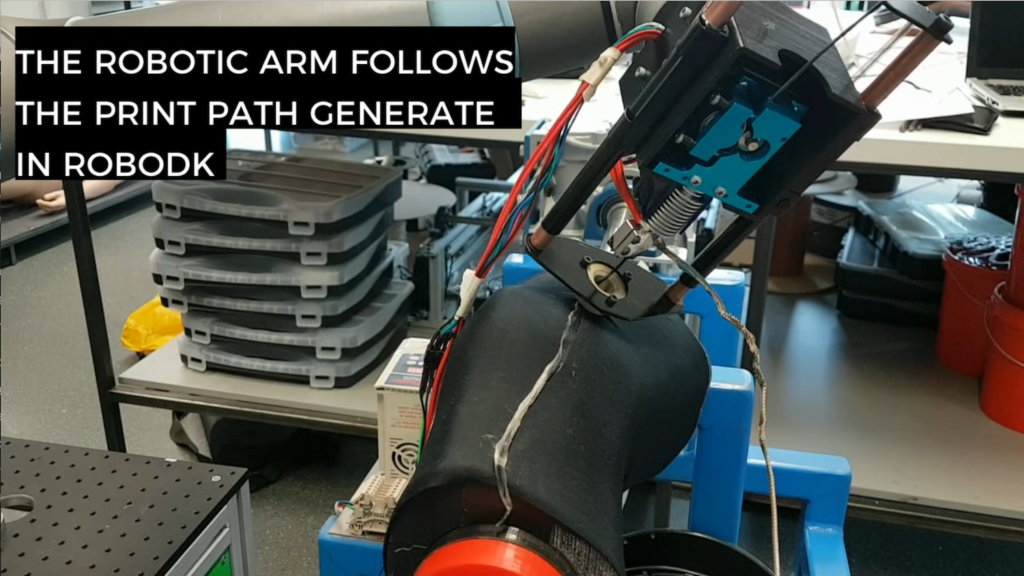
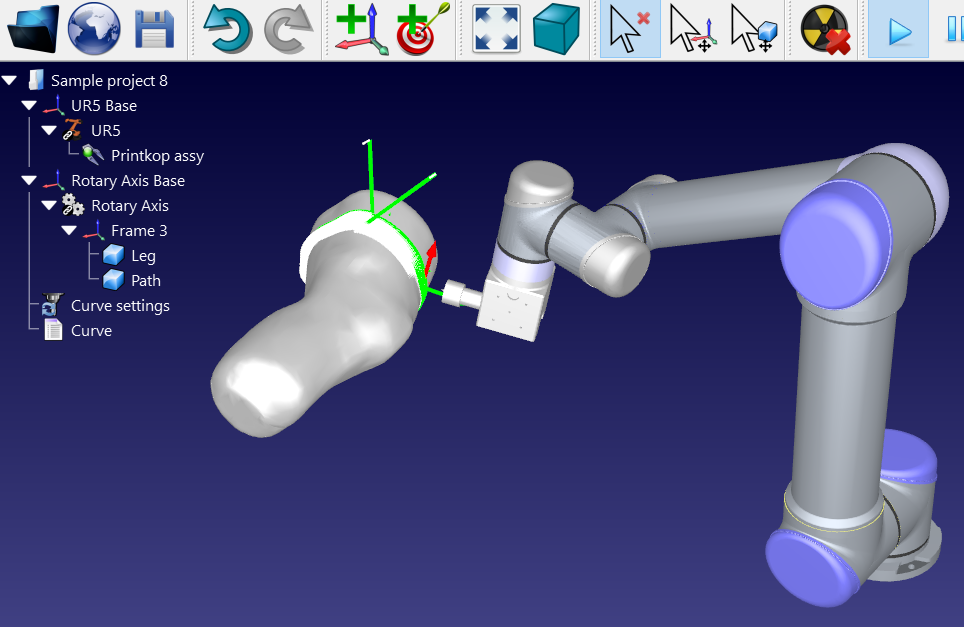
We’re delighted to highlight the successful automation of fiber placement on a custom-made leg brace by Saxion University in the Netherlands. Saxion uses RoboDK for Simulation and Offline Programing a UR5 robot arm.
The process begins by 3D scanning the patient’s knee. The 3D scan is then converted to a CAD file and edited using SolidWorks. The mould and fiber placement toolpaths are defined in SolidWorks software. The mould is first printed using a 3D printer.
Glass reinforced polypropylene is printed on the mould using a UR5 robot. The 3D files generated from SolidWorks are converted to robot programs using RoboDK’s simulation and Offline Programming features, which allows Automated Fiber Placement using a robot from a 3D file.
Setting up and using RoboDK was an easy process. It allowed us to complete our project accurately and on time.
Rutger Hofman – Mechanical Engineer at Saxion University
The automated fiber placement takes place using a rotary axis and an industrial robot arm. The custom brace is ready for the patient after the automated fiber placement is completed by the robot.
The research team has been nominated for the Dutch Young Professional Award, YPA 2017.
Learn more about RoboDK by subscribing to our newsletter here.

3D scanners replaced plaster casting of patient’s residual limbs a long time ago, but prosthetists were unable to 3D print layered fibre prosthetic sockets so they either 3D-printed the socket in bio-compatible plastics or they printed a positive and hand-layered a fibre socket over it. This solution is I think the first to “stay on the digital path” from residual limb shape acquisition through to final layered fibre socket.