3D printing is great, but it can be restrictively small. What do you do when you want to go bigger? Here’s how one German artist supersized his designs.
“After some years using the desktop 3D printers,” says Ascan Aldag, “I wanted to go bigger.”
Aldag is an engineer who is pushing the boundaries of 3D printing. His latest project uses robotics and a custom-built extruder to make artistic creations for interior design.
Here’s how he is making his products supersized with RoboDK and robotic 3D printing.
Pushing The Boundaries Of 3D Printing
Many of us have only recently got started with 3D printing and have only recently started to see the benefits of it for our businesses. But, there are some pioneers who have been experimenting with 3D printing for years.
Engineer Ascan Aldag, the brains behind Engineering Art and Goal Engineering, is one such pioneer. Instead of using the printed parts only to print small proof-of-concepts (as many users do) he uses the printers to produce interior design products with complex geometries.
“For a long time, I have been dealing with 3D printers and am fascinated by the new possibilities.”
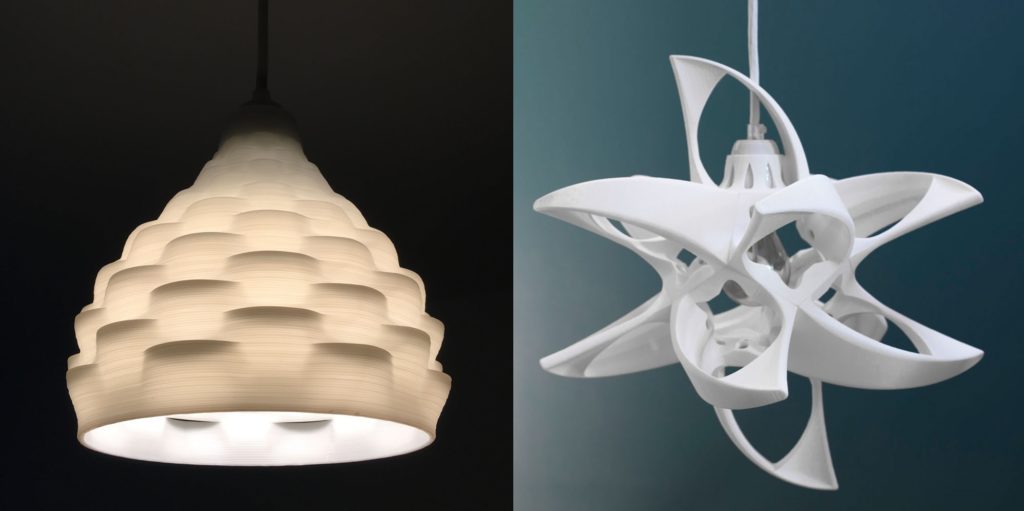
His most impressive designs use semi-transparent plastics to print intricate lampshades, such as Eos, Erebos, and Medusa. These are not just your average lampshade. Hyperion, for example, is made of several components which are stuck together by magnets. This allows the lampshade to be reconfigured into 48 million combinations.
A Need to Go Bigger
For years, Aldag has used tabletop 3D printers. These have yielded some impressive results, but he was starting to feel restricted by their limitations.
He told us:
“After some years using the desktop 3D-printers, I wanted to go bigger. The parts must become larger and stronger to allow everyday use.
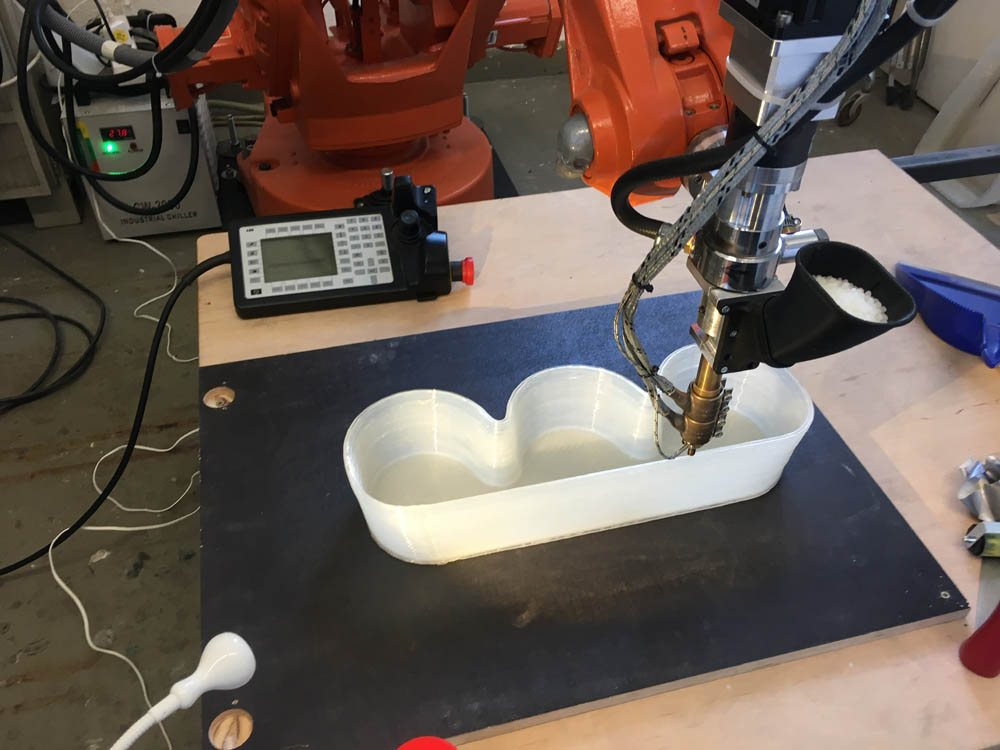
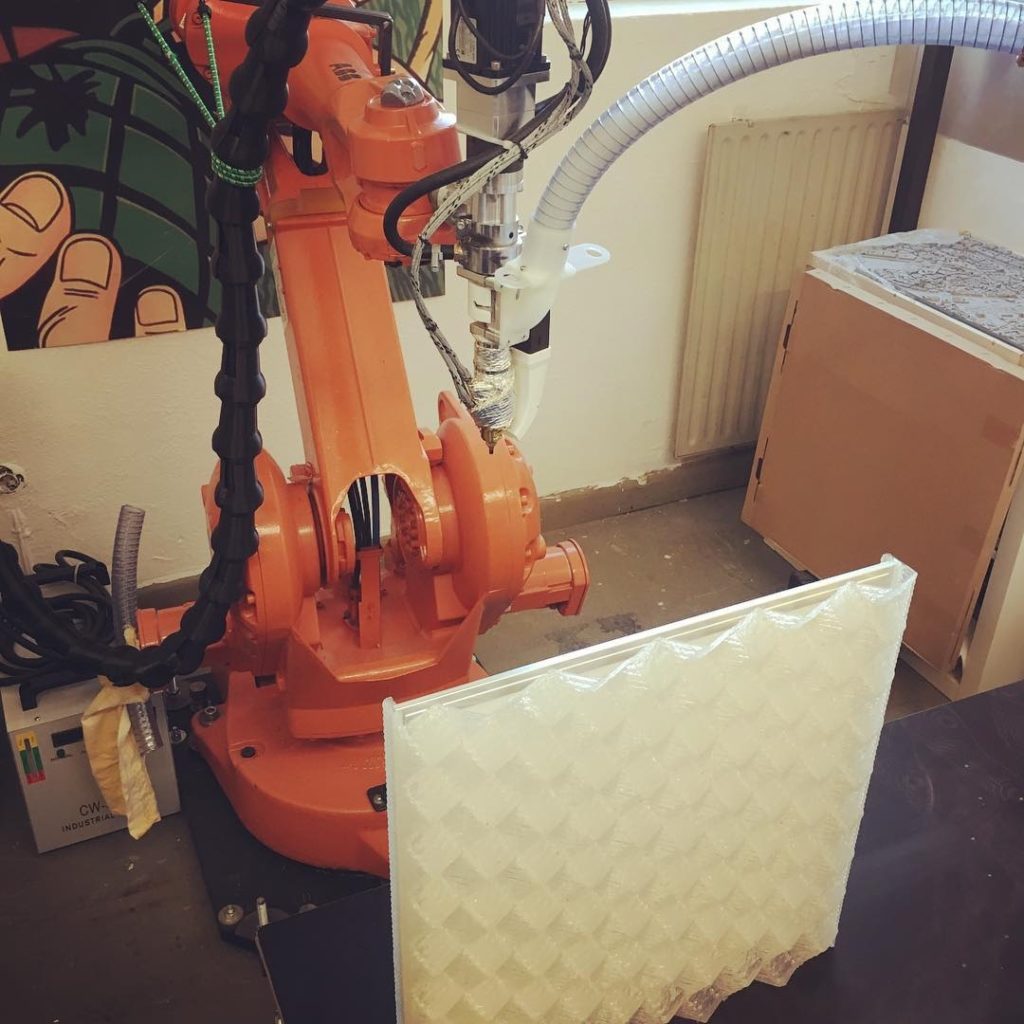
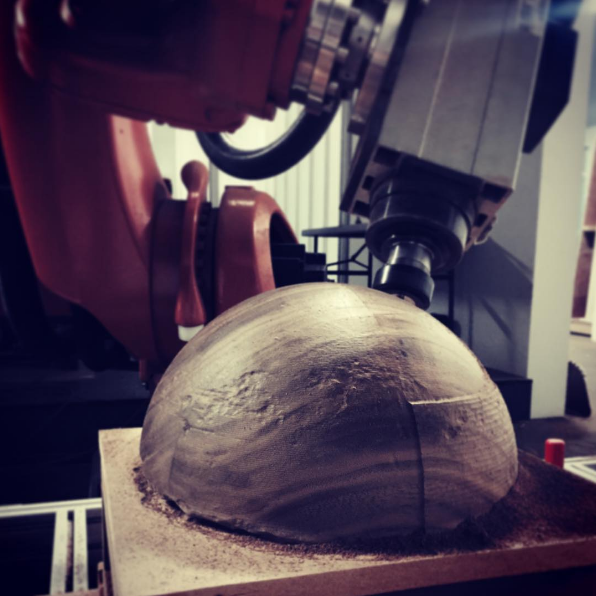
“I was always fascinated by industrial robots — a lot of power combined with precision — so I got a used ABB 2400 and put it in my workshop to build a giant 3D-printer.”
With RoboDK and his industrial robot, he was able to start printing larger parts.
But, he soon ran into a problem…
Overcoming the Challenge of Low-Print Speeds
The problem with many desktop 3D printers is that they are quite slow. This is a good thing if you want to print in high-detail. However, it can become a problem when you’re scaling up for robotic 3D printing with large workpieces.
Ascan Aldag encountered this problem as soon as he stuck an extruder onto the end of the robot arm. The print speed of the extruder was restrictively slow.
His solution? Design a new extruder which could handle faster print speeds and use plastic granulate.
He told us:
“Normal extruders use expansive filament and can only extrude 100g/hour. A large print would need days. With my granulate extruder, I can directly use plastic granulate and extrude up to 2kg/hour, large prints are done in some hours.
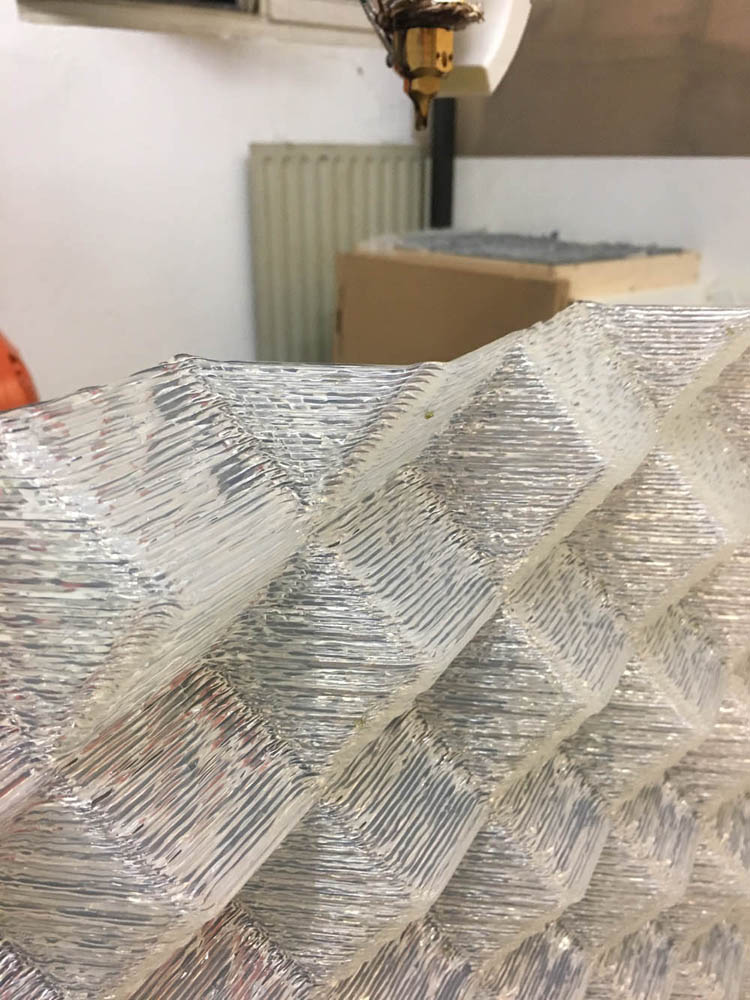
I am using nozzles of between 1-3mm, so I can’t print small details but I can print fast and the 3D-prints are really strong.”
This is not the first time our users have built their own extruders. We’ve also seen custom extruders for 3D printing concrete and for 3D printing food.
Control Problems and a RoboDK Post-processor Solution
Aldag built his new extruder, but his challenges were not over yet. In fact, they had only just begun. There are a lot of moving parts in a 3D printer, literally.
“Getting the extruder working really was a challenge. I experimented with different motors, gears, temperatures, and speeds.”
What made it more challenging was the complex control needed for his new extruder. The robot controller needed to synchronize the extrusion speed with the movements of the robot.
But, help was at hand. He told us:
“Fortunately, I could adapt the RoboDK post processor to my needs – with excellent support from RoboDK…thanks!”
It’s very easy to add a custom end effector to RoboDK. In fact, it’s just as easy as using an off-the-shelf end effector. We outlined the process in our article The 5 Minute Guide to Use Any End Effector with RoboDK.
Once you have added the model, you can do exactly what Aldag did and update the post-processor. Not familiar with post processors? Check out Robot Post-Processors: Everything You Need to Know
What the Future Holds for 3D Printed Art
With the extruder working perfectly, he is now able to build pieces with a print size of over 1m³.
As he says, with such a big print size “only our imagination is the limit.”
But, Ascan Aldag’s pioneering ideas don’t stop there. He has big plans for the future.
His next idea? To tackle environmental sustainability.
“I have a vision” he says “of using plastic waste, like bottles, put it in a shredder and use the material to make new parts, like a chair for your home.”
At the moment, the granulate he is using is made of ABS and PLA granulate, the two standard materials for 3D printing. This next step will involve using recycled plastic.
He says:
“Everybody knows about the problems with plastic waste, especially in the oceans, but nobody has a good solution. But plastic can be easily heated up and formed into new parts. It is perfect for recycling.
This can be done using the granulate extruder, since it can directly use plastic out of a shredder without any more processing in between.
How great would this be! Instead of throwing plastic away, you collect your plastic and make something new out of it. I am working to make it happen!”
You know? I think that’s the best idea I’ve heard all year!
Check out Ascan Aldag’s website here at Engineering Art (it’s in German, but the amazing photos can be understood in any language).
What would you print if size wasn’t a restriction? Tell us in the comments below or join the discussion on LinkedIn, Twitter, Facebook, Instagram or in the RoboDK Forum.

Lol
Did also with S4c plus in 2014 already
Business ongoing now 😜
Hi Sylvain,
Wonderful. Another pioneer! You guys should definitely get in contact with each other. You can find Ascan at http://engineering-art.de/
Cheers,
Alex