What does a project using the Fusion 360 plugin look like in practice? Here’s how one university fabrication lab Protolab used multiple external axes.
We always love hearing from users of RoboDK, especially when they are using new features of the software. Often, the first we hear about these great case studies is when a user sends us a question.
Recently, Andrew Tarlinton from Protolab at the Swinburne University of Technology had a question about using robotic milling with the new Fusion 360 Plugin.
Andrew asked: How can I incorporate multiple external axes into my robotic milling project?
Let’s have a look at that project!
Meet… Protolab
Protolab is a fabrication laboratory at the Swinburne University of Technology in Victoria, Australia. The lab provides training and fabrication services to students at the university and has an impressive collection of machines including 5-axis CNC machines, SLA 3D printers, and, of course, robots.
Andrew Tarlinton is the manager of technical services, design, and architecture for Protolab. He has a background in industrial design and scientific instrument making.
The lab serves the university both by providing a space for students to learn about fabrication in a hands-on setting and by providing fabrication services for the university’s many technical projects.

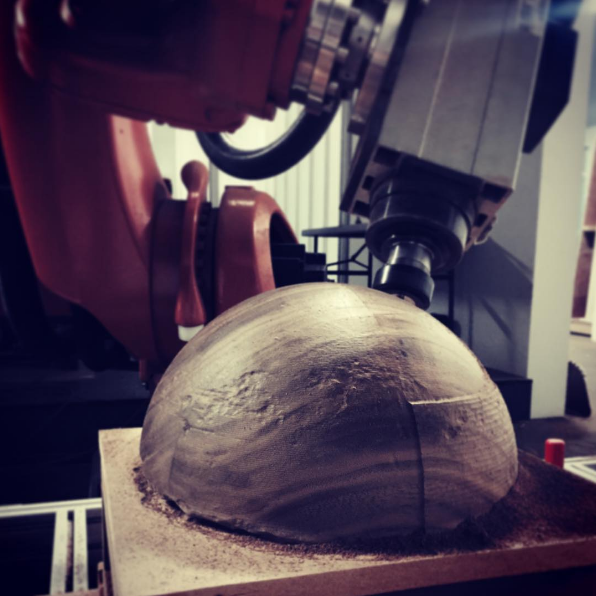
The Project: Multi-Axis Robot Milling Workstation
Fabrication technology is always improving and Andrew is always on the lookout for new and better ways to run the Protolab workshop. He got in contact with us because he was setting up a new robot milling workstation using a KUKA robot.
The setup uses multiple external axes to allow for an extremely flexible robot milling station. At the moment, the team is primarily using this setup for architecture research, but Andrew expects that they will soon start using it for applications like furniture fabrication and possibly creating automotive models.
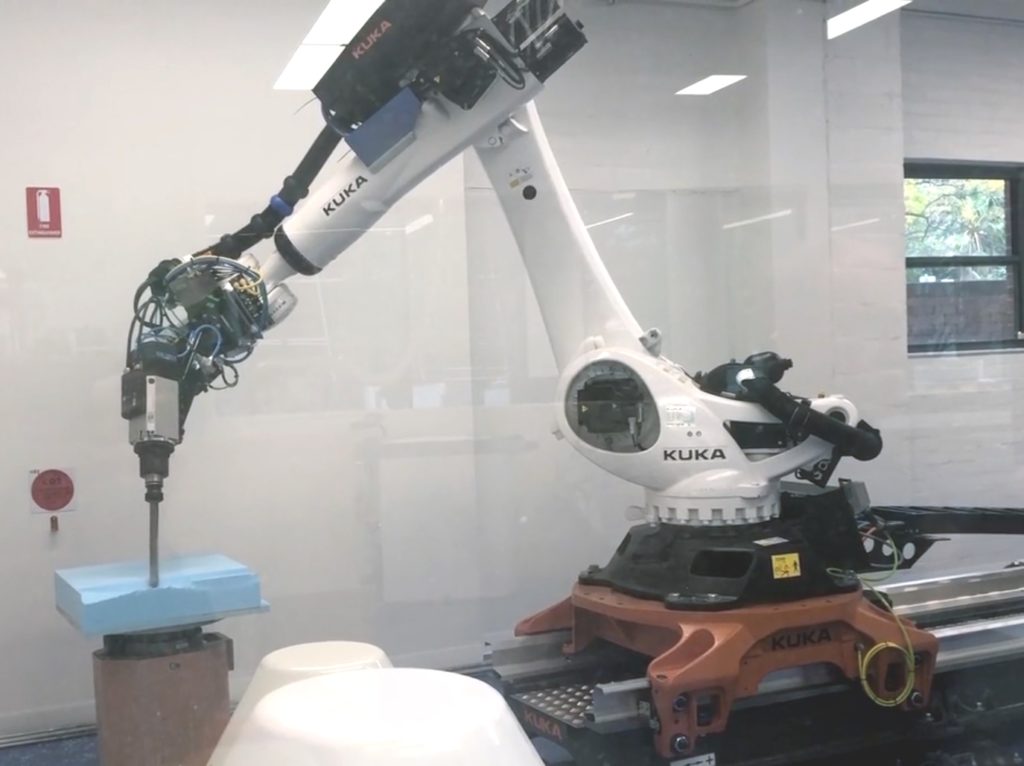
Hardware Setup
Andrew and the team at Protolab decided on the following robotic technology:
- KUKA KR 120 — The KR120 is a range of KUKA robots all of which have a payload of 120 kg, but with differing reaches. Many of this range are already within the RoboDK library. The team used the KR C4 Controller which can control both the robot and external axes.
- KL 4000 — This is a linear track external axis with a 7.9-meter travel distance and supports payloads up to 4000kg.
- KP1-V 500 — From KUKA’s range of positioners, this is a vertical single-axis positioner with a payload capacity of up to 500 kg. The team uses this as the turntable to hold the workpiece.
- KP1-H 500 — Also from the KUKA range, this is a 500 kg payload single-axis positioner which can be used for horizontal positioning.
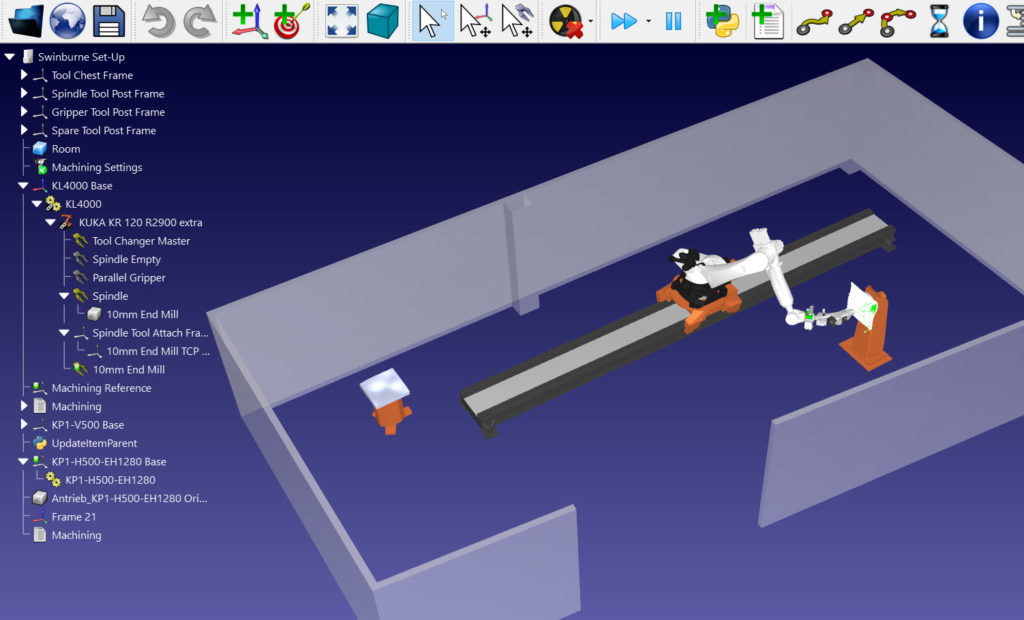
This combination of 3 programmable external axes with a 6 Degrees of Freedom (DoF) robot provides up to 9 DoF for the team at Protolab to carry out robot milling, with a huge workspace thanks to the 7.9 m distance of the KL 4000.
Software Setup
Despite the complex hardware setup, the software workflow is quite simple:
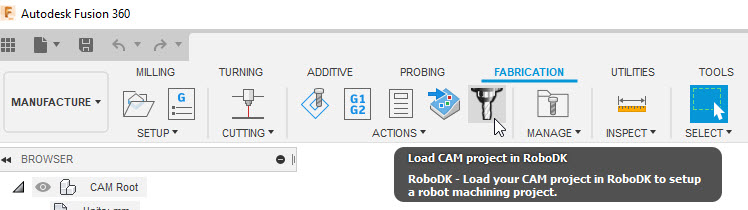
- Fusion 360 — The design of the machined part is done within Autodesk’s Fusion 360, a cloud-based CAD/CAM software which has various advantages over Autodesk Inventor. Once the CAD model is designed, the CAM path is generated within the same software.
- RoboDK — Using the plugin for Fusion 360, the robot program can be generated immediately, by using RoboDK’s robot machining capability, without leaving the Fusion 360 software.
- KR C4 — The generated robot program is then sent to the KUKA controller, with a program in KUKA’s KRL programming language generated by the relevant post-processor. This controller then moves the physical robot through the milling process.
This is the same software workflow that you would use for any similar robot machining project.
Handling Multiple New External Axes in RoboDK
Andrew Tarlinton initially got in contact with us for some help. The three external axes that he was using provided a great amount of flexibility for larger robot machining tasks. However, he wasn’t sure how to incorporate them into RoboDK.
Our Robot Library already contained the robot (KR 120) and horizontal positioner (KP1-H), but the other two axes were not there yet.
Of course, we can always add new axes, robots, and accessories to the library if you ask us to. However, there was a quick way for Andrew to get his missing axes…
The Solution: Custom Axes and Auto-Sync
RoboDK has a very large library of already-supported robots. But, it can also easily support any other mechanism which is not already in the library. All you need to do is create a custom mechanism by using the “Create Mechanism” tool.
Andrew was able to create the two missing axes as single-axis mechanisms consisting of one linear and one rotative axis.
In RoboDK we can then synchronize the axes. By making one or more mechanisms (e.g. an external axis) the child of another (e.g. the robot), the software will integrate the DoFs of both mechanisms, allowing you to seamlessly control the entire setup as if it were one single mechanism.
Fusion 360 + RoboDK = Seamless Integration
Using Fusion 360 in collaboration with RoboDK — via the plugin — is a great way to achieve robot machining in a familiar software environment (if you are already a user of Fusion 360, of course).
As Andrew Tarlinton told us: “I was very impressed how seamless it was to go from Fusion to RoboDK to robot machining. I am looking forward to seeing what we can achieve with it!”
An added benefit of using the RoboDK and Fusion 360 combo over more traditional programming methods is that it is easier for non-programmers to program the robot.
As Andrew explained: “I really think it will allow non robot & coding experts the opportunity to work with the machine.”
The Protolab website expands on this, saying: “With the ease of functionality these two programs, it puts the power of robotics well within reach of our students, allowing for greater prototyping and exploration of concepts.”
Which project are you planning on deploying next? Tell us in the comments below or join the discussion on LinkedIn, Twitter, Facebook, Instagram or in the RoboDK Forum.